Hi all!
Recently, a respectable client came to our office and asked if we could cover his balcony with boards. After much questioning and consultation, it turned out that he needed to cover the balcony with wooden clapboard. Read about what kind of lining there is and what you should pay attention to when working with it in this material.
Wooden eurolining is an excellent finishing material that is popular due to its environmental friendliness, ease of installation and ease of maintenance.
With its help you can hide all surface irregularities. This material is used for cladding the walls of apartments, houses, bathhouses and balconies.
Covering a balcony with eurolining is an excellent solution, since this material will not only add aesthetic appeal, but also insulate the loggia or balcony.
This publication will introduce readers to the optimal types of wood for external and internal cladding of a balcony, as well as what classes of eurolining can be used for cladding.
Choosing material for cladding the balcony
Lining made from coniferous trees (cedar, larch, pine) is used for both internal and external cladding.
Pine wood is very durable, although its color may darken over time. In addition, thanks to resins, pine lining is not subject to rotting. Cedar boards are recognized as one of the most wear-resistant. However, its main drawback is its high cost.
The temperature on glazed loggias and balconies in hot weather sometimes rises to 50-60 C°. Therefore, if the balcony is located on the sunny side, pine and cedar lining cannot be used for external and internal cladding under any circumstances, because resin may be released on the surface of the boards when heated.
Eurolining made of hardwood (aspen, linden, oak, alder) is used in most cases for interior decoration of balconies.
The most budget options are alder and aspen. However, they do have minor drawbacks. Firstly, eurolining made from these types of wood may darken over time. Secondly, alder has relatively high thermal conductivity.
Linden lining is the most popular and, perhaps, ideal option for interior lining of a balcony. Linden wood has a pleasant light golden color that does not change over time.
In addition, you do not have to treat it with impregnations and varnishes. Linden lining does not overheat, does not swell and practically does not contain knots. In addition, it has high sound insulation properties. And this is especially true when it comes to a balcony.
What type of eurolining is suitable for a balcony?
There are three classes of eurolining:
- Grade A – these are boards with virtually no knots or core on the surface. The surface of class A eurolining has a uniform shade and is ideally smooth.
- Grade B means that a small number of knots are allowed on the surface, the size of which should not exceed 15-20 mm. These are high quality boards with good performance properties.
- Grade C – boards with knots up to 25 mm in size, blind holes, stripes and recesses.
If your budget allows, then it is better to use high-quality class A eurolining as upholstery, since it is most resistant to damage and harmful environmental factors.
Grade B is slightly inferior in performance characteristics to class A; it can be given a solid four plus. This type of eurolining is cheaper. In popularity it is not inferior to class A.
Class C boards, which are the most budget option, are used least often as a facing material for balconies.
It is definitely impossible to answer the question which eurolining is best for a balcony. After all, everything depends not only on the wood and type of material, but also on the climate zone, as well as on whether the balcony is located on the sunny side or not. Be sure to consider these factors.
Source: timberli.ru/vse-o-vagonke/kakaya-vagonka-luchshe-dlya-balkona/
Which one is better to sheathe?
Lining comes in several types, differing in operational and external characteristics. The specifics of installing boards and caring for them, as well as the interior of the future living space, depend on the choice of material. You can cover the loggia with one of the following types of lining.
Wooden
Natural material with all the ensuing advantages. The lining is made in the form of thin panels of different sizes. Timbers are made from different types of wood: ash, oak, alder, cedar, linden, spruce, pine, larch. The material “breathes” and prevents the air on the balcony from stagnating. An unusual feature of the lining is its pleasant, fresh aroma. It comes, first of all, from coniferous boards.
Depending on the quality of the raw materials, the lining is divided into types:
- The material labeled “Extra” is considered the best. The boards are well processed and free of external flaws. The cost of such material is higher.
- Class “A” allows for the presence of small knots, but is highly durable.
- Medium quality wood is used to create class “B” lining. There may be cracks and resin pockets on the beams.
- Class “C” material has the lowest quality. The lining is poorly polished and easily deformed. The boards contain captive knots up to 25 mm in size, non-through cracks, stripes and other defects.
Eurolining
A type of wood paneling. Externally, these types are very similar, but eurolining is of higher quality, since it is manufactured according to European standards. This material is more expensive, the price is due to its high performance characteristics. Eurolining is stronger and made from the best types of wood.
The material is divided by size and shape. There are standard profiles, softline, landhouse, landhau, American, block house.
Eurolining is made taking into account strict requirements, including those related to its dimensions. It has a thickness of 13, 16 or 19 mm, and a width of 80, 100, 110, 120 mm. The length of the beam is 500-6000 mm.
Plastic
Building materials are made of PVC and vinyl and have good heat and sound insulation characteristics. The service life of plastic lining reaches 30 years.
Plastic beams are easy to install and guarantee joint tightness. They are resistant to ultraviolet rays and do not fade in the sun. The material is not afraid of cold and hot weather: its operating temperature range is from -50 to +50 C. A wide variety of beam designs allows you to choose them for any interior. Manufacturers create plastic lining that imitates natural materials, decorated with drawings or patterns.
The listed materials have their pros and cons. Plastic panels act as a cheap analogue of wooden beams and even have a longer service life. At the same time, it is wood boards that are associated with nobility and comfort. Wooden lining is more resistant to sudden temperature changes, but plastic lining is resistant to fire.
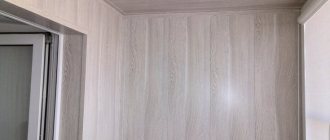
Balcony cladding with wooden clapboard
Wood paneling is a classic option for finishing a balcony.
Wood is natural, environmentally friendly, has an individual pattern for each board, and has excellent characteristics as a finishing material in terms of thermophysical parameters. The clapboard-covered balcony smells slightly of resin, the smell is reminiscent of a fresh coniferous forest.
Upon completion of the work, all wooden surfaces are treated with a wood-protective agent with a UV filter, which extends the service life of the material, or tinted in any color.
Finishing balconies with clapboard is another item that is included in the range of work performed by our specialists.
For finishing we offer euro-lining grade “A” (with light knots), grade “Extra” (without knots) of softwood: spruce, pine, larch.
Eurolining is made from various types of wood: spruce, pine, aspen, larch and others. Thickness – 12.5 mm. Overall width – 96 mm. The width of the working surface without groove is 88 mm. Length from 1 to 6 meters. GOST 8242-88
Cladding, choice of material
Eurolining differs in the presence or absence of defects in the wood from which it is made and processing defects. The total number of defects on one workpiece determines the grade of the lining. There are several grades of eurolining (according to quality deterioration): Extra, A, B, C. Grades B, C are not used by Fenster St. Petersburg for finishing balconies due to the large number of defects.
Eurolining grade A – Healthy light intergrown round, oval and oblong knots with a diameter of up to 1/3 of the width of the product are allowed, a core with access to the front face with a length of no more than 200 mm per linear meter and covered resin pockets are also allowed. Open resin pockets are not allowed.
Eurolining, Extra grade - any knots, cracks, core are not allowed.
How to choose lining for cladding a balcony
It should be noted that: the humidity of the lining should be no more than 12%, otherwise it may become deformed over time.
If you have leaks on your balcony, wooden lining will not suit you. As practice shows, grade A and Extra linings behave the same during long-term use, despite the presence of knots in grade A. The choice of material depends on your preference.
Source: balkon-spb.ru/otdelka_balkonov_petersburg.html
Selection of material
- No matter what kind of work begins with the selection of material. For this type of finishing work, a fairly wide range of wood species is used. Pine or spruce are more popular, but on the sunny side they will actively release resin. Oak and cedar are considered elite species. A balanced version of deciduous varieties: ash, alder, linden.
- There is also ordinary lining, which is currently used very rarely, and eurolining. Next we will talk specifically about eurolining, because it is more popular and much easier to work with. There are several classes here.
- Premium class or extra - one hundred percent homogeneous wood species that does not have knots, chips or shells. This is the most desirable option, but the cost is quite high.
- Class A - also has the highest quality of processing, but it is allowed 1 - 2 small knots per 15 cm of surface.
- Class B - quite different from the previous two varieties; there may be cracks, huge knots or pockets of resin.
- Class C is generally not suitable for our option, because it may have huge chips or through cracks. Unlimited number of knots and resin pockets. Usually used exclusively for technical purposes.
Where to start covering a balcony with clapboard
Have you decided to improve your balcony, are you looking for a reliable construction team? Put your search aside; you can decorate a room with clapboard yourself, without extra costs for specialists. All detailed information on how to do this will be presented below.
Preparation process before the start
Cladding balconies with clapboards with your own hands begins not with any instructions for use or installation rules, but with the selection of material and the necessary tools.
Of all the wood species existing on the construction market, the most suitable for balconies and loggias are:
- Pine is resistant to sudden changes in temperature and is easy to process.
- Linden - its price is a little high, but this is due to the positive qualities it has: density, appearance, long life. It very rarely contains small knots.
- Larch does not rot, has an interesting texture, and tolerates very low temperatures.
And here is a list of the necessary tools that will be needed to ensure that the cladding of the balcony with wooden clapboard is done efficiently and quickly:
- Screwdriver. Without it, work will progress very slowly;
- Electric drill. It will do just fine as a screwdriver if you don’t have one at hand;
- Wood saw or jigsaw;
- Electric tools are much more efficient;
- Building level;
- Roulette;
- Hammer.
If you will use sealant to treat joints of walls and finishing materials, then you should stock up on a gun for sealants in tubes.
Work organization
The good thing about finishing balconies with clapboards yourself is that the work does not require special skills or sophisticated equipment. Below are step-by-step instructions, which are divided into 2 parts:
- preparatory;
- main
You need to follow simple guidelines and be careful to get the job done.
During the work process, do not forget about lighting equipment
Part 1 - preparatory activities
First you need to purchase materials, the list is presented in the table.
| Materials | Recommendations for selection |
| Lining | You choose the version of the planks yourself; there are many options. The required quantity is determined simply: the length and width of the ceiling are measured and the quadrature is calculated |
| Bar | The frame will be constructed from it. The thickness of the elements depends on whether insulation will be performed. If insulation is present, the frame must be no thinner than the insulation |
| Fasteners | The frame is secured using dowel nails. Finishing a balcony with wooden paneling is done using nails or special fasteners called clamps |
| Insulation | Used when necessary; if not needed, the frame can be made thin |
You can use the option with a reflective layer to further retain heat on the balcony
Finishing of loggias and balconies with clapboard is done using special tools:
A building level, tape measure and pencil are needed to control the plane and measure work. To create a reference plane, you can pull the cord; this is very convenient for ceiling work;
Perforator for drilling the ceiling;
Hammer and hammer - if nails will be used. If you fasten the clamps with self-tapping screws, you will need a screwdriver;
Ladder or stable table. Finishing balconies with clapboards, or rather covering the ceiling, is impossible without using either a ladder or a table
It is important to ensure ease of work.
It is important to ensure safety when working
Part 2 - Workflow
Let's figure out how to decorate a balcony with clapboard.
The process for covering the ceiling is as follows:
Measurements. First of all, we need to take measurements and cut the block into pieces of the size we require. Do not forget that the frame is located perpendicular to the position of the lining
It is also important to leave 5 mm gaps at the edges so that the wood does not deform due to changes in temperature and humidity;
Drilling. Holes are made in the block through which drilling is carried out in concrete
After this, the elements are secured using dowel nails. To align the structure evenly, you may need to place blocks under the frame at the distance you need; this is especially important when using insulation;
It is important to set the frame level
Surface insulation. If insulation is required, the material is cut so that the pieces are wider than the distance between the bars. This will allow you to fill the cavities very tightly, without securing the mineral wool with dowels. If you use polystyrene foam, then it is better to fill all the joints with polyurethane foam; it will serve both as an adhesive and as a heat insulator;
Mineral wool is more convenient to use, as it does not leave gaps in the gaps
Preparing the lining. When the structure is ready, you can proceed to the next part of the work (by the way, finishing with plastic lining is done in exactly the same way before this stage). First of all, you need to take measurements to determine the length of the elements (do not forget about the necessary clearances). Cutting is done either with a hand saw with a fine tooth, or with a power tool;
It is important to take accurate measurements so as not to cut off too much and ruin the material.
- Fastening is done from any side; usually the part of the ceiling that is best visible is selected. The first element is placed close to the wall with the tenon facing forward;
- From the edge, the fastening is done directly through the lining, the joint will still close;
- On the groove side, the element is fixed either with nails or clamps, there is not much difference in this;
Fit. In order for a ceiling trimmed with clapboard to look its best, it is worth combining the planks tightly.
- To do this, each element is tapped through a wooden spacer so that the joints are as tight as possible;
Fastening is done only from the groove side; there is nothing complicated in the process;
It is important to fit the products together well
The measurements of the holes in the lining are determined locally; they should not be taken in advance
Surface preparation
To save on thermal insulation materials, it is necessary to insulate only those walls that face the streets.
All the rest will be ennobled with lining, which, in fact, is also a kind of insulation.
List of what needs to be purchased for insulation and installation work:
- Beam 50x50 mm.
- Hardware.
- Final elements: baseboards and decorative corners.
- Vapor barrier film.
- Insulation. And, of course, the lining itself.
Don’t forget, the quality of the product entirely influences the final result.
A primer is applied to the cleaned surface, which helps to avoid streaks from street precipitation. The bars are installed on the wall in increments of 40-50 cm: a kind of balcony sheathing for the lining.
Insulation is attached between the sheathing on top of the primer: most often people choose polystyrene foam and ecowool. They can be mounted with glue or disc nails.
Only walls can be primed, the floor cannot, otherwise there is a possibility of condensation being trapped under the finishing material.
The technology of covering a balcony with clapboard requires that the surface be flat, otherwise such a structure will be visually unattractive, plus its service life will be significantly reduced.
The third stage - installation of lining
In the prepared room, work begins with the floor, on which the same timber sheathing is laid.
The step between the beams can be made about 30-40 cm, if the balcony area is planned to be used annually.
As for the ceiling, the beams are attached at a distance of 50-60 cm from each other, and no insulation is required. It is not needed here at all, unless your balcony is on the very top floor.
After this, we proceed to finishing the walls with eurolining: the fasteners (screws or nails) should be hidden in the part of the panels that will be covered by the next row.
By following the order of covering the balcony with clapboard, you can easily achieve a positive result, and the new surface will delight you for many, many years to come.
Workflow Features
Still, you should be careful, because the lining is made of wood, and the natural material is too “gentle” to various influences.
You should not heavily wet the surface of the balcony cladding (lining), as it is the abundant moisture that causes deformation of the planks. It is enough to lightly wet the cloth.
Detergents should be used with caution; not all of them are suitable for wooden surfaces. If, however, you need to erase a stubborn stain, then the best option would be to purchase a cleaning gel.
Air should circulate between the lining and the insulation, that is, a distance of 2-3 cm should be left.
Note! It is advisable to leave a gap of a few centimeters in the corner to improve air circulation. Then there will be no condensation remaining, which will not lead to rapid rotting.
It is better that the lining of the balcony with wooden paneling is carried out in warm weather. Working at low temperatures can lead to thermal contraction of the wood in the spring: cracks will form in some places.
DIY installation
Self-laying of lining panels consists of several stages.
Preparation
The preparatory stage of installation includes:
- Removing old finishes, if any;
- A thorough examination of the surface for damage (cracks, chips, dents, etc.);
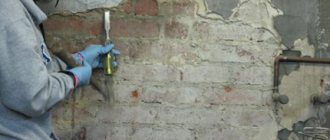
- If they are found, then at this stage of preparation they should be eliminated - by embroidering, plastering, puttying, concreted or using other methods of elimination - this depends on the material from which the balcony structure is constructed;
- The walls on which the lining will be located should be treated with a special antifungal compound;
It is advisable to purchase solutions that work in several directions of biological protection of surfaces at once, protecting them from many types and methods of sabotage.
Installation of sheathing and insulation
This installation step will be a little more difficult. It involves the installation of lathing and a thermal insulation system. It is also complicated by the fact that you first need to decide on the type of insulation. After all, the complexity of installation and arrangement of the sheathing depends on this. There are two technologies for insulating balconies:
- For the first, thermal insulators such as isolon, penofol and other foil materials of this category are suitable. If they act as insulation, then the sheathing needs to be strengthened over them;
- When choosing insulation, for example, polystyrene, mineral wool, the first step will be to lay not a heat insulator, but a sheathing.
Processing of wooden lining
After the installation has been completely completed, the tools have been put away, and your loved ones are happy, you should perform another simple procedure - treat the surface.
And you need to treat it not with a simple varnish, which at low temperatures will not show its best side, but you need to select special products.
What you need to know to ensure that clapboard cladding on a balcony lasts for many years
Before covering wood with aqualacs, you need to make sure that it is completely dry. Otherwise, the remaining moisture in the wood will adversely affect the thin layer of protective film.
Important! Moreover, the surface must also be clean from fine dust and chips.
If you don’t trust modern antiseptics, you can get by using ship varnish: affordable price, high wear resistance. But there is one drawback: such a coating deprives wooden materials of their ability to breathe, which reduces their service life.
If you decide to get a more expensive and reliable product, pay attention to the description when purchasing: it must indicate that the varnish is water-based. It is also good if it contains ultraviolet filters that protect the color of the wood from darkening. Manufacturers include Tikkurila and Penotek.
Apply varnishes in several layers; after each layer (as soon as it is completely dry), it is advisable to sand the surface. This procedure will help smooth out the treated wooden paneling.
That, in fact, is all you needed to know before you started decorating the balcony of your apartment. The answers to the remaining questions can be found in the video: step-by-step instructions for installing wooden lining on balconies and loggias. We wish you success in any endeavor!
Source: izvagonki.ru/v-pomeshheniyah/balkoni/16-obshivka-balkona-vagonkoj
Material calculation
When planning to cover a balcony with clapboards, it is important to accurately calculate the required number of planks. To do this, it is convenient to use our online calculator to calculate the lining, but if necessary, the calculation can be done manually.
Basic data:
- the number and area of sheathed surfaces (only walls, floors, ceilings, additional elements - storage boxes or cabinets, benches, tables, etc.);
- room configuration. This information can be conveniently presented in the form of a detailed drawing with all dimensions;
- profile type and lamella length;
- the number and profile of frame elements (wooden slats or metal parts are used as the frame);
- the need for heat, hydro and vapor barrier, additional ventilation measures;
- auxiliary equipment and furniture. This point takes into account both existing fragments of the situation and planned ones.
The page with an online calculator provides a calculation of the amount of lining for a balcony of standard sizes. Based on the above drawing, we will repeat the calculation taking into account the need to finish the ceiling, shelf and slopes of the balcony block.
For such a balcony, the area of the walls (side walls, walls between the outside room and the room, fences) is 17 sq.m. To this figure you need to add the area of the ceiling and floor:
(1.2 x 3) x 2 = 7.2 sq.m.
Total total area is
17 + 7.2 = 24.2 sq.m.
Taking into account the need to finish the slopes and have a reserve in case of defects, unsuccessful cutting of planks or the emergence of additional ideas, we increase the estimated area by 15%.
24.2 + 3.75 = 28 sq.m.
If the lining is sold individually, you can purchase it “on a calculated basis; when selling in packages, you will have to purchase such a number of packs that the total area of the lamellas is equal to or exceeds the calculated one.
How many other materials are needed?
When planning to insulate a balcony with clapboards, it is important to purchase the same amount of insulation along with the wood (the area of the slopes is not taken into account, the margin for possible unaccounted expenses is assumed to be 5...8%). A thematic article will help you understand in more detail about insulation and additional protective measures.
The number of slats or profiles for the frame is purchased based on a certain frame placement step and cladding area. At the same time, for vertical cladding of the loggia with clapboard, the frame is positioned horizontally, and for horizontal cladding - vertically. The image shows an approximate layout of the sheathing for vertically located lamellas.
If we assume that in the design version the lining on the balcony will be mounted vertically with our own hands, then we will need:
- for the ceiling (1200x3000 mm) 5 three-meter slats;
- for a wall with a balcony block (depending on its size) 18…21 m;
- for balcony railing (1100x3000 mm) 5 three-meter slats;
- for the floor there are 5 three-meter slats, the cross-section here is taken not to be 30x30 mm, but 40x60 or 60x60, depending on the planned load on the floor. These slats will act as lags.
The total number of slats is about 50 meters of 30x30 mm bars and 15 meters of 40x60 (60x60) mm. For thinner bars, it is advisable to provide a margin of 5...10%.
Ultimately, the sheathing will look consistent with the diagram.
The sheathing is fastened to the walls using dowel-nails, the number of which is calculated individually, taking into account the condition of the walls. Fastening the lining to the sheathing is carried out:
- nails, preferably galvanized. Plus – it’s cheap and simple, minus – the lamella can be split or damaged;
- self-tapping screws - a more rational option, but also spoils the appearance;
- construction stapler - requires good skills in using the tool;
- using clamps - special holders. This is the most modern and reasonable method of hidden installation when finishing a loggia with clapboard.
With any fastening method used, the fixing element is driven into the groove; fastening from the outside is undesirable.
How much lining is needed to cover a balcony?
It is better to consider the algorithm for calculating the area of a room using the example of a 5x8 house, where we will cover the walls and ceiling with clapboard.
Next you need to calculate the square footage of one of the rooms. Let its length (a) be 5m, width (b) 4m, and height (c) 2.5m. And then everything was as we were taught in the school geometry course.
- Let's start with a long wall: multiply its height by length (ac) = 5x2.5 = 12.5 m2.
- The opposite wall will be the same size, so we simply multiply the result by two. 12.5x2=25 sq. m.
- Now, using the same principle, we find the size of the smaller wall (bc) = 4x2.5 = 10 square meters. Multiply by two. 10x2=20 sq. m.
- We multiply the length of the room by its width and get the ceiling area (ab) = 5x4 = 20 square meters.
- Let's summarize the data obtained from points 2, 3 and 4. And in addition, the square footage for finishing one room is 25 + 20 + 20 = 65 square meters.
We are trying to correctly calculate the area of the balcony
The calculation of the square of the balcony follows the same principle, only in this case, for convenience, it is better to divide each side into its constituent figures.
Take the appropriate measurements and calculate the area of the resulting figures using the formula.
Add it up and you get the balcony data.
Calculation of the required amount of material
How to calculate the amount of lining? First we need to know the size of the cladding material.
According to GOST, the thickness of a standard board should be 1.2-2.5 cm, length - 600 cm, and width up to 15 cm.
Panels up to 1.6 cm thick are used for interior decoration, and panels with a thickness of 1.8 cm are used for exterior work.
Knowing the width and height of the boards, we can also find out their quadrature . For example, if their height is 600 cm and width is 9.5 cm, then the total area of the board will be 0.52 square meters.
To find out how many units of material will be needed to cover a room, divide its total area (walls and ceiling) by the area of one board.
You can also contact a consultant at any building materials store for help or calculate using a special calculator on the manufacturer’s website.
It is recommended to take the material with a reserve in case of defects or breakage during installation.
Source: kubvagonki.ru/operation/ustanovka/kak-rasschitat-kolichestvo-vagonki-dlya-obshivki.html
Types of lining
A special board for finishing surfaces can be of different types, despite the fact that it is made according to the same principle. The material is classified based on the type of wood and general characteristics. After passing through all production stages, the lining is sorted according to certain GOST standards. The presence of resin pockets, cracks, knots, and blue stains is detected. Panels are divided into the following grades:
- Extra. Top class material. The slightest burrs are not allowed, the panel does not require additional processing.
- Class A. There may be 2-3 knots and chips near them per 1 m of product length. The front part may have microcracks. Chips at the end are allowed, but no more than the width of the board. A slight amount of tar is allowed for coniferous products.
- Class B. Cracks and a few falling knots with a diameter of no more than 2 cm are allowed. Resin pockets and areas affected by insects are possible, but no more than 3 lesions on one board and 5% of the entire lot. Uneven color and pattern are allowed. Blue is excluded.
- Class C. They have no restrictions on all parameters except rot. Through cracks, large resin pockets, growths, pattern inconsistencies, and extensive pest damage are allowed.
Based on the type of wood, the lining is divided into coniferous, hardwood, and exotic varieties. The choice of a specific type depends on the characteristics of the wood and the treated surface. Any type is produced in various sizes - length from 0.3 m to 6 m, width - from 0.8 cm to 1.6 cm.
Technology of covering a balcony with clapboard
It is a mistake to believe that to cover a balcony with clapboard you need to know all the relevant mechanisms for performing the work.
In fact, it is enough to select high-quality material and prudently stock up on the necessary construction equipment.
For covering a balcony with clapboard, the most optimal wood species are considered to be linden, which, although not cheap, is a durable and attractive material that has virtually no knots after processing, as well as pine, which is resistant to wear and temperature changes.
Another suitable material is larch, which does not rot, does not deteriorate under the influence of low temperatures and has an excellent texture.
Devices for work
In order for the work to proceed without much difficulty, it is enough to collect the necessary tools, in particular, prepare a tape measure, level, drill (screwdriver), hacksaw and hammer.
The joints will have to be treated with something, so a sealant can be useful here, which is very convenient to use if you have a special tube gun on hand.
Surface preparation stage
All walls will be covered with clapboard, except those facing the street. Naturally, it is better to insulate them, and at the same time save on appropriate materials. It is important to know that the final result directly depends on their quality.
To insulate the walls and organize the installation of the lining, you will need beams measuring 50x50 mm. Corners and baseboards will serve as decorative elements.
You will also need hardware and insulation. A film that insulates from steam will not be superfluous. And, of course, the lining itself (usually called eurolining).
The surface of the lining, which has not yet been treated, looks more elegant than a regular PVC panel.
Before applying a primer that protects against street precipitation, the surface must be completely cleaned of all kinds of contaminants. It will be necessary to make lathing for the lining; for this you need to install beams around the perimeter of the walls, 40-50 cm from each other.
When the beams are mounted on the facade, insulation is applied between them on top of the primer (usually ecowool or polystyrene foam). Only walls can be coated with primer; this cannot be done on the floor due to the accumulation of condensation under the finishing materials.
Covering a balcony with clapboard should be done on flat surfaces, this will extend its service life and create a beautiful appearance.
How to properly cover a balcony with clapboard
The cladding of a balcony is technologically not much different from the finishing of other rooms: first, the frame is assembled, then the cladding board is nailed to it. It is necessary to align the sheathing horizontally and vertically, and then correctly position the first plank on the wall or ceiling, since all the others are installed from it. Then the second is nailed to the first board, then the third, and so on, until the corner. On the next wall everything repeats again.
Making the sheathing
Cladding with clapboard begins with the creation of a frame - sheathing. It is most often made from a block. The cross-section is selected depending on the thickness of the insulation (if any). The block should be of such a size that there is a gap of 1.5-2 cm above the surface of the insulation. This gap will allow maintaining normal humidity of the insulation and wood, which will prevent the appearance of fungi and mold.
If a beam of the required size is too expensive, you can save money. Under the sheathing take a block of the same thickness as the insulation (or a little more). It is mounted between the guides, and a counter-lattice is placed on top, perpendicularly. It is made from planks 1.5-2 cm thick. They will give the required gap. Just be sure not to get confused with the direction of fastening the lining.
An example of a balcony sheathing under clapboard
Cladding can be vertical or horizontal. The sheathing strips under it are installed perpendicularly. If the trim will be attached vertically, then the sheathing under it should be positioned horizontally.
If there is a counter-batten, the rules change: the primary batten is also packed (vertically), and the counter-batten is packed horizontally. With this system, the planks will be mounted vertically.
More often, clapboard cladding on the balcony is done vertically. Accordingly, installation of the sheathing can begin with the strip under the window block. It is set horizontally, checking the level in two planes. If the wall is uneven, install wooden or plywood pads of the required thickness in the right places. Fasten the sheathing with dowels.
The planks must be installed around the perimeter of the walls and ceiling, 30-40 mm away from the corners. It is also necessary to fill the perimeter of window and door openings. Then the intermediate bars are fixed: one plank from the other should be at a distance of 40-50 cm. It turns out to be a frame on the walls and ceiling, to which the lining is then attached.
A similar structure is assembled on the ceiling
The lining boards are cut slightly shorter than the required length (0.5-1 cm). This is necessary to compensate for dimensional changes due to high temperature and/or humidity.
Installation instructions for lining
They are fastened with self-tapping screws or nails to the sheathing strips. If you use nails, take them with a small head - finishing nails, self-tapping screws - for wood (preferably light ones, not black ones). There is another fastening option - with staples from a construction stapler. This is the fastest way and quite reliable. Just take staples with a long, sharpened leg; T-shaped ones will also work.
The first bar is installed in the most difficult corner to work with. It is placed with a spike in a corner, and the correct installation is checked using a building level. They are nailed into the face (into the front surface), retreating 1-2 cm from the edge. To prevent the wood from splitting, a hole is first made with a thin drill. Then they tighten the screw or hammer in a nail.
On the opposite side (where the groove is located), the lining is secured with nails, screws, and staples. They are driven into the tenon at an angle of 45°. This creates a hidden fastening - it is covered with the next board.
Fastening the lining with a nail (screw, staple) into the groove
There is another option - cladding with clapboard using special mounting plates - clamps. They hold well if the tenon is long enough, and this can most often be observed with eurolining. The clamps are installed in the tenon (as if they are put on it). On the other side they have a mounting plate with holes for nails. One or two nails with a small head are hammered into this plate.
Fastening with clamps
The first board is attached to each plank of the sheathing, all subsequent ones - one after another in a checkerboard pattern (alternating). The second board is inserted into the tenon of the first. If it does not fit tightly, it is tamped down with a small piece of wood placed against the plank. and a hammer. They hit a piece of wood with a hammer. This complexity is necessary to avoid damaging the board. Having driven the tenon into the groove, check whether the bar is vertical. If necessary, adjust, then nail. This is how the entire paneling is assembled. The last plank sometimes needs to be cut to width. It is attached closer to the corner, like the first one, in the face.
The process of installing lathing and wooden lining is shown in the video.
See the video below for the complete process of covering a balcony - from installation of exterior finishing to installation of slopes and trims. We only worked with PVC panels, but the finishing stages are similar. The only difference is that the wooden lining does not have starting strips. All tops and bottoms are covered with baseboards, and corners with corners.
Installation of lining
When the room is prepared for cladding work, they start from the floor, where there is already a sheathing similar to the wall one.
The only caveat is that you can take a smaller step between the beams (30-40 cm), which will allow you to use the balcony for a long time.
In cases where the floor is already ready, it is necessary to finish the ceiling, securing the beams 50-60 cm from one another and without insulating the surface, unless, of course, the balcony is on the top floor of the house.
When the floor and ceiling are prepared, you can begin installing the lining on the walls. Fasteners, which can be nails or self-tapping screws, must be hidden in those places of the panels that will then be covered with the next row of sheathing.
Installation of lining on the sheathing
This installation option is used most often. The result is a strong and rigid structure that can withstand any mechanical loads and has a long service life. In addition, under the lining it will be possible to hide electrical wiring, ventilation ducts, heating lines, and so on. To decorate a balcony with clapboard with your own hands using this method, it will take a little more time than in the case of installation with glue.
Covering a balcony with clapboard begins with installing the sheathing
Installation of sheathing and insulation
The surface to be sheathed must first be marked.
On a note! The lining can be mounted both horizontally and vertically, but the latter option is more preferable due to the fact that the balcony is narrow and long.
First you need to draw vertical lines at a distance of 10 cm from corners and openings. Check that the markings are correct with a building level, and then draw horizontal lines along the perimeter of the walls, retreating 40 cm from the floor. Next, continue to draw horizontal lines, but now in increments of 60 cm.
Marking for installation of sheathing
At the end, you need to check the markings again with a building level. And you can start installing the frame:
- First of all, using a hacksaw or jigsaw, cut the slats to the required length.
- Then you should attach the wooden product to the line, step back 5 cm from the edge and drill the first hole with a hammer drill so that its depth in the wall is no more than 5 cm.
- Next, you need to drill holes along the entire length of the beam in increments of no more than 80 cm.
- This is how you need to process all the products, and then install plastic dowels in the holes in the wall.
- Now you should put the sheathing aside for a while and install the waterproofing material on liquid nails. Allow time for the glue to set (the period is indicated by the manufacturer on the packaging).
- Then the sheathing is simply installed on screws, which are screwed into the previously prepared holes. The installation is also checked at the building level. It is better not to screw in the fasteners completely at once, but after checking with a level, slightly recess the caps into the material.
At the end of this stage, insulation is installed. If we are talking about rolled materials, then they must be laid before the installation of the frame begins. Thermal insulation materials in the form of slabs are simply laid in the niches that were formed during the installation of the sheathing. At this stage, all utilities are also laid out and heating radiators are installed.
Cladding technology
Finishing a balcony with eurolining includes the following steps:
- The slats are cut to length and thoroughly treated with antiseptic compounds.
- Using a hacksaw, cut off the tenon of one plank and apply it to the corner with the groove in the direction opposite to it. The vertical is checked with a level.
- Then you need to secure the element to the frame using nails or clamps. In the first case, the hardware is simply driven in at an angle. In the second, the process is a little more complicated: the plank is fixed with two nails at the top and bottom, not driving them in completely. A clamp is mounted into the groove of the panel and secured with screws. At the end the nails are simply removed.
Installation of lining on a wooden frame: fastening with clamps - The next product is installed in the same way, but inserting the tenon into the groove of the previous one.
- The last strip may need to be trimmed. This should be done in such a way as to leave the thorn intact.
- At the end, the surface is treated with varnish, plugs, ceiling and floor plinths are installed.
The procedure for installing the lining on the ceiling is exactly the same. It may only be necessary to install a metal frame rather than a wooden one if heavy products were purchased.
Video: an interesting way to install lining on the ceiling
How to work with lining without damaging it?
When installing the lining, it is advisable to do it carefully. After all, we are talking about a natural material that can be easily damaged during the process of covering the balcony. In particular, it is not recommended to generously wet the balcony cladding with water, since excessive moisture causes deformation of the planks.
The sponge must be damp during cleaning. As for detergents, they should be designed for caring for wooden surfaces. If there are strong or difficult to remove stains, you can use a small amount of cleaning gel that will not scratch the upholstery.
It is important, even at the installation stage, to provide options for air access under the sheathing, so it is necessary to leave gaps of several centimeters in the corners, this will eliminate condensation and prevent the wood from rotting.
It is better to carry out the work itself in the warm season to avoid compression of the wood and, as a result, the appearance of cracks.
Source: ovagonke.com/balkon/kak-osushhestvljaetsja-obshivka-balkona-vagonkoj.html
Impregnations and coatings for lining on the balcony
In pursuit of cheap, practical building materials, we forgot about wood, which half a century ago occupied a leading position in construction. Now wood in a house is partly the roof, sometimes the floor, doors, furniture, and decoration.
For finishing residential premises, lining is used - lumber in the form of edged planed boards. Once upon a time, freight cars were sheathed with similar boards, which is where the name “lining” came from.
Due to massive deforestation and destruction of forests, the price of wood has risen. Not everyone can afford it. In addition, it is believed that wood requires special care and handling. But paneling on a balcony is not such an expensive solution: the area of the walls and ceiling for the cladding is small, and installation is easy to do with your own hands.
It is more difficult to process the lining on the balcony. But a balcony decorated with such material will look expensive and stylish! Every time you go out onto it, you will be able to inhale an indescribable woody smell.
Traditional processing option: brief instructions
Let’s take a closer look at a solution that is suitable for any enclosed space – a room, veranda or loggia. How exactly to process the lining on the balcony, decide for yourself, based on your own preferences, but for greater efficiency, adhere to the following procedure:
- Cleaning wooden surfaces (especially for recycled materials).
- Grinding of slats (with the exception of top-class products that are completely ready for painting).
- Primer of all wooden elements requiring painting.
- Applying varnish or paint.
Make sure the primer or finish contains antiseptic ingredients.
Surface cleanliness is the key to quality painting
The surface needs to be cleaned in two cases: if this is not the first painting or if the panels were stored in unsuitable conditions, as a result of which they became damp, stained or moldy. The old decorative layer is removed using available tools - a hair dryer, a spatula. The stains are treated with bleach. We recommend replacing parts with severe damage.
It is better to sand with fine sandpaper or pumice, as well as a power tool with suitable attachments. This is a labor-intensive process, but the appearance of the panels largely depends on it. The dust generated during sanding must be removed, then you can begin priming.
To apply the primer, use a wide paint brush or spray gun. One layer is enough. Don't forget to work the gaps between the planks and hard-to-reach places - a small brush will do for this. If you did not have time to buy a special composition, prime the surface with a finishing paint.
The last stage is the application of a decorative agent, such as paint. The instructions for paintwork materials usually define the painting sequence and indicate the number of layers required to create a durable, uniform coating. Usually they paint 2-3 times, waiting for the previous layer to dry.
The number of paint layers affects the color intensity
This is a description of the standard process for processing wood panels; you can safely make adjustments to it. This instruction is also suitable for exterior work, but the materials for exterior finishing will be different.
What you need to know when choosing wood material
To properly care for wood in the interior, you need to know its humidity, density, porosity, thermal conductivity, strength, hardness, viscosity.
Coniferous and deciduous raw materials are used in the construction and furniture industry. Coniferous materials are more durable because they have resinous substances in their structure.
The density is high in spruce, aspen, pine, birch, and dry oak wood. Without competition - larch.deciduous raw materials. Coniferous materials are more durable because they have resinous substances in their structure.
The presence of pores in hardwood is 30-80%, in coniferous wood - 45-85%, therefore, more impregnation is required for the primary processing of pine-spruce lining.
The aesthetic properties of wood include color, texture (surface shine) and texture (fiber pattern). Aspen and birch lining is almost white. In other species, the shade varies from cream, yellow-brown to brown.
In the air, under the influence of moisture and sun, wood “burns out” - changes color. The natural color of wood can be changed artificially using stains, varnishes, and dyes.
Most species have a matte surface, while beech, maple, oak, elm, and white acacia have a shiny surface. The gloss can be enhanced by treating the wood with varnish and wax.
The cost of wood depends on the grain pattern, the internal structure of the trunk, the direction and method of cutting, the time of wood harvesting and the place where the tree grows. Softwoods have simple, featureless grain lines.
Beech, walnut and maple have interesting patterns. The interweaving of oak, Karelian and ordinary birch fibers looks impressive. Texture is important when wood paneling is going to be painted with a clear finish.
What characteristics does the lining have?
Lumber is obtained by longitudinally sawing logs of predominantly coniferous species: they have an even, long trunk. Wide and thin timber - board.
It has two faces/edges and two ends/sawed ends. Depending on the processing of the edges, the boards can be unedged, half-edged, or edged.
Lining (edged folded or tongue-and-groove board) refers to molded products: the product is measured in linear meters. Rebate is a rectangular protrusion in the edge of the lining for better assembly.
A tongue-and-groove on one side of the board is inserted into a tongue-and-groove groove on the other board. The result is a particularly strong tongue-and-groove joint with an almost invisible seam.
You can buy a variety of linings on the finishing materials market. It is classified according to the presence of knots, stains, cracks, chips, and manifestations of resin. Extra material of the highest quality with indicators = 0 (zero) the most expensive.
Next comes the lining of classes A, B, C. For example, wooden panels, designated by the letter C, may have 4 captive knots of a fairly large diameter per one and a half meters, cracks, stripes, blue spots (fungal lesions).
The lining of classes A and B has, accordingly, fewer flaws. During transportation and storage, serious manufacturing companies subject the wood to transport chemical treatment.
The lining should be taken certified, in the original packaging indicating its characteristics; buy either individually, or where you are allowed to unpack it and check it.
Boards wrapped in plastic are a sure sign of a non-standard product. The number of defects is directly proportional to the efforts and means to correct them. If you come across material with knot holes, try to seal them. Cut out suitable blanks and insert tightly into the face of the board.
To preserve the beauty of wood, it is processed to a minimum.
Required Tools
To install the lining with your own hands, you do not need specialized professional equipment, and this is its advantage. The list varies depending on the type of material chosen, but in general the list of tools includes:
- Hammer, drill with impact mechanism;
- Drill with a diameter of 4 or 6 mm;
- Screwdriver (electric or battery);
- Boer;
- Hacksaw, jigsaw;
- Construction level, body kit, nylon cord;
- Cross bat;
- hammer, axe.
To take measurements you will also need a tape measure, a square and a pencil; fastening is carried out using nails with large heads (60 mm), wood or metal screws (50, 75 and 90 mm) and umbrella anchors. And during the finishing work, you will need parts for the fittings: corners and baseboards.
Reasons why lining processing is required
If there is excess moisture, the wooden lining will rot. Untreated thin wood easily catches fire and is damaged by insects.
Its correct use will reduce risks. First of all, reliable waterproofing of the walls and insulation of the balcony with non-flammable insulating materials are necessary. The balcony should be well ventilated, to prevent the appearance of condensation, cold bridges, and sudden temperature changes.
Wood in any condition requires mechanical and chemical protection to ensure its safety. Wooden lining on a residential balcony requires particularly careful environmentally friendly processing.
Where to start processing lining on the balcony
When you do not have the opportunity to buy already antiseptic lumber, you will have to process the lining intended for the balcony yourself.
Impregnations used to treat wooden boards are solutions of chemicals with various additives. They should be handled with care.
For work you will need rubber gloves, goggles, a respirator or mask, and a long oilskin apron. To process the lining, prepare a roller, a set of brushes, brushes, sponges, rags, a spray gun, and containers for liquids. Follow the recommendations of the technological map and instructions for using chemical compositions.
There are both mono-primers and wide-range impregnations on sale. It is assumed that by treating the lining with them, you immediately protect it from all risks. It is better to prefer special preparations to universal means of protection as they are more effective.
Whitening
Wood bleaching surgery is needed when the board is already affected by fungus. An indicator is the presence of blue, gray-black spots on its plane.
Treating lining with chlorine-containing liquids does not kill microbial spores, but will inhibit the development of the fungus. Bleach will lighten the board, but penetrating the wood will destroy the cellulose. The effect of chlorine is neutralized by washing off with a stream of warm water.
The bleached board must be dried in air under a canopy, cleaned of efflorescence and antiseptic.
Detarring
On lining made of coniferous materials, resin often appears, which prevents the penetration of the necessary impregnating compounds into the wood. Therefore, the board will need to be cleaned of resin “tears”.
For this purpose, ready-made resin solvent preparations are sold. But you can remove the tar from the board with alcohol, white spirit, acetone, or gasoline. The liquid is applied to the surface to be treated several times, rubbed with a brush, washed, wiped with acetic acid, and dried.
Fire treatment
Fire retardants or fire retardants are aqueous solutions of ammonium sulfate, boric and phosphoric acid salts.
Treating the lining with a fire retardant slows down or stops the burning of wood, which allows the fire to be extinguished more quickly.
Wooden lining is impregnated with fire retardants on all sides, especially at the ends. Impregnation can be superficial or deep. It does not change the color of the processed lining. Deep vacuum impregnation is carried out at a woodworking enterprise during the production of lumber.
At home, in soft soil, dig a hole the size of the lining, line it with thick polyethylene, pour in impregnation and soak the wood. Surface treatment is done by applying fire retardant with a brush, sponge, or spray gun.
Such actions need to be resumed after 2-3 years if nothing else is going to be applied to the lining.
When buying a fire retardant, pay attention to the type and class/fire protection group. Class I flame retardants have the highest level of fire protection. The lining on the balcony can be treated with class II fire protection.
It is strictly forbidden to mix different fire retardant liquids. The first and subsequent layers of impregnation must also be applied to the board using a product of the same brand and manufacturer.
Treatment for mold and shashel
Preparations for mold, fungal microorganisms and wood-damaging wood-boring beetles are called aniseptics, bioprotection, impregnates. Impregnations are available in dry, liquid, concentrated form, calculated per m2.
Antiseptics are divided into water-soluble, oil-based, and combined. The first include impregnations based on copper sulfate, sodium fluoride and fluorosilicone, and zinc chloride.
Sodium tetraborate, borax, has antiseptic properties. Oily primers are not used inside buildings. In case of slight infection of wood with shashel, use a medical syringe to clog its passages with special wax, and carry out deep treatment with the biological preparation “Antishashel” or similar. It’s better not to delay treating the lining from mold and insects.
Repairing cracks and other mechanical damage
If it is preferable to carry out fire and bioprotection of the lining before its installation on the balcony, then the processing and leveling is done according to the finished lining.
You will need to fill up splits, cracks, and seal holes from knots. It is better to buy industrial wood putty in a small container - it dries quickly. Putty on a dry board, following the text on the package.