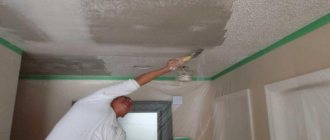
Every person wants his room to look stylish and beautiful. And, of course, most people choose paint as the material for interior decoration. But sometimes it happens that self-painted walls don’t look as beautiful as expected. This happens because people make mistakes when painting walls. For example, they choose the wrong tool and use brushes where work with a roller is required.
But painting walls without the help of professionals is actually quite simple. You just need to know the techniques that painters use and not neglect the recommendations from professional decorators.
What should you have on hand?
Most people who are going to paint walls do not consider it necessary to prepare anything other than a brush and a can of enamel. However, there should be quite a lot of items at hand.
When painting walls you may need the following:
- putty knife;
- handle for extending the paint roller;
- rags;
- paint rollers of different diameters and covers for them;
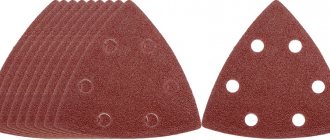
- sandpaper;
- scraper and paint tray;
- brushes, flat and round, of different widths and hardness;
- foam sponge;
- masking tape.
And, of course, you need to choose the right paint. If you are not sure what kind of enamel is required, you need to carefully study the samples.
Prepare in advance
Many people begin preparing to paint their walls the same day they plan to begin their renovation. And this is the most common mistake. After all, removing furniture, placing protective flooring, installing stepladders and other similar actions not only take time, but also require effort. Accordingly, people start painting walls already pretty tired. And this certainly affects the result of the work.
AstraZeneca plans to create a vaccine against new strains of coronavirus
Meteorologists predict a new ice age: the Gulf Stream may stop
Blouses with a collar and 8 other things that all fashionistas will wear this spring
Professionals prepare the room for painting not on the day they start work, but in advance. Even if you plan to paint the walls on the weekend, but you don’t have time during the week, you need to prepare in advance. This doesn’t have to be done at once; you can spend a little time every evening.
Preparing the room for painting
The room must also be prepared for painting. Remove furniture and interior items - paintings, mirrors, lamps. Anything that cannot be taken out of the room must be carefully covered with covers and plastic film and, for greater reliability, secured with masking tape. It is necessary to cover the entire surface of the floor with film or newspapers. Cover the window with film and cover the window sill to protect it from splashes and drops of paint. Clothes and shoes in which work will be performed must be comfortable. You must tie a scarf or another headdress on your head, protect your eyes with glasses, and protect your hands with gloves.
The surface of the ceiling must be pre-prepared - cleaned of old coating or whitewash, seams and unevenness sealed using putty. The ceiling must be treated with a special primer 24 hours before painting. It is necessary to prime the surface before painting, as it creates a moisture-proof layer and the paint lasts a long time and is durable. Before you start painting the ceiling, the paint must be mixed thoroughly. Using a paint brush, we paint hard-to-reach areas and the ceiling along the perimeter walls, where it would be difficult to paint with a roller.
Repair and clean the walls
Before you begin painting, you must carefully inspect for damage.
Every little detail matters. Any scratch or roughness will become visible after applying a coat of paint.
The most convenient way to check the condition of the walls is to wash them manually. When running a sponge over the wall, you cannot help but notice the damage.
The pros and cons of early rise are named
Dumplings on the table for Maslenitsa: how to cook them with cottage cheese and poppy seeds
How to update a refrigerator and repaint it: simple step-by-step instructions
Of course, all detected defects must be eliminated before painting.
What possible defects should you pay attention to?
When buying a roller for water-based paint, carefully inspect it for defects. Poor quality products can spoil the results of your work.
- Test the roller for resistance to deformation by squeezing it tightly. The pad should quickly return to its original state.
- Pay attention to the joint on the fur coat; it should not protrude much; a noticeable joint will leave unaesthetic marks that will reduce the quality of the painting.
- If you buy a tool with a lot of lint, pull on a few lint so it doesn't fall out. The falling lint will remain on the surface being painted, giving it an untidy appearance.
In general, these actions are enough to choose a roller suitable for water-based emulsion, the work of which will bring pleasure due to its speed and quality.
Dismantle everything you can
Paradoxical as it may seem, many people forget to remove the sockets and switches before painting the walls. Meanwhile, these items interfere with painting, especially if they are covered with masking tape.
Before starting repair work, professionals dismantle everything possible, not limited to switches and sockets. For example, if it is possible to remove the baseboards, they do it.
When purchasing paint, check the type of tools
The choice of the type of tool depends not only on the desired result, but also on what type of paint is chosen for the repair. For example, latex paint cannot be applied with rollers made of lush faux fur. But for whitewash and chalk paints, such a tool is perfect.
Oleshko is dissatisfied with participation in the “Fashionable Sentence” project
Soft Christmas tree: DIY succulent tree
What happens if you bake the cream in the oven: children especially loved the dessert
When purchasing paint, you need to consult which tool is best suited to work with it. If you have never worked with the enamel you have chosen before, it is better to purchase several tools of different types.
Natural or synthetic bristles?
Expensive brushes most often have either synthetic fibers or natural bristles. In this case, the right choice will again depend on the type of paint used. For acrylic paints, it is recommended to use brushes with synthetic bristles, as natural bristles absorb more water and lose their shape faster. Brushes with natural bristles are suitable for use with paints based on synthetic resins and paints that contain alcohol or solvent. All brushes should be rinsed with water before first use.
See also: Making stencils for painting
When and how to use a brush?
Brushes come in different shapes and sizes. Flat, wide brushes are designed to handle large, flat spaces. Edge brushes have a straight edge and are not very wide.
They are a good choice when it comes to painting doors and window frames. Flap brushes have bristles cut at an angle. They are typically used for painting difficult surfaces and applying artistic strokes. Round brushes are ideal for working with stencils.
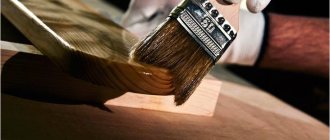
The brushes are easy to use. The bristles should not be completely immersed in the paint; they are only immersed in the enamel by a third. If the paint is taken directly from the can, then the bristles need to be moved from the center to the inner edge and then remove the brush. Of course, the edge of the can should be used to squeeze out excess paint. Paints are collected from buckets in the same way.
Europe will develop a digital twin of the Earth to simulate climate change
The couple transformed an old Soviet apartment beyond recognition: photo
Let's read the hand: how to easily identify a traitor by the lines on the palm
When decorating, you should try to make long, smooth brush strokes to avoid the appearance of streaks and marks.
Tips for choosing the right brushes
- To ensure that consumables are used economically when painting, and that the paint itself is applied in an even, neat layer, without smudges or streaks, it is better to take brushes with split ends. The hairs should be thick at the beginning and thin and flexible at the end. When bending them, they must not break.
- Regardless of what surface you need to paint, you need to buy a brush whose hair length will be approximately one and a half times the width of the brush.
- Many people do not know this general rule: before painting with a new brush just brought from the store, you need to wash it in soapy water and dry it well. Thus, it is cleaned of dust, dirt, hairs, grease, and so on. Make sure the brush is completely dry before painting.
- To prevent paint and varnish material from flowing down the handle, from smearing your hands, and from wasting paint, its bristles should be lowered into the paint can about half the length.
- If you need to paint objects made of wood, then the brush should be inserted along the grain. After all, some hairs will remain on the surface. If the wood is not treated, then it is better to use inexpensive brushes.
Rollers are an item that is used to work on objects with a very large area. Based on surfaces and tasks, rollers are made different in appearance.
Rollers are used quite often, but still, its main use is on large areas.
It will do an excellent job of painting flat floors, walls and ceilings, but it should not be used in complex curved shapes. The roller has a soft main part in the form of a cylinder, which is called a fur coat.
Thanks to this structure, it can easily regulate paint consumption and can also make the surface more textured, which is impossible to achieve with a brush. Depending on the size, rollers are divided into small, medium and large.
The largest ones are used for large, flat surfaces where the product is used extensively, for example, painting the ceiling. The smallest ones are most often used for small surfaces or difficult to paint areas, such as corners.
Professionals in this business always have in stock many types of rollers that are suitable for any type of painting. Rollers have a fairly high price, but they last longer and can also perform specific tasks.
The properties and parameters of such a tool change based on the material from which the roller handle is made, as well as the fur coat. There are different types of rollers on sale:
- From foam rubber;
- Made from velor;
- From felt;
- Made from natural fur of various animals;
- From mohair;
- From different polymers.
If the painting will be made of acrylic or latex, then it is better to buy a synthetic roller for it. But for oil-based paint, you can buy any roller.
The larger the roller cylinder, the greater the amount of paint it absorbs and the greater its consumption.
This needs to be remembered, especially when buying a mohair or velor roller. A roller takes more consumables than a brush, but at the same time it reduces work time and labor costs.
Advantages of a roller compared to brushes:
- Using a roller, you can paint a large area very quickly, compared to a brush. Even if the coverage area is not very smooth and even. Going over it once with a roller can be compared to going over it with a brush dozens of times.
- If the area was not prepared before painting, the roller will still paint it evenly.
- Today there are a huge number of different consumables that can give different textures to surfaces. And many brushes are not suitable for most of these modern products. For example, it cannot be combined with liquid plaster.
- With a roller there are no visible strokes on the surface.
But there are also disadvantages:
- Rollers are much more expensive than brushes. But over time, you can only buy a new cylinder for the roller, and this is already economically profitable.
- There is no way to paint hard-to-reach places with a roller; here you will still have to use a brush.
- The roller quickly becomes unusable, even if you don’t buy a new roller, you will have to change the fur coat.
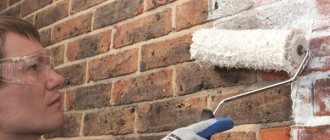
When and how to use a roller?
When working with paint, you must cover your hair and wear goggles and gloves. When painting large areas, you need to use an extension screwed to the handle of the paint roller. This device will help you reach the upper zones.
The length of the pile should correspond to the type of paint. The roller must not be overloaded with paint. You need to fill the hole in the tray with enamel and lower the roller into it halfway, and then roll it out with force on the platform.
The paint must be applied in a special way. First, the paint is rolled out on the surface in a pattern resembling the letter W. Then the paint is rolled out again, but this time horizontally. At the end of the painting, vertical stripes are applied.
You need to cover the entire surface with paint, without gaps. Don't worry if the first coat looks thin, appears lighter than the chosen color, or doesn't completely cover the original surface. Second and third stripes of paint provide even coverage that closely matches the chosen color.
No. 1. Types of painting tools
A number of devices are used for painting surfaces, ranging from spatulas for leveling to ladders for better access to certain areas. Buckets, drills, trays and paper strips are also used, but these are all tools used in other jobs. We will focus on painting tools that are used exclusively for painting surfaces :
- brushes;
- rollers;
- spray guns;
- other tools for hard-to-reach places or to create a relief surface (crumpled cloth, sponges, etc.).
What should we not forget?
Many times people ruin their own work by improperly removing masking tape or moving stencils.
If you try to remove the masking tape with a sharp movement, there is a high risk of “tearing” some of the paint from the wall. Also, the tape should not be removed until the enamel is completely dry.
But with stencils everything is quite the opposite. There is no need to remove them smoothly; on the contrary, the stencil is removed in one clear movement.
If you need to take a long break while working, brushes and rollers should not be simply abandoned, left in paint, or immersed in solvent. They should simply be wrapped in film or placed in a bag and tied.
Found a violation? Report content


