The basis of a durable floor is a screed - an intermediate layer between the floor slab and the finishing coating of tiles, laminate, parquet, linoleum or other material. It is performed with the aim of leveling the surface, giving it rigidity or a certain slope, improving thermal insulation and sound insulation. The choice and service life of the finishing coating depends on the quality of the screed.
Today, some craftsmen practice leveling the floor with gypsum plaster. But if you want to independently prepare the surface for laying flooring, you need to weigh the pros and cons of using this material. Is screeding a floor with plaster always a profitable and rational solution, or is it better to give preference to other materials?
Types of screeds
There are two ways to level the floor surface:
- Wet screeds - cement-sand mortars, self-leveling floors or levelers and gypsum plasters. To create a layer up to 35 mm thick, it is necessary to install beacons.
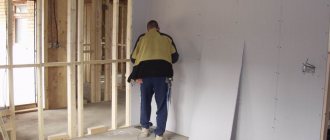
- Dry or prefabricated - using chipboard, plasterboard or thick plywood. They are laid on a dry layer of fine expanded clay or wooden logs.
The choice of screed type depends on the floor material, the number of storeys in the building, the condition of the floor, the purpose and location of the premises.
Gypsum plaster for floors: features and disadvantages
Based on the main binding component, dry mixtures are divided into cement and gypsum or anhydrite. Cement mortars are universal; they can be used in any premises and for outdoor work. Self-leveling floors are easy to use, easy to apply and have an affordable price. Leveling with gypsum plaster is only suitable for dry rooms.
Gypsum-based mixtures are environmentally friendly, more plastic and harden faster than cement ones, but have the following disadvantages:
- absorb moisture - cannot be used in damp areas;
- their strength is much less than that of cement-based compositions;
- over a large area can cause significant shrinkage;
- when exposed to heavy loads, they crack and crumble;
- generate dust during operation.
How to make the right choice?
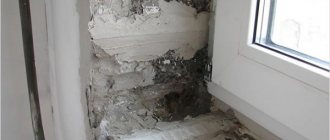
Can you be 100% sure that your upstairs neighbors won’t flood you, a pipe won’t burst in your house or apartment, a radiator won’t leak, or a child won’t turn over a bucket of water on the floor while cleaning? Surely all the answers will be negative! This means that leveling the floor with gypsum plaster is not an acceptable option for you.
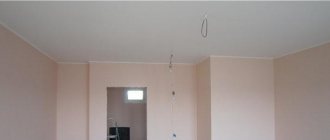
To create a strong and durable screed 2 - 3 centimeters thick, we recommend using a traditional cement-sand mortar. And to eliminate small level differences and unevenness, self-leveling self-leveling floors are perfect. Gypsum plaster for the floor is not the best solution, but it is great for finishing walls and ceilings! Its use makes it possible to mask all unevenness and create perfectly smooth and even surfaces.
Gypsum plaster for ceilings and walls absorbs excess moisture, and releases it when the temperature rises, thereby maintaining a favorable microclimate in the premises. Don't forget about the advantages of this material when you make repairs!
Added: 01/21/2019 16:39:00
How is a wooden floor leveled?
How can I level a wooden floor? Usually, sanding is used to level such surfaces. This method is advisable to use only if the wooden flooring is thick. Before starting work, make sure that each board is securely fastened and the nails are driven in well.
Usually, sanding is used to level a wooden floor.
Important! When working with scraping machines, do not neglect personal protective equipment. It is recommended to carry out work wearing a respiratory mask and goggles. Due to the fact that scraping is quite a noisy process, it is recommended to wear headphones to block the sound.
After sanding, you can lay any covering on the floor, be it linoleum or parquet. Remember that the scraping method is not advisable if there are significant differences in height on the floor.
Is it possible to level the floor with plywood? You can use plywood to level wood surfaces. This material is used in cases where there are large differences in height on the floor. If there is high air humidity in the room, it is recommended to purchase moisture-resistant plywood sheets.
Preparing joists for flooring with plywood
Leveling with plywood can be done by:
- Tape support. This method is used most often. When using strip supports, you will have to build a special sheathing. For its manufacture, longitudinal logs and cross members are used. They are laid in increments of 50 centimeters.
- Mini-lagam. This method is used if the difference in height is more than 8-9 centimeters. Alignment using mini-lags is rarely performed, since this technology requires accurate calculations (to carry out calculations, you should contact specialists or purchase specialized software).
- Point supports. When using this method, support blocks are installed around the entire perimeter of the room. They are made from OSB boards or wooden boards. The sheathing is made using supports. Leveling using point supports is carried out if the differences in height are no more than 4-5 centimeters.
Leveling floors under laminate
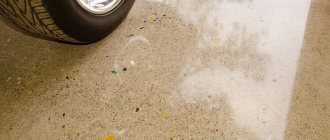
How can I level a concrete floor under a laminate? In this case, it is best to resort to grinding the base surface. This method is the most inexpensive and simplest. Processing with a grinding machine can only be done if the difference in height is no more than 5 millimeters. After sanding, the surface is cleaned with a vacuum cleaner and primed.
How can you level a laminate floor if the differences in height are large? It is best to resort to using a cement-sand screed. It is poured onto the previous screed or directly onto the ceiling. When using this leveling method, it is necessary to clean the base surface and lay a waterproofing layer. A reinforcing mesh can be installed on top. Also, when using a cement-sand screed, beacons are placed, which are fixed using alabaster mortars.
Is it possible to level the floor with underlayment? It is believed that a substrate can be used if the difference in height is no more than 7-8 millimeters. This leveling method is also used in cases where the laminate is laid on top of linoleum.
Important! It is customary to lay the substrate perpendicular to the laminated panels. This way you can best compensate for unevenness of the base surface and achieve high sound insulation rates in the room.
As a substrate you can use:
Scheme of laying the substrate under the laminate
- Foamed polyethylene. This material is often used because it is inexpensive and has high thermal insulation properties.
- Polystyrene. This substrate consists of two layers. The first is polystyrene itself, and the second is aluminum foil. The substrate must be laid so that the foil is on top.
- Cork materials. They are available in rolls. When using cork substrates, you must resort to additional application of moisture-resistant materials. For example, you can use rubber, bitumen mastic or ordinary polyethylene.
Is it possible to level the floor with tile adhesive? In construction practice, adhesive compositions are widely used, as they are inexpensive and easy to apply. In addition, tile adhesive can be used to repair cracks on the base surface. Remember that you can use adhesives only if the differences are insignificant. The material must be applied on top of the concrete screed.
Using tile adhesive you can eliminate cracks on the base surface
Installation of beacons
Beacons must be mounted parallel to each other and perpendicular to the wall. It doesn’t matter what type of beacons was purchased, they must be mounted on the floor; for this, you can use any construction glue, plaster or other solution. During installation, experts recommend using a hydraulic level and regularly checking the marks on the wall. In a situation where the profile is much lower than the mark made, you can put a substrate under it. It can be anything - plastic, stones, mortar. Cardboard and paper cannot be used for these purposes. Otherwise, after drying, a crack will form in this place. How to make a floor screed
In order to get a perfectly flat floor as a final result, the pouring needs to be done in one day, so you simply can’t do it without help. For example, one person will make the screed, and the second will be busy preparing the solution.
Progress:
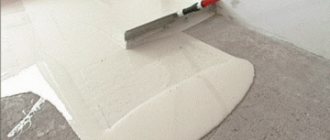
- it is important to lay the plaster only from the far corner and end at the door;
- as soon as the first portion of the cent is launched, you need to level it evenly along the pre-placed beacons; there is no need to move the beacons;
- carefully remove the excess mixture into the container used for kneading;
- for an even and quick distribution of the cement mortar, it is recommended to move it from side to side at a slight angle;
- After laying and leveling the cement floor screed, it must be left for 2-3 days so that it dries.
After all construction work, you can start decorating the floor only after the room has been thoroughly cleaned. At the owner’s discretion, you can use any available material - linoleum, laminate, parquet and much more.
What other alignment methods are there?
In some cases, solutions of PVA and sawdust are used to level the surface. This method is advisable to use only to eliminate minor defects of the base surface. Such compositions are applied as follows:
- Initially, the area located between the guides should be filled with the mixture.
- Then you should wait for the mixture to dry completely.
- Next, another layer of adhesive is applied.
- Plywood sheets of small thickness are laid on top and secured with self-tapping screws.
- After this, you need to lay linoleum or laminate.
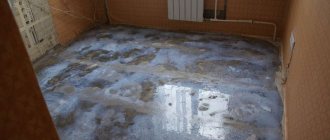
Scheme for applying self-leveling floor
Is it possible to level the floor with self-leveling flooring? Leveling compounds can be used to level the base surface. However, remember that this method is very labor-intensive and expensive. Before pouring self-leveling floors, a number of preparatory measures should be taken. Initially, the base surface is cleaned, all windows are closed and cracks are eliminated. Be sure to remove dust with a vacuum cleaner. Otherwise, the mixture may not set well. Also, during the preparation process, a primer is applied to the floor using a sprayer. This procedure is necessary in order to ensure better adhesion.
Is it possible to level floors with gypsum plaster?
List of tools and materials:
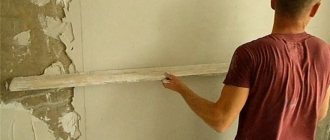
Sequence of leveling the floor with plaster
First you need to prepare the surface.
It is better to level the floor in warm weather (the floor surface should have a temperature of 15 to 25).
Remove nails and screws.
We attach a metal plaster mesh to the floor surface or make a notch using electrical appliances.
Before you begin, you need to remove all dust, dirt, and traces of paint.
Prime the surface with a deep action primer.
Preparatory work with beacons
Using a building level, we find out the unevenness.
We fix the profiles on the same gypsum plaster, monitoring their level (if your rule is one meter long, then it is better to make the distance between the beacons about 90 centimeters).
Profiles should begin to be fixed at a distance of 25-30 centimeters from the wall. Secure the beacon with a solution every 20 centimeters, pressing to create a flat surface. Then, after a gap, fix the second profile (checking the plane by level).
If the floor is uneven (the distance from the lighthouse to the floor is more than 4 centimeters), then level it in two passes, waiting for the first layer to dry
To mix the solution, use cold water (the warmer the water, the faster the plaster will set).
Mix the components in the proportions specified according to the instructions, mix thoroughly (you can even use a drill). Let the solution sit for 5 minutes, then stir again.
We apply the solution in the gap between the beacons, then level it with the rule (this must be done quickly, since after 20-30 minutes the solution will lose almost all its plasticity).
After the first section, we proceed to the next one.
Leave to dry (depending on the thickness of the plaster, it can take from a week to 3 weeks to dry).
You can level the floor using gypsum plaster yourself and call your friends for faster work. In any case, there should not be any particular difficulties.
Pros and cons of gypsum plaster
The main difference between gypsum plaster and cement plaster mixtures: lower water resistance, lower density and consumption.
Gypsum gives the composition many useful properties:
- environmentally friendly - harmless to health even when heated and wet;
- non-flammability - fire-resistant partitions are made from it;
- vapor permeability – does not interfere with air exchange in the room;
- noise insulation – absorbs noise due to the softness of the material;
- quick drying - does not delay the start of the next stages of finishing;
- no deformation - does not shrink or crack when drying.
These same properties are considered disadvantages under certain conditions:
- the lack of waterproofing leads to the destruction of the plaster layer when humidity increases and causes corrosion of the metal reinforcing elements underneath;
- the softness of the material gives low resistance to scratching by hard objects;
- rapid setting requires high speed of work and prevents the preparation of large portions of the solution.
The price of a bag of gypsum plaster is 20% higher than cement plaster. This disadvantage is offset by the difference in consumption at the same layer thickness. As a result, it turns out to be more profitable to use gypsum plaster.