Leveling the floor is the key to ensuring that the finishing floor covering will be laid correctly and will retain its functionality and beautiful appearance for a long time. For this, a variety of materials are used - made on the basis of cement and sand, wood, gypsum, and a finishing self-leveling floor can also be an excellent option for a flat floor. How to choose a mixture for self-leveling flooring? What do you need for self-installation? Read more below.
Finish self-leveling floor
Features of self-leveling floors
Self-leveling flooring is a fairly new technology that allows you to get a perfectly smooth and even finish to the base. It has already partially replaced many types of leveling materials, as it has certain qualities that make it possible to achieve what other coatings cannot provide.
Self-leveling floor structure diagram
On a note! Self-leveling floors were previously used only in industrial premises. To this it owes its strength, durability, and the ability to obtain an easy-to-clean coating that has no joints or crevices.
Options for self-leveling floors with different insulation
A self-leveling floor is a special type of building mixture that has the ability to level on its own, although this fact does not eliminate the need to pour it in a certain way and additionally distribute it over the surface. The composition of such a mixture may include various synthetic components, cement, and various additives that increase the rate of hardening and the ability to spread well without forming bumps and cracks.
Self-leveling floor
The advantages of self-leveling floors are as follows:
- long service life;
- high strength and ability to resist various types of mechanical stress;
- ability to resist moisture;
- fire safety;
- resistance to high and low temperatures;
- neat, attractive appearance;
- the ability to create a uniform floor without joints and thresholds throughout the entire apartment;
- easy to maintain and antiseptic - mold and mildew will not live on such a floor.
Self-leveling floors have many advantages
Photo of polymer self-leveling floor in the bathroom
These and other advantages of self-leveling flooring make it one of the best types of coatings, which does not lose its appearance for decades even with intensive use. A self-leveling floor can also be a leveling option for the base, and often itself becomes the final finishing option. By using certain technologies, various decorative components and designs on banners, you can turn your apartment into a real gallery, only the paintings will be located on the floor and not on the walls.
However, self-leveling flooring cannot be called an ideal coating. It has its drawbacks, one of which is the need for special care . For example, such a coating cannot be cleaned with products containing abrasive components. This will cause the floor to lose its shine.
The entire surface of the self-leveling floor is covered with numerous scratches
Scratches on the surface of the self-leveling floor
Types and characteristics of self-leveling self-leveling floors for the home
Types and characteristics
Quick-drying self-leveling floors are sold only in dry form. And beginners do not always understand that mixtures have different characteristics depending on the base that is used in them.
Plaster compositions
Popular option Gypsum compositions
A very popular option, which is chosen for wooden bases. Gypsum mixtures dry very quickly and have excellent thermal conductivity.
They are also characterized by:
- Complete drying after 3 hours;
- environmental friendliness;
- zero shrinkage;
- creating a healthy microclimate by drawing in excess moisture.
The latter property limits the scope of application of the mixtures - they are contraindicated:
- on industrial areas;
- in kitchens;
- in the bathrooms.
Important! Gypsum compounds have low wear resistance. Therefore, after drying, the floor needs a finishing coat.
Cement compositions
Cement compositions
These compositions are chosen by craftsmen quite often, since it is permissible to introduce various additives into them. They are flexible and resistant to any type of wear. And:
- may be stained;
- insensitive to moisture;
- have increased strength.
But it is precisely such mixtures that have a lot of disadvantages:
- shrink;
- takes a long time to dry;
- may crack;
- high consumption.
Important! Liquid cement floors are poured only onto combined surfaces. This reduces the risk of cracking.
Polymer compositions
Modern polymer compositions
Modern compositions based on different components - polymers (their number is not limited). They have an astringent nature and, after drying, delight owners with a beautiful aesthetic appearance.
The best two-component polymer self-leveling floor:
- hardener;
- plasticizer
Such mixtures have a long list of advantages:
- have no restrictions on the scope of application;
- high wear resistance;
- the ability to use dye;
- resistance to temperature changes.
The latter characteristic makes polymer liquid floors the best option for country houses, where power outages and sudden temperature changes are possible.
Important! Polymer mixtures are very expensive and require strict adherence to technology. Otherwise, the floor will lie unevenly and will not be uniform.
Types of self-leveling coatings
All types of mixtures used for the manufacture of self-leveling floors can be divided into types depending on the composition or application. And it is important to familiarize yourself with each of them in order to make the right choice and decide what type of mixture to purchase in each specific case.
DIY self-leveling floor
Table. Types of self-leveling floor depending on its composition.
| Floor type | Description and features of the composition |
| Polymer epoxy | Mixtures for such floors contain epoxy resins. The final coating is durable and reliable, it is not afraid of water or any chemicals. Most often, this type of floor is used indoors in industrial premises - workshops, warehouses, inside car service centers, etc. Floors are recommended for installation in rooms where there is a high level of air humidity and coatings. |
| Polyurethane epoxy | These floors also contain epoxy resins, but due to a certain group of compounds included in the composition, they are able to withstand significant mechanical loads and are used in parking lots, shopping centers, and open areas. Such floors have maximum durability. |
| Mineral | To make a mixture for this floor, various mineral components are used. This is cement, all kinds of modifiers, fillers. Such floors are distinguished by their maximum ability to be evenly distributed over the subfloor. |
Mixing with a mixer
For the manufacture of self-leveling floors in a residential building or apartment, mineral compounds are most often used. They are great if the base needs to be leveled before laying the final coating on it. Such coatings harden quickly, are quite flexible during pouring, and last a long time.
How to fill a self-leveling floor with your own hands
In general, all mineral compositions can be divided into three main categories.
- Base floor . It is used to correct deficiencies in concrete screed. Filled with a layer of up to 8 cm.
- Average category . It is used to correct minor defects in a base made of a cement-sand mixture. The thickness of such a layer usually does not exceed 3 cm.
- Finish floor . It is not difficult to guess that these particular mixtures are used to make the base perfectly even. Can only be used if the unevenness of the screed varies within 1 cm.
On a note! When choosing a mixture, it is worth remembering that mineral compositions have a higher consumption during pouring than polymer ones. But aligning them is much easier.
Choosing a mixture for self-leveling floor
Filling the surface
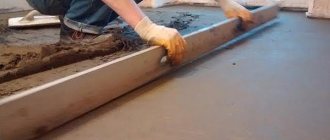
To pour the finishing floor, you need to prepare all the listed tools and materials. After this, you need to remove furniture and other objects from the room, remove the baseboards and remove the old covering. The floor is cleaned of dust and debris and carefully inspected. All cracks, potholes and other defects are covered with starting putty, and after drying they are sanded. Then you should check the horizontalness of the floor covering. If the differences are large, then it is better to first level them with a screed or starting liquid mixtures. Small unevenness (0.1–0.5 cm) can be eliminated using a finishing mixture.
The durability and attractiveness of self-leveling floors largely depends on the quality of base preparation.
After this, you need to treat the entire area with a deep penetration primer. Before pouring, it is recommended to ensure the necessary conditions: the air temperature should be from +5 to +25 C, the presence of drafts is unacceptable.
To make a finishing self-leveling floor with your own hands, it is important to follow the instructions:
- The solution is prepared immediately before application. It is better to make small portions, since the material sets within 20–30 minutes.
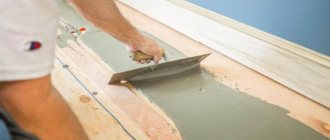
- Pour the mixture into the far corner of the room and level it with a squeegee.
- Roll the coating with a needle roller to remove air.
When pouring, it is especially important to roll the mixture well with a needle roller to remove air bubbles from the composition.
Thus, you need to fill the entire room. You can walk on uncured coating only with paint shoes. The floor will be ready within a few hours, but experts recommend using it only after 3-4 days.
Self-leveling flooring as an option for arranging surfaces is now quite popular. It has a lot of advantages, but it is important to remember that they all relate only to materials that are made using the correct technology, so it is recommended to buy them in large, trusted chain stores.
Finish self-leveling floor
A self-leveling finishing floor is an ideal base option for coverings such as carpet, linoleum, parquet, and ceramic tiles. Also, its advantage over other types of leveling is that it is simple and quick to install, allowing you to quickly continue other repair work. To carry out the work, the joint efforts of two people are sufficient, with one working directly with the floor, while the second mixes the fresh mixture at this time.
Pouring the final self-leveling floor
Expert opinion
Afanasyev E.V.
Chief editor of the pol-exp.com project Engineer.
The rate of polymerization of the mixture for self-leveling floors is quite high, so you should not immediately dilute a full package of the composition. It's better to do this in doses. By the way, the speed of polymerization also has its drawback - work must be carried out as quickly as possible, before the mixture placed on the base hardens.
Finishing mixtures are used only for the final leveling of the screed. They have the maximum fluidity among other categories of compositions for self-leveling floors. The layer thickness usually varies between 3-10 mm. If the differences in screed heights are greater, then before using finishing mixtures it is necessary to first level the base with a base solution.
Ready finished self-leveling floor
Decorative design of polymer floors
To add decorativeness, epoxy and polyurethane coatings are made with geometric or pictorial patterns. a 3D effect look especially impressive . To do this, a three-dimensional pattern is glued onto the prepared surface, and after 24 hours it is filled with transparent epoxy resin.
The graphic image is applied to paper, fabric or special film. To create a spatial effect with visual perspective, photo printing is used. Fashionable 3D floors are actively used in shopping centers, offices and institutional halls. The hypoallergenic nature of epoxy resin makes it possible to decorate children's playrooms with three-dimensional designs.
flocks - when pouring .
They are available in various colors and sizes. Apply immediately after pouring and rolling, until the coating layer has hardened, by hand or using a flock gun. After 12 hours, the dried surface is coated with colorless varnish or transparent epoxy resin.
Note! Self-leveling floors with silver, gold and multi-colored sparkles look original. The manufacturing technology is the same as creating a coating with flocks. Shiny floors create a festive atmosphere and are used in cafes, restaurants and shopping centers.
Another interesting decoration option is a stone carpet .
Quartz sand with a rich color palette or stone chips are added to polymer resins. To obtain a catchy pattern, several shades are used in one coating, which are applied using stencils.
Depending on the place of use, the stone carpet is made in two versions:
- Open. It has a rough surface that has anti-slip properties. Used in rooms with high humidity or outdoors.
- Closed. It is carried out in two stages - after applying a mixture of mineral filler and polymer component, leave it for 12 hours and apply a transparent layer of epoxy resin. The result is a glossy coating with decorative inclusions inside.
A stone carpet looks original when one of the filling elements is shell rock with a fraction of 50-60 mm. This coating is appropriate to use when decorating the space around swimming pools and artificial reservoirs.
To create luminous floors and paths in the garden, a luminescent component is added.
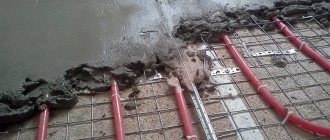
Differences between self-leveling floor and cement-sand screed
Do not confuse self-leveling floors with standard cement-sand screed. The fact is that these coatings, although they pursue the same goal, differ significantly from each other. And the main difference is the amount of labor involved. To make a new screed, you will have to work much longer, and you will have to wait at least 28 days for it to dry. And this is a long time if repair work needs to be completed as soon as possible.
Arrangement of cement-sand floor screed
Attention! Sometimes it is impossible to do without dismantling the old screed and pouring a new one. These are those cases when it is so destroyed and damaged that the finishing self-leveling floor simply won’t do any good, and the base can no longer be repaired. There is no point in experimenting here, but it is better to immediately get ready to carry out large-scale and rather dirty and costly work on dismantling the old screed and laying a new one.
There is also another drawback of standard cement-sand mixtures - their ability to quickly release water into the environment. Because of this property and if it is not dried correctly, sometimes the screed is not as smooth as we would like. Elementary shrinkage of the solution occurs. During its preparation, craftsmen add quite a lot of water, and during the drying process, moisture from the solution begins to rise to the surface of the screed layer and evaporate. It is because of this that height differences of up to 5 mm can be observed even on a perfectly level screed.
But such problems are not observed with self-leveling floors. They dry quite quickly and do not shrink as much as cement-sand screed.
Self-leveling floors dry quickly
TOP 3 manufacturers of finished floors
| Photo | Name | Rating | Price | |
| #1 | Prospectors | ⭐ 96 / 100 | More details | |
| #2 | Vetonit | ⭐ 94 / 100 | More details | |
| #3 | Bolars | ⭐ 93 / 100 | More details |
Do not worry that cement screed and self-leveling floor may be incompatible. Depending on the type of base, it is now easy to select a mixture, since the market offers a large selection of all kinds of self-leveling floors and among them there is sure to be one that is suitable in each specific case.
Vetonit
Self-leveling quick-hardening floor Weber Vetonit Fast Level, produced in Russia, is designed for leveling bases with a layer of 3 to 60 mm. Suitable for rooms with moderate mechanical loads.
Vetonit
pros
- quickly hardening composition;
- the mixture can be poured onto concrete, cement and gypsum surfaces;
- low consumption;
- compatible with underfloor heating system;
- Withstands wet conditions without deterioration.
Minuses
- maximum layer up to 60 mm;
- short pot life of the finished solution.
self-leveling floor Vetonit
Prospectors
High-quality self-leveling mixture for interior work. Designed for universal floor leveling in rooms with low and moderate humidity levels.
Self-leveling floors "Starateli"
pros
- affordable price;
- durable material;
- environmentally friendly composition;
- economical consumption.
Minuses
- short pot life of the finished solution.
self-leveling floor Prospectors
Bolars
It is used for installing floors in rooms with any level of humidity (including bathrooms, showers, basements, etc.). Used as part of the “warm floor” system. Manufactured using highly effective modifying additives. Designed for manual and machine application.
Bolars
pros
- layer from 2 to 10 mm;
- durable structure;
- compatible with underfloor heating systems;
- gypsum-cement base with modifying additives and polymers;
- low consumption;
- wear-resistant;
- operation of a ready-made frozen floor at temperatures from -40 to +70 degrees;
- Designed for all existing floor coverings.
Minuses
- only for interior work;
- short pot life of the finished solution.
Bolars self-leveling floor
How to fill a floor screed
To decide which mixture to choose, you should carefully study all the information on the packaging and read the recommendations for use. It is important to remember about the conditions for pouring the floor and the condition of the room where such a coating will be created.
Overview of decorative mixtures
In this case, we are talking about expensive materials that are applied in a thin layer. The use of such funds for starting work is inappropriate.
- Paintpolymerstone-2. This material is also called liquid linoleum; after drying, it produces a perfectly smooth, shiny coating. It is characterized by high strength, resistance to various influences and durability. In this case, it is possible to add color. Most often used for arranging floors in rooms with significant traffic. There are many foreign analogues on the market at a high price, which are no better than domestic material, so it’s not worth spending extra money. Liquid linoleum is of much higher quality than traditional linoleum; moreover, domestic compositions are in no way inferior to foreign analogues
- Arturo EP2500. One of the most expensive options. Produced in the Netherlands, it meets strict quality requirements. The material allows you to obtain a seamless coating of the desired shade and is used for arranging floors in rooms for any purpose. To create a non-slip surface, you can add quartz sand, which will further save on material. If the pouring rules and appropriate conditions are observed, the coating will be ready for use in a week.
The ability to add sand allows you to save the base composition and at the same time obtain a high-strength coating - Remmers Epoxy OS Color. This is a polymer-based material that is suitable for arranging floor surfaces in residential and non-residential premises. After drying, the result is a smooth and abrasion-resistant coating.
Floors with the possibility of tinting and high resistance to abrasion are used in both technical and residential areas - Tikkurila Novopox LP. Ideal for creating self-leveling floors on balconies, loggias, basements and other unheated rooms. The material is made using resins. A thin-layer coating will reliably protect concrete or other surfaces from mechanical damage. In addition, after drying, a beautiful glossy floor is formed in one of 10 shades.
Thin-layer mixtures from Tikkurila are chosen if the coating will be used in extreme conditions of the street or basement - Elakor-ED. A transparent composition based on epoxy resin, which can be added in various colors, creates a durable and durable coating. The price of the material is relatively low, so it can be used not only for decoration, but also for minimal leveling.
Inexpensive transparent compositions "Elakor-ED" open up enormous opportunities for independent floor decoration
Tips for applying the final self-leveling floor
Before we study the technology of applying the finishing self-leveling floor, we will familiarize ourselves with some of the features of pouring this material. It is also worth taking note of some tips regarding this type of work.
- After pouring, the self-leveling floor must be rolled with a needle roller or treated with a vibrating screed. This is necessary in order to remove air that gets into the mixture during mixing. In this case, the roller is used if the layer thickness does not exceed 1 cm.
- There should be no sub-zero temperatures in the room while pouring the self-leveling floor. The best option is +15-25 degrees.
- Drafts should not move around the room. All windows and doors should be closed. Temperature changes during work with self-leveling floors can significantly worsen the condition of the finished base.
All windows must be closed during pouring.
- The humidity of the base on which the self-leveling floor is installed should not exceed 4%. If this indicator is higher, the surface is pre-treated with a waterproofing compound at least 2 times.
- If the self-leveling floor is poured over ceramic tiles, it is recommended to make sure that it is firmly attached. Degreasing and priming procedures must be carried out.
- Application of a self-leveling floor in the case of arranging a screed is possible only after the second one has completely dried.
- Before applying the self-leveling floor, the surface must be treated with a primer mixture and dried well.
Attention! Self-leveling flooring cannot be used to level a wooden base. The results will not be what is expected. It is also not recommended to apply the finishing self-leveling floor to a bare floor or monolithic concrete - the adhesion of the composition to these materials will be insufficient, and the self-leveling floor will fall off.
Screed under self-leveling floor in garage
Review of popular universal solutions
Such materials are called universal because they can be used for rough leveling. After drying, a high quality coating is formed that does not require further finishing.
- Glims Heavy Duty Hd Drymix. High-quality and reliable two-component composition. After drying, the resulting coating has a significant level of compressive or flexural strength. The material can be tinted, so it can also carry a decorative load. Best suited for arranging floors in garages, warehouses and other utility and industrial premises.
Compositions from Glims have unique strength, therefore they are used in technical rooms with high loads - Weber vetonit 4655 Industry Flow Rapid. The mixture is perfect for rooms with high foot traffic; it is applied in a thin layer, so you can walk on the coating after 4 hours. This is both an advantage and a disadvantage, as the compound begins to set after 20 minutes, making it difficult to work with. The floor can be fully used only after 7 days. Super-thin mixtures from Vetonit harden quickly, so they require a professional approach
- Ilmax. If we are talking about covering floors in bedrooms or living rooms, that is, where the load on the surface is minimal, it is better to save a little and purchase a material that is not as high quality as the previous two. Ilmax solution can be applied in a thick layer, making it possible to level even very curved floors. The cost of the material is relatively low, but it is difficult to find in stores.
Ilmax solutions are excellent for furnishing domestic premises, but they are difficult to find in our market - Monopol 5. This is a polymer-based mixture that dries to a semi-matte finish. The floor is strong and durable, but the product is still more suitable for decorative leveling, so it is recommended to use it only in residential areas.
Matte floors from Monopol were developed for technical rooms, but are no less actively used in private houses and apartments - Teping Floor 205 PU. A two-component solution that is used to create a coating that is both durable and flexible. Floors withstand shock and vibration well. Best suited for a garage or unheated space such as a basement. According to the technology, quartz sand can be added to the material to save the mixture and obtain texture.
The decorative characteristics of Teping solutions are not very diverse, but they are elastic and very durable
Do-it-yourself finishing self-leveling floor
Let's consider the technology of applying the final self-leveling coating to the base. To avoid mistakes during work, it is best to rely on step-by-step instructions.
Table. Work on creating a finishing self-leveling floor.
| Steps, photo | Description of actions |
| Step 1 | All large cracks in the screed and between the base and the wall are sealed with a small amount of cement mortar. This is necessary so that the mixture for the self-leveling floor does not leak where it should not. Otherwise, its consumption will increase significantly. |
| Step 2 | The base is thoroughly cleaned of all kinds of stains - paint, oil, etc. The presence of such marks will significantly reduce adhesion, and the self-leveling floor in these places will hold up worse. |
| Step 3 | The base is thoroughly cleaned of debris, dust and dirt. To do this, use a construction vacuum cleaner or brush. Even wet cleaning may be required. |
| Step 4 | The floor is treated with a deep penetration primer. The composition will close the micropores of the base and increase adhesion. It is convenient to apply the primer with a roller, but for hard-to-reach places a brush is used. If the concrete is excessively porous, then priming is done in two layers. |
| Step 5 | Along the floor line, damper tape is glued to the wall around the perimeter of the room. All protrusions and columns, if any, are covered with it. It is necessary to compensate for the thermal expansion of the self-leveling floor. |
| Step 6 | Using a level and a tape measure, find the zero mark in the room - this is the highest point of the rough foundation. The minimum thickness of the self-leveling floor is added to it. This will help calculate the amount of mixture to level the base. |
| Step 7 | The solution for the self-leveling floor is mixed in accordance with the instructions indicated on the packaging. A construction mixer will help to mix the composition. |
| Step 8 | The mixture is poured onto the prepared base and distributed evenly over it. You cannot pour the composition into one point and wait for it to spread on its own. A wide spatula can be used for leveling. |
| Step 9 | After distributing the mixture over the entire base, it is rolled with a needle roller. |
| Step 10 | After this, the self-leveling floor is dried. Any type of flooring can then be laid over it. |
Video - Finish self-leveling floor
Video - Installation of self-leveling floor Ivsilom Tai-Rod 3
Tools and materials
In addition to the mixture itself, to level the floor coverings with your own hands, you will need additional materials and tools. It is recommended to purchase everything before starting work, so as not to have to make forced stops later.
- Paintshoes. This is a special studded sole that is attached to your foot or shoe; you can walk in it on freshly poured surfaces. To roll the surface with a roller, you need to reach all parts of the room. In training videos, most craftsmen walk on the floor in ordinary shoes, but this is incorrect from the point of view of pouring technology.
Paint stools are especially useful when working with relatively thick compounds and over large areas. - Damper tape. Used to level out linear vibrations of the coating during drying or thermal expansion. The tape is made of polyethylene foam and is equipped with an adhesive base. It is attached along the perimeter of the room to the bottom of the wall. As a result, the pressure is absorbed by the tape, and the walls and floor are protected from cracking.
When installing any floors, especially self-leveling ones, a damper tape must be installed around the perimeter of the room. - Raklya. This tool, also called a squeegee, is a shaped spatula with teeth. For mineral compositions, the working area of the device is steel, for polymer compositions it is rubber. The tool is necessary when working with quick-drying compounds or thin coatings. The price depends on the size and availability of additional equipment.
- Needle roller. If you can do without a squeegee, then a needle roller is a must-have tool. During manufacturing, the solution is saturated with air; if it remains in the material after pouring, pores will soon appear, reducing the performance of the coating. Using a roller you can easily remove air bubbles. In addition, it helps to better level the surface.
- Devices for installing beacons. It is recommended to use a laser level for marking the level and subsequent installation of products. More experienced craftsmen will make do with a regular construction or hydraulic level. A rather outdated, but still used option are benchmarks - mechanical devices for mounting guides.
Basic tools for leveling liquid composition - Additional materials. To improve decorative qualities, so-called flocks are used. These are dried fragments of various dyes that are included in mixtures at the manufacturing stage. It is recommended to further decorate all mineral coatings using paints and varnishes.
