Until recently, plastic for ceiling lining was used mainly in budget renovations of Soviet-built apartments. According to established tradition, these were an entrance hall, a corridor, a toilet, a bathroom, a kitchen, a balcony or a loggia. This was facilitated by the low price of the finishing material and easy maintenance - soot and grease were easily washed off with soapy water without streaks. Unpleasant odors and the simple design of plastic panels made such a ceiling inappropriate in living rooms: bedroom, nursery and living room.
Everything changed with the advent of new types of finishing materials made of polyvinyl chloride. Various colors, textures and sizes of panels, allowing you to create an interesting design for the upper part of the apartment, the ability to assemble a two-level ceiling and combine plastic finishing with gypsum plasterboard, decorative plaster and tension fabrics, the absence of odor, and ease of maintenance have made PVC panels in demand for people with average incomes .
The ceilings in all rooms began to be finished with plastic. The growing popularity of PVC did not pass by the owners of wooden houses - they increasingly began to cover their ceilings with polyvinyl chloride.
Variety of plastic panels
This material can be plain, checkered, striped, with all kinds of plant elements, as well as imitating natural stone or brickwork, etc. Despite the available variety, to make a ceiling from plastic panels, one-color products are used, most often white or with a light tint.
Depending on the type of surface, these products can be matte or glossy. There are models with a rough finish and shiny inserts; they are usually used to implement original design solutions.
Since the installation of panels on the ceiling is usually carried out in utility or technical rooms, it is better to use glossy products for small surfaces, since then the bath, kitchen, toilet, loggia appears higher and, due to reflection, looks more spacious.
The presence of reflections on them increases the degree of illumination. More lamps must be installed on a matte ceiling or they must have increased power.
How harmful is plastic?
Plastic is everywhere today. Even many kitchen utensils are made from this material, and goods are packaged in it. PVC panels are made from the same group of plastics as food containers, medical syringes and much more.
The advantage of this material is that it does not have pores in which microorganisms harmful to health can accumulate. If there is a nutrient medium for them and the appropriate conditions, they begin to multiply on the surface of the plastic, but they can be easily removed with a cloth with soap or disinfectant. Panels made from this material are truly hygienic and therefore the sanitary and epidemiological station allows finishing from them in medical institutions.
Many consumers are wondering whether it is worth installing a ceiling from PVC panels with their own hands, and they are forced to think about their flammability. Indeed, they burn, but they begin to maintain the flame at temperatures exceeding +360°C. When compared with OSB, chipboard and fiberboard, they ignite at +250°C. As for the amount of smoke generated, plastic products emit about 40-50% less.
Another argument against the use of such panels is the claim that they do not breathe. But there are nuances here. When living in a private house with a ventilated attic, there should always be air exchange.
If it is a high-rise building, then the apartment has a ventilation system in the bathroom, toilet and kitchen. Therefore, before making ceilings from plastic panels, it is advisable to install ventilation grilles in them in opposite corners. True, such a ceiling structure is not completely sealed anyway and if there is air exchange, problems will not arise.
Other types of lathing - everything is much simpler!
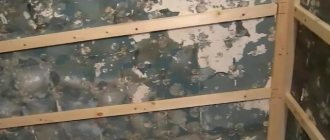
Now let's see how to make a frame out of wood. For these purposes, it is advisable to use slats with a cross-section of 3x3–5x5 cm. They must be treated with an antiseptic (just apply it with a spray bottle or a brush to the slats) and left to dry for a day. Then you need to install four prepared strips around the perimeter of the wall or ceiling, creating a kind of base for the entire sheathing. This preliminary structure must be perfectly aligned. Use a level to check that it is positioned correctly. If necessary, place additional wooden blocks under the frame you have made.
A wooden frame is the easiest to install
Next, attach additional guides to the mounted base every 0.35–0.4 m. They should be attached to the ceiling (wall) with self-tapping screws or self-tapping screws. If this is not done, the frame will sag after a couple of years of use. Don't skimp on fasteners. If necessary, perform additional fastening of the sheathing elements using extra slats and hardware. The frame should be as strong and reliable as possible.
There are even fewer problems with plastic skeletons under PVC panels. Their installation diagram is as follows:
- Mark the base.
- Install plastic strips, attaching them to the walls with dowels.
- Mount the panels on the guides. The latter are equipped with clips - special fasteners.
Note! All guides must be mounted strictly perpendicular to the plastic panels. If you do not fulfill this condition, you will not be able to line the wall (ceiling) with PVC products. Clips simply won't work. This feature of plastic frames discourages novice craftsmen from using PVC guides.
Choose the method of arranging the frame for plastic panels that suits you. Create original interiors in your home, admire the perfectly smooth walls and ceilings in your home. Good luck.
Types of plastic ceiling panels
PVC panels are produced in two types - ceiling and wall. They differ in weight and rigidity. The fact is that for ceiling systems the mechanical strength of the panels is not important and therefore they are created to be lightweight and have a small thickness. For this reason, they need to be handled with the utmost care - they are easily dented.
Is it possible to install a ceiling from wall-type PVC panels? Yes, it is quite possible, but such products will cost more, and the high strength of these products will remain unclaimed. And since the wall panels are heavier, the load on the frame will increase, which must be taken into account.
Products differ in size and surface type:
- Externally, the material is similar to lining, it has exactly the same stripes. The ceiling made from it was called slatted.
- Seamless panels produce a surface on which the joints are difficult to distinguish. Their front side is smooth and even, and on the sides there is a tongue and groove for assembling the skin.
- Working with sheet plastic is more difficult and is used extremely rarely. This material is used when finishing columns or other non-linear surfaces, but it is more convenient to make a ceiling from PVC panels with your own hands from slats.
Ceiling structures using plastic have a great advantage - they are easy to care for. Almost all types of dirt can be removed with soapy warm water. The original finish lasts for about 5 - 10 years, which largely depends on the quality of the product.
How to choose plastic panels
To choose a truly high-quality material, be sure to pay attention to the stiffeners; the more there are, the stronger and more reliable the panel will be and the lower the risk that after a few years it will deform under its own weight and from exposure to moisture. The painting should be uniform, without smudging, smudges, and especially without unpainted areas. The back side of the panel should be uniformly colored and smooth.
Types of plastic panels
Features of arranging ceilings made of PVC panels
Before installing a ceiling made of plastic panels, in addition to PVC slats, you will need to purchase moldings - finishing profiles that are needed to decorate the joints and ends.
They are selected depending on the configuration of the room and the ceiling finishing option:
- construction of a suspended ceiling;
- fastening panels to the base ceiling surface.
On the one hand, such a finishing method as installing a suspended ceiling made of plastic panels makes it possible to lay hidden communications without gating the walls, and on the other hand, it reduces the height of the room by at least 3 centimeters.
This is provided that ordinary lighting fixtures are installed, and not built-in ones, when using which the false ceiling should be lowered 8–12 centimeters below the main one.
Installation of hangers for sheathing
Upon completion of the installation of the UDeshek, they proceed to the installation of suspensions. We are most often talking about perforated tape-type elements. If the height of the ceiling space is large, use wire fastenings of the sheathing to the ceiling under the panels. The first step is to distribute them over the base surface, using screws and dowels for fixation. In this case, it is best to give preference to screwing rather than nailing.
The optimal distance between individual hangers is up to 70 cm. Sometimes the ceiling surface is sheathed with plasterboard slabs for further gluing of ceramic tiles: in this case, the distance must be reduced to 40-50 cm.
In this case, the profile guides are placed more closely together. While installing the suspension, it is necessary to ensure that the central oblong hole coincides with the center of the marking. The antennae can be bent after installing the CD profile inside the UD.
DIY frame assembly
There is a certain sequence of actions in how to make a suspended ceiling from panels. First of all, the frame is assembled from the guides. Typically, profiles for plasterboard structures are used for this. If the ceiling is mounted in a kitchen or bathroom, then the profile and fasteners must be galvanized.
For rooms with low humidity levels, you can make a frame from wooden blocks with a cross-section of 30x30 millimeters or more. First of all, profiles or strips are attached around the perimeter, aligning them according to the level. After this, in increments of 50–60 centimeters, intermediate guides are secured to hangers or bars. They are also aligned and aligned so that they are located in the same plane as the previously installed elements.
PVC profiles and cornices
There are several types of various components, in particular profiles and cornices for installing polyvinyl chloride, in stores, but not all of them may be needed, so you need to familiarize yourself with the main ones in advance and decide which ones are needed and in what quantity.
- Starting profile - is fixed around the perimeter of the room and serves to fix the panels and hide their ends.
- An H-shaped profile is needed to join the two ends of the panel if one strip is not enough for the entire length of the room.
- PVC ceiling plinth is essentially the same starting profile, but with a decorative border.
- A universal corner - you can use it to cover any joints. It is practically not used in ceiling installation, except in multi-level structures.
Types of fastenings for suspended ceilings
Attaching starting strips
When creating suspended ceiling panels from PVC, after constructing the frame, they begin their installation. It begins with fixing the starting profile. In addition, a ceiling molding is used, which is attached closely to a plank or profile along the perimeter of the room. The edges are filed strictly at an angle of 45°.
The length must be measured accurately, otherwise even a slight discrepancy will lead to gaps. The fact is that against the background of profiles of different colors, the cracks are clearly visible. When they are minor, they can be covered with putty, but it is advisable to carefully measure and cut according to the length of the wall or a small 1-mm spacer.
Installation is carried out using self-tapping screws or adhesive. It is better to glue the molding using liquid nails. As a result, the joint will be perfect.
A thin zigzag strip of glue is applied to the side close to the wall. The wall surface is degreased. A piece of the product is applied to the place, pressed tightly and torn off. The adhesive should remain on the wall; it should be allowed to dry for 4 to 8 minutes. After this, the plank should hold steady and the glue should stick well. Only then is she placed in place.
To make sure that the bar is installed level, take a rule (you can use a ruler, an even block) and use them to check the level of the starting profile. Until the adhesive has completely set, the product can be corrected.
The starting profiles are glued on three sides in a U shape and allowed to dry, otherwise they can be moved when installing the panels. The glue hardens after 8 - 12 hours and then you can begin installing PVC panels on the ceiling with your own hands.
If the “liquid nails” protrude somewhere beyond the strip, you need to wait for them to dry completely and then pry them off with a sharp knife. The glue will not leave a mark behind. If you remove it liquid, it smears and stains everything around.
Step-by-step instruction
Step 1 - preparation
Before you decide to mount such panels, you need to make preparations. This is the most difficult and painstaking work, but you can’t do without it. First, carefully measure the height of the walls in all corners of the room; it may not be the same. If it turns out that the height is different, then it is necessary to equalize it. Do this using slats or a profile, attaching them to the ceiling, level and as tightly as possible.
Step 2 - frame
Installation of profiles directly holding the panels. The profile is attached using self-tapping screws parallel to one of the walls.
Step 3 - sheathing
We supplement the sheathing with a perpendicular profile, which is attached to the ceiling using special hangers. It also needs to be leveled. Otherwise, poor joining of the panels is possible - the formation of cracks.
For a bathtub, only a metal profile is used; in dry rooms, wooden beams can be used for lathing. After this, you need to install L-shaped profiles (elks) along the entire perimeter of your ceiling. To attach them, use a special construction stapler or self-tapping screws. Of course, I will advise you to use self-tapping screws, because the brackets may not support the weight of the panels. Remember to install the profiles as firmly as possible. Also, if you wish, you can lay an additional layer of sound insulation when installing the ceilings.
The installation of the lighting system is carried out at this stage, before the installation of the PVC panels themselves begins. It is necessary to mark the lamps and carry out the wiring. Directly fixing the lamps is done after the final finishing of the ceiling.
Ceiling with plastic panels - do it yourself
Step 4 - installation
After you have completed all the preparatory work, you can proceed directly to the installation itself. This job is the easiest and fastest. But you shouldn’t relax, because you can just as easily ruin it. To prevent this from happening, you need to carefully measure and cut. After all, plastic material is quite fragile and can be easily broken.
Once you have carefully cut the plastic sheet, insert it into the groove of the elka (profile) and inspect it. If everything fits well, then you can start attaching it to the rail using self-tapping screws. Then proceed to install the rest in the same way.
The installation of the first panel must be done as carefully as possible - further accuracy and the final appearance of the suspended ceiling depend on it. The subsequent ones are connected to those already mounted using a special lock and attached to the profile.
Step 5 - last panel
After assembling the main part of the ceiling, you need to carefully insert the last panel. It is cut to width, inserted into a groove on the wall, and then carefully locked into a lock.
Installation of plastic panels on the ceiling
Before making a ceiling from plastic panels, measure the distance from one installed plinth to another and add 1.5–1.8 centimeters to the result obtained. When the room has the correct geometry, you can cut several pieces at a time. If there are deviations in size, the length of the panels should be adjusted during installation. For cutting, use a grinder or jigsaw.
Next, when you install a ceiling made of PVC panels with your own hands, the step-by-step instructions look like this:
- The first element is inserted into the fixed molding. The panel is placed in the plank with the tenon facing forward.
- In some cases, if the finishing profile is made of soft plastic, its top bends, and this circumstance causes difficulties during installation. To reduce deflection, the edge can be reinforced with self-tapping screws. As a result, the panel will be easier to install, otherwise it will have to be adjusted with a spatula when installing it in place.
- The plank must fit into the profile or baseboard along its entire length. The strip is fixed to each of the guides with self-tapping screws. If you have a wooden frame, you can use a stapler with staples. If installation is carried out in the kitchen or bathroom, then it is better that they are made of stainless steel or galvanized.
- Then all strips are installed using the same technology. First they are mounted on one edge, then on the other. Then the bar is leveled, while the middle is lifted by hand and the deflection is eliminated, and the edge is tapped with the palm of the hand, driving the lock into the groove. Significant efforts should not be made, you just need to ensure that the panel fits tightly. If the gap at the joint is not visible from below, this means that the strip is installed normally.
- It is better if you have an assistant who can help you assemble a suspended ceiling from plastic panels. He will support the product being installed so that it does not fall out while a second pair of hands attaches screws or staples. If the work is done alone, sagging of the panel can be prevented by gluing strips of double-sided tape to the profile. They will hold the bar in place until it is secured.
- During the installation process, it is necessary to prepare holes for lighting fixtures. To do this, you can use a ring attachment or a ballerina, or, if you have the appropriate skills, a jigsaw or drill with a thin drill.
- After installing the strips with holes for the lamps, the devices are immediately mounted and connected to the power supply. If this is not done in a timely manner, then it will be problematic to connect the wires when you assemble a suspended ceiling from PVC panels yourself. The structure will need to be dismantled. And if the last strip is attached to glue, it will have to be broken off.
Bottom line
Mounting frames made of galvanized CD profiles have the best performance characteristics. Such structures are very durable and moisture-resistant: they can be used for laying almost any panels. Cheaper wooden lathings require additional treatment with antiseptic impregnations, especially if they are used in rooms with high humidity.
As for the need to prepare a rough foundation, you need to look at the circumstances. If the old finish is strong enough, it can be left, even if it doesn't look very nice. As for the old whitewash, they try to remove it, because... Over time, it can crumble, accumulating on the back of the panels. As a result, this increases the load on the structure and creates a real threat of dirt entering the room.
Installation of the last panel
The last strip is the hardest to install. This panel is usually trimmed. To do this, measure the distance from opposite sides of the ceiling. Sometimes the difference reaches several centimeters.
There are two methods for making a ceiling from PVC panels in this case:
- The trimmed strip is placed in a pre-fixed starting profile or plastic plinth. If the panel is wide, then this is quite possible. Then approximately 5–7 millimeters are subtracted from the measured distance and the strip is cut off, otherwise the element will not be able to be inserted. Even so that it falls into place, you have to straighten it with a thin tool, for example, a steel spatula. But in addition to the complicated installation, this option has another drawback - since the panel is slightly shorter, it sinks more deeply into the molding and a gap is formed in the ceiling surface.
- There is another way - gluing a strip. In this case, cutting off the last of the elements, a pre-measured distance is set on the ceiling, but not from the beginning of the panel, but from the stop strip. Then it is glued using “liquid nails”. But the glue should be applied to all the guides, and not to the strip. Then they proceed in the same way - apply, press down, leave for a few minutes and install finally. The downside of this option is that the strip is not removable. If necessary, it will have to be broken.
This is how the process of installing plastic panels on the ceiling looks like. All that remains is to install the last of the baseboards. It is cut at 45° in the corners, tried on and cut as accurately as possible. You need to make sure that the size is correct and then cover the baseboard with glue, both sides of it - the one that will be attached to the ceiling and the one that will be glued to the wall.
Design features of suspended ceilings
The design of a suspended ceiling is quite simple - it is a frame that is attached to the base ceiling and sheathed with suitable finishing material. If we are talking about a bathroom, then it is better to make the frame not from wooden beams, but from metal profiles for drywall.
When the profile extensions are attached directly to the ceiling, the structure is called a suspended structure, but if they are lowered on suspensions, it is called suspended. The ceiling frame consists of thin wall profiles (UD), screwed around the perimeter of the room and wide guides (CD), which are attached perpendicular to the plastic strips.
Suspended ceiling mounting
Filling cracks with acrylic
After installing the PVC panels on the ceiling has been completed, it may be necessary to seal all existing gaps with white acrylic. This operation is unlikely to be required if high-quality foreign-made products with the correct geometry were installed. No correction will be required when assembling them, since they do not sag due to the unevenness of the panels.
To eliminate errors, you will need to take acrylic sealant and insert the tube with it into the mounting gun. Next, you should fill all the gaps and cracks with the composition. They usually form in corners and places where the baseboard and ceiling meet. It often turns out that there are so many cracks that the entire perimeter has to be treated with acrylic.
The voids must be filled in sections 30–40 centimeters long, removing all excess and leveling the seams. Acrylic can be easily smoothed until it sets, which only takes a few seconds. Remove excess composition with a soft cloth, but in some cases it is more convenient to do this with your finger, since it turns out smoother.
Having covered the area, take a tool with a smooth and sharp edge, for example, a spatula, and a damp sponge. Excess putty is cut off with a sharp corner of a spatula, then rubbed with a damp sponge until completely clean, otherwise it cannot be wiped off. Having passed the entire perimeter, give 8 - 12 hours to dry completely.
When the acrylic dries, the compound can be drawn into the seam, and then again you have to start eliminating errors and filling the cracks, rubbing and removing excess, and washing off the smeared compound. Usually twice is enough. After the second layer dries, streaks form on the ceiling. They are wiped with a new damp sponge, and then the ceiling surface is rubbed until shiny with a soft cloth.
Attaching panels to the ceiling
If the base base is flat and does not require correction, then you can use the method of making a ceiling from panels by attaching them directly to it. The work is carried out in the following sequence: first, the starting profile is mounted, then strips cut to the required size are inserted into it, fixing them with a minimum interval of 50 centimeters.
Fastening elements are selected depending on the material from which the ceiling is constructed. When it is wood, then you can hammer in nails or use staples with a stapler. With a concrete floor it will be more difficult, since self-tapping screws will not work, and drilling a hole for each dowel takes a lot of time and effort.
In this case, it is possible to make a decision on how to make a suspended ceiling from PVC panels using a frame, with a minimum deviation from the base base, and then assemble the structure as described earlier.
There is another option - fixation with liquid nails. The disadvantage of this technology is that the ceiling structure made of plastic panels is non-removable and, if it has to be dismantled, then completely.
Frame installation
How to install a suspended ceiling
Stages of installation work:
- Install the frame (wooden or metal).
- The PVC skirting board should be attached to the sheathing.
- Install the panels into the baseboard and secure them.
Important! If a collapsible plinth is chosen, then the decorative part of the baguette should be attached last, after attaching the panel.
Lighting fixtures for plastic ceilings
There are two options for organizing lighting for a room in which plastic ceilings are installed:
- install appliances at 220 V;
- install lamps with a 12 V step-down transformer.
In the first option, incandescent or housekeeper lamps are purchased, and in the other, LED or halogen lamps are purchased. In both cases, to illuminate the kitchen or bathroom you need to have a circuit breaker with an RCD that cuts off the electricity supply in the event of a short circuit.
Selection and installation of 220 V devices
When operating 220 V lamps, even if you screw in even low-power incandescent lamps of 40-60 W, you will need to think about thermal insulation of the housing. The fact is that when the lamp heats up, it also gets very hot. For this reason, the plastic begins to darken and warp. To avoid overheating, a layer of flexible heat insulator is glued to the body.
You not only need to know how to properly make a ceiling out of plastic panels, but also remember about electrical safety when working with lighting fixtures. If this is a bathroom, then it should install lamps with a high degree of protection, at least IP44, which means that the lamp body is not dangerous from water jets.
Such devices are expensive because complex technologies are used to manufacture them. As a rule, such lamps are bulky, since their body is most often ceramic. It will not be possible to place them on plastic - you will need mortgages, which should be installed when constructing the frame. They represent additional jumpers at the place where the lamp is mounted.
Wooden and metal frames – guaranteed strength
If the surface to be treated has noticeable differences in height, it is better to use wooden blocks for lathing. They make it possible to create reliable frames for plastic panels. The cost of wood is affordable, the installation process itself does not cause serious problems. In this case, it is only important to use well-dried bars that do not have noticeable bends.
Wooden sheathing is installed exclusively in dry rooms. It is prohibited to install such a structure in rooms with high humidity!
Metal profiles ensure maximum reliability of the frame. They can be installed in rooms of any temperature and humidity level. And most importantly, metal lathing under PVC panels can be mounted on any ceilings and walls with significant curvatures and height differences. Another advantage of metal structures is the possibility of safely installing built-in lighting equipment in them.
The metal frame is the most reliable
The disadvantages of metal profiles include the following:
- Certain complexity and labor-intensive installation of the frame (a home craftsman must have some skills in working with metal).
- High price of products and hardware for their fastening.
- Large consumption of material to create the sheathing, which increases the overall cost of the work.
The lathing for modern plastic panels is selected taking into account all the above facts. We hope it will be easy for you to choose the optimal material.
Halogen or LED lighting
Lamps of this type consume 12 V, so when using them, the electrical safety requirements are not so strict. Power from the panel after the machine goes to the transformer, and then to the lamps.
It is permissible to power no more than 4 lamps from one transformer. But according to the instructions for them, the maximum length of the wire to the lamp cannot exceed 2 meters. As the voltage drops, the glow becomes weaker. Sometimes a separate transformer is used for each lamp. Such lighting arrangement will cost more, but if there is a significant gap between the lamps, it is quite justified.
