Tiles and tiles
Facing a Russian stove with tiles allows you to give the structure an elegant appearance and make maintenance easier. Small and medium format ceramic tiles, clinker, majolica and unglazed terracotta tiles are used for work. The color may vary; materials with a relief surface and a pattern imitating tiles are welcome.
Materials and tools
To finish the stove with ceramic tiles you will need:
- facing tiles;
- tile adhesive (SkanfixSuper or Plitonit-Super Fireplace with a low expansion coefficient and maximum resistance to high heat are best suited);
- container for preparing the solution;
- construction mixer;
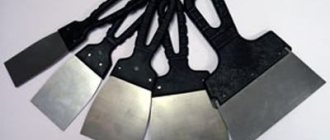
- spatulas;
- level;
- plumb line;
- separator crosses to form a neat seam;
- tile cutter;
- heat-resistant grout;
- mounting steel mesh;
- washers, screws, bierbachi hardware;
- chisel;
- rubber hammer;
- soap solution.
If there is no special solution, you can use a clay solution with a mixture ratio of 1:4:1 (oily clay, sifted sand, water, respectively). A cement mortar in the proportion of 1 part cement to 3 parts water is also suitable for the job (it is better to take M400 grade cement). To improve the properties of the mixture, crushed asbestos, PVA, and ordinary salt are added to it (a kilogram of ordinary kitchen salt is required per bucket).
Instructions
- First, prepare the surface of the oven (see instructions for plastering above);
- The cladding starts from the bottom row and moves up in even rows. It is recommended that you first draw up a diagram with the selected type of layout and strictly adhere to the drawing while working.
- The glue (mortar) is applied to the back side of the tile with a notched trowel, after which the plate is pressed against the surface, turning it slightly from side to side.
The process of applying mortar to tiles
- Verticality is checked with a level, after which you can begin gluing the next element.
Level check
- As you lay, you should use plastic crosses, which will make the seams smooth and beautiful (the crosses can be removed while grouting the seams, usually this is done after a day).
Stages of tiling a stove
Attention! The position of an individual tile can only be corrected within 15 minutes after gluing. If you need to correct the work after a longer period of time, the tiles must be completely removed and the mortar removed.. Lining the oven requires quite a lot of time; it is recommended to lay no more than three next to each other for fresh mortar, then take a break for 3-4 hours, necessary for the mortar to set.
After this, work can continue. Whole tiles are used for the outer corners of the structure, pieces for the inner corners.
Lining the furnace requires quite a lot of time; it is recommended to lay no more than three next to each other on fresh mortar, then take a break for 3-4 hours, necessary for the mortar to set. After this, work can continue. Whole tiles are used for the outer corners of the structure, and pieces for the inner corners.
An example of tiling a stove
A day after finishing, the grouting solution is mixed, the seams must be filled, gradually removing the crosses. A rubber spatula is used in this work; all excess mixture is removed with a sponge and soapy water. A couple of hours after completion of work, wipe the surface of the oven with a damp cloth.
Master class on laying tiles
Tiling a fireplace with your own hands is not that difficult.
The entire finishing process will take 5-8 hours. The builder's high level of skill will significantly speed up the procedure. The grouting is done the next day, so you can get a beautiful, stylish interior element in just two days. The finishing process is divided into three stages:
- Surface preparation;
- Cladding works;
- Finishing.
The process is completed by decorating the mantelpiece and part of the chimney if you plan to use wall decorations.
Preparatory work
Before tiling the fireplace, its surface must first be prepared. If the old layer of finishing has been removed from it, then the portal is cleaned of any remaining adhesive and leveled. Then the surface is degreased and small particles of dust are removed, which can subsequently affect the quality of fixation of the finishing material. The treatment is completed by applying a layer of mastic, which seals microcracks.
Tools and materials
For work you will need the following materials:
- Tile;
- Corner elements;
- Heat-resistant grout for joints and glue;
- Identical pieces of drywall to create even seams between elements.
The standard set of tools includes:
- Level and plumb;
- Latex gloves;
- Construction pistol;
- Grinder with a disc for cutting tiles;
- Comb spatula;
- Rubber hammer;
- Unnecessary container (bucket, bowl);
- Drill and attachment for mixing dry mixtures.
The list of materials is sometimes supplemented with special means for surface treatment after laying the tiles. For example, some use dirt-repellent agents.
Technology for laying tiles on the walls of the fireplace and exhaust pipe
The fireplace should be covered only after surface preparation has been completed. Start from the corners. They are fixed after measurements are taken. They will serve as a guide that will ensure that even rows of tiles are laid without distortions. Heat-resistant glue is mixed in a container. Then it is applied with a comb spatula to the back side of the tile. For better adhesion, the surface of the fireplace is also covered with glue in a similar way. Then a tile is applied to it and, after correcting the position, pressed with force. Finish fastening by tapping with a rubber hammer. To maintain a gap of the same width between the seams, pre-prepared pieces of drywall are inserted into them. It can be removed only after 12 hours from the moment the decor is fixed. If necessary, the tiles are cut with a grinder into fragments of the required size. A day after installation, you can start grouting the joints. The composition has a base white color, which is adjusted using special dyes. The grout is mixed with pigment according to the instructions, and then filled into a construction gun. Its nozzle is inserted into the groove of the seam and the mixture is carefully squeezed out, moving along the gap. The grout should be level with the tile, but not protruding above it. If some of the composition gets on a clean surface, there is no need to immediately try to wipe it off. The grout is removed after it has hardened using a screwdriver or knife. After 1.5-2 hours, the composition will begin to thicken and acquire the consistency of a dense paste. Now we begin to unstitch the seams, which is carried out using a regular flat-head screwdriver.
Types of stone suitable for stove finishing
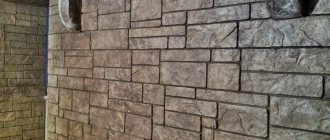
Figure 2. Options for artificial stone
There are many types of artificial stone. Not all of them are suitable for cladding bases that are subject to temperature changes. Let's consider the suitable ones.
Porcelain tiles
Artificial stone is another common name for ceramic granite. Visually, the material does not have to resemble at all what it is associated with. Rather, it is an analogue of ceramics or glass. However, in terms of strength, porcelain stoneware is superior to both and natural prototypes. Being fired in a kiln at high temperatures, the material does not react in any way to the thermal effects of the fireplace. He doesn’t care about mechanical load either – within reasonable limits.
There are several types of ceramic granite. If you wish, you can find hundreds of collections that imitate stone not only at the level of physical and chemical characteristics, but also externally. There are materials with both strict geometry and a “natural” silhouette. You can use any slabs, but the latter type is preferable for those who decide to finish the stove themselves.
Porcelain stoneware contains various types of clay, feldspar, mineral additives and pigments. The multi-component mixture is pressed under enormous pressure and then fired at temperatures above 1200 degrees. This provides excellent strength characteristics.
concrete stone
One of the most popular types of artificial stone, which is most often used when decorating stoves. The composition includes sand, cement, dyes, plasticizers, fillers and water repellents. Materials of this type are distinguished by good contextual indicators and accessibility - lining the stove with concrete artificial stone will not strain the budget.
Gypsum-based stone
It has excellent strength characteristics. Any imitations are possible. Due to the properties of gypsum, it is well suited for lining heated surfaces.
Traditional methods
The first 3 points and positions in Fig. and in the list above - traditional methods of facing fireplaces and stoves. The best of them, but the most expensive and complex, is finishing with tiles; it increases the efficiency of the stove by 15-17 percentage points. For example, if the initial efficiency of the stove is 60%, then after tiling it will reach 70%; For this reason, we will return to tiling later.
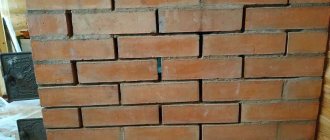
Finishing the furnace with dry-molded facing bricks gives an increase in efficiency of 7-9 percentage points. provided that it is carried out at the same time as the construction of the furnace, i.e. decorative brick cladding was included in its layout at the design stage. Otherwise, when lining an already standing fire (running) stove, an increase in efficiency is possible, as when lining with terracotta, up to 5 percentage points. The facing brick is then mounted on the fireplace/stove structure in the same way as stone (see below), but the labor-intensive procedure of its preliminary laying is much simplified.
Brick cladding of heating devices
When using a modern insulated fireplace insert with glass and a standard chimney for it, a small fireplace can be made entirely of face brick, pos. 1 in Fig. on right. Just not silicate, in Fig. just light! And a stove or stove-fireplace with a lining of red facing brick under a simple worker fits well aesthetically with majolica, pos. 2. However, these and other types of “brick” decor can be achieved more easily and cheaper by facing with terracotta and clinker. But before moving on to them, let's linger a little on the plaster.
Stove/fireplace plaster
Plastering a fireplace or stove allows you to achieve good aesthetics of the device in various types of interiors, see figure, but it is very labor-intensive even for simple white plaster. Decorative plasters, e.g. Venetian or polished stucco, you will have to leave it here altogether, this is a separate complex topic. In any case, the main obstacle when plastering a stove/fireplace is cutting the seams. If the appliance and masonry mortar in the joints are sintered into stone, preparing its surface for plaster becomes not only long, but exhausting, requiring extreme attention and experience so that a crack does not appear in the joint.
Cladding stoves and fireplaces with plaster
Next, the plaster mass needs lime. Even in the conditions of a fireplace shopping center, gypsum soon begins to lose water of crystallization, causing the plaster to dry out. The addition of vermiculite does not help, it only worsens heat transfer. In general, the procedure for plastering a fireplace or stove is as follows:
- The parts of the furnace structure to be lined are cleaned of the previous finish until there are no traces of it; the last residues are removed with a steel brush.
- The surface under the plaster is moistened by applying lightly moistened burlap or technical cloth for 1-1.5 hours.
- Masonry joints are cut to a depth of 9-10 mm with a narrow chisel for cutting out grooves - a cross-cutting tool - and light blows of a hammer.
- If the device was previously in use (heated), it will not be possible to cut the seams to the required depth right away: picking at dry clay mortar is unacceptable! In this case, wetting and cutting are repeated several times.
- The surface with cut seams is carefully brushed to remove dust and crumbs, then moistened with a plaster brush.
- Prepare a primary (starting) plaster solution with the consistency of medium-thick sour cream.
- The starting solution is used to fill the cut seams and the base surface to a thickness of 4-5 mm.
- After the primary plaster has dried, the same finishing solution or decorative plaster with the consistency of very thick sour cream or soft plasticine is prepared.
- The finishing plaster is applied in a layer of the same thickness.
- After the plaster has completely dried, a full cycle of putting the furnace into operation (starting up) is carried out: drying, a series of accelerating fireboxes, a test firebox.
Advantages of marble and granite for decoration:
- resistance to temperature changes;
- when heated, they do not emit harmful odors and smoke;
- always impressive appearance;
- combination with various building materials, such as wood, metal, glass, ceramics and other natural stones;
- undemanding operation;
- high strength, immunity to external influences.
Soapstone chlorite
Refers to a popular type of finishing materials. Thanks to its layered structure, it provides high heat capacity, so heat is retained in the stone and its surface is always warm.
They have known about it for many centuries. In Ancient Egypt and Asian countries, magical properties were attributed to it. The frequency of the emitted heat matches human radiation. The stone is believed to convey healthy natural strength when in contact with the human body. This strength increases the body's immunity and increases resistance to various bacteria and diseases.
In folk medicine there is information about the beneficial effects on human health, normalization of blood pressure, restoration of the respiratory system and metabolism.
Soapstone has high density, thermal conductivity and low thermal expansion. These qualities are best used when finishing fireplaces and stoves.
Sandstone
It is used for the front decoration of the fireplace, as it is resistant to high temperatures, durable and has a strong structure. Thanks to the uniqueness of this stone, a variety of original solutions for the fireplace are obtained.
It is easy to process and can be cut. It has a large selection of colors, shades and unique appearance. When facing with sandstone, you can create picturesque stone paintings.
This type of material best combines the qualities of decorativeness, environmental friendliness and affordable price.
Granite ceramics
Refers to a kind of finishing material, which is made from natural clay and is used for decorative finishing. The appearance is similar to the texture and color of granite, marble and similar stones.
This material differs from ordinary ceramic tiles only in the basis of its manufacture. Granite ceramics are made using especially durable clay. In other respects they are very similar, especially in appearance.
Thanks to the clay contained in porcelain stoneware, this material has a strong structure, is not subject to mechanical stress, is resistant to elevated temperatures and is durable. During operation, the finishing stone always retains its color and original shine.
Shell rock
It is one of the most unique natural stones that create an original fireplace lining. Thanks to its natural porous structure, it has high thermal insulation and resistance to high temperatures, which is an important factor for finishing a fireplace.
The shell rock contains the remains of fossilized sea shells and mollusks, which are preserved inside the stone.
To create the required shapes from shell rock, it is polished.
The most common yellow and white colors with various shades are successfully used for interior decoration. Cutting out original parts from sandstone-shell rock allows you to design the structure in accordance with any requests of the owners.
Cladding with natural stone is not always suitable for decorating fireplaces. Modern technologies make it possible to use materials that are superior to natural stones in terms of heat transfer.
Therefore, use stone to decorate fireplaces if you are satisfied with the low heat capacity of its surface.
It is important to know that:
- stone finishing reduces the efficiency of the structure, absorbing heat;
- facing the fireplace with granite can be done in the house if it is not the heat transfer that is important, but the presence of a live fire;
- the durability of marble and granite fireplaces is an indisputable fact.
If you use the softest of stones - limestone, then only after a few decades you will be able to see the destruction of its structure. Other stones are less susceptible to external influences, so finishing with natural materials does not have an expiration date.
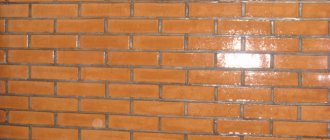
Facing brick
Kiln facing brick is a fairly heavy and expensive material. The masons who will do the façade masonry also have to pay a lot.
Before starting brick cladding, make sure that the stove has a solid reinforced foundation.
Brick cladding is perhaps the best option if it is possible to make a foundation. It's easy to do and the effect will be amazing. This is a reliable and durable design that will last for many years.
Using tiles
The tiles on the stove in the bathhouse are afraid of thermal expansion, therefore, when performing work, it is important to carefully follow the technological process. The lining of the stove in the bathhouse does not tolerate negligence
Kinds
Typically, 7 types of tiles are used for cladding:
- Terracotta is a tile that has not been glazed. It consists of terracotta clay and fireclay, which are mixed in a certain ratio. Such tiles have been known for several centuries. A correctly implemented technological process greatly influences the final quality of the material. This tile can be easily recognized by its characteristic red tint.
- Clinker tiles - clay is the main raw material. The material is obtained by pressing, then it is fired at a temperature of +12000C. The crystal lattice of the clay changes and the tile acquires the properties of ceramics.
- Majolica is very difficult to produce. Previously, only manual labor was used for drawing. Now there are industrial designs. The glaze on the tile is obtained by firing. Properties resemble terracotta tiles.
- Tiles are the most preferred option due to the air gap between the tiles and the oven wall. This layer works as an additional heat insulator, allowing the stove to retain heat near itself even longer.
- Porcelain tiles can also be used for lining a stove. Marble chips added during the production of porcelain stoneware give the material unique decorative properties and high strength. Due to this, porcelain tiles are rapidly gaining popularity.
- Fireclay is able to withstand direct exposure to fire. Fireclay is pressed into blanks and fired at a temperature of +13000C.
- Tile - only a material with a high heat resistance coefficient can withstand temperature loads.
Expert opinion Nikolay Davydov Stove maker with 15 years of experience
Based on their properties, the most preferable option for lining a stove is tiles. It is also the most labor-intensive. The most budget option is special tiles with a high heat resistance coefficient, but with its help it will not be possible to finish the hottest areas.
Instructions
Do-it-yourself tiling of a sauna stove is done as follows:
- It is necessary to properly prepare the surface. All traces of old finishes must be removed from the wall. Each seam should be selected at 10-15 mm.
- We dilute a deep penetration primer and add marble chips to it. Carefully prime the surface. Do not forget that the primer must dry (at least 24 hours).
- We stretch and fix the metal mesh using dowels. Such reinforcement will significantly increase the strength of the structure.
- The tiles should not be laid on an uneven surface. We level the wall with plaster. We recommend using stove mortar that is specifically designed for plastering stoves. The plaster must be allowed to dry for 48 hours.
- Apply the facing adhesive evenly to the entire surface of the tile. Carefully cover the surface of the stove and press lightly. The tiles can be leveled in about 10 minutes. Then the glue will set. We check the correctness of the masonry using a level. The glue layer should not exceed 1 cm. To make the seams even, we use special crosses. The thickness of the seam is 2-3 mm.
- When the glue dries, we grout the joints.
Tiles
This material was first invented by the ancient Babylonians, who also decorated stoves with it. Each tile is prepared individually from ceramics and then covered with glaze with a pre-selected pattern. As a result, you can get a very beautiful and unique stove that will look exquisite. It is believed that tiles produce the most environmentally friendly heat.
Covering a stove with tiles is very expensive and difficult, so you need to call special craftsmen for this, who are not so easy to find. But it’s worth it, because tiles have the highest heat transfer - 0.3 kW more than other materials.
If you have already built a stove, it will not be possible to cover it with tiles, since this must be done simultaneously with its construction.
Another disadvantage of the material is that you need to wait about a month until the solution completely dries and the oven is suitable for use. Thus, tiles are a choice only for those who want to stand out and create a unique interior.
Brick cladding
If you are satisfied with the aesthetics of ceramic bricks, then use this material for cladding. The most difficult question is that protecting the heated surface from cracks does not arise in this case. The brick cladding stands on a common stove foundation and does not require the use of reinforcing mesh.
Finishing the stove in the house using facing bricks can be done simultaneously with the masonry. This material is also well suited for improving the appearance of an existing structure. Contrasting colors and shaped details pleasantly transform the appearance of an ordinary stove.
The beauty of a brick fireplace lining is not inferior to expensive marble or granite.
Brick finishing is also good for metal stoves. Here, a ballast backfill of dry fine sand is used between the steel body and the brick cladding. It protects the masonry from the deforming expansion of hot metal and transfers thermal energy well.
Combination of materials
Quite an interesting result can be obtained by combining different finishing materials. This technique allows you not only to create a unique appearance, but also saves on materials. You will be able to use cheaper finishing options for parts of the stove that are subject to less wear.
Today, glass wallpaper is used in many industries as a durable, wear-resistant, as well as aesthetic finishing material. The functionality of these wallpapers allows them to be used as a decorative finish on almost any surface. They are used in gluing the surfaces of office and residential premises, in finishing the ceiling, as well as various stoves. Of particular interest are glass wallpapers for finishing furnaces, which are characterized by fire safety and environmental friendliness, since when heated they practically do not emit any toxic substances.
Stylistic directions in fireplace decoration
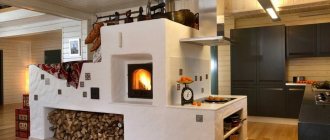
Various types of stoves are built into very different interiors
It is important to maintain the integrity of the interior and select an acceptable color scheme. A fireplace is often a zoning detail that allows you to neatly divide a spacious room into two functional parts
Most often, fireplaces are built into classicism, baroque, loft, Provence, and country interiors.
In English style
The hearth in the English style is U-shaped, equipped with a large firebox and a wide mantelpiece. Suitable finishing materials are valuable wood species (wenge, zebrawood, bog oak, Karelian birch, etc.) or their high-quality imitation, ceramic tiles, metal (forged elements). Most of the lines here are smooth, the corners are strictly straight, all the details have a strictly regular shape.
Provence style
The Provence fireplace has the simplest possible shape, but every detail is worked out to the maximum. The color of the structure is usually white, other suitable colors are pastel, cream, pale pink, bluish, soft green. Suitable materials include decorative plaster, ceramic tiles with floral patterns, and light wood, including painted and artificially aged wood. Forging will also come in handy.
Country style
Country is a style associated with rustic simplicity and comfort, which is why the fireplace here is finished “modestly, but tastefully.” This design is rather heavy and very voluminous, so independent finishing is very labor-intensive. The portal itself is D-shaped; above the firebox there is a thick beam, most often stone. For decoration, artificially aged natural stone (shell rock, sandstone), brickwork, imitation stone, brick are suitable.
Classic style
Classic is usually associated with harmony, symmetry, correct geometry, both of the object itself and of the entire room where it is located. A few stucco elements are allowed here - moldings, rosettes, half-columns, pilasters, corner parts, etc. Forged, ceramic tiles made in light colors with unobtrusive decor, including those imitating wood, are also acceptable.
High-tech style
A fireplace in high-tech style is necessarily smooth and shiny. Rarely is it located against a wall - usually these are located in the corner, island, suspended, rotating structures. The main finishing materials are metal, glass (fireproof, transparent, patterned, partially tinted, etc.).
In ethnic style
Ethnic fireplaces - colorful oriental and strict European designs. Less often, it is an imitation of a “Russian stove” fit into the corresponding interior. Popular finishing methods are decorative plaster, whitewashing with chalk, coating with clay mixed with various dyes, mosaic of colored ceramic tiles. There are no patterns here at all, or they are as winding and multi-colored as possible.
Loft style
A loft fireplace is always decorated in an antique style, finished with brick, stone, dark metal, rough wood, and less often with plaster and stucco. The structure is usually placed near the wall, but island and hanging options are acceptable; the shape is rectangular, round, in the form of a barrel, etc. The chimney here is not disguised, but is made accent. Also, the hearth may resemble a slightly modernized “potbelly stove” located in an empty niche.
Advantages of artificial stone
Natural stone is expensive. In this, the “fake” has an undoubted advantage. But cost is not the only advantage of artificial stone. Among the advantages of the latter:
relative ease of installation; finishing with tiles or stone slabs requires high qualifications; strict dimensions of materials make the slightest miscalculation fatal - a clumsy result is guaranteed; artificial stone can be different, and a clear geometry may be present in this case as well; but nothing prevents you from purchasing a stone with shapes close to natural - hence there is no need to maintain “mathematically” even seams; inclusion of light fillers in the composition, which are responsible for significantly lightening the finishing structure; this is important because the stone is characterized by considerable thickness, and excess weight would reduce the adhesion (adhesion) of the coating to the base; the opportunity to not limit the flight of imagination in any way - the market is replete with offers for every taste; no need for expensive professional tools; natural stone and ceramic tiles may require professional equipment; artificial variations can also dictate similar requirements, but a stone with a ragged silhouette is a completely different matter.
Choosing tile adhesive
Figure 5. Options for “stove” adhesive
The stone is laid on tile adhesive. We will not repeat the importance of resistance to high temperatures. But this is not the only criterion for choosing a composition.
Artificial stone is usually not large in size. But if the oven is lined with dimensional materials, you need to take care of adhesion. In such cases, you need to purchase glue designed to work with heavy slabs. And in general, it’s better not to skimp and buy a mixture with excellent grip.
If the base is properly prepared, the glue calculation is carried out according to the diagram specified in the instructions. Otherwise, the quantity must be adjusted taking into account deviations of the furnace surface from the plane and vertical.
Grouting and jointing
Figure 9. Grouting joints using a bag
For aesthetic and hygienic purposes, the seams are jointed - filled with a durable heat-resistant grout mixture. There are two main options for jointing - using a rubber spatula and using a syringe (or its replacement - a regular bag with a hole).
The trowel is suitable in situations with smooth stone and thin joints. Wide joints and porous tiles are the reason to turn to another option.
The process of jointing with a spatula:
- the grout is applied with a spatula using diagonal (relative to the joints) movements;
- the fugue should fill at least 2/3 of the seam thickness;
- without allowing the grout to set, its excess is removed from the surface of the stone, and a fugue at the joints is formed using a finger or, for example, a piece of wire;
- The coating is polished using a foam sponge.
The process of jointing using a bag:
- You should fill a strong cellophane bag with the mixture and cut off one corner; it turned out to be an analogue of a syringe, with which the grout can be squeezed into the seam;
- avoiding the fugue getting on the surface of the stone, fill the joints with it;
- after filling a certain area, the joints are embroidered in the same way - using a round object of suitable diameter.
Preparing the furnace for work
Before finishing, preparatory work cannot be avoided. They are needed for smooth application of plaster and high-quality wall cladding. The first step is to remove the old plaster if the stove has been used before.
This process is carried out with a spatula and water. If the old plaster contains cement, then you will have to use a chisel or hammer. If the old material is successfully removed, the wall should be cleaned down to the brickwork.
The next step is to run a wire brush or sander over the surface of the oven.
Important! To properly attach the plaster, you will need to spray the walls with water and clean the seams between the bricks. New masonry must be dried and cleaned of dust and other defects.
New masonry must be dried and cleaned of dust and other defects.
After cleaning, the walls need measurements. Using a building level, the correctness of the corners is assessed and, if necessary, they need to be plastered to level them.
Using tiles
The tiles on the stove in the bathhouse are afraid of thermal expansion, therefore, when performing work, it is important to carefully follow the technological process. The lining of the stove in the bathhouse does not tolerate negligence
Kinds
Typically, 7 types of tiles are used for cladding:
- Terracotta is a tile that has not been glazed. It consists of terracotta clay and fireclay, which are mixed in a certain ratio. Such tiles have been known for several centuries. A correctly implemented technological process greatly influences the final quality of the material. This tile can be easily recognized by its characteristic red tint.
- Clinker tiles - clay is the main raw material. The material is obtained by pressing, then it is fired at a temperature of +12000C. The crystal lattice of the clay changes and the tile acquires the properties of ceramics.
- Majolica is very difficult to produce. Previously, only manual labor was used for drawing. Now there are industrial designs. The glaze on the tile is obtained by firing. Properties resemble terracotta tiles.
- Tiles are the most preferred option due to the air gap between the tiles and the oven wall. This layer works as an additional heat insulator, allowing the stove to retain heat near itself even longer.
- Porcelain tiles can also be used for lining a stove. Marble chips added during the production of porcelain stoneware give the material unique decorative properties and high strength. Due to this, porcelain tiles are rapidly gaining popularity.
- Fireclay is able to withstand direct exposure to fire. Fireclay is pressed into blanks and fired at a temperature of +13000C.
- Tile - only a material with a high heat resistance coefficient can withstand temperature loads.
Expert opinion
Nikolay Davydov
Stove maker with 15 years of experience
Based on their properties, the most preferable option for lining a stove is tiles. It is also the most labor-intensive. The most budget option is special tiles with a high heat resistance coefficient, but with its help it will not be possible to finish the hottest areas.
Instructions
Do-it-yourself tiling of a sauna stove is done as follows:
- It is necessary to properly prepare the surface. All traces of old finishes must be removed from the wall. Each seam should be selected at 10-15 mm.
- We dilute a deep penetration primer and add marble chips to it. Carefully prime the surface. Do not forget that the primer must dry (at least 24 hours).
- We stretch and fix the metal mesh using dowels. Such reinforcement will significantly increase the strength of the structure.
- The tiles should not be laid on an uneven surface. We level the wall with plaster. We recommend using stove mortar that is specifically designed for plastering stoves. The plaster must be allowed to dry for 48 hours.
- Apply the facing adhesive evenly to the entire surface of the tile. Carefully cover the surface of the stove and press lightly. The tiles can be leveled in about 10 minutes. Then the glue will set. We check the correctness of the masonry using a level. The glue layer should not exceed 1 cm. To make the seams even, we use special crosses. The thickness of the seam is 2-3 mm.
- When the glue dries, we grout the joints.
This is interesting: Window decoration in a house made of laminated veneer lumber - study with us
Algorithm for finishing work
Tools for work
- Measuring devices: tape measure, plumb line, level.
- Hand tools: trowel, spatula, mallet and hammer.
- Cutting tool.
- Brushes: paint brushes, metal brushes.
- Containers.
- Consumables: nails, screws, etc.
At the beginning of work, the surface is cleaned of dirt and dust. Make indentations in the masonry seams and wipe with a wet rag. To eliminate deformation, a power frame is formed. A reinforced mesh is attached to the surface of the stove with nails, and a metal profile is placed on the corners. Apply a layer of plaster and allow it to dry. After this, it is recommended to heat the stove. This will give the plaster the necessary strength. After this, you can cover the prepared oven with ceramics. This should only be done by a trained specialist.
The tiles begin to be fixed from the bottom row from the corners in different directions. The distances between the seams are maintained using a template (tile cross). When the tiles have been laid and the mortar has dried, they begin to process the joints using special grouts and impregnation solutions. At the end of the work, remove traces of the solution and wipe the surface with a dry cloth.
https://youtube.com/watch?v=bmtLfPIXSoU
Finishing materials (natural stone, brick, wood)
Most often, tiles are used to decorate a fireplace.
You can decorate the hearth not with solid tiles, but with pieces like a mosaic
The material will not be damaged by high oven temperatures and drafts. Additionally, it is characterized by the following advantages:
Allows air to circulate within the surface without creating obstructions.
The tiles have a high degree of heat transfer
- Long service life.
- Made from natural ingredients.
- When heated, it does not emit an unpleasant odor.
- Among the wide range of products, you can choose the one suitable for a specific room in the house.
Natural or artificial stone is used in rooms with a classic design style. Most often, granite, marble, shell rock and slate are used to clad the fireplace portal. The material is high in cost, so it is not used in budget living rooms.
Natural stone finishing is found in country style
The stone should be selected based on its following advantages:
- The texture does not deteriorate under the influence of high temperature.
- Eco-friendly and durable.
- Easy to install.
- Creates a unique and unique piece of furniture.
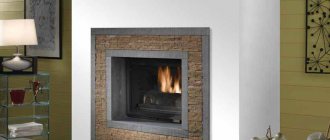
A brick fireplace is a classic option that looks great in any interior.
The brick is not afraid of high temperatures, so it will last for a long period of time.
Porcelain tile is a natural material that looks like natural stone. It owes its unique performance properties to the presence of a minimum number of pores in its composition.
Finishing the fireplace with porcelain tiles will fit into high-tech, art deco, eclectic and other styles
Buyers also choose it because of the following advantages:
- High strength.
- The cladding will not be damaged by open flame. It will retain its structure even in conditions of high humidity and frost.
- Environmentally friendly.
- Wide range of colors and textures.
- Easy to use.
Plaster is considered a budget option because it does not require significant financial investments. With its help you can create a visually attractive corrugated surface. Suitable for corner fireplaces.
Plaster finishing fits perfectly into the minimalist style
Today it has become possible to cladding the fireplace with wood.
The fireplace portal can be decorated with wood
The material not only has unique aesthetic properties, but also emits a pleasant aroma when heated. The owner will need to purchase breeds that are resistant to this type of external influence. The best option is oak, hornbeam, maple or cherry.
You can’t make a real fireplace in an ordinary apartment, but it’s easy to assemble a budget version from plasterboard
Drywall can be used as a facing option only for an electric fireplace. During operation, safety precautions must be observed. Otherwise, the structure may catch fire.
If a person has a minimal budget, then he can decorate the room with a false fireplace. You can choose any materials to decorate it.
Features of preparing masonry mortar
Anyone who is wondering how to lay out a brick stove for a sauna should first of all decide what will act as a binding mixture.
Most often this is one of three options:
- Cement mortar with the addition of an adhesive composition for porcelain tiles.
- A classic composition prepared by mixing clay and sand.
- A cement-based mixture with the addition of a small part of fireclay clay.
It should be remembered that if you use a classic clay solution, you should definitely check it for plasticity before starting work. To do this, a tourniquet is rolled out of the mixture and rolled into a ring. After this, it is necessary to inspect it for cracks; if there are few of them, the solution is suitable for work; if the cracks are significant, the plasticity of the composition should be adjusted by adding sand.
Advice: in some cases, when a metal furnace is unreliable or the structure is temporary, only the lower part of the structure can be mounted on the solution. The top one is laid dry; in the future this will simplify the replacement of the stove or its repair.
Base
If there were instructions for lining this stove, there would undoubtedly be a lot of attention paid to the construction of the base. It is necessary to roughly calculate the strength of the base, after which it is determined how best to equip it
If the floor plane is not very reliable, it is advisable to build a foundation for the sauna stove, but if everything is good with reliability, then the foundation is much easier to build.
If a foundation is needed, its size is determined, formwork is placed, into which the solution is poured. Its composition is the same as for conventional screeds. You can begin further work after it has completely hardened.
Pouring the foundation for a stove in a bathhouse
If pouring the base is not required for laying bricks, work is carried out as follows:
- The location of the brick is marked. The optimal distance from the metal surface is from 3 to 5 cm, and the permissible gap is from 0.5 to 10 cm.
Note! The close location ensures rapid heating, but constantly overheats the brick, which reduces its service life. A large gap preserves the brick, but significantly lengthens the heating process.
- A metal sheet is nailed along the contour of the masonry to protect the surface from overheating.
- Asbestos cardboard is laid on top around the perimeter. This material perfectly protects surfaces, it is resistant to temperatures up to 500 degrees, and is resistant to burning and charring.
Asbestos cardboard is an excellent insulator for hot surfaces
Masonry work
Now we have come to the description of the main stage - how to line a metal stove in a bathhouse with bricks. The laying is done as follows: the first row is laid solid, in the second row you need to leave two holes on each wall, the size of which is usually equal to half a brick.
If an opening for the firebox is needed, its size is not particularly regulated. The main thing is that it should be comfortable and not interfere with opening the door. It is best to reinforce the upper edge of the opening with a metal corner; this will significantly increase the strength of the masonry. (see also article)
In the penultimate row at the top you should also leave two holes. The upper part can be different, sometimes nothing is needed there, and in some cases stones are poured in, which increase the heat transfer even more due to their properties.
Metal oven before and after lining
Advice: to improve adhesion, the brick must be soaked in water before laying; the adhesion to the mortar will be much stronger, especially since the structure will be constantly exposed to high temperatures.
The size of the seams between the bricks must be kept within 3-5 mm, and do not forget about bandaging the bricks. All this will provide the necessary strength and durability. Despite the apparent complexity, almost every person can lay a brick over a stove with their own hands.
After finishing the masonry work, the solution must be given time to dry; depending on the humidity and temperature in the room, the process takes on average 1-3 days. Then, if necessary, excess mortar is removed from the surface of the brick. This can be done in various ways, the main thing is not to damage the surface of the oven.
Preparing the base
The choice is made, the stone is in place. But this is not enough for finishing - first you need to prepare the base. It should be smooth and durable. If the stove is not new, you will have to first remove the old coating. It is necessary that the base remains clean after dismantling. Grease stains, pieces of mortar, tile or paint residues must be removed. In the case of surfaces subject to heating, this aspect is very important - it is necessary to ensure maximum adhesion of the plaster mixture to the base and glue to the plaster.
The adhesion will be better if the brick seams are deepened. This can be done simply and quickly using a grinder and a diamond blade. A 5mm recess is sufficient. After the basic preparatory work, you need to check whether the base is loose. To do this, go over the surface and seams with a metal brush - nothing should crumble.
Left:
- saturate the walls with a primer - this will strengthen the base and enhance the adhesion of the materials;
- reinforce the base - this is also necessary to strengthen the ligament; as a reinforcing layer - plaster mesh;
- moisten the prepared surface generously with water; ignoring this point will lead to the fact that the base will absorb most of the liquid from the plaster - this will have a very negative impact on the strength of the latter.
Tools needed for oven adhesive finishing
Figure 6. Tools for laying artificial stone
For stone cladding you will need:
- level (laser, water or bubble);
- grinder for cutting stone;
- spatula for applying the mixture;
- notched spatula (comb) for forming an adhesive layer;
- rubber spatula;
- rod or rule;
- tile wedges;
- foam sponge.
If the stove needs to be tiled with porcelain stoneware, a tile cutter will not hurt. It makes it much easier to cut tiles evenly and without chipping. A tile cutter cannot cut torn stone, and the effects of working with a grinder on it are almost invisible.
It is better to mix the glue with a mixer or a drill with a mixing attachment. But if you don’t have a drill, you can knead by hand. It is not recommended to do this - it takes a long time and is of lower quality, but not critical. It is only important to bring the mixture to the maximum possible homogeneity.
We do not mention small tools. Surely there is a tape measure and other little things in every home.
How to make a barbecue from stone and brick
Having previously developed a construction plan, you can build a barbecue from rubble stone with your own hands using bricks. By combining two different materials, you get an interesting design for cooking over a fire.
Work on the foundation
A do-it-yourself stone grill requires a strong, reliable foundation. Sequence of construction work:
- At the selected location, remove the top layer of soil.
- The bottom is covered with a sand and gravel mixture.
- A frame of reinforcement is laid to strengthen the concrete mixture.
At the last stage, concrete is poured.
The foundation for a barbecue made of stone and brick must be even and smooth.
Work on the construction of the basement
When erecting a plinth, it is important to strictly follow the layout of stone and bricks. It is important to treat each row well with a solution to prevent the formation of cracks
For the stability of the structure, it is recommended to place metal rods in the solution
Also, when building a basement, it is important to pay attention to the construction of additional work surfaces - a stove or sink
By strictly following the instructions, the end result will be gorgeous.
Work on the hearth
When laying out rows, it is important to install metal brackets on which the grid is placed. If desired, you can prepare a place to install two or three such elements
Since the grill grate will be installed on the top row, it is important to make small grooves under it
Finishing
Upon completion of the construction, modular stone barbecues can be decorated with brick mosaics or stone patterns.
Photo options for a stone barbecue in the country house given below will help you decide on the design of the future building.
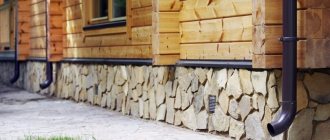
Finishing with natural stone will allow you to plunge into the Middle Ages. An excellent and affordable cladding option is natural stone.
Natural stone for cladding the stove, fireplace and rough walls
The currently fashionable cladding with natural stone (preferably fireplaces) will require the work of a professional. Of course, the price will be high, but the result will be good. For finishing use:
- onyx;
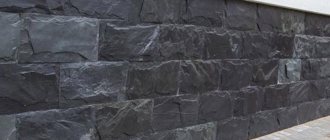
- rubble stone;
- soapstone;
- rhodonite;
- soapstone;
- jade;
- coil;
- granite.
Natural stone accumulates heat well and is resistant to temperature changes and fireproof. It should be taken into account that the stone laying is done with a small gap, since there is a difference in the coefficients of thermal expansion.
Advantages:
- strength;
- practicality;
- fire resistance;
- moisture resistance;
- durability.
Flaws:
- heavy weight;
- high price;
- due to the difference in size, chaotic masonry may be obtained;
- large distances between individual stones can create the effect of a broken composition;
- Care is required when cutting to ensure a high-quality front surface;
- need for color selection.
Choosing artificial stone for finishing
Artificial stone is made from gypsum, synthetic materials, most often with the addition of stone chips. Some of its types are externally indistinguishable from the real thing. High-quality design is achieved with the right choice of materials.
Main criteria:
- price - a good stone is never excessively cheap, but foreign products are always an order of magnitude more expensive than domestic ones;
- goods used for finishing residential premises must have a certificate of conformity and hygiene, and not contain harmful components;
- the longer a manufacturing company exists, the more likely it is that it produces high-quality material;
- the stone should not be too porous - this affects the strength and service life of finishing elements;
- The manufacturer's logo must be indicated on the packaging; the date of manufacture is also important - the optimal strength of the artificial stone is achieved within 28-30 days from the date of manufacture. If the period is shorter, the product is of poor quality, it is better to refuse to purchase it.
Features of working with artificial stone when decorating a fireplace
Decorating a hearth with fake stone has a number of features:
work is performed at a temperature of at least +6 degrees; it is important to use the appropriate adhesive recommended by the manufacturer; for cutting use a hacksaw; the surface of the product is cleaned, a reinforcing mesh is installed on it; then plaster is applied to the mesh, the layer thickness is 0.9-1.5 cm, and dried; cladding is done from the corner from top to bottom so that the parts do not get dirty; a thick layer of mortar is applied to each part with a trowel, pressed to the place to be decorated, and excess glue is removed; it is advisable to use long and short parts in turn, adjusting them with a hacksaw or wire cutters; all seams are filled with mortar, dried, and excess is removed; After complete drying, the structure is coated with hydrophobic compounds to increase the service life of the coating.
Wood finishing
Natural wood is perfect for finishing a fireplace. The breed can be any, because... Special modern impregnations make it possible to give wood the appearance of even the most valuable species, but it is better to use high-quality, durable and strong material. Wood is used to decorate the fireplace portal. Shelves are also made from this material.
The wood must first be impregnated with a fire retardant to increase its fire-resistant properties. Finally, the structure can be painted and varnished.
Good luck!
Video - Do-it-yourself fireplace decoration
Cladding with artificial stone is carried out in three stages. Let's figure out what needs to be done:
- Prepare the surface - this affects the service life of the structure. If it is done incorrectly, the cladding will not last long.
- Select material:
- parts should be multiples of the surface width to reduce waste;
- make sure that the building material can withstand high temperatures;
- artificial stone should fit into the overall decor.
- Make the cladding yourself.
Advantages of artificial stone:
- has soft mechanical characteristics, which makes it easy to work with;
- the design will weigh a little, since the material used consists of flexible and lightweight components;
- on the construction market, stone is presented in a wide variety of shapes and textures;
- the price of artificial stone is much lower than that of natural material;
There is a list of rules that are followed when working on decorating a fireplace with artificial stone:
You should understand what you need to pay attention to when tiling different surfaces:
- wood coating is very susceptible to destruction by moisture, so it should be covered with waterproofing, for example, pigment, before treating it with artificial stone;
- An important next step will be the installation of the plaster mesh with special fasteners. To do this, you need to make holes in the masonry with a hammer drill and insert self-tapping screws into them. Caps should be placed on the caps. In such circumstances, the mesh will not be able to fall under load. The fasteners should be about 15 cm apart vertically and 5 cm horizontally;
- the plaster on the mesh must be adjusted so that its layer is 1 cm. It must dry completely, after which it is worth continuing work.
All the same actions can be carried out when laying artificial stone on a concrete or metal surface, with the only difference being that there will be no need to do waterproofing.
Necessary tools for work:
- screws or nails for fastening elements;
- a spray bottle for moistening before laying the surface of the fireplace;
- construction hammer and trowel;
- grinder, drill;
- a block having a flat surface;
- dishes for mixing the solution.
At the very beginning of processing the fireplace with artificial stone, finishing begins from the corner part of the fireplace. During the work process, you need to alternate material of different lengths.
First, the largest parts of the stone are attached, using a small amount of mortar. This will make it easier for you to lay the material in the future.
Using a trowel, you need to apply a solution of 1.5 cm layers on the stone. Make sure that the surface is covered evenly.
When laying the stone, apply light pressure to it, moving it to the desired position. This way the element will be better secured and the seam will be completely filled.
If you are doing the cladding in a very dry room, then the surface of the fireplace and the inside of the artificial stone must be moistened with a wet brush or spray.
If you use seamless masonry, the material should be moistened, regardless of the room temperature.
Finishing options for false fireplaces
Not every private mansion will be able to install a real fireplace; in a city apartment, to install it, you will have to visit several authorities, draw up a project, and with a high degree of probability receive a refusal. Therefore, where it is impossible to create a real hearth, they create a portal for a fake one. The fire in it is painted or made of fabric, driven by air, which is sometimes accompanied by the sound of crackling firewood.
Artificial fireplaces are made one-sided, three-sided, less often - viewed from all four sides. By type they distinguish wall, corner (convex and concave), island pseudo-foci; by shape - square, cylindrical, “pyramids”, etc.
The finishing of such a design is simpler than that of a real one - the false fireplace does not heat up and is completely fireproof, therefore the requirements for finishing relate, first of all, to the appearance of the product. The portal is decorated with plasterboard, wood, various types of ceramics, and stone.
The oldest type of ceramics
Terracotta is a special type of clay with a porous structure. In fact, it is the same majolica, but not glazed. It is considered the most ancient type of cladding. It has high strength and bright color.
Pressed clay of a certain grade is first pressed and then fired in special kilns. It turns out to be an excellent decor for cladding.
Terracotta was used in construction for roofing, various types of cladding, and to decorate stoves and hearths.
Choosing artificial stone for masonry
The correct choice of material will ensure a high-quality result.
When purchasing, you must check all documentation, including the certificate of conformity and hygiene certificates. The quality of a product directly depends on the manufacturer: the longer a brand is on the market, the greater the likelihood that the quality of the product meets modern requirements. Particular attention should be paid to the surface of the stone: the porous structure of the front surface indicates a violation of the production technology and can affect the strength of the structure. It is necessary that the packaging is intended specifically for this product and is equipped with the manufacturer’s logo.
Applying plaster
Here, any heat-resistant composition is used for basic plastering of walls. The solution is thrown onto the mesh and leveled with spatulas, moving from bottom to top.
There is no need to make layers thicker than a centimeter to avoid cracks. Then you can heat the stove and make sure that this will not further destroy the materials laid under the finishing.