Slopes, Miscellaneous
When the apartment is being renovated or the doors are just being replaced, finishing the slopes is not the last place. The most pressing issue is the choice of material.
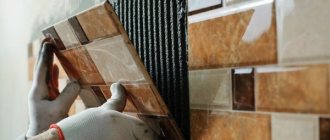
There are many finishing methods. Some people prefer simple plaster, others like painting. Tile slopes have become very popular.
How to choose the right tile
To make the right choice and finish the slopes with such material, you need to take into account several basic criteria:
- purpose of the premises;
- sanitary condition;
- design;
- the desire of the owner of the room.
For example, in the kitchen you should not decorate with artificial stone. Its uneven surface will be difficult to clean. This material is more suitable for a living room with a corresponding design.
Laying tiles most often occurs in rooms with high humidity. Finishing door slopes in such rooms helps to obtain the desired interior and design.
Decorative textured slopes with stone-like tiles
Finishing window and door slopes with ceramic tiles
Korovin Sergey Dmitrievich
Master of Architecture, graduated from Samara State University of Architecture and Civil Engineering. 11 years of experience in design and construction.
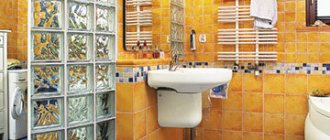
Finishing slopes with ceramic tiles is relevant for rooms with high humidity - where this material is most often used for cladding walls and floors: in bathrooms, toilets and kitchens. Tiles on window slopes will perform not only a decorative function, but also a practical one - in quality it can be compared with natural or artificial stone.
Description of material
In the interiors of living rooms you can find openings decorated with mosaics - it always looks unusual and bright. This interior is distinguished by individuality and special beauty. The tile can be ceramic or figured, imitating artificial stone .
Ceramics
Decorative ceramic tiles can be used to decorate the slopes of windows and doors in the bathroom and kitchen. Due to its high hygienic qualities, this material is used for kitchen aprons.
Ceramic tiles are highly durable
Ceramics has many positive qualities:
- strength;
- high wear resistance;
- durability;
- minimal water absorption;
- hygiene;
- it does not allow electric current to pass through;
- fire safety;
- environmental friendliness;
- affordable cost;
- decorativeness and a wide selection of colors, shapes and sizes.
Tile
Tile is a type of ceramic, from which it differs in its durable glossy glazed surface. The cost of these products is higher than ceramic ones, but their service life is measured in decades.
The tiles are resistant to temperature changes
- has high strength;
- is resistant to chemicals and alkali;
- withstands temperature changes and exposure to direct sunlight;
- retains its appearance and quality throughout the entire operational period;
- waterproof;
- easy to care for and has a high level of hygiene;
- has a wide range of colors, patterns and shapes;
- common and affordable.
Stone effect tiles
This finish perfectly imitates masonry made of any natural and artificial stones. This material is based on fusible clay and quartz sand. Thanks to this, the products are lightweight, unlike ceramics and tiles. Finishing windows with such tiles will avoid excessive load on the window opening. In a private house, external slopes can be finished with this material. You just need to choose products for external cladding work.
The tiles on window slopes with imitation stone are different:
- light weight;
- various surface options - textured, matte, glossy;
- compactness;
- simple installation and ease of processing;
- can be used when finishing a door arch is required;
- firmly fixed to tile adhesive.
Products that imitate old masonry are expensive. This must be taken into account when choosing material .
Mosaic
Window decoration with ceramic mosaics looks unusual and original. With its help you can make interesting doorways in living rooms.
The most original way to finish slopes is mosaic
This type of window decoration is made using small ceramic elements, from which a strict ornament or a chaotic pattern is formed.
Slopes made of ceramic tiles under stone
You can make slopes made of tiles that imitate masonry made of natural or artificial stone for windows and doors with your own hands.
You can trim the slopes with tiles yourself
Before starting work with this material, you do not need to level the surface . This material is convenient because in addition to flat elements, you can purchase corner parts to make the opening look neat.
- To achieve high-quality adhesion between the product and the surface of the slope, notches are made on the latter.
Notches on the slope improve adhesion. Slopes are primed.
Primer of the slope surface The adhesive solution is applied not to the wall, but directly to the product.
The solution is applied to the tiles. Lay the tiles starting from the corner. When laying, the masonry elements are pressed tightly against each other, leaving no seams. If there is a desire to have seams, then plastic pegs are inserted between the parts.
To form a seam, pegs are inserted between the tiles. The seams are filled with grout mixture using a construction syringe.
The seam is filled with grout
- The grout is distributed along the seam using a brush.
To trim some of the fragments connecting to the window frame, you can use a regular hacksaw. At the ends, the tiles can be laid freely.
Slopes made of tiles or ceramic tiles
If it is necessary to finish the slopes of windows or doors with elements with precise geometric dimensions, you must follow the instructions given below.
Laying
Before starting work, the slopes must be carefully leveled. The tiles will be laid with high quality only on a smooth, even surface . This must be controlled using a building level.
There are several methods for leveling slopes: using plaster, drywall or chipboard.
You can line the window opening with plasterboard
Below we will tell you how to lay tiles on a previously plastered and primed slope.
Before gluing the tiles, parts are laid out on the prepared slopes to assess their future position. Lay out the tiles starting from the corner. The principle is the same as when laying tiles on a wall - the first bottom row is laid out first.
Laying tiles begins from the bottom row
The glue is applied to the wall using a metal spatula. The texture obtained in this way will contribute to better adhesion of the adhesive and tiles. The joints are grouted after a day using a rubber spatula.
How to make a corner connection
At the preparation stage, it is necessary to install metal or plastic perforated corners under the plaster mortar to give the corner edges of the window opening a clear geometric shape.
The layout scheme must be selected in such a way that the width of the tiles on both sides coincides and the seams between the tiles coincide in all planes.
The seams between the tiles must coincide in all planes
The corner can be finished using grout. Therefore, fixing the tiles at the corners should be done in the manner shown below.
Corner finishing is done using grout
In another case, you can use a decorative corner.
Mosaic slopes
To install a mosaic covering on the slopes of windows and doors, you can use special soft canvases on which ceramic pieces are glued. The base can be paper or in the form of a mesh. Their convenience lies in the fact that you can cut the canvas to the required size.
The installation process is simple. The surface of the slope must be dry, clean and level. At the preparatory stage, preliminary markings are made on the slope, according to which the mosaic canvas is then glued.
the glue is applied with a notched trowel;
To apply the glue, use a notched trowel when gluing the mosaic canvas; you do not need to put too much pressure on it so that the adhesive does not squeeze out through the seams;
It is necessary to glue the mosaic canvas without strong pressure; to seal the seams, it is recommended to use epoxy resin-based grout;
To grout the joints, use epoxy resin and spread the grout in an even layer using a rubber spatula;
To distribute the grout evenly, use a rubber spatula
Window and door slopes, finished with one of the listed materials, will decorate any interior and retain their original appearance for many years.
Flaws
For all its advantages, this material has several disadvantages. Firstly, it is high cost. Secondly, laying tiles requires certain skills and knowledge. This facing material requires great care and a lot of time when working. However, the resulting result always compensates for all the disadvantages with its attractive appearance and reliability.
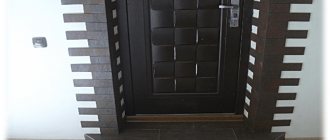
Slopes made of ceramic tiles for the entrance door opening
Door trim
You can decorate the perimeter of the door opening and slopes with ceramics. Moreover, the type of tile will play a major role. Imitation of walls and brick slopes is done with special tiles. It is usually based on cement, which is mixed with additional fillers and various dyes.
You can lay textured material for finishing slopes yourself, without the help of specialists. This work does not cause any difficulties, since it does not require leveling the surface. The use of special corners eliminates the need to join external corners.
Advantages of finishing
Natural stone is very beautiful and luxurious. However, recently many people prefer a man-made analogue. The reason is that natural stone is too expensive and heavy. The advantages of this material are as follows:
Light weight compared to natural material. This significantly reduces the cost of work, since there is no need to worry about additional strengthening of the foundation:
- Durability. In this respect, composite materials are not inferior to natural ones;
- Variety of shades, configurations and textures. Imitation of granite, shell rock or marble is possible, and very realistic;
- Easy to install. The back side of the artificial stone tiles is completely smooth. This is how the man-made version compares favorably with the natural one;
- Versatility. The decor can be mounted on walls made of wood, brick or concrete;
- Fire resistance. Thanks to this, fireplaces are decorated with artificial stone;
- Hydrophobicity. This allows the material to be used for decorating walls in swimming pools and bathrooms. In addition, surfaces lined with decorative stone are unattractive to fungi and molds;
- Resistance to temperature changes and solar radiation;
- Good compatibility with other materials. These are plaster, wood and forged elements;
- Easy to care for (a soft cloth and a detergent solution without abrasive elements is enough).
Stone is also suitable as an accent of interior elements (arch, column, fireplace, niche, separate “accent” wall. However, laying all the walls completely with stone is, to put it mildly, not the best idea. The result will be some kind of ancient knight’s castle, and not a stylish modern one room.
Laying technology
- For better adhesion to the adhesive solution, notches are made on the surface to be coated.
- Door slopes are covered with soil.
- Glue is applied to the surface of the ceramic. It must comply with the manufacturer's recommendations.
- The tile must be glued horizontally. You need to start from the corner, fitting each piece tightly so that there are no seams.
- A regular hacksaw is suitable for cutting.
- Excess glue is removed with a rag.
When doing this type of trim, you usually only have to trim the part that fits into the window frame. On other planes it is laid out in a chaotic manner. You may even end up with an uneven end.
Leveling slopes with plasterboard for tiles
Original do-it-yourself window slopes from mirrors
To decorate window slopes with mirror materials, you can use not only tiles with a mirror surface, but also entire mirrors according to the size of the slope. This cladding creates the effect of expanded space, an endless path of images on both sides of the window. Mirrors are cut out yourself or mirror panels are ordered according to individual cutting, strictly corresponding to the dimensions of the slopes - the top and two side surfaces.
To increase space
- For gluing, liquid nails, sealant or amalgam glue are used.
- The glue is applied to the back side of the panel and to the surface of the slope, the mirror is placed at the attachment point, pressed and the glue is allowed to set.
- All work must be carried out extremely carefully and carefully, since if the fragile mirror bursts, you will have to cut it out or order a new panel; a cracked one can no longer be repaired.
- If you need to support the panel with supports, be sure to protect the outer mirror layer from scratches with a soft material.
- If necessary, the joints are covered with a decorative strip.
Ceramic cladding
When it is necessary to clad only one doorway, and the walls are lined with a different material, the door slopes are faced with ceramic tiles in a miter pattern.
The slopes are carefully leveled. All surfaces must be level. You can use a building level to check.
Surface leveling is done using different materials:
- drywall;
- plaster;
- chipboard;
- DSP;
- OSB.
Plastering slopes: preparation for laying tiles
Some tips
Craftsmen recommend that everyone who finishes and decorates slopes adhere to several rules.
- On leveled slopes, you must first lay out the parts to determine the best location. It is advisable that narrow elements are not located at the junction of adjacent surfaces. The appearance deteriorates.
- When the size of the side surface does not allow laying a whole part, cladding should begin with a trimmed piece. Moreover, the upper segment should be the same dimensions.
- If the width of the part exceeds the width of the slopes, the whole figure must be laid out along the outer edge. The free space formed between the parts and the door frame is closed with additional pieces cut to the required dimensions.
- Sometimes the part does not stay on the top surface. Its mass cannot be held by glue. To solve the problem, you can use wooden struts. They must hold it until the applied glue has completely set.
- Grouting should be done the next day. During this time the glue will dry completely.
Decorated stone slopes for an arched opening without a door
What should the slope be?
To begin with, it doesn’t hurt to figure out why slopes are needed at all . There are several reasons to install them:
- a window with neatly lined slopes looks more beautiful than without them. After installation, unaesthetic seams filled with polyurethane foam may remain. If we are talking about an apartment, then this view will greatly spoil any interior, making it unnecessary to carry out further repair work;
- polyurethane foam, which is actively used when installing plastic windows, has excellent thermal insulation characteristics, but easily absorbs moisture. If it is not protected, it will soon become damp and collapse, and the window will lose its proper thermal insulation properties. It is especially important to protect the mounting foam on the outside of the window, but you should not forget about the internal slopes;
- Correctly executed slopes increase the level of heat and sound insulation of the window structure and protect it from condensation.
Therefore, window slopes must meet the following requirements:
- do not spoil the performance qualities of plastic windows, and even better – improve them;
- have a durability no less than that of plastic windows, i.e. about 15-20 years;
- correspond to the general style of the window and interior;
- external slopes must be resistant to precipitation, temperature changes, and sunlight.
Sequence of work
You need to start laying tiles on the side surfaces. Moreover, only whole tiles should be used. Work continues until the horizontal row is above the upper end of the opening.
A flat strip is attached above the opening. The top edge of the plank should match the line that connects the bottom edges of the entire tiles above the opening line.
When the laying of solid tiles is completed, you can begin tiling near the slopes with additional pieces. Work should start from the bottom point. It is very important that the edge tiles are cut at an angle. You'll have to use a grinder.
After this, the facing of the side planes begins. During the work, the glue on the top will set well. You can remove the support bar. All that remains is to close the consolidated space remaining above the door.
Tiling door slopes in the bathroom
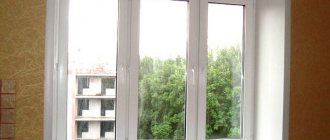
Slopes for plastic windows made of tiles
Not all companies involved in the installation of plastic windows include the installation of slopes in the list of services provided. Unreasonably high fees are sometimes demanded for the construction of slopes. If you have the appropriate equipment, materials and basic knowledge, you can do this task yourself.
The slopes protect the seams from moisture and provide thermal insulation. There are several ways to install slopes: plastering, installing plasterboard or PVC sheets.
Content:
- Installation of plaster slopes
- Installation of beacons
- Plastering the slope
- Drywall slopes
- Laying plasterboard slopes on the frame
- Frameless method of installing slopes
- Plastic slopes
- Types of plastic slopes
- Plastic sandwich panels
- Foamed PVC slopes
Installation of plaster slopes (plastering slopes)
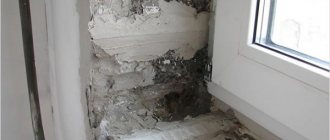
Do-it-yourself installation of plaster slopes will require a lot of time to complete. This method is usually chosen for the restoration of existing slopes during major renovations. To create slopes in the process of in-line cosmetic repairs, it is better to choose other materials. After all, when plastering and puttying is done, the wallpaper around the window opening will inevitably deteriorate. If during the dismantling of the old surface the edge of the slope has crumbled, then it is necessary to install a metal corner.
Installation of beacons
Professionals carry out plastering on beacons - wooden or metal devices. If you need to “build up” a small layer, then you can get by with marks made from a mixture with the addition of gypsum. For beginners, it is better to purchase ready-made plaster beacons. The first beacon is placed right next to the window or door block so that the layer of plaster rests on the frame by at least 50 mm. During the installation of beacons, all distances are verified with a building level or laser level. The second beacon is placed in the corners of the box. The distances between the first and second beacons should be the same along the entire perimeter of the window opening.
Plastering the slope
To plaster slopes indoors, you can use gypsum dry plaster. This solution is a quick-drying solution; it is better to mix it using a construction mixer. This type of plaster can be applied in a thicker layer than cement-sand plaster, which is important if you have to cover up deep potholes in old slopes.
Add sand to the cement mixture at the rate of ½ if you need to apply a layer of plaster more than 3 centimeters. This will allow the layer to harden faster. Before adding sand to the solution, it is better to sift it. External slopes on windows are treated with a cement mixture or facade starting putty in combination with water-repellent additives. If the house has plastic windows, then before plastering you will also need to carry out thermal insulation. Otherwise, in the cold season, the glass will sweat a lot.
The plaster is applied in several layers, each of which requires drying. First, spraying is carried out, then soil is produced in 1-2 layers. The last layer is the finishing layer. The next layer of the mixture is applied only after the previous one has completely dried. After this, the surface is puttied, thus getting rid of smaller irregularities. It is impossible to apply putty in a thick layer. If you need to apply another layer of putty, then the previous one must be primed. The very last layer is the finishing putty. As it dries, it becomes lighter. The next stage is grinding, which is performed with a grinder.
Small gaps at the junction of the putty and the window or door block are sealed with paintable sealant. The joint is trimmed by 2-3 mm with a utility knife at an angle of 450. The resulting recess is primed. Using a gun, the surface is coated with sealant so that the groove is completely filled. The sealant strip should be as smooth as possible. To do this, apply masking tape. The sealant is leveled with a small rubber spatula, after which the masking tape is removed.
The surface of the slope must be primed with a wide brush in order to prevent cracking and prepare for subsequent painting. Can be painted with solvent based enamel. But recently acrylic paint has been increasingly used. The slopes are finished in two layers. The second layer is applied after the first has completely dried. This way the base will not show through the paint layer. Completing all stages will take about a week.
Drywall slopes
One of the advantages of plasterboard slopes over plastic ones is their practicality. In case of minor damage or contamination of the top layer, plasterboard, unlike plastic, can be repaired. To restore the slope to its original aesthetic properties, it is enough to putty it again, sand it and paint it. To make slopes from plasterboard, you don’t need any special skills, but it will take a lot of time to make them. Installation takes place in several stages: creating a frame (with the frame method), laying drywall, puttying, priming, and painting. Such slopes are durable and practical. However, they have a significant disadvantage - they absorb moisture. Therefore, they are not suitable for rooms with high humidity and exterior decoration.