Andrey
7523 0 0
Andrey June 26, 2017 Specialization: facade finishing, interior finishing, construction of dachas, garages. Experience of an amateur gardener and gardener. We also have experience in repairing cars and motorcycles. Hobbies: playing the guitar and many other things that I don’t have time for :)
Is it possible to varnish wallpaper, and what kind of paint and varnish material is suitable for this purpose? Previously, I myself asked this question to specialists, but now, having personal experience and knowledge, I will answer it. I will also tell you how this procedure is performed correctly.
Varnish increases the moisture resistance of wallpaper and makes it more attractive
What you need to know about wallpaper varnishing
Is it possible to varnish trellises?
I’ll say right away that not all wallpaper can be varnished. The following types can be subjected to similar finishing:
- Paper;
- Liquid;
- Non-woven for painting. Keep in mind that they need to be painted first, otherwise the canvases will become transparent.
Sometimes people doubt whether liquid wallpaper can be varnished, and whether this will affect its attractiveness? There is a special varnish on sale for these purposes, which only improves the quality of the finish.
Liquid wallpaper coated with varnish is easy to clean - this allows you to decorate kitchen walls with it
There is no point in varnishing vinyl trellises, since they themselves are washable. However, if the canvases are painted, you can give them a beautiful glossy film.
Why varnish
Wallpaper, of course, is a finishing material in itself, so varnishing it is completely optional. However, such a solution has its pros and cons, which we will consider below.
Advantages:
- Moisture resistance. Ordinary paper photo wallpapers can be varnished, after which they become washable. Of course, this applies not only to paper trellises, but also to any other canvases exposed to moisture;
Thanks to the protective treatment, paper photo wallpaper can be used even in the bathroom
- Glossy film. After varnishing, the walls become glossy, as a result of which they look more interesting and unusual. True, if you wish, you can use a matte finish;
- Strength. After finishing, the trellises become more wear-resistant and impact-resistant.
Varnished trellises become more durable due to increased strength and wear resistance
You can use varnish for photo wallpapers only if they are really paper and do not have any protective treatment. Recently, there are washable photo wallpapers that cannot be varnished.
Flaws:
- Transparency . After varnishing, the wall can be visible through the wallpaper;
- Surface imperfections will be obvious. Glossy film highlights all the imperfections of the wall;
- Removing wallpaper will become more difficult. The process of removing varnished trellises is very labor-intensive;
- Possibility of peeling off edges. When hardening, the paint and varnish material shrinks, as a result of which the canvases can move away from the walls in areas where the edges are poorly glued.
Many beginners are interested in the forums - how and with what to remove varnished wallpaper? To do this, you can use a sander with a brush attachment. Another option is to pick up the canvas with a spatula and pour water into the space between it and the wall.
Therefore, you yourself must decide whether to varnish the wallpaper or not.
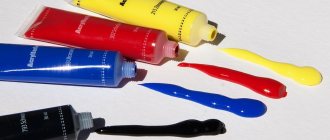
Acrylic varnish is environmentally friendly - it has virtually no odor
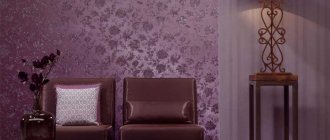
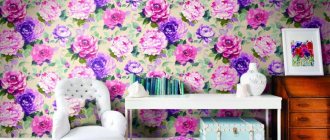
Pros and cons of washable wallpaper
Each of the above types of wallpaper has advantages and disadvantages. Non-woven - with a dense structure, which allows you to hide uneven walls. The top of this finishing material is embossed; wallpaper is also made that can be coated with water-based emulsion. Minus - dust accumulates in the relief surface.
Acrylic ones are made on a non-woven base. The surface of this wallpaper is foamed acrylic. This type is environmentally friendly and durable. Despite the embossed wallpaper pattern, they can be washed. Minus - when washing acrylic wallpaper, you cannot use a brush and detergent.
Vinyl wallpapers are divided into flat, dense and foam. Flat – made using the silk-screen printing method. Dense – quite difficult to glue on your own, since the wallpaper is quite heavy.
The most suitable ones for the kitchen are vinyl ones with a vinyl foam coating. The surface of this finishing material is difficult to damage, and the deposited grease deposits on the wallpaper can be washed off using a detergent for cleaning. The disadvantage is the complexity of installation and the possibility of condensation forming on the dense vinyl sheet.
Fiberglass - called matting. They are perfect for painting, do not deform, and are resistant to scratches and temperature changes. The matting can be washed using detergents.
How not to make a mistake and choose the right washable wallpaper for the kitchen so that it lasts for a long time? Of course, each buyer makes a choice at his own discretion, but if there are doubts about the correctness of the choice, you can consult with the seller.
Which varnish to choose
The best solution in our case is a water-based polymer varnish. Why is he the best? The fact is that this paint and varnish material has a number of positive qualities:
- Environmental friendliness . The material is odorless and harmless to health;
- Good adhesion. The coating fits well on any type of wallpaper;
- Drying speed. Under normal conditions it dries in 2-3 hours.
- Durability . The material can last for many years while maintaining its attractiveness;
- Easy to apply . The composition is easily applied with your own hands with a roller, while forming a smooth surface.
When choosing acrylic varnish, you need to consider the following points:
- Moisture resistance . This indicator may be different for different brands of the varnish in question - some of them can be washed, while others can only withstand gentle wet cleaning. In the kitchen, use a washable varnish, but in dry rooms, for example, in the living room, just a moisture-resistant coating is enough;
- Surface type . As I said above, the paint material in question can be glossy, matte or satin.
Wallpaper laid on the floor under varnish looks interesting. If they have a pattern that imitates wood, then the floor resembles parquet or laminate. Such a finish can last more than ten to fifteen years, the only thing is that nitro varnish should be used as a finishing material, and it needs to be updated every few years.
Wallpaper on the floor covered with varnish resembles parquet or laminate
Below are the costs of different types of varnish:
| Brand | Price in rubles |
| Clavel Poliver varnish for liquid wallpaper 5l | 1 350 |
| Olvia, for cork wallpaper 5l | 420 |
| DALI-DECOR 1kg | 380 |
| Optimist L 209 10kg | 1900 |
| TEX 10l | 2990 |
In the photo, moisture-resistant acrylic varnish optimist
Prices are valid for summer 2021.
Technology for working with washable wallpaper
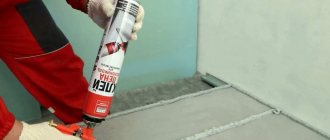
Treatment of areas where wallpaper adjoins electrical outlets.
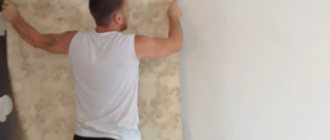
Despite the fact that washable wallpaper has a fairly dense structure, which allows it to cope well with unevenness and defects in the base, it is preferable to treat the wall with putty and then clean it. After the canvases are cut, they should be kept for several minutes, only then can you begin gluing them.
It is better to glue thick wallpaper end-to-end. Initially, the surface should be primed using liquid glue, which can be replaced with a primer with deep penetration action, after which the surface should be treated with a special composition that prevents the appearance of mold, despite the fact that glue with appropriate additives of a similar effect will be used.
After the primer has dried, you should determine the vertical according to which the first wallpaper will be glued. It is better to use the plumb line method as a guide, as it is the most convenient.
The surface must be dry before wallpapering. Before the pasting process, you have to get rid of the old wallpaper, the cracks should be filled with putty, and the surface should be leveled.
In order to determine whether the walls are dry enough for wallpapering, you should glue a small piece of polyethylene to the surface. If moisture does not appear on it overnight, then the surface is ready to begin the gluing process.
Applying glue to wallpaper.
Surface strength is also very important. This can be determined by sticking a piece of tape to the surface, after which it should be pulled back sharply. If old paint or plaster remains on its surface, then the surface must be rid of old coatings. Also make sure that there are no drafts in the room while gluing the walls.
When gluing the canvas, you must ensure that the adhesive does not get on the base of the front side of the wallpaper. After the wallpaper glue has swelled, it should be left for 10 minutes. Then it must be applied to the wall; additional glue can be applied to the wallpaper. After the wallpaper has dried, you can open the windows and doors to ventilate the room.
For some craftsmen, gluing wallpaper in hard-to-reach places becomes a particularly difficult task, for example, baseboards and the space under the ceiling, as well as in corners and near heating pipes, with no exception the area around sockets and switches.
Near the baseboard, the canvas should be fastened end-to-end between it and the wall surface. If the lower part remains, it should be cut and glued with a strip on top, which will cover the upper area of the plinth. In order to get a more aesthetic effect, the plinth should be dismantled before you begin pasting the room, and after completion of the work it can be installed in its original place.
Application technology
Finally, let's look at how to varnish wallpaper. This operation includes three main steps:
The main stages of wallpaper varnishing
The instructions for doing the work look like this:
| Illustrations | Description of actions |
Surface preparation:
| |
Padding:
| |
Varnish application:
|
This completes the work.
Wallpaper varnish: advantages, disadvantages, application
The main advantage of varnish for paper wallpaper is the surface's resistance to mechanical damage and moisture. After successfully applying varnish to paper wallpaper, you can wash it and remove dust with a damp sponge. Non-woven wallpaper can also be coated with the same composition. There is no point in treating vinyl with varnish; it can be washed and cleaned anyway, if the layer of material is thick enough. Special varnishes are produced for liquid wallpaper and cork wallpaper. Bamboo wallpaper can be coated with a composition for wooden products.
Varnish for paper wallpapers adds extra shine and makes them brighter. If you do not want to increase the intensity of the color, then before varnishing it is worth covering the wallpaper with a solution of PVA glue.
Another advantage of varnish for paper wallpaper is protection against mold and other parasites. This is especially important for rooms with increased humidity.
Conclusion
So we figured out what kind of wallpaper can be varnished, which varnish is best suited and how to apply it correctly. But before you start this procedure, watch another video in this article. If you haven’t found the answers to all your questions, ask them in the comments, and I will answer you as soon as possible.
Did you like the article? Subscribe to our Yandex.Zen channel
June 26, 2021
Wallpaper, Finishing materials, Construction Chemicals
If you want to express gratitude, add a clarification or objection, or ask the author something, add a comment or say thank you!
Varnishing instructions
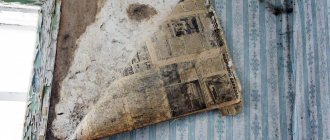
Let us first note that old wallpaper cannot be varnished. Otherwise, all the flaws on the surface will be visible. Also, before gluing, you need to carefully level the wall. For this, putty is used.
Additionally, the wall is primed for better adhesion and painted with white water-based paint. This will even out the tone of the wall (since the varnish will highlight all the stains and differences in shades). For reliable fixation, it is recommended to add PVA glue to the solution. It is necessary to carefully glue all joints.
If it is non-woven or paper wallpaper, it is primed with a PVA solution before varnishing.
Next, start applying varnish. This can be done using a roller. Acrylic varnish for walls: how to apply video?
You should not use a brush, as it leaves noticeable and unsightly streaks. Varnishing is done in two layers. In this case, you should wait until the previous one dries completely.
This will take about a day.
Vinyl wallpaper on non-woven backing
The backing of this coating is non-woven material made from cellulose fibers. It has excellent dimensional stability
and greater strength compared to paper base.
These properties determine the best adhesion of the wallpaper to the wall. Vinyl flooring provides excellent performance properties needed in the kitchen. Sometimes this type of coating is called non-woven wallpaper, which is not entirely correct. The latter, consisting of non-woven fabric, do not have a water-repellent coating and therefore are subject to exclusively dry cleaning
.
How to apply
Let's look at brief instructions for applying varnish to the surface of wallpaper. Here are the steps you have to complete if you decide to handle this task entirely with your own hands, without resorting to the help of professionals:
- Prepare the glue, glue the wallpaper according to the instructions, and then wait for it to dry. There is a whole separate section on our website about how to properly stick wallpaper on walls.
- After the glue has dried, apply a thin layer of transparent primer. After this, it’s time to apply varnish. For a high-quality result, you need to use at least 2-3 layers.
- After the varnish has dried, it can be subjected to a kind of “polishing” using a soft cloth for this purpose.
Processing technique
Application of the composition
To avoid the unpleasant consequences described above, the work must be done very carefully.
The instructions in this case are as follows:
Applying a tinting coating
- Firstly, we glue the wallpaper with high quality . To do this, we level and prime the base, use properly prepared glue and provide the treated surfaces with an optimal drying regime. If this is not done, the varnish coating will inevitably “bubble”.
- Secondly, we treat the wallpaper with a transparent primer based on PVA glue . The soil must be of high quality, otherwise yellow spots will appear.
- Next, apply the varnish in two or three layers . The first pass is carried out with a roller or a wide brush, applying the material from top to bottom.
- After the composition has dried, we treat it with clean flannel so that the wall shines . When polishing is complete, repeat application.
Polish the treated wall with a clean rag.
- Drying of varnish should take place at temperatures from 5 to 300C and humidity not higher than 80% . It is highly undesirable to speed up drying by heating surfaces with hair dryers!
After drying is complete, you can polish the varnish again. In the future, the coating requires virtually no maintenance, as it has antistatic properties. To remove heavy dirt, it is enough to treat the walls with a damp cloth, or in extreme cases, moistened with a soap solution.
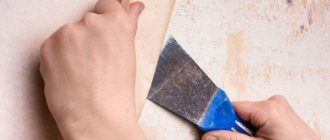
Wallpaper removal technique
One of the current problems is also the removal of varnished wallpaper.
There are two ways to deal with this situation:
- Firstly, the varnish coating can be removed using sandpaper. To speed up the work, we use a grinder with a brush attachment: this tool doesn’t care whether there was varnish there or not!
Note! The wall will then have to be replastered.
- Secondly, you can apply a special softening compound to the finish (the most popular brand is Quelyd Dissoucol) and roll the coating with a needle roller. Penetrating into the thickness of the material, the active components will partially dissolve the varnish, and removing the finish will not be difficult.
A nozzle that makes it easy to remove any coatings