Carrying out independent repairs and finishing of an apartment is fraught with not only the complexity of the work, but also the lack of certain skills on the part of the performer. Many owners are interested in how to glue meter-long wallpaper so that the pattern fits correctly and there are no visible joints left on the wall. The process of gluing wide wallpaper needs to be considered in more detail.
How to hang wallpaper alone (click to enlarge)
Advantages and disadvantages
In fact, meter-long wallpapers are not 100 cm wide. There are models larger and smaller than this value. Before purchasing, it is important to carefully evaluate the advantages and disadvantages of the material. The main disadvantage is that such canvases are difficult to glue alone. Also, on average, the consumption is higher, and docking difficulties arise. If the walls are uneven, the wallpaper may peel quite badly. However, for those apartments and houses where surface treatment has been carried out, this is the best option for many reasons.
- The quality of the pasting improves. The joints are less noticeable and the overall appearance becomes more attractive.
- Each room requires less preparation time. It’s easier to cut and you’ll need fewer blades.
- Even meter-long non-woven wallpaper is cheaper than its half-meter counterparts.
- Meter versions are made only of non-woven or vinyl, they can be removed and reattached, unlike paper ones.
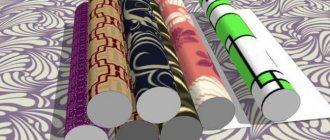
Today, the choice of wallpaper for the living room, kitchen or bedroom is practically unlimited. You can easily find a huge number of options in stores.
Types of meter wallpaper and what is better to choose
Meter wallpaper is most often produced in vinyl or on a non-woven base. You can also find more expensive options made of fabric and bamboo. Since it is more difficult to glue such wallpaper due to its weight after applying the glue, it is clear here that there is no meter-long paper-based wallpaper. Naturally, there is also silk-screen printing.
If you choose, the best option would be vinyl wallpaper. Their relief will help hide the imperfections of the walls and the joints between the canvases will be less visible. If you want to hang wallpaper based on silk-screen printing, then you will need to carefully prepare and level your walls. This wallpaper is thinner and imperfections in the wall will come out.
Also, meter-long wallpapers can be duplex and simplex - that is, two-layer and single-layer, but you don’t need to know this - these are the manufacturer’s problems. We advise you to read about the right choice of wallpaper according to characteristics and rooms.
How to glue vinyl wallpaper on non-woven backing
Tools and materials
Hanging meter-long wallpaper requires careful preparation. First of all, gather the necessary tools. It will be difficult to glue wide wallpaper without them.
- pencil;
- stationery knife;
- roulette;
- plumb line;
- roller;
- brushes wide and narrow;
- clean rags.
Pencil Utility knife Tape measure Plumb Roller Brush Wide brush Clean cloths
The width of the wallpaper is impressive; make room for work in advance so that it is convenient to cut the canvas.
Working in difficult areas
Usually people have difficulty with those areas where it is not very convenient to stick wallpaper - these are corners, areas near radiators, above windows and doorways.
In these areas it is recommended to glue wallpaper cut into small pieces. You need to use slow-drying glue, which will allow you to correct shortcomings and remove errors.
Angles
Since gluing corners with wallpaper measuring a meter wide is not very convenient, most often all attempts come down to distortions, the formation of folds and other defects.
Therefore, to get a high-quality result, you should use the following tips:
- In the corner area, the sheet must be glued in such a way that most of the sheet is on one wall and extends 5 cm onto the adjacent one.
- For the allowance, you need to find the narrowest place, step back 1 cm from the edge of the wallpaper, and apply markings to draw a vertical line.
- The next canvas is glued overlapping this marking.
- Seams can be trimmed using a spatula, ruler, or stationery knife.
Batteries
The area around the battery needs to be wallpapered at the very last moment, while showing maximum accuracy, ingenuity and resourcefulness:
- It is necessary to cut a sheet of wallpaper to fit the niche for the radiators.
- In the place where the battery mount will be located, you need to make a vertical cut.
- The sheet is covered with glue and placed behind the pipes. You need to carefully straighten the folds that appear on the sheet and press it tightly against the wall.
- It will be inconvenient to use a roller in such a place, so a rag will come in handy.
- The excess part is overlapped onto the edge of the wallpaper and pressed tightly with a spatula. The excess is trimmed off.
If it is not possible to place the wallpaper near the battery in this way, then you can cut the canvas into smaller pieces and fill the hard-to-reach area with them.
Sockets and switches
Since all switches and sockets were removed before wallpapering, it is necessary to stick entire sheets onto the wall. The contours of existing holes will appear through them.
Using a stationery knife, you need to make a cross-shaped cut, and then tuck the remaining paper inside.
Advice! If the holes for the sockets are round, then you need to make a star-shaped cut.
Openings
When working with door and window openings, it is necessary to trim the wallpaper. They must first be cut to the size of the opening and do not forget to combine the pattern.
How to calculate footage
It is important to correctly calculate the number of rolls so as not to spend extra money. The width of standard rolls is a meter, but before purchasing, check the characteristics of the selected option. It is important for expense items to take into account doors and windows.
Using a tape measure, measure the room and the area of the walls; to do this, take the wall length, height and width. From it, subtract the area of windows, glazing, and doors. Then count the required number of rolls, usually 10 meters in one. Leave a small supply of wallpaper.
It’s easy to find a calculation calculator on the Internet for pasting meter-long wallpaper.
Detailed instructions: how to glue meter-long non-woven wallpaper
The process of gluing meter-wide non-woven wallpaper includes several main stages. Let's look at each of them in more detail and find out how to glue meter-long wallpaper:
- Preliminary preparation of the wall. We remove the old wallpaper and remove any remaining unevenness in the form of paper and other residues. The advantage is the fact that wallpaper with a non-woven base is not afraid of minor surface irregularities, chips and scratches on the walls and partitions of the room. In addition, if the prepared working surface is slightly rough, this will be rather a plus before starting work.
- Then you need to close all windows, vents and other sources of drafts. It is recommended to close even technical ventilation openings. Moreover, opening vents and windows is allowed only after the glue has completely dried, which can take from 24 to 72 hours. It is also recommended to turn off the power for a while, dismantle the sockets, remove various fasteners from the walls: nails, screws, etc.
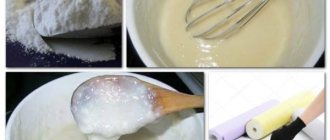
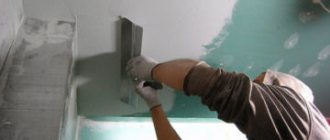
- Preparation of adhesive solution and wall surfaces. Be especially careful when purchasing adhesive as it must match the type of wallpaper. The process of preparing the solution itself is not complicated and even a non-professional can easily do it with their own hands. Pour water into a pre-prepared container and gradually add dry glue, while stirring with a small stick or other available means. Read the glue instructions: it says how long it will take for the solution to harden sufficiently and be ready to start work. As a rule, you will not have to wait more than 10-20 minutes. Once the glue is ready, you need to mark the wall. Considering that this is non-woven, and, moreover, meter-long wallpaper, it is necessary to take into account that they will need to be glued at the joint - this is exactly what will be correct. As reviews and expert advice say, it is better to start gluing from the window, moving deeper into the room. As for the first sheet, align it vertically with a plumb line, and draw a line with a regular pencil using a long meter ruler.
- The next stage is cutting wallpaper for gluing. Leave 10 cm at the top and bottom as a margin. After completing the work and completely drying, you can remove excess (left in reserve) sections of wallpaper using a previously prepared sharp knife.
- Let's start gluing. Having successfully completed all the previous instructions, you need to move on to the next stage of work - directly to gluing. Before applying the glue itself, you need to mix it again. After this, we proceed to applying the adhesive layer. This is done using a wide wallpaper paste brush. As you know, non-woven wallpaper is not coated with a layer of glue. It is enough just to apply it to the surface of the wall. After applying a layer of adhesive solution, carefully smooth the wallpaper. This stage must be performed efficiently and conscientiously, taking into account that you are gluing wide meter-long wallpaper. If necessary, straighten the wallpaper, level it and get rid of air bubbles using a special plastic spatula for leveling wallpaper. Smoothing can also be done using a plastic comb or roller, downwards and away from the middle of the wallpaper sheet. Remove excess glue with a small sponge or rag.
- We continue gluing the remaining cut sheets. This needs to be done at the joint. If necessary, you need to accurately select the pattern so that it matches the adjacent sheet of wallpaper.
Due to the larger width of the roll, gluing work is done faster
Advice from the experts! Since meter-long wallpaper is much wider than standard wallpaper, it is recommended that two people hang it together. Therefore, before starting work, find yourself an assistant - it will be much easier to work with him.
Surface preparation
Before gluing it is necessary to treat the walls.
- Removing screws and nails;
- Dismantling the old coating;
- stripping;
- Leveling with putty;
- Applying primer.
It is best to use a white topcoat; some materials are translucent.
Use a tape measure to mark. This is quite easy when the walls are smooth. It is important that the joints are not visible. It is better to immediately putty and prime the surface so that there are no problems in the future. Otherwise, you will need to measure everything several times before you start applying glue.
Pasting in problem areas
There are places where it is quite difficult to glue wallpaper. This applies not only to the corners of the room, but also to the space behind the radiator and in places above the openings (how to glue wallpaper in the corners of a room?). Even ceilings can be a problem area if you try to glue alone and/or use strips that are too narrow.
Advice
To glue wallpaper in hard-to-reach places, you will have to cut the sheet into several parts. It is best to use the same strip for this - this way there will be no errors with the dimensions.
Another problem with pasting problem areas is the mismatch of the print (how to match the wallpaper to the pattern?). To achieve an exact match, you will have to tinker a lot and use all your design abilities. In most cases, nothing works the first time.
To facilitate the procedure, you should resort to using non-woven wallpaper. They can be moved on the wall without problems within ten minutes after gluing. For rooms with a large number of hard-to-reach places, this will come in handy. But in this case, when purchasing glue, you need to make sure that it does not contain substances that accelerate drying .
Preparing vinyl wallpaper for hanging
Before carrying out the main work, rolled materials are cut into strips, the length of which corresponds to the height of the wall plus a margin of 5–10 centimeters. For greater accuracy, the height of the room is checked in different places. If the sizes match, several strips are cut, the total width of which allows you to cover the entire plane of the wall.
If the height of the ceiling in the room is not the same, each subsequent strip is cut off after gluing the previous one. Or, before cutting, carefully measure each section between the marking lines.
When preparing strips with a pattern, make sure that the pattern matches. To do this, you need to combine adjacent canvases so that the image elements are joined in the correct order. The finished strips are stacked on top of each other in the required sequence.
USEFUL INFORMATION: How to calculate the required amount of wallpaper per room: a simple formula