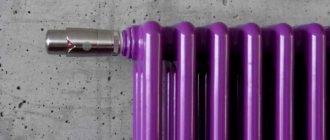
Modern finishing technologies offer dozens of options for upgrading the floor - practical and durable, and design ideas for a stylish floor cause sincere delight. However, one of the classic methods, painting a wooden floor, does not lose its relevance, making the color of the flooring match the interior or highlight it.
Types of floor paint: enamel, varnish, rubber
In apartments and private houses they use varnish coatings to emphasize the beauty of the board with its natural pattern, and different types of paints - depending on the goals and objectives.
The main thing is to choose the right type of paint or varnish so that the coating matches the wood according to technical parameters, performing its functions perfectly. We tell you in detail which paint to choose and how to paint the floor with a high-quality result.
Peculiarities
Painting wooden floors is used almost everywhere today.
This is due to several advantages of such a system:
- The paint qualitatively protects the wood from damage. The top layer absorbs almost all physical loads, and this, in turn, allows you to extend the service life of the material.
- Coated wood does not absorb moisture, as a thin film of paint prevents this. This also prevents the board from expanding or contracting greatly, and also prevents the development of rot and fungus in the organic structure.
- Using paint, you can give wood any color, matching the floor to the specific style of the room. This expands the use of wood in construction and makes it very popular.
The paints themselves for wooden surfaces differ in several features:
- Drying time. High-quality products dry fairly quickly without releasing any strong odors. But there are solutions that harden only after several days, which is not always practical in a modern home.
- Environmentally friendly. Almost all paints consist of harmful components that evaporate into the air during the drying period. Only water-based formulations have optimal performance.
- Moisture resistance. Paints have different structures that can transmit or repel moisture.
Features of floor coloring.
Page 1 of 2Next ⇒
OUTLINE PLAN.
PAINTING OF INTERNAL SURFACES WITH NON-AQUEOUS COMPOSITIONS
General information
Surfaces are painted with non-aqueous compounds - oil, varnish, enamel - for protective and decorative purposes. When the main purpose of the coating is the protective one, compositions that form glossy films are used. When glossy films are formed, the pigments are immersed in the thickness of the paint coating, and on top of the pigments there is a continuous layer of binder that specularly reflects light.
When decoratively painting surfaces inside a building, matte coatings are used, which soften the color tones of the paint and make defects in plaster, concrete, and wood less noticeable.
Non-aqueous compositions are used to decorate rooms that are subject to increased hygienic requirements and in which the paint must be mechanically durable (kitchens, public canteens, laundries, operating rooms, shops, corridors of public institutions). They are applied only to dry surfaces in a thin, even layer two or three times, and each layer must be completely dry before applying the next one.
In a thick layer under the top film, a liquid layer remains and roughness, wrinkles and cracks form on the painted surface.
To increase hiding power, solvents (for example, turpentine) are added to non-aqueous compositions.
The number and sequence of operations for preparing, processing and painting internal surfaces with non-aqueous compositions depend on the type of surface, type of painting composition and category of painting work.
Oil formulations
Oil paints (GOST 1503-71) are widely used in capital construction and repair work. As a binder for oil paints, natural, compacted or modified
alkyd resins drying oil. Oil paint coatings allow you to create not only a decorative surface, but also protect structures (for example, carpentry, metal structures, pipelines) from moisture and corrosion.
Oil paints are supplied to construction sites thickly grated or ready for use. Thickly rubbed paints are diluted with drying oil or emulsion thinner to paint viscosity in centralized paint preparation workshops or directly at construction sites.
objects.
As a primer for oil paint, use oil color (on natural drying oil), diluted with drying oil to the required viscosity, or drying oil-oxol, which is a substitute for natural drying oil and consists of oxypolymerized drying vegetable oil followed by the addition of a solvent.
Natural drying oil consists almost entirely of valuable edible vegetable oil, so its production is limited. As a substitute for natural drying oil, artificial glyphthalic drying oil is also used, which is a product of the interaction of semi-drying vegetable oil, glycerin and phthalic anhydride with the addition of a drier.
For interior work, as a primer for oil paints, it is allowed to use an oil color, diluted with a paint-emulsion thinner to a certain viscosity.
To protect building structures and elements from moisture and corrosion, conventional oil-based or Mayo-alkyd paints are used, which create a dense glossy surface. The walls are finished with matte colors, which are prepared either centrally or in an on-site workshop according to standards set by the architect from thickly ground ordinary paints with the addition of white spirit and laundry soap. These additives somewhat reduce the strength of the paint film, so it cannot be washed or wiped with damp cloths. Walls painted with matte colors are cleaned with dry brushes or vacuum cleaners.
Matte colors are prepared in accordance with samples of approved colors, which requires constant adjustment of the recipe depending on the color and shade of the supplied products. Deviations from the approved colors are agreed upon with the architect.
To ensure the durability of the matte coating, thickly rubbed paints are used, rubbed on drying oil containing at least 70% oil. The materials used for the manufacture of matte colors are subjected to laboratory quality control.
In table 10 shows the compositions of matte oil colors. The preparation of matte colors begins with the preparation of a soap solution: the soap is cut into shavings, dissolved in hot water (temperature 70-80°C) in the amount specified in the recipe.
The resulting composition is poured into the mixer, and poured into it at
stirring white spirit in an amount that corresponds to the lower limit specified in the recipe. Then add the required amount of thickly grated paints and mix it all until a homogeneous mass is obtained. The finished color is adjusted to the specified viscosity by adding white spirit. Note. For all recipes - laundry soap 40% - 0.5; water - 5; white spirit - 10-25%. The content of white spirit in the color depends on the initial viscosity of the thickly rubbed paints and on the method (manual or mechanized) of applying the finished color.
The matte color is stored in hermetically sealed containers with a capacity of 50 kg in closed warehouses at a temperature not lower than 5-5°C in compliance with the requirements for flammable materials. Each batch of matte color and primer is supplied with a passport and coloring.
Matte colors must have the following physical and mechanical properties:
The degree of dullness of the coating, expressed by the indicator
gloss according to the photoelectric gloss meter FB-2.... ABOUT
Durability of the coating, expressed by the degree of washable™,
g/m2 (no more)……………………………………………………………… 1
Paint viscosity according to VZ-4 for application using:
roller……………………………………………………….. 110—140
UBRKH-1M ………………………………………………………. 40—60
Degree of grinding, microns, for application using:
roller ………………………………………………………………………………… 30
UBRKH-1M……………………………………………………………. 10
Drying time, h:
from dust………………………………………………………………………………………. 6
complete ……………………………………………………………………………….. 24
Surface haze cannot be measured numerically. To determine the degree of matte or gloss, use a gloss meter. The operating principle of the device is as follows. A ray of light passes through the lens of the device and falls on the painted surface, is reflected from it and its deviation is displayed on the scale of the device. The amount of beam deflection characterizes the reflectivity of the surface. The more reflected rays enter the measuring device (hole), the smoother and glossier the painted surface, and vice versa.
Before painting with a matte color, the surface is cleaned of dust and dirt, and then, as a rule, it is covered with oxol linseed oil manually using brushes or rollers to create a durable film. A small amount of pigment (5-10%) is added to the drying oil to match the color of the oil color, so that during the drying process, gaps on the surface are more visible and can be immediately eliminated. In dry sunny weather, drying oil-oxol dries in no less than 24 hours. When applying a paint composition or putty to a wet film, bubbles form and the coating peels off. In this case, the defective areas are partially corrected by drying them, filling them with putty, sanding them with pumice or glass sandpaper, and then drying them again.
Then a continuous putty is applied to level the surface using spatulas with replaceable working strips made of plastic or rubber trowels. The best surface quality for oil painting is obtained by “scraping” putty, in which the pores are filled with putty without forming a putty layer.
Finally, the surface is primed with thickly grated oil paint (10-15%) diluted in drying oil-oxol (85-90%), tinted to match the matte color. The primer is applied with a paint sprayer or a paint roller with a foam rubber or fur cover in an even layer without drips or gaps. For synthetic putties, surface drying is not required.
Oil paints are applied to small, even areas of walls using hand brushes or fur rollers. Window sashes and metal lattice structures are painted with hand brushes, large surfaces are painted with paint sprayers.
When using paint sprayers, the productivity is 400-500 m2/h. The disadvantage of using paint sprayers is the formation of fog in the painter's work area. To reduce fogging, the spray gun head is equipped with a protective air jacket. When painting, the spray gun head is held at a distance of 20-30 cm from the surface to be painted, and the paint stream is directed perpendicular to it. Painting is usually done in vertical or horizontal stripes. To obtain a uniformly painted surface, each subsequent strip should overlap the previous one by 3-4 cm. The air pressure at the paint sprayer should not exceed 0.4 MPa, since with increasing pressure, fogging increases, and, consequently, paint consumption. In order to reduce fogging, it is also advisable to use paint of high viscosity, which is applied with non-compressor paint sprayers or pneumatic ones equipped with an electric heating element, in which the paint composition and air
heat up to 80°C.
Oil paints are usually applied in two coats. The interval between applying the first and second layers is 1-2 days, which is required for the first layer to dry completely. For rooms up to 3 m in height, paint is applied with a brush or a paint roller while standing on the floor, and when applied with a paint sprayer, one of the painters works on a stepladder or scaffolding, and the other on the floor.
The most common defects on surfaces painted with oil paint, the causes of their occurrence and methods of elimination:
The stains are dark and rusty.
Germination of various tar and oil stains that have not been removed from the surface. Dry the surface of the plaster or concrete, wash with 5% hydrochloric acid and cover with two or three layers of shellac varnish, grind the weak base. Remove surface stains of resins and oils by scraping
and rinsing with alkaline water.
The stains are of various colors and do not dry out.
Painting over fresh plaster, using alkaline paste in the putty instead of animal glue. Scrape off the paint, neutralize the alkali with a weak 5% solution of hydrochloric acid, rinse with clean water, dry, prepare and paint with benign materials.
Paint blistering and blistering.
The result of painting on a wet surface.
Scrape off the peeling paint, dry it, and prepare the surface for painting again. Peeling of the top layer when painting over a previously painted surface.
The result of painting on a contaminated surface. Clean the surface with pumice, wash with soap and then clean water and paint again.
Networks of cracks on a painted surface.
The trimming was done incorrectly, the painting was done on an insufficiently dry layer of soil. Clean the surface with pumice and sandpaper, dry it, putty and paint again.
Rottenness.
The surface retained its tensile strength; the paint oil was absorbed into the poorly primed surface. Clean the surface with fine sandpaper and
paint.
Low hiding power.
The paint is not opaque enough due to the use of glaze pigment; the paint is too liquid; The primer used is not the same color as the paint.
Color additionally.
The paint film does not dry for a long time.
A drying-delaying pigment has been applied; the drying oil contained impurities of mineral oils. Blend with adding
desiccant.
Sebaceous surface
Poor quality drying oil. Rinse with cold, slightly acidified water using a clean brush or sponge. As a last resort, repaint using good quality material.
Brush marks.
Fluting or facing has not been completed; too thick paint is applied and there is insufficient fluting Clean with pumice and sandpaper and
paint again.
Drips.
Liquid paint, insufficient shading; the brush is cut on sharp edges
ribs Clean with pumice and sandpaper and paint again.
Joints at the joints of the grips.
Consecutive painting of several large areas with quick-drying paint by one painter. Paint 2-3 grips at the same time using the brush-to-brush method.
"Crocodile skin"
Painting with quick-drying paint when the preparation is not dry enough. Clean with pumice and sandpaper, dry, putty and paint again.
Gaps, distortions, rough paint texture
Careless work Repaint
Varnishes and enamels
Varnishes are film-forming solutions of synthetic (glyphthalic, pentaphthalic, perchlorovinyl) or natural (rosin, amber, bitumen) resins with or without various additives in organic volatile solvents (for example, turpentine, white spirit or solvent).
Oil-resin and oil-free synthetic varnishes are used in painting work.
Oil-resin varnishes (GOST 5470-75) are produced in two grades: PF-283 and GF-166. Varnishes are intended for coating on oil paints, wood and metal surfaces indoors. Varnish GF-166 can be used for painting external surfaces. Varnishes are applied with a brush, spray, and, if necessary, to obtain a thin layer of coating - using a gauze swab. The varnish consumption is on average 180-200 g per 1 m2 of coating, and the drying time at a temperature of 18-20°C is 24-48 hours.
Oil-free synthetic varnishes are made from synthetic resins. These include pentaphthalic, alkyd-styrene and perchlorovinyl varnishes.
Pentaphthalic varnish PF-170 (light brown) is used for interior and exterior coatings on oil paint, wood and metal. When mixed with oil-resin varnishes of grades 4, 5 and 6 in the corresponding tones in a mass ratio of 60:40 (oil-resin: pentaphthalic), it forms a durable and wear-resistant coating for self-leveling polyvinyl acetate and oil-painted floors. This varnish dries within 2-3 days, and its consumption is 200 g per 1 m2 of surface. The varnish is applied with a roller or spray gun (Fig. 88).
Alkyd washing varnish MS-25
(light brown) is used to obtain durable internal anti-corrosion coatings for structures made of bronze, copper and aluminum, as well as for weather-resistant coatings on wood. At a temperature of 18-20°C this varnish dries within
8 hours
Perchlorovinyl varnishes
are solutions of perchlorovinyl resin or a copolymer of perchlorovinyl and vinylidene chloride resins in organic solvents. These include varnishes KhSL (GOST 7313-81E) and KhS-76D. These varnishes are colorless and dry at a temperature of 18–23°C for 2 hours.
Khsl varnishes are used to varnish oil-based coatings in order to improve their anti-corrosion properties, and hsl-76d varnishes protect building structures from exposure to aggressive environments. Due to toxicity, these varnishes are used in rooms where people do not stay for a long time. The varnish consumption is about 350 g/m2.
Acid-curing nitrovarnishes NTs-228 and NTs-243 are matte. They are used to decorate built-in furniture. Coatings made from these varnishes differ in comparison with other brands of nitro varnishes in improved physical and mechanical characteristics, increased light resistance and resistance to weak chemicals and solvents.
Enamels are a suspension of pigment in varnish. Alkyd, pentaphthalic, glyphthalic, nitroglyphthalic tars and nitro enamels are used in construction. Enamel coatings are durable, resistant to environmental influences, have a good appearance, and also have the ability to dry at room temperature in no more than 1-2 seconds. Alkyd enamels
They are a suspension of pigments in glyphthalic, pentaphthalic, alkyd styrene and other alkyd varnishes. If it is necessary to accelerate the hardening (films), up to 5% white spirit and drier are added to alkyd enamels.
Pentaphthalic compounds are widely used in construction.
and
glyphthalic
enamels mixed with oil paints and bitumen varnishes. They are also compatible with many other enamels made on the basis of polycondensation resins.
Pentaphthalic enamels PF-115 and PF-1105 (GOST 6465-76) are used for critical external and internal painting of metal, wood and plaster. For priming wood and plaster, use a composition of 0.8 parts pentaphthalic enamel and solvent, 1 part natural drying oil. Enamels with a viscosity of 80-100 s according to the VZ-4 viscometer are applied with a brush, 40-50 s - with a paint sprayer. The enamel is diluted to working viscosity with white spirit or its mixture with turpentine in a ratio of 9:1. The duration of drying the enamel at a temperature of 18-23°C is no more than 24 hours.
Nitroglyphthalic enamels NTs-132
used for painting metal, wood and plaster. The enamel is applied with a brush or roller in two layers (Fig. 89). Due to their toxicity, spray application is not recommended.
Nitroenamel NTs-258
^acid-curing (various colors) is intended for painting built-in furniture, fiberboard and particle boards, previously puttied and sanded.
Enamel is supplied with a viscosity of 60-135 s, which is checked with a VZ-4 viscometer at a temperature of 20°C. To a working viscosity of 22-28 s, the enamel is diluted with solvent No. 646. It is applied with a paint sprayer in three layers. The layer thickness is 80-150 microns. Duration of drying at a temperature of 18-22°C is no more than an hour.
rials are allowed to persons who have previously studied the instructions for their use and safety regulations.
Features of floor coloring.
Plank floors and chipboard floors are painted in several layers with the same oil paints that are used for painting walls. Floors are painted with brushes, rollers (Fig. 90), a pneumatic hand-held paint sprayer (Fig. 91) and a special device.
The device for painting floors consists of a filling tank with a capacity of 1.6 liters; a feeder made of a perforated tube with a diameter of 14 mm with holes with a diameter of 2, 3, 4 and 5 mm; metal frame with two rotating foam rollers (feeding and working); a wooden handle with a diameter of 35 and a length of 1300 mm and a metal lever connected to a conical plug in the bottom of the tank. This lever controls the flow of paint to the roller.
The paint flows from the tank (with the valve open) into a perforated tube, and finally onto the roller feed cover. The rotation of the working roller (lower) is transmitted to the feed roller (upper), as a result of which the lower one is covered with paint evenly along its entire length. Good painting is obtained by rolling the roller over the surface to be painted twice. A worker paints 350 m2 of floor per day.
Parquet floors are usually coated with varnishes (for example, GF-257, PF-231 and UR-19).
Varnish GF-257
hardens when interacting with acid, so it is supplied in two containers: one contains varnish, the other contains an acid hardener. Before applying varnish, the floors are scraped, sanded and cleaned of dust. Then the varnish is thoroughly mixed with an acid hardener in a glass or enamel container (1 part hardener per 8 parts varnish by weight). The varnish is prepared in an amount that will be used within 24 hours, otherwise it will thicken and be difficult to apply to the surface.
The varnish is applied in a thin layer to a dry, clean floor, starting from the end of the room away from the entrance towards the door. Rub it into the pores of the wood with a brush or swab. All drops and sagging are immediately shaded.
After the varnish layer has hardened (in normal temperature conditions after 24 hours) to remove individual wood fibers that rise after the first coating, the floor is sanded with fine emery cloth, which improves its appearance and extends its service life. Then remove the dust and apply a second layer of varnish with a soft brush, and after 24 hours a third. The floor is put into operation 48 hours after completion of work. During work, the room is ventilated, and in the summer, the windows are opened.
Old previously rubbed parquet is scraped and sanded to completely remove traces of polishing mastic and paint. The floor is then varnished just like new.
Varnish PF-231
supplied to construction sites in ready-to-use form.
It can be applied to the coating with a paint sprayer, which significantly increases labor productivity. The thickened varnish is diluted with turpentine or white spirit. The requirements for the condition of the floor surface are the same as when applying GF-257 varnish. Each layer is dried for 10 hours. At least 72 hours must pass from the moment the last layer is applied until the floors are put into operation. The PF-231 varnish, when dried, gives a softer film. Urethane varnish UR-19
produces a strong and long-lasting varnish film. Requirements for surface preparation (floors are the same as for coating with other varnishes. It is supplied in two containers. At the work site, the main component (KT prepolymer) is mixed with a catalyst (100 parts of the main component and 20 parts of catalyst by weight) After thorough mixing with a brush apply the varnish in two layers. The bottom component urethane varnishes are varnishes UR-293 and UR-294. They are applied like ordinary one-component varnishes. Urethane varnishes harden as a result of contact with moist air. The best curing conditions are at a relative humidity of 70-75 % In dry weather or in a well-heated room, urethane varnishes harden more slowly.
1Next ⇒
Recommended pages:
Use the site search:
Why do you need to paint a wooden floor in your country house?
Wood is a soft natural material that can quickly deteriorate under the influence of external factors without additional protection. Therefore, in any case, the main task of the coating applied to a wooden floor is to protect it from moisture, rotting, and the spread of mold and mildew indoors. However, this is not enough. The interior of the house in general and the floor in particular should be beautiful, lift your spirits, and make you return to the dacha with joy and impatience.
Gone are the days when the dacha was used exclusively as an additional warehouse for unnecessary things in the city. Today, the interiors of country cottages are an independent area of design, and the choice of paint for a wooden floor must be approached very responsibly.
Accordingly, there are a number of main reasons for painting a wooden floor in a house:
- painted floors practically do not absorb moisture and do not dry out;
- paint protects wood from mold and mildew, extends its service life;
- Painted surfaces are much easier to care for and are easy to clean;
- the paint protects the surface from temperature fluctuations;
- Using varnish or paint you can create a very beautiful, original interior.
Painting the floor is only part of the room design Source stroi-remontirui.ru
What paint to choose for a wooden floor and how to paint it correctly?
Paint for a wooden floor is designed to protect it from moisture, fungus, external factors and create a complete picture of the interior of the room. There are several types of paint that are suitable for painting wood floors. Painting wooden floor surfaces must be carried out according to a certain algorithm.
Benefits of painting wood floors
The advantages of painting a wooden floor include the following:
- High-quality protection of wood from various damages. A layer of paint takes on almost all physical loads.
- Obtaining a magnificent decorative effect. An extensive color palette allows you to choose any desired shade that will suit your interior.
- Possibility to renew the surface. This can be done quickly and without much difficulty by simply applying a new layer of bright paint over the old one.
- Moisture protection. A layer of paint reliably protects the wood from liquid, so it does not change its structure, does not shrink or expand. Coloring prevents the development of fungus and rot.
- Emphasizing the wood structure. If you want to preserve the structure of the wood and emphasize it with a paint coating, you just need to choose a certain type of paint.
- Increasing the service life of the material. The high level of protection that the paint layer provides on the floor extends the life of the wood floor.
Basic requirements for paint
When choosing paint for wooden surfaces and calculating the required amount, you should consider the following criteria:
- Type of wood. Different types of wood have different degrees of moisture absorption, so paint consumption may vary.
- Terms of Use. Depending on how the room with a wooden floor is used and what climatic factors take place, a material with the necessary resistance indicators is selected. The level of humidity and the likelihood of exposure to ultraviolet rays must be taken into account.
- State of the previous layer. If paint has already been applied to the floor, it is necessary to select a coating that is compatible with the previous one.
- The need for pre-treatment of wood. Before painting a wooden floor, you should familiarize yourself with the basic characteristics of the material and find out whether other solutions or coatings are required beforehand.
Paint intended for application to wooden floors must have the following qualities:
- a composition that is harmless to health and should not have a negative effect on the human body;
- wear resistance to various mechanical influences, as well as to wet cleaning and chemical cleaning agents;
- protection of wood from rot and the spread of mold and other pathogenic microorganisms;
- resistance to ultraviolet rays, preservation of original color;
- resistance to temperature changes;
- lack of ability to support combustion.
Main types of paints for wooden floors
The market for building materials and finishing products offers a large number of paints and varnishes for treating wooden surfaces.
Acrylic paint
These paints are made from acrylic resin, dyes and water. The main feature of this material is the absence of odor and quick drying. That is why acrylic paints are chosen by those who want to paint the floor, but do not want to move somewhere while painting work is taking place.
The advantages of acrylic paints for wooden floors include the following:
- absence of a sharp unpleasant odor;
- heat resistance;
- high drying speed;
- fire resistance;
- high level of adhesion to the painted surface;
- good tolerance of chemical elements that are part of detergents;
- increased resistance to low temperatures;
- a large selection of textures and colors: you can choose matte or glossy compositions, various shades that will fit into any interior;
- color retention for several years;
- the material does not require special care and has a long service life (on average 10 years).
The disadvantages of this material include the following:
- cheap acrylic paints need to be applied in at least three layers, which increases consumption;
- the material is not stored at subzero temperatures;
- quality products are quite expensive.
Popular manufacturers of acrylic paints are:
Rubber paints
This product consists of acrylic, latex, pigments, coalescent, antifreeze. This composition ensures the formation of a protective film on the treated surface, imparting superelastic properties to the coating, resistance to low temperatures and aggressive substances.
The advantages of rubber paints include the following:
- waterproof;
- high drying speed;
- high elasticity rates;
- resistance to daily temperature changes;
- good adhesion to any materials made of wood (boards, plywood, timber);
- no odor;
- the ability to apply paint to a cracked surface without first applying putty;
- economical consumption with high density of the applied layer.
The disadvantages include the high cost of such materials. Also, in some way, a negative characteristic of rubber paints is that it does not create a shiny surface: after application, a matte layer is formed.
Rubber paints that can be used to coat wooden surfaces are produced by the following manufacturers:
Alkyd paint
Alkyd paints for wood coatings have a composition that is similar to that of acrylic paints, with the exception of one component - this product does not contain resin. When the floor is treated with alkyd paint, it acquires a glossy shine.
This material has the following advantages:
- obtaining a perfectly smooth, shiny coating on the floor surface;
- absence of harmful toxic substances in the composition;
- reliable protection against fungus and mold;
- quick drying;
- durability of the coating, long-term preservation of the original color.
The disadvantages of alkyd paint include an unpleasant odor, easy flammability, and a low level of resistance to chemicals.
High-quality alkyd paints are offered by the following manufacturers:
Oil paints
Wooden floors can also be treated with oil paints. This coloring composition has several advantages:
- high resistance to low and high temperatures - this is why the material can be used for painting floors both in unheated houses and apartments;
- high resistance to mechanical damage;
- formation of a smooth surface on a treated wooden floor;
- more affordable price compared to other types of dyes.
The disadvantages of oil paints are:
- long drying time;
- the possibility of cracks and peeling areas if the paint was applied incorrectly;
- the possibility of changing color some time after processing the wood;
- oil paint does not penetrate into the deep layers of wood, which is why we cannot talk about its sufficient protective properties.
Oil paints are produced by such manufacturers as:
Polyurethane paint
The material has the following positive characteristics:
- durability of the coating;
- not too pronounced odor when painting the floor;
- resistance to external factors;
- wear resistance;
- high protective qualities.
As for the disadvantages of polyurethane-based paints, these include the high toxicity of the composition and the need to first remove the old coating from the floor.
It is not recommended to paint the floor with polyurethane paint in places where people constantly live. This type of coloring material is more suitable for rooms with high traffic volumes.
Manufacturers of polyurethane paints:
Wood floor painting technology
First you need to decide on the type of paint and its color, prepare the necessary tools.
The required amount of paint can be calculated as follows: per 1 sq. m of wooden floor on average takes:
- acrylic paint - about 125-150 g;
- oil paint – 100-160 g;
- alkyd enamel – 130-180 g.
For coloring you will need:
- wide brushes of different sizes;
- paint roller;
- goggles, respirator, rubber gloves;
- primer or drying oil;
- solvent;
- sandpaper;
- putty knife;
- water;
- rags;
- if necessary, tow for cracks.
The process of painting a wooden floor looks like this:
- Preparing the surface for applying the painting composition. It is necessary to identify roughness and remove them using sandpaper. Wash the floor with warm soapy water so that there is no dust or stains of any origin left on the surface. You also need to hammer in all the protruding nail heads and clean the gaps between the floorboards.
- Applying primer. Drying oil or commercial primer is most often used as a primer for paint on wooden floors. The composition must be applied with brushes and a roller. After applying the primer, it is recommended to wait 2-3 days.
- Putty. Wooden floors can be puttied in 2 or 3 layers. After the soil has dried, apply the first layer of putty. When it dries, sand down any uneven surfaces with fine-grained sandpaper. Next, apply a second layer of putty, wait until it dries again and remove the sediment. If the putty is made in 3 layers, then after applying the second layer, a special mesh or gauze is placed over the entire floor area, wait until it dries and apply the final, third layer.
- Actually painting. Before you begin painting, you should protect adjacent surfaces from paint with masking tape. Wear personal protective equipment. Start painting from the baseboards using small brushes. It is best to paint a wooden floor in 2 or 3 layers.
- After the paint has completely dried, varnish is applied to the surface, usually in 3 layers.
This video will tell you more about how to properly paint a wooden floor:
Choosing paint for a wooden floor
Some people believe that wooden floors are an indispensable attribute of the old days. But this opinion is erroneous, since floors made from natural materials are often used even now to create a pleasant atmosphere and make the room more attractive.
Only with the help of proper floor painting can you achieve the best quality of the floor structure. This does not require special knowledge or skills. All stages of the procedure can be performed by yourself.
It is quite possible to paint the floor yourself - the main thing is to follow the technology
Before you start painting, you need to consider the following points:
- Is the flooring quality?
- what the final appearance of the floor should be after painting;
- what material is best to use in a given situation;
- How long does it take for paint to dry?
Ultimately, you need to have a complete vision of what should happen in the end, and based on this, make a choice in favor of one of the materials.
It would be useful to first familiarize yourself with the types of materials in order to have an idea of what to apply to the flooring so that it gives maximum benefit. Transparent products, such as various varnishes and impregnations, allow you to emphasize the natural texture of wood, but do not provide adequate protection from any loads.
You can use only varnish without applying paint - this will add beauty to the wood, but will not protect it adequately
You cannot move heavy objects or walk in heels on such a coating, as this will damage the protective layer, which will not be able to protect the tree from negative influences in the future.
When painting floors, you can forget about the natural beauty of wood, but in return you get a variety of colors that are obtained by choosing the right materials. In addition, the paint helps strengthen the coating.
Important! When choosing paint, it is important to consider the humidity in the room. By the way, in any case, you need to apply a protective layer only to a previously prepared floor.
The coating should be applied taking into account the selected materials in this way.
- Varnish. One layer of varnish is applied to the previously prepared coating. After it dries, the surface is leveled with fine sandpaper and cleaned. Then, using the same principle, a couple more layers are applied, but not less than three.
- Dye. Drying oil is first applied to the boards. After hardening (after 3 days), the floor is painted 2 times. Once the paint has dried, you can safely move around it.
Several layers of paint are required
When re-treating the floor, you need to take into account the degree of preservation of the coating. In a situation where the quality of the floor is called into question, it is worth re-laying the entire floor again. This will save you from problems.
Similar products for covering wooden floors
To preserve the natural pattern of a wooden floor covering, you need to select transparent products:
- oils;
- impregnation;
- varnishes.
Using varnish you can provide reliable coverage for a long time. It forms a hard protective shell that preserves both the color and texture of the wood. Mastic was always used for varnishing and polishing oak parquet. This product is great for hard wood. But for soft varieties, such as pine, it is better to use a plastic transparent composition. Otherwise, after some time you may find cracks or dents on the floor.
To preserve the natural color of wood, you can use varnishes
Wooden flooring, assembled from inexpensive softwood, is treated with special products that contain pigments that enhance the natural texture and color of the wood. Biological compounds do not pose a danger to people, and they also have fire retardant properties. Surfaces treated with this composition do not rot for a long time and do not suffer from pests and fires.
Oil impregnations are compounds made on the basis of natural ingredients: natural resin, wood or linseed oil. With their help, you can protect and tint the coating, increase its wear resistance. Oil is much more plastic than varnish - this allows the product to be absorbed into the deeper layers and make them stronger.
Important! Impregnations should be used to treat high traffic areas.
Oil impregnations are best suited for unheated rooms. Therefore, they can be used to paint floors on the veranda or terrace. The same composition is good for use in rooms with high humidity. This will make the wood water-repellent and protect it from mold.
Oil impregnations can be used
To protect wood from fungus, mold and insects, it is treated with antiseptics. They can also be used at home by surface spraying. For deep impregnation, production conditions are required. In specialized markets you can purchase treated wood for flooring.
What tools will you need?
The quality of the work performed depends not only on the correct paint, but also on the tools prepared in advance - so that you do not have to be distracted by this issue during the work process. Before you start painting, you need to buy protective gloves, a respirator, several brushes of different sizes, and a roller with a long handle. The telescopic handle is more convenient; it allows you to adjust the tool to the height of the worker.
Brushes are needed in any case, for painting corners and baseboards, even if everything else will be painted with a roller. By the way, for the roller itself you will need a paint tray (or several, depending on the number of workers who will paint the floor).
When working with a roller you will need a paint bath Source en.decorexpro.com
You will also need masking tape - it will cover areas of the surface that are easy to stain with paint during the process.
When using oil paint and enamel, you must additionally prepare a solvent or drying oil and ensure the room is ventilated.
If alkyd paint is chosen for painting the floor, purchasing a sprayer will greatly simplify the work.
How to calculate the required amount of paint
If the owners plan to paint the concrete floor, then they will probably be interested in the question of how much paint they will need to purchase. Moreover, it is not cheap.
Manufacturers always indicate approximate consumption - this information can be found on the packaging or in the description on the Internet. It is indicated in our tables in this article.
In addition to the “certificate” consumption, of course, it is necessary to know the area of the floor to be painted. This is easy to calculate for anyone who has not forgotten the basics of geometry.
Paint consumption also depends on the condition of the floor. The minimum amount of it will be spent on a concrete surface that is polished according to all the rules. Average consumption figures will be obtained when working with a floor filled with a self-leveling compound. But if the old concrete coating with all its shortcomings is to be treated with paint, then the consumption will have to be calculated to the maximum.
Well, of course, the number of layers that are planned to be applied is taken into account. As a rule, they are not limited to one layer - at least two are required. If funds allow, you can apply a third one - the strength of the coating will only benefit from this. With each subsequent layer, the consumption decreases slightly.
As a rule, a margin of about 5% is added to the result obtained.
The online calculator below will help you make quick calculations. It contains exactly the same compositions that were discussed above in the article. But you can carry out a calculation for other paints - for this, the consumption is specifically indicated, which will simply need to be compared with this indicator for another purchased paintwork material.
The result (in kg) is shown taking into account the reserve. For two-component paints, this means a ready-made mixture. So the user will only have to choose the most suitable packaging from those offered for sale.
Concrete floor paint calculator
Go to calculations
Paint Colors - Main Categories
Paint and varnish coatings offer a truly wide selection of colors, so you can find almost any color and variations of its shade in the store. The task is made easier by colored colors that can be mixed with each other to achieve the desired shade.
In addition to the palette, there are main categories that determine the final surface:
- satin;
- matte;
- glossy;
- semi-gloss.
The color palette is not limited
in any way. Depending on this property, the coating is distinguished by high gloss or, on the contrary, its absence.
When deciding how to paint the wooden floors in your home, do not forget about the purpose of the paint coating! Choose paints designed specifically for floors - they are most protected from abrasion.
Painting floors - advantages and disadvantages
Paint is used to update the appearance of the floor covering. This method is used by both apartment owners and owners of non-residential premises. The main advantage of painting the floor is the fact that the paint can be applied to any kind of surface: wood, concrete, plaster, etc. At the same time, painting does not require hiring specialists or using special equipment. Even one person can do it.
Other benefits of floor painting include:
- resistance of the coating to moisture, since most paints applied to the floor are moisture resistant;
- the paint creates a protective film on the floor that protects it from various types of influences;
- the coating becomes easy to maintain and can easily withstand any type of cleaning, both dry and wet;
- application of paint is quick and does not require special physical effort; in addition, after the paint has dried, the floor is ready for further use;
- This type of finishing is economical and affordable, therefore it is the most popular among alternative options.
Among the disadvantages of painting floors in the house are:
- low level of thermal insulation; in winter, walking on a painted floor does not bring comfort, so it requires the installation of rugs;
- low level of wear resistance, this coating is not capable of being used for a long time and requires periodic updating;
- low drying speed, most paints dry within two to seven days, during which time walking on the floor is prohibited;
- the appearance of the coating is quite simple, so when arranging a special designer room, painting the floor would be inappropriate.
Preparatory work
Wooden floors are painted several times during their entire service life. Preparing a new surface is not difficult, since it has virtually no damage and is completely leveled after installation.
Let's consider the technology of how to properly paint an old wooden floor that already has paints and varnishes on it.
The procedure begins with preparing the base and consists of the following sequential steps:
- Removing old paint or varnish. You can do this yourself using special grinding wheels and a grinder. But this approach will lead to the formation of a large amount of dust. An alternative to mechanical removal is chemical removal. This method involves the use of aggressive chemical solutions that dissolve the paint. After this, it is easily pulled together with a regular spatula. If you don't want to use chemical mixtures, you can try heating the top layer with a hairdryer to soften the mixture.
- Leveling the floor. This operation is performed for both new and old coatings. But if the structure has already served for several years, then it is necessary to inspect the condition of each board. If there is rot, a separate element is replaced with a new one. The leveling itself is carried out using a grinder and a special attachment, or with scraping machines. The latter option is faster and of higher quality.
- Primer. Wood should be impregnated with special compounds that will prevent it from catching fire and quickly rotting. For this, various types of solutions are used. Before applying them, the floor must be thoroughly washed, dirt removed and dried.
- Puttying. This process involves filling large cracks, dents or crevices with special mixtures. They resemble gypsum solutions, which are painted in different colors. They can be selected to match almost any wood structure. But this is not so important when you use opaque paints.
After drying, the primer must be sanded with fine sandpaper. If this is not done, lumps will remain on the floor surface even after painting.
How to paint a concrete floor yourself
This section will provide recommendations for painting a concrete floor yourself, for example, in a garage. This is perhaps one of the most typical cases.
Naturally, paint should not be applied to an unprepared surface - there will be no benefit from such work. And the preparation process may vary - for a fresh screed or for one that has already served for a certain time.
1 — If the screed is freshly painted, it must have no serious defects. Therefore, the main emphasis is on polishing the surface as much as possible.
Ideally, grouting is done with a special installation, usually called a “helicopter”. But this requires inviting a specialist with the appropriate equipment. So if the area is small, you can get by with surface treatment using a manual angle grinder with a special cup disc installed on it.
Grinding a concrete floor is a very difficult and dirty operation.
The purpose of this treatment is to remove the upper unstable loose layers of concrete, opening the pores for primer and paint to penetrate into them. As a last resort, if you don’t have the appropriate tool, you can clean the surface with a wire brush and then thoroughly remove the dust. And many people completely refuse such an operation due to its complexity and labor intensity, limiting themselves to only very thorough cleaning.
Painting of freshly poured prepared screed before it has completely dried can only be carried out with those compounds for which such a possibility is specified.
2 – Preparing an old, long-used screed for painting always begins with its inspection and repair.
- There is no point in painting “bubbly”, that is, flaking, unstable areas. They are completely chipped to a durable surface. Loose or oily areas should be cleaned off in the same way - down to “healthy” concrete.
All damaged areas of the concrete pavement are cleaned to stable layers
Cracks and crevices must be cut to a depth and width of at least 20 mm - otherwise their repair will not be successful.
- After such cleaning, the defective areas are thoroughly cleaned using a powerful vacuum cleaner.
- The next step is to prime the damaged areas to repair them. Very often, manufacturers of concrete paints directly recommend those primers that are optimal for their compositions. As a rule, primers have the same base as paint (epoxy, acrylic, polyurethane). And it’s better if they are from the same manufacturer - the adaptation of the compositions will be complete.
Primer for concrete surfaces of the same
But using paint diluted to a liquid state is not particularly recommended, since the goals of priming may remain unachieved. True, there are special paints that are called “primer paint”. With them it’s a completely different matter - the surface is well processed and acquires some kind of uniform base color.
- After the treated soil defective areas have dried, they proceed to their repair. It is best to use special quick-hardening repair compounds for these purposes. But it is unwise to use a regular cement-sand mixture in this case - you will have to wait too long for it to completely harden and gain strength. And still, it will hardly be possible to vouch for the quality of such repairs.
To fill surface defects, it is best to use special repair compounds
There is another option - a small amount of paint, the same one that will be used to cover the floor, is brought to a very thick, dough-like state with pure quartz sand. The result is an excellent putty mixture that tightly fills all cleaned and over-primed surface defects.
Once filled, these repaired areas are compared to the overall surface.
- After allowing the repaired areas to dry, they proceed to continuous priming of the entire floor surface for painting. Follow the instructions supplied with the primer (paint). You may have to apply the primer in two layers.
The primer is applied in the most convenient way. Since we are talking about floor covering, it is often poured into small puddles and then distributed using a roller on a bar.
Priming a concrete floor
- The paint is being prepared for use.
If it is a one-component composition, then it is enough to mix it thoroughly in a standard container, for example, using a mixer attachment on an electric drill.
To mix paint, it is most convenient to use a mixer attachment for an electric drill.
The two-component composition is prepared in strict accordance with the attached instructions; it should be correctly understood that mixing the components starts the paint polymerization process. That is, it must be prepared in a quantity that is guaranteed to be consumed in the near future (this viability period is also always indicated in the instructions). The unspent amount will simply have to be thrown away - it will harden one way or another and cannot be “resuscitated”.
- When the paint is ready, proceed to its application. Usually a roller is used again, and difficult areas in corners, like those along walls, are treated with a brush.
It is very important that the period between the last priming of the surface and its painting should not exceed a day! Otherwise, the paint loses many of its protective qualities due to deterioration of adhesion to the base.
You can distribute the paint by pouring it, followed by distribution with a roller - if the priming was of high quality, then the concrete surface, as they say, “will not take too much.”
You can also paint the floor surface using the method of “dispersing spilled puddles”
- After applying the first coat, you can let it dry completely and then proceed to the secondary painting.
But another method is often practiced, which makes it possible to end up with not just a painted, but also a uniformly rough surface, which will prevent slipping at subzero temperatures in the garage.
— Without allowing the first layer to dry, it is immediately covered with a layer of pure quartz sand (can be purchased at the store). To do this, you will have to put on special devices on your shoes, paint shoes, which allow you to move along the painted surface without leaving marks.
Applying a layer of sand to a freshly painted surface.
— When the paint has time to dry, thoroughly sweep the surface with a broom - this will remove only excess sand that has not been saturated with paint.
— Well, then you can apply a second layer of paint, which will finally seal this quartz filling.
Painted floor “with sand” - it looks nicer, has better protection, and won’t slip in winter
After the time specified in the instructions for use of a specific composition, the painted concrete floor will be ready for use.
Compatibility of paints and varnishes
If the floor is not painted for the first time, then its compatibility with other types of paints will be the main factor when choosing a new material. Thus, acrylic compositions can be used on most types of coatings, alkyd can be used on oil-based coating compositions, polyurethane can only be applied to the same type of paint. Manufacturers write information on the packaging if there are particularities of coating application. Therefore, studying this information will be rational.
If the floor is not painted for the first time, then its compatibility with other types of paints will be the main factor when choosing a new material.
Paint selection
If you choose the right paint, you can not only decorate your wooden floor beautifully, but also preserve it for a long time. It is very important to pay attention to the following details before purchasing.
- What paint was used previously? For example, a coating that can withstand sub-zero temperatures is suitable for a balcony. For rooms with high humidity it is better to use moisture-resistant coatings.
- Interior decoration. The paint color should match the overall design. Currently, the choice of colors is so diverse that there should not be any problems with this. If there are any doubts, you can opt for white, which is considered universal.
It is important that the color of the floor paint matches the overall design of the room - Wood species and texture. The surface of the pine flooring is quite soft and flexible, so it needs additional protection and strength. For it you need to choose a paint with these properties. Beech flooring has a glossy sheen and a non-standard texture, which means it is worth using coatings that can highlight this. You can also apply oil impregnation to the beech surface before painting - this will preserve the properties of the wood.
- Type and characteristics. Transparent products, such as impregnation or varnish, do not allow oxygen to pass through well, and their layer becomes thinner over time. However, they enhance the shine of surfaces and protect them from solar radiation. But they need to be applied to an already painted surface.
When choosing paint, you need to consider what kind of coating it will be applied to - for example, different materials are suitable for pine and beech floors
When the choice is made and the paint is purchased, you can begin preparatory activities.
Useful theory - why you need to paint floors
The natural properties of wood make this material soft and vulnerable, causing rapid destruction of the structure under the influence of external factors. Therefore, the board requires additional protection. The key task of paint for a wooden floor is to protect the material from moisture penetration, prevent rotting, and the formation of mold and mildew.
Country houses have long ceased to serve as a kind of warehouse or a one-time vacation spot for those who are tired of living in a city apartment. Therefore, the country house interior began to be approached in detail; the design of country houses has turned into an independent design unit, where every element is important, including the choice of paint for floor coverings.
Why is it important to paint the floor:
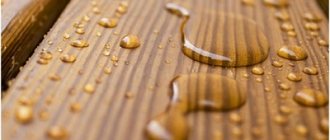
- the painted board is protected from moisture, so it does not dry out;
- the paint creates a barrier against the development of microorganisms, extending the actual service life of the floor;
- the painted surface makes it easier to care for (the smooth coating is quickly cleaned of dirt);
- under a layer of paint, the wood is protected from temperature changes.
Properly selected paint will not only protect the floorboard, but will also make the room original.
Paints and varnishes make it possible to make the interior original, opening up hundreds of ideas for design, ornament and color options.
Surface drying
After the last coat of paint has been applied, you need to wait some time for it to dry. The optimal temperature for drying is considered to be +20-22°C, so it is recommended to paint a wooden floor in the warm season. Even if the paint is completely dry, it is advisable to avoid any mechanical stress on the floor surface at first. Only after 3-4 days from the moment of painting is it possible to fully use the floor.
Drying a wooden floor
There are several factors that affect drying speed, such as the level of humidity in the room, the quality of the paint purchased and its chemical composition. All this must be taken into account to give the paint enough time to dry. This is the only way the finished coating will achieve maximum wear resistance.
How long does it take for a wooden floor to dry?
How to paint a floor - process technology
The first stage of work is preparatory. It requires the removal of old flooring or other finishing materials, if any. If there are greasy stains on the surface, they are removed using degreasers such as white spirit.
When using wax to polish floors, it should also be removed. It is better to do this using a solution of soda and water, in the proportion of a glass to seven liters of liquid. Next, apply the mixture to the floor surface and wipe off the wax using a stiff brush. Finally, rinse the floor with clean water and leave to dry completely.
If there are convex knots on the wooden floor, remove them with a chisel, and recess the caps from the fasteners a few millimeters deep and putty.
Before painting, treat the surface with a primer or drying oil; the latter option is only suitable for floors made of wood. If possible, wait a few days until the solution is well absorbed into the surface and begins to perform its intended functions. If you need a perfectly flat surface, it is recommended to treat the floor with putty; choose compounds with an oil base, they are highly wear-resistant and will last on the floor for many years. Please note that the color of the putty should not differ much from the color of the floor. Apply putty to the entire surface of the floor, eliminating unevenness or minor defects. Use sandpaper to sand down uneven areas. If desired, repeat these steps several times until the surface achieves the desired appearance.
After completing the preparatory stage, a painting procedure follows, which will make the floor attractive in appearance and protect it from external irritants.
Before starting work, pour the paint from the can and stir until the mixture reaches a uniform consistency and structure. Please note that the presence of lumps or small clots is unacceptable.
Use masking tape to protect areas that do not require painting but are in direct contact with the floor. It is this material that will protect these places from sudden ingress of paint.
Carry out coloring in stages. First apply the first coat of paint, after it dries, apply another coat. Applying a second coat will make the surface more attractive and high-quality painted. The second layer must dry for at least four days.
Tip: When re-painting, it is enough to apply one coat of paint to the surface, but if the floor is being painted for the first time, then at least two and sometimes three layers should be applied.
Please note that the application layer must be thin, otherwise, after a certain time, it will become deformed and swell.
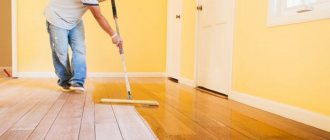
Painting a wooden floor is done along the horizontal movement of the wood fibers. It is preferable to start work from the perimeter of the room, namely from the baseboard.
Take a little paint, squeeze the brush against the edge of the reservoir in which the paint is located and apply it to the surface. Hold the brush at an angle in relation to the surface to be painted. Try to work with smooth movements - strokes. The power of brush pressure is affected by the required layer thickness and its color saturation.
After painting the baseboards, begin applying paint to the entire surface of the floor.
It is better to do this with a roller. Start with the corners:
- lower the roller into the paint bath;
- soak it;
- press against the raised area on the bath;
- Place the roller on the floor and roll the paint over the surface.
Tip: Do not lift the roller off the floor as long as there is at least some paint on it.
When the first coat of paint has dried, inspect the surface for defects and, if necessary, repaint. The floor should not contain streaks, paint drops, stains, drips or roller marks.
Take care to remove all glued tape, remaining drying oil, and oil on the floor. This is done by periodically cleaning the floor with a special solution, the preparation of which requires diluting water with vinegar. At the same time, adding soap, powder, any cleaning agents or soda to this mixture is unacceptable, as this will significantly affect the attractiveness of the coating. If the appearance of the floor is satisfactory, proceed to its operation.
The advantage of wooden floors
Such an element in the house has many positive qualities, but the main ones are:
- environmental friendliness;
- low thermal conductivity (comfortable temperature is maintained regardless of the time of year);
- ease of installation;
- long service life and repairability.
In private homes, when installing flooring, it is recommended to use boards made of oak and ash. They are the most durable, so they will last quite a long time. The only drawback is their high cost. As a worthy alternative, you can choose materials such as cedar, larch or pine.
It is important to choose properly dried boards, the humidity of which will not exceed 12%
How to paint floors in a wooden house: what paint?
Wood has been one of the main building materials for hundreds of years.
A special atmosphere is created in a wooden house, because wood is actually the only material that can “breathe,” as well as disinfect the air and maintain a favorable level of humidity. That is why the decoration of such a house is made from environmentally friendly materials. The floor in most cases is also wooden. Naturally, the question arises of how to paint the floors in a wooden house so that they not only have a beautiful appearance, but also preserve their natural qualities as much as possible.
Famous brands
Wood floor paints are very popular products today. This has led to many companies producing them. Among all this diversity, several of the most popular brands should be highlighted:
- Tikkurila (“Tikkurila”). This brand produces many varieties of paints that are of high quality. The Finnish manufacturer is one of the leaders in this market. The best paints for wooden floors are Betolux and Betolux Aqua.
- Dulux. The paint of this British company is distinguished by high performance. But at the same time, it is significantly inferior to the previous manufacturer.
- Polisan. The products of the Turkish company are in the middle price range. Suitable for solving standard problems.
Preparing to paint the floor yourself
To obtain a high-quality coating, you need to do everything exactly according to the instructions. The work begins with cleaning the surface and choosing the right paint. It is recommended to immediately focus on high-quality and durable compositions, especially if you plan to finish a cement or concrete base.
Work must be carried out in normal humidity and within an appropriate temperature range. Information about this is given in the instructions for the paint; be sure to study it before use.
It is recommended to check the surface moisture first. To do this, you can take some plastic tape and leave it on the floor for about a day.
- If condensation appears on the outer part of the plastic, you will have to work to reduce the air humidity. For this you can use special dehumidifiers.
- If condensation is present on the inside of the “tester,” excess moisture is present in the concrete itself. To solve this problem, you should leave one or more heaters and a bag of salt in the room, which will absorb excess moisture.
- Perhaps the reason for the increased humidity in the room is worn-out heating pipelines. In this case, repairing the coolant or cleaning the pipes and gutters of the water supply cannot be avoided.
The standard temperature range at which floor painting can be done is between 5-33 degrees. However, it is necessary to further clarify the permissible indicators in the instructions for the selected paint.
Before painting, the surface must be thoroughly cleaned of all kinds of debris.
Before painting, the surface must be thoroughly cleaned of all kinds of debris.
Old paint can usually be easily removed with a sander. You can do it manually using ordinary sandpaper, but it takes too long.
Remove furniture and equipment from the premises. Vacuum the floor thoroughly and get rid of any kind of dirt, if any. If necessary, use a degreaser.
Wash the floor. To do this you will need a brush, detergent and clean water. Any contamination will cause the quality of paint adhesion to the surface to deteriorate significantly. Wait until the floor is completely dry.
Get rid of cracks and other damage. This is easily done using a spatula and special repair kits, which are sold in any hardware and construction stores.
Before starting work, cover the baseboards with adhesive tape. This will reduce the time spent on painting and eliminate unnecessary work in the future.
Before starting work, cover the skirting boards with adhesive tape
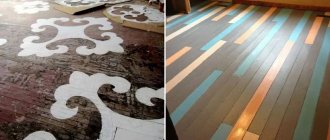
Good ideas and options
A wooden floor can be made original by painting the floorboards with multi-colored paints, as in this example.
And thanks to the design idea, well-chosen floor paint and other details, it is quite possible to decorate a city apartment in a rustic style - nice and unexpected.
In this interior, the green floor and the red sofa very successfully complement each other in such a way that it makes your soul even more cheerful.
The Scandinavian style can be called “all white” in another way: it includes walls, floors, and furniture. This is an ideal option for a dining room, as it emphasizes the sterility of the room.
How to varnish floors
Before covering the floors with varnish, they are also primed. This is done with nitro varnish, which is applied along the wood fibers, carefully, leaving no untreated areas.
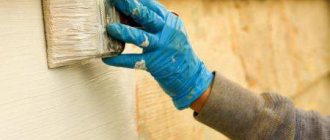
After the primer has completely dried, varnish begins to be applied to the floor. When varnishing, a roller is usually not used. The varnish is applied with a wide soft brush, which must be carefully selected, since falling hairs are difficult to remove from the treated surface.
Wide brush for applying varnish Source martand.ru
Important! When purchasing a large quantity of paints or varnish, it is strongly recommended to pay attention to the product article and lot number. In this simple way you can select and purchase paint of a completely identical shade.
Features of the use of cosmetics for the floor
In homes that have painted wood floors, there are two ways to update them.
Repaint the boards with a product of similar composition. In this case, it is possible to preserve the previous layer of paint.
Varnishing or impregnating with oil and wax an old floor is a more labor-intensive task. It consists of preliminary surface preparation, including complete removal of the old coating, sanding and smoothing of the wood. After this, it is possible to use a clear varnish. It is applied in 2-3 layers to ensure the strength and stability of the floor in subsequent use.
It is much more interesting and better to carry out cosmetic repairs to a surface made from new boards. But here we must take into account that the consumption of paint or varnish may increase. Untreated wood absorbs liquids well. Before painting or varnishing, new wood floorboards
Coating compatibility
Rarely does anyone think about compatibility when choosing varnish for a parquet floor or paint for unheated rooms. However, the compatibility of the paint and varnish material and the surface for its application is one of the rules for high-quality painting.
So, compatibility:
- Acrylic paint fits well on all previous coatings.
- Alkyd does not “conflict” with oil, so the first can be applied over the second.
- Polyurethane - give excellent results only in combination with each other.
As a rule, the manufacturer specifies such nuances on the packaging, so take a closer look at the description. You will spend a little more time choosing floor paint, but the excellent results are definitely worth it!
Painting with stripes
Another interesting and simple option, and you can add a little creativity to it:
- stripes go along the edge or in the center of the room, moving from the room to the corridor;
- they can be both smooth (a perfectionist’s dream) and curved (for those who are not afraid of chaos);
- you can alternate them by shade and size (from thin to wide and vice versa).
Don't be afraid to experiment. Even if you don’t like the result, you can remove the old layer of paint at any time and try again.