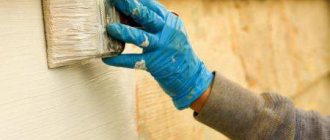
If you are lucky and you were able to not only purchase a plot of land, but also build a small house on it, it’s time to think about decorating it. It is not enough to simply build walls; they must be protected from atmospheric influences in order to increase their service life. One of the simplest and most universal methods is painting a country house with special compounds.
In the photo - painting a country house
Most often, such buildings are built from wood and brick. We will talk about coloring these materials below in the text.
How much paint do you need for walls?
What paint to paint the house?
To choose the right paint, read the previous page about choosing façade paint
for painting the outside of the house.
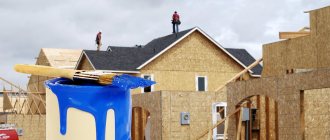
It is quite possible to do the painting of the facade yourself; you only need time, knowledge and patience.
The paint packaging always contains information about paint consumption. Typically, the specific consumption of facade paint is indicated - the number of liters (kg) that will need to be consumed to paint 1 m2 of facade in one layer, l/m2
.
Sometimes façade paint packages indicate the inverse consumption value - the surface area that can be painted with 1 liter of paint, m2/l
.
Usually the paint consumption is indicated in a certain range
, for example like this: flow rate 0.1 - 0.25
l/m2
. Here, a lower consumption value is for smooth primed surfaces, and a larger value is for rough, textured, unprimed facades.
On the websites of paint manufacturers and sellers you can find calculators for calculating the amount of paint chosen depending on the area of the house facade to be painted, the number of layers and the roughness of the surface being painted. Facade paint is usually applied in two layers.
To paint the outside of a house, the amount of paint is determined by multiplying the area of the surface to be painted - m2
, specific consumption -
l/m2
, number of layers - 2, safety factor - 1.1.
A safety factor of 10% is necessary to avoid the unpleasant situation of running out of paint at the end of the job.
How to prepare the walls of a house for painting?
The quality and durability of painting the outside of a house depends to a very large extent on proper preparation of the wall surface.
The base on which the paint will be applied must be dense, durable and primed.
Preparing for painting old house walls
As a rule, it is always necessary to improve the condition of the base before painting the old walls of the house.
Before painting, the old wall must be cleaned of dust, mold, moss and easily peeling layers of old coatings . To do this, it is best to wash the wall with a pressure washer, for example, a car wash. Or you can wipe the entire surface of the wall with a stiff brush, but this option is more labor-intensive. It is better to use both methods; after washing, brush only areas of intense dirt.
After removing them, areas where mold and moss accumulate must be treated with a liquid bioprotective preparation. Otherwise, parts of these biological substances may remain in the thickness of the wall covering, which will quickly grow through the new paint.
Then the plastered surfaces are repaired, cracks and places with peeling plaster are sealed. Old paint on the facade should not peel off or become dusty. Places with peeling paint are cleaned, primed and covered with an additional layer of new paint.
If the old paint is damaged over a large area, then it is better to remove it from the entire surface of the wall. To remove old paint, it is convenient to use a sandblaster.
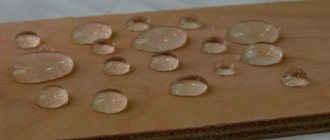
How to determine the strength of the surface of a wall to be painted?
To do this, stick a fairly large piece of transparent stationery tape to the wall.
and a minute later, with a sharp movement, they tear it off the wall. If pieces of the base do not come off the wall along with the tape, then such a wall can be primed and painted. Otherwise, the wall surface should be cleaned by removing the old paint.
Preparing to paint the facade of a new house
The plastered facades of new houses are quite durable. Preparing the facade for painting the outside of a new house comes down to the following steps:
- It is imperative to dry the freshly plastered facade for at least 30 - 60 days. The wall must be completely dry.
- Apply primer to the wall of the house.
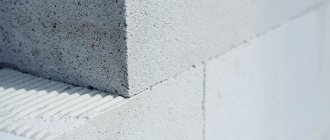
Unplastered silicate brick facades
You can coat it with a special colorless protective compound, or you can simply paint it with façade paint. In any case, the surface of the wall is primed.
Facades made of facing ceramic bricks
Usually they don't paint.
New walls made of ordinary ceramic bricks
It is better to paint them in the first two years, before efflorescence appears on them.
Features of painting the interior walls of a wooden house
The choice of color is largely determined by the interior design. Historically, rooms in wooden houses were decorated in eco-style. In any case, it is advisable to emphasize the texture of the wood, especially for planed boards.
painting the interior walls of a wooden house
When painting walls in a wooden house or inside rooms, it is not advisable to use cheap paints, since cheap varieties can be highly toxic. There is no point in hoping that the smell will disappear after the paint dries. All the vapors emitted by the paint will remain in the room for a long time, disturbing the microclimate.
Painting the walls of a wooden house indoors looks something like this:
Furniture must be removed from the rooms where the walls are to be painted; any furniture that is built-in must be covered with film. In addition, you need to prepare a stepladder and everything else that is needed to work with paint.
Surfaces that meet wood must be covered with masking tape.
When preparing a room for painting, it makes sense to turn off the electrical power and remove all electrical fittings installed in the walls and ceiling.
The walls must be cleaned using a rough brush and, at the end of this operation, wipe the walls with a damp cloth or sponge. If cracks or other defects are found, it must be repaired. For this operation, a primer and putty are used. After they dry, a primer is applied to the repaired areas.
Immediately before painting, the surface must be treated with antiseptics and fire-retardant compounds.
The work can be performed with any available tool - brush, spray gun, roller, etc.
Priming the walls of the house outside
The primer allows you to:
- strengthen the dusty base;
- increase the adhesion (adhesion) of paint to the base;
- reduce water absorption of the coating;
- reduce the consumption of facade paint.
Facade paint spreads more easily over a primed surface, and its consumption is noticeably reduced
.
It is best to use a primer recommended by the façade paint manufacturer.
chosen to paint the exterior of the house.
The quality of painting the facade of a house can be improved if the primer is tinted to match
, close to the color of the façade paint.
Facade paint diluted with water is sometimes used as a primer.
in a 1:1 ratio.
The primer is applied to the wall surface in the same way as paint. Before painting, the primer must be allowed to dry completely for at least 24 hours.
Why is this necessary?
Let's define the tasks.
Why do you need exterior painting of a wooden house?
- To protect wood from ultraviolet radiation . The reason for the darkening of the surface of old log houses is precisely the effect of ultraviolet radiation.
- To reduce hygroscopicity . With the onset of frost, wet wood is filled with ice crystals, which have a larger volume than water. Microcracks and fiber breaks significantly reduce the life of the walls.
Helpful: The problem affects more than just the tree. Cement plasters are no less afraid of freezing water in their pores.
- To prevent wood rotting and damage by insects . Carpenter beetles readily destroy logs and beams, but they disdain paints.
A photograph allows you to assess the severity of the problem.
How to apply paint?
Facades are most often painted with a roller, brush or spray gun.
The choice of tool is determined by the consistency (viscosity) of the paint, the texture of the surface to be painted and the qualifications of the workers.
Walls with a smooth surface
Paint with a brush or short-haired roller. Painting with a roller is more convenient and faster than with a brush, and less paint is consumed.
When painting walls with a textured surface
or directly on the brick, use a wide brush with long bristles.
You can use a spray gun to paint walls of any texture.
, both smooth and embossed.
Painting a house with a spray gun requires performers to have higher qualifications and experience working with this painting machine. It is necessary to choose the right paint viscosity and select nozzles for the sprayer of the device. You also need practical skill in applying paint evenly to the surface of the wall. It is better to entrust painting a house with a spray gun to specialists.
In the case of using special high-viscosity textured paints with filler
, to apply paint to the facade, in addition to the above tools, they also use a spatula.
Varieties of painting compositions for exterior use
Before painting the outside of a timber house, you need to study the range of products offered by manufacturers. There are two types of substances suitable for this purpose - impregnation and paint.
Before painting the outside of a timber house, you need to study the range of products offered by manufacturers.
Antiseptic impregnations and solutions
Antiseptic impregnations help create a barrier against the formation of mold and fungi on the surface of wood. They penetrate deeply into the wood structure, creating a protective layer.
Fireproofing solutions are also commercially available that reduce the flammability of wood, which is known to burn quickly. They are called fire retardants.
Antiseptic impregnations help create a barrier against the formation of mold and fungi on the surface of wood.
Painting the house outside
paint the outside of your house yourself
by following these recommendations:
- The work of painting the facade must be planned by checking the weather forecast. On rainy, windy days or at temperatures below +5 ° C, it is better not to paint the facade.
- The surfaces to be painted must first be primed
. To apply primer to the wall, use the same methods as for applying paint (see above). - Before starting work, all non-painted parts of the facade (windows, doors, slopes, plinth, blind area, etc.) are protected with plastic film.
- Painting work is carried out in dry weather in the absence of strong wind. The outside air temperature must be within the operating range indicated on the exterior paint packaging. Check the weather forecast before starting work.
- To paint the facade at a height, install scaffolding or scaffolding. Painting the facade from the stairs is inconvenient and dangerous.
- A layer of paint is applied to one wall of the house without taking long breaks in work. If you paint part of the wall the next day, there will be streaks on the wall - places with different shades of paint.
- The second layer of paint is applied after a certain break, not earlier than indicated by the manufacturer on the paint packaging.
- In order not to wash the roller or brush before each break in work, wrap the tool in a plastic bag - the paint will not dry out.
The paint is distributed by moving the roller or brush in different directions alternately - vertically, horizontally and diagonally.
Tips for painting walls
It is impossible to work on coloring at low temperatures and high humidity, as well as under precipitation. At the same time, too much dryness and direct exposure to sunlight are also not acceptable conditions, since the paint dries too quickly, and this can cause cracks. Ideal conditions are cloudy, but dry and calm.
As for which tool to use in your work, you can answer with confidence - you can paint in any way convenient for you. It is more effective to use a roller to process large surfaces without joints. However, a brush is much better at painting the joints that are so characteristic of concrete walls. Moreover, if possible, you can also use a spray gun, especially since it can be rented for a while without spending money on buying a tool for a one-time job.
https://www.youtube.com/watch?v=TcdFBrS43jE
How to store paints?
Paint packaging should be protected from direct sunlight and frost. The paint should be stored at temperatures from +5 to +25 degrees C in tightly closed packaging. Paint stored under such conditions remains usable even after the expiration date indicated on the packaging.
Products for construction and repair
⇆
If the paint has flaked during storage, mix it thoroughly with a mixer attached to an electric drill, and the paint will become usable again.
What color to paint the facade of the house
When choosing the color of the facade walls, they are guided by the following basic rules:
1. The color of the walls of the facade of the house should be different from the color of the roof.
2. The paint color should be in harmony with natural and other non-paintable materials with which the facade is finished: brick, natural stone, tiles, panels, etc.
3. Various architectural elements on the facade are distinguished by color: the front door, windows, shutters, cornices, cladding, etc.
4. If there is no contrast in the color scheme, the facade, as a rule, looks dull and unattractive.
5. It is recommended to use three paint colors for painting the facade : main color, decor and accent.
In the photo, the main color of the wall is combined with the color of the natural stone on the facade.
Smaller elements of the facade are highlighted with light beige paint. A warm light tone against the background of a thick dark wall color softens and makes the color scheme pleasing to the eye and successfully decorates the facade.
The color accent on the front facade is usually placed on the entrance to the house, the front door.
In this photo, the wall of the first floor of the house is made of unpainted clay bricks. The color scheme for the facade of the upper floor was chosen to visually reduce its volume and make the lower level more significant.
Maintenance and repair of façade plaster and painting
Regular inspection and elimination of any defects will ensure the durability of the façade. After each winter it is worth checking the condition of the plaster and paint layer. Here are basic tips for maintaining and repairing them.
The most common are damage caused by deformation of the base of the plaster or paint layer, as well as mechanical damage, and damage associated with leaching of the plaster by rainwater during leaks. Only after eliminating the causes of the damage can you begin to repair the damaged areas.
Well-made decorative thin-layer plasters applied to thermal insulation usually do not require any repairs for many years.
Regular inspection of the facade and cleaning of dirt are the main means of its maintenance.
Even small leaks, if left uncorrected for a long time, over time can lead to significant damage not only to the paint layer, but also to the plaster layer. If you react quickly, it is enough to restore only the color. It is necessary to eliminate the cause of the leaks, allow the wall to dry and carry out repairs.
Preparing the wall for painting
- First of all, you need to thoroughly clean the wall of dirt, dust, moss and other unnecessary parts. This is true, first of all, for old houses, where, before painting, we will also have to remove the previous finishing. But during the construction of a new house, the mills also become dirty, so it is better to clean them;
- Further actions depend on which wall will be painted. If this is a wooden house, which happens most often, then you need to take a sanding machine and carefully sand the wall. This way we will not only improve the appearance, but create better adhesion. Concrete or brick walls may often need leveling. In the case of brick, you can trim the protruding mortar and cover the concrete surfaces with a plaster compound;
- Next, wooden walls are usually coated with antiseptic compounds to protect them from the formation of fungus and mold. It is necessary to apply the antiseptic with longitudinal movements, especially carefully treating the joints, since this is where water accumulates the most. At the final stage, both wooden and concrete walls must be coated with primers for a better application of the paint layer. Metal structural elements should be primed especially well, since the composition will also resist corrosion.
Important! To make the color deeper. You can also tint the primer in the same shade that was chosen for the paint.
Green algae on the facade - how to prevent and remove
Green algae on a wall always indicates high humidity, which encourages algae growth.
Houses located near forests and parks, in areas with high humidity (near bodies of water), are especially vulnerable to biological pollution. Mainly only the northern and western walls are susceptible to green invasion. This is due to the fact that winds from the west blow more often, and rain falls on the walls from these directions, and the sun is less frequent in these places. Algae and fungal spores thrive on damp surfaces, and on south-facing walls the sun dries out the façade.
It is enough to disinfect walls with a slight degree of contamination with a preparation to combat microorganisms, and then rinse them with water under pressure. If after disinfection traces of algae remain, then the color will need to be restored - paint the façade with paint containing biocides.
It should be remembered that the active period of most biocides is from three to five years. After this time, in areas particularly susceptible to microbial contamination, facades should be re-protected by spraying the product. I know of no means of providing long-term permanent protection against algae.
The appearance of algae should be prevented regularly, because prolonged exposure to it not only spoils the paint, but can lead to weakening and damage to the plaster.
Small cracks in the plaster layer can be filled with putty. It is convenient to apply it from a cartouche, the tip of which must be cut so that a thin stream of mass is created.
The depressions after impact are filled with a mass applied with a spatula.
More Articles on this topic:
⇒ Decorating the walls of the house with facade plaster ⇒ Which facade paint to choose
More articles on this topic
- Materials for the construction of a single-layer external wall of a house
- How to make an entrance vestibule in a private house
- Malfunctions and errors of the gas boiler Ariston, Protherm, Baxi
- Ventilation of the attic and upper floors of a multi-storey building
- Economy class house
- How to remove the smell of hydrogen sulfide from water in a well, boiler, well
- Frost index on the map
- Apartment redevelopment - fresh ideas