This kind of request is very common among those who decide to carry out high-quality repairs themselves.
It should be understood that a successful result depends on how prepared the surface is, and puttying cannot be avoided. It is important to follow the steps step by step and handle the tool correctly.
In order for the puttying process to result in ideal smoothness, a finishing putty will be required. A concrete wall or other surfaces can be properly prepared for the application of further decorative coating.
What tool will you need?
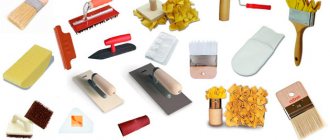
Do-it-yourself finishing putty on walls requires a certain number of tools. So what is needed:
- Device for mixing the solution. You can use a drill with an attachment. The dry mixture is mixed with water. To find out how to dilute finishing putty for walls, you should read the manufacturer's recommendations. The result should be a homogeneous, plastic mass without lumps;
- Several spatulas. The required set should contain both large and small tools so that puttying can be done even in hard-to-reach places;
- Brushes, rollers. Surface priming is also a stage that should not be ignored. Extra strength and good adhesion never hurt anyone;
- Rule. Necessary when leveling large wall errors, to distribute a thick layer of mass;
- Level. Indispensable for leveling uneven walls. After installing the beacons at the level, verification measurements are carried out;
- Sandpaper. A perfectly smooth surface requires careful rubbing. For starting work, coarse-grained sandpaper is used, and for finishing work, fine-grained sandpaper is used;
- Device for fixing sandpaper. Significantly facilitates the work of both beginners and more experienced craftsmen;
- Container for preparing putty.
Features of applying putty for wallpaper and painting
If you plan to glue thick wallpaper, it is recommended to apply the putty in two layers. Thin wallpaper requires three leveling layers.
The surface must be prepared more thoroughly before painting. After applying the paint, even the slightest unevenness will be visible. In this case, more leveling layers will be required.
The quality of application of the finishing putty directly affects the appearance of painted or wallpapered walls. Therefore, this stage of repair should be treated with great responsibility.
Below is a video on the topic from the Vetonit manufacturer, but in principle all major manufacturers have putties of different fractions from initial to finishing paste.
A Weber-Vetonit specialist demonstrates the technology of using weber.vetonit LR+ finishing putty and weber.vetonit LR Pasta super-finishing putty.
putty
Material selection
What finishing putty is better to putty on walls? Based on its composition, putty can be divided into: gypsum, acrylic, cement. Let's pay attention to considering the positive and negative aspects.
- Gypsum composition. It has an affordable price, good recommendations during the work process, and no shrinkage.
- The cement included in the composition shows excellent resistance to moisture, but significant shrinkage occurs over time.
- Polymer products. They have a lot of advantages: they are resistant to moisture and do not shrink. The treated walls are of high quality. An excellent option to consider for those who are wondering how to level walls with finishing putty and are looking for quality materials. The only disadvantage is the cost of putty.
There is also a division by purpose.
- Starting mixtures. They are distinguished by their strength, excellent adhesion characteristics, and coarse grain size. Suitable for correcting uneven walls.
- Decorative. Application is recommended to obtain a perfectly flat surface with correction of minor unevenness. The strength is also quite high, the work process does not cause problems.
- Universal. The product combines leveling and decorative properties. Their cost is slightly higher, although they are inferior to the coatings described above. Use is recommended for eliminating minor wall imperfections.
On the modern market you can purchase both dry mixtures and those already completely ready for use. The dry product is more attractive due to its cost and the possibility of longer storage.
Ready-made material is, of course, more convenient to use. You won't have to knead it, making the process faster and cleaner. However, such putty can cause significant shrinkage.
Choosing a finishing putty
Manufacturers and sellers of building mixtures offer a large number of putty materials intended for use in various conditions. Only a correctly selected composition can ensure high quality finishing and improve the technical characteristics of the decorative coating.
A good putty is a finely dispersed white composition that does not form lumps and is easily applied to the surface with a spatula. After drying, it should be firmly held on the wall and not crack. Material consumption: from 0.5 to 1 kg per m2. At the same time, craftsmen recommend using starting and finishing compositions of the same brand for finishing.
It is very difficult to give an unambiguous answer to the question of which putty is better, since rooms with different humidity and temperature changes require different mixtures. If you have doubts about the right choice, buy a small trial package of dry mixture or ready-to-apply solution.
Differences in composition
The binder base material for putties can be gypsum, cement or acrylic polymers. It is the basic composition of the mixture that determines the scope of its possible use for different operating conditions of the finishing coating after completion of the repair.
Gypsum. Gypsum finishing putties are environmentally friendly, do not shrink, set quickly, and form a beautiful matte white surface. These qualities and affordable cost make this option the most popular among finishers.
The main disadvantage is increased sensitivity to moisture. As a result, the use of gypsum is limited only to dry heated rooms and is unacceptable in areas with high humidity.
Cement mixtures.
Cement-based putties are slightly susceptible to moisture and temperature changes. The setting time is much longer than that of gypsum, which allows, if necessary, to correct mistakes.
The main disadvantage is the presence of shrinkage during setting and the possible formation of cracks. In addition, most cementitious materials have a gray tint, which may lead to the need for additional layers when painting.
Polymer.
Finishing putty materials based on polymers, like gypsum, can only be used in dry, heated rooms, but their complete setting time is longer and ranges from 1 to 3 days. They are highly elastic and can be applied to the surface in a thin layer of 0.2 mm. Provides a high quality finish that eliminates the need for final painting. The main disadvantage is the high cost.
Special additives.
To improve the quality of the putty surface, polypropylene fibers are added to the mixtures for dispersed reinforcement. As a result, strength increases and the wall acquires a beautiful silky surface.
Types by coating material
When choosing putty, it is necessary to take into account the material of walls, partitions and ceilings. Thus, for leveling concrete and cement plaster, the composition “Knauf NR Finish” is recommended. When processing plasterboard and gypsum fiber sheets, it is better to use “Veronit LR+”.
"Unius Premium" is a universal putty and is suitable for any room. The manufacturer's recommendations for the use of the material are usually indicated on the packaging.
By type of further finishing
The next stage after finishing putty may include:
- painting;
- wallpapering;
- silk-screen printing;
- fabric upholstery;
- panoramic pasting.
All these types have a small thickness and, as a result, any defects on the surface will become noticeable. To avoid this, for finishing leveling you should choose dry, finely dispersed compounds or ready-to-use mixtures.
According to the purpose of the premises
The technical characteristics of the premises for puttying should take into account air humidity and possible temperature changes, which can lead to moisture condensation. Bathroom, kitchen, shower room, toilet, loggia, veranda and balcony are defined as rooms with high humidity. Therefore, gypsum and polymer putties should not be used in them. The best material in this case is cement-based putty mixtures such as Ceresit, Sitek and Knauf.
Dry and prepared formulations
Ready-to-use putties are of high quality and convenient. Factory mixing of components allows you to obtain the optimal ratio between dry materials and water. As a result, the finished mixtures are highly plastic and can be applied in a very thin layer. However, their cost is 3-5 times higher than that of dry formulations.
Differences in ceiling and wall treatments
The peculiarity of ceiling putty is the application of a thinner layer of material on the horizontal surface of a flat floor slab. The mixture for the ceiling must be white to obtain high-quality painting.
It is not recommended to use gypsum compounds in the bathroom and kitchen. The requirements for the material for the walls provide for the possibility of double surface treatment with subsequent grinding, processing of corners and places where it abuts the ceiling.
Calculation of the required material
Beginners are often interested in the question: how to calculate the finishing putty on the walls? The task, the essence of which is to find out how much material will be used per 1 m2, is not easy even for a professional. Here it is necessary to take into account a number of factors that will affect the final figure, and there are no generally accepted indicators. That is why in any work there is an error, only then the indicators will be more realistic.
The cost will depend and vary depending on what work has been done previously. If we talk about finishing putty, then if there is a base layer, its amount will decrease and will be approximately 1-2 mm. Therefore, the material consumed will be somewhere around 2 kg per 1 m2.
It should also be remembered that the consumption will be higher, regardless of the initial calculations. The material remains on the spatula, on the walls of the container being used. Since the solution must be mixed in small portions, and it hardens very quickly, therefore, more putty will be needed.
Putty is often applied in 2 layers. The first layer can reach 8 mm, and the second will not exceed 3 mm. If even after such adjustments to the walls the flaws are still visible, it means the work was done poorly. A thick layer of product will lead to all sorts of defects.
Puttying walls: features of each stage
After the surface is completely prepared and primed, you can begin to apply a leveling layer of putty. But in this case, you should know that if the differences exceed 20 mm, then one layer is not enough.
Although, if there is an unevenness of up to 40 mm in only a few places and its size is small, then it is quite acceptable to first apply a layer up to 40 mm thick.
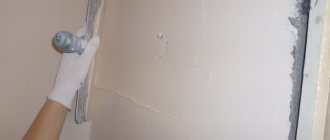
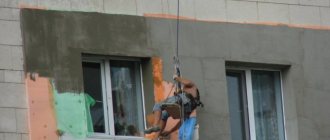
The main working tool is a wide spatula for puttingtying walls, onto which another, smaller one, applies and distributes the solution. It is best to start work on the left side of the wall (if the master is right-handed).
Using a wide spatula, at an angle of 30-45°, apply the solution onto the wall surface with uniform movements, making sure that each stroke overlaps the previous one.
After the putty has been applied to an area of approximately 2-3 m2, you need to do the first grouting with a spatula and remove excess mortar. And after the entire surface has been puttied, the rule comes into play, with the help of which the final grouting is performed.
After this, all defects and differences in the wall will be very clearly visible, which will need to be corrected during the application of the next layer. But, if the unevenness is due to the fact that in certain areas the layer thickness is greater, then they should be removed using a rule or a spatula. This is not so difficult to do, since the solution will not have time to set during this time.
Puttying walls
And if they are insignificant, then after drying you can begin to apply the finishing layer. Since frame partitions or walls finished with sheet materials initially do not have differences, puttying of plasterboard under the wallpaper is immediately performed with a finishing compound.
Corners and slopes should be handled especially carefully. To do this, you need to use either a small spatula or a special one shaped like a right angle. Additionally, to protect and add strength to the outer corners, special aluminum profiles should be used.
Next, you should wait for the layer to dry completely and use a grinder or grater to rub the surface, prime it, and you can begin the final puttying. The time it takes for the putty to dry on the walls depends on the thickness of the applied layer, air temperature, humidity and the individual characteristics of the particular type of solution.
Preparing the wall for putty
So, if you don’t know how to properly putty walls with finishing putty, you should learn the steps of the overall process. First, assess the condition of the wall. One should be clean, that is, without visible traces of grease, paint, old plaster, etc. You should not start work if the surface has been exposed to low temperatures for a long time.
Before finishing puttying, the walls must be primed. This will provide not only good adhesion, but also provide moisture resistance. Use a roller to thoroughly distribute the composition. You can limit yourself to one layer.
Preparation of putty solution
If a ready-made mixture is used for work, then it is mixed until a homogeneous consistency is formed.
Preparation of a putty solution from a dry mixture is carried out as follows:
- Cold water is poured into a round plastic container.
- Then the powder is poured in.
- The solution is mixed using a special mixer until a homogeneous paste-like mass is formed. After a few minutes, stirring is repeated.
The required proportions are indicated on the packaging. There are also brief instructions on how to apply the solution.
Let's look at two ways to level walls with finishing putty:
- using a spatula;
- using a roller.
Starting putty
Finishing putty on walls for painting, as well as for any other coating, requires perfect evenness. It’s worth starting by applying the starting composition. This is a rough material that is successfully used to eliminate the curvature of walls, cracks, and holes.
Before plastering the walls with finishing putty, and in order to improve the quality of work, use a painting mesh. First, the composition is evenly distributed over it, and then it is completely puttied. This method has proven itself successfully. The surface is smoother and more durable. And the greater the degree of roughness of the serpyanka, the more reliable the material will be.
Preparing the surface for puttying
Not only the quality of the putty and the level of skill affect the quality of the work, but also how correctly the surface was prepared.
If we are talking about repairs, then you will need to remove the external decorative coating: wallpaper, paint. Sometimes it may be necessary to remove the putty layer, and in very difficult cases even remove the plaster.
It is imperative to conduct a thorough examination of the surface for the presence of hidden peeling areas and make a prompt decision to eliminate them, depending on their size and specificity. In a new building, such problems do not exist, and puttying is carried out on a pre-plastered surface.
Primer of walls before putty
When starting work, you should definitely find out what the difference is between plaster and putty, since people often confuse these two completely different types of finishes. In addition to the fact that different types of materials are used for them, they perform completely different functions.
The question often arises as to whether plasterboard should be puttied, since this material already provides a smooth and even surface, or whether one can limit ourselves to just sealing seams and holes for screws.
Of course, you can save money, but only if the surface is covered with wallpaper, but when a light material is chosen, it is impossible to guarantee that the grayish or greenish color of the sheet will not show through.
But puttying drywall before painting is mandatory, but is carried out only using a finishing mixture, which is applied, on average, in two thin layers. To ensure that the seams between the sheets of drywall do not appear over time, they are puttied using fiberglass or painting mesh.
The final stage of preparing the surface for puttying is the application of a primer, which solves several problems:
- serves as an antiseptic treatment;
- strengthens the surface of the base;
- reduces absorbency, which is especially important when using putties prone to cracking:
- provides improved surface adhesion to putty.
It should be borne in mind that priming the walls before puttying is a mandatory process also after each layer has dried. Despite the fact that the amount of composition increases, this fact cannot be considered wasteful, since the quality of work and the durability of such finishing depend on it.
It is necessary to begin applying the next layer of putty only after the primer has dried, which takes on average 2-4 hours, depending on the air temperature, humidity and the properties of the material itself.
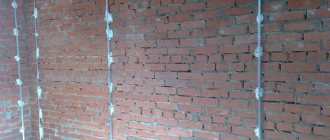
Putty using beacons
Another type of work that is carried out before plastering the walls with finishing putty. The composition used here is the same, but lighthouse devices are used.
A lighthouse is usually considered to be a slate made of wood or plaster. It is installed vertically, and the degree of evenness is checked with a building level. Having attached them to the gypsum mixture, you can continue further work.
The same principle applies to horizontal alignment, where the rule comes in handy.
If all recommendations are followed, the result is a surface whose evenness can be checked with a level.
Due to the cost, which is higher than the starting putty, this method is rarely used, because there are practically no visual differences between them.
Kinds
Plaster
Finishing white putty based on gypsum allows you to hide dark spots on the walls well. Such compositions are good for preparing walls and ceilings that will be decorated with thin, light or textured wallpaper.
Attention! The composition hardens quickly! The drying time of the product takes about two hours. However, it must be used within 30 minutes after dilution. Otherwise, the mixture will become unusable.
When using gypsum putty, it is important not to apply a coating layer of more than 2 mm. It is better to use the material in warm heated rooms. Due to the low waterproofing and water-repellent characteristics, the service area of the putty is significantly reduced. At the same time, the undeniable advantage of white gypsum-based finishing putty is its affordable price, which ensures high consumer demand.
Cement mixture
Cement mixture is an affordable and simple coating option. It is used in various types of premises, including rooms with high humidity. The product is suitable for both indoor and outdoor use. A layer of cement putty forms a durable coating that is resistant to external influences. The disadvantages of the material include an increased risk of cracks forming in the wall after drying.
Important! The coating must be sanded until completely dry. After drying, manipulation will be impossible.
Polymer
Polymer putty is the most convenient mixture option. The product is easy to use and is more suitable than others for a person who does not have professional experience in working with finishing putty. When applied to a work surface, the composition perfectly corrects surface imperfections, but its high cost makes the solution inaccessible to most buyers.
The undoubted advantages of the finished finishing polymer putty are its ease of application and high degree of adhesion. The superfinish mixture has the finest structure and is purchased in the case of artistic decoration of walls and ceilings, which require delicate decorative work.
Attention! The product is not prone to shrinkage, which eliminates the possibility of cracks forming in the wall. It has high plasticity and moisture resistance.
As for the texture of the putty, it is determined by the size of the particles. The smaller the fraction, the smoother the treated surface. The superfinish putty elements reach about 0.15 mm in diameter.
Water-dispersed
This product can withstand various temperature changes and moisture with dignity. The solution can be used for both exterior and interior decoration. The special properties of the putty form a waterproof barrier, which allows the use of a breathable acrylic surface in wet rooms such as the bathroom and kitchen. An equally important feature is good adhesion performance.
Finishing putty
After completing one of the preliminary stages of wall leveling you have chosen, plastering of the walls with finishing putty can begin.
At the first stage, the question may arise: what is used to putty the walls? For these purposes, special mixtures are used that will provide the surface with exemplary smoothness without cracks and pores.
For those who are interested in whether it is possible to level the walls with finishing putty, I would like to note that you need to start work by applying the thinnest layer. If the starting alignment was not of good quality, then it will be impossible to correct the situation. Therefore, try to place the main emphasis on leveling the walls, and only after that take on the finishing work.
Finishing putty on walls under wallpaper, as well as applying it under other materials, is a must-have product for an ideal wall.
How to apply finishing putty to a wall
Tip 1: How to apply finishing putty Tip 2: How to plaster and putty
After the wall is erected, the plastering process begins. The main task of this process is to level the surface. Using putty, minor defects are corrected and large-scale unevenness is leveled out. The consumption of materials depends on their type and the type of surface that will be finished.
- Guide slats, trowel, wide spatula, narrow spatula, usually a level, container for preparing mortar, plaster mixture, rubber gloves, mixer for construction mixture, primer, putty, roller, roller tray, brush, stepladder, sanding mesh.
Dilute the plaster mixture in the prepared container, strictly following the instructions supplied by the manufacturer. Mix using a mortar mixer. The mixture should not be liquid. Set the guide beacons strictly according to the level. The edge closest to you should be 15-30 mm away from the wall. The amount of leveling mixture applied will be oriented precisely at this distance.
Apply several strokes of the mixture from top to bottom. Strengthen the beacon. Level the beacon correctly before the mixture on which you glued it dries. Using a level, check that the beacon is installed horizontally. In those places where necessary, carefully adjust it to the level.
Place the next beacon in the same way as the previous one. Do not forget that the applied layer of cement mixture should not exceed 30 mm. Otherwise, the layer of plaster will fall off in one piece due to its heaviness.
The angle between the main and future walls should be 90 degrees. Make sure that all corners match, install another beacon. Check it in the same way, using a level, in two directions. After installing the beacons, secure them to the wall surface. Let the mixture dry. It will take about 5 hours.
When the mixture has dried, start plastering. Moisten the surface with water so that the plaster mixture is in stronger contact with the wall. Use a trowel to spread the mixture onto the dampened wall until it fills all the cracks and crevices. The protrusion level above the beacons is 2-3 mm.
Without letting it dry, smooth the mixture over the surface. Level the surface with a long and wide rule from bottom to top. Carefully apply the solution with a spatula if there is not enough of it. Continue until the wall is level. A plastered wall needs 10 days to dry.
Before you start filling the wall, apply a primer using a roller. It will prevent the formation of fungi and mold, penetrating into the smallest pores of the wall covering, and will ensure maximum adhesion of the putty to the wall. Pour the primer into a special roller tray. Dip the roller into the recess of the primer bath, pressing lightly against the flat surface of the bath, and squeeze out the excess. Apply the primer evenly over the entire surface. Use a brush in hard-to-reach places.
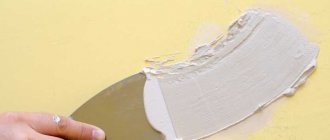
After the primer has dried, proceed to puttying. Start puttingty using the method from the corner to the middle. Take a wide spatula in your right hand. Hold it like a table tennis racket. In the left hand - a narrow spatula. Using a narrow spatula, scoop up putty from the container and stretch it onto a wide spatula. Use a wide spatula to move along the wall, stretching the putty from the corner from right to left. Then, using a narrow spatula, remove the excess putty from the wide one. Run the wide putty knife again over the area where you just applied the putty, skimming off any excess. Then putty the area above, overlapping the previous one.
When you start filling the middle of the wall, use a different method. Putty from bottom to top, and remove excess from top to bottom, “drawing” semicircles with a wide spatula. After each such movement, remove the putty from a wide spatula.
Let the putty dry. Sand using a special sanding grid. Re-prime the wall surface.
Perform a second putty. Apply putty from the corner in a horizontal direction. Remove excess in the same direction. When filling the middle of the wall, apply the putty from right to left, and remove the excess by moving in the opposite direction. Let it dry and you can start gluing wallpaper or painting the walls.
Finishing putty: how to apply it efficiently
How to apply putty on a wall
Today we will look at how to apply putty on the wall in detail. After all, finishing material will be applied to this layer and the surface must be prepared efficiently. For example, after applying paint, all errors will be visible. Therefore, the plane must be flat and smooth. When working, you must immediately determine how many layers of putty need to be applied. After all, a very large layer cannot be applied at once; this work will have to be done in several stages. Also in the video in this article you can watch the whole process and then do everything yourself.
Rules for applying the finish
Now let’s look at how to properly apply putty on the wall in more detail. Let's go through all the points. Not just the quality of the coating, but also its appearance and durability will completely depend on the correctness of this work. Before starting work, you should also look at photos of materials; you must initially choose the final type of finish according to the interior of the room.
Material used for finishing putty
To putty the walls yourself, you will need the following set of tools.
Drill with mixer attachment
Drill with attachment assembly
In most cases, homeowners purchase dry putty and prepare it immediately before work. To stir the mixture with water, you will need to use a special mixer, which will allow you to get rid of lumps in the mixture. When using such a mixer, you can get a homogeneous mixture that will be of high quality.
Spatulas of various sizes
For this work you will have to use at least two spatulas - one small and the second large with a size of 50 centimeters. A small spatula is necessary for working in hard-to-reach places, which improves the quality of application of the mixture.
Brushes and rollers for priming
Paint brushes
Many homeowners skip the step of priming the walls to save money. However, this is not recommended, as the primer allows you to improve the strength of the finishing materials and improves the adhesion of the putty to the wall. To work with uneven walls, when you need to apply the putty in a thick layer, use a rule that will make it easy to level the putty on a large surface of the walls.
Laser or water level
During the work, it is necessary to level the walls, and a level is used to control this work. As a rule, before starting work directly, special beacons are installed, along which the putty is subsequently leveled using a rule.
To obtain a perfectly smooth surface of a putty wall, you must use sandpaper, which is applied after the putty has dried (see How to sand walls after putty and how to do it correctly). To obtain ideal results, we recommend using sandpaper with an index of 240. The finest sandpaper is recommended to be used when applying finishing putty. Whereas when laying the starting putty, coarse sandpaper is used. To simplify sanding the walls, you can use a manual sandpaper, which can significantly simplify and improve the quality of this stage of work.
Also, for work you will need a container of 10 - 20 liters, in which we will stir the putty.
Choosing putty for working on walls
How to properly apply putty on walls is decided after choosing the material. Depending on its composition, putty is usually divided into cement, polymer and gypsum. Let's take a closer look at the advantages and disadvantages of each type of putty:
- One of the advantages of using gypsum putties is their affordable cost and ease of leveling. Among the shortcomings, we can only note mediocre resistance to moisture, which somewhat limits the scope of use of gypsum putty.
- Cement putty, on the contrary, perfectly withstands prolonged exposure to moisture, but is subject to shrinkage.
- Polymer putty does not shrink and has excellent moisture resistance. Using this finishing material, you can easily process walls of different structures. The disadvantage of polymer putty is its fairly high cost.
All putties, depending on the scope of their application, can be divided into decorative, starting and leveling. Also in recent years, universal putties have become popular.
- Leveling starting putties are characterized by high grain size, moisture resistance and excellent strength indicators. It is recommended to use this putty immediately after applying the plaster. The thickness of the layer can vary from 3 to 20 millimeters. The thickness depends on the general condition of the surface being treated.
- To ensure maximum durability of the treated surface, it is recommended to apply finishing putty to the leveling mixture. This will give the surface a perfectly smooth appearance. Finishing with putty is not difficult and is done using sandpaper. The application layer is usually from 3 to 5 millimeters.
- Universal putties have the characteristics of a leveling mixture and decorative putties. They have a fairly high cost, but at the same time they can significantly simplify the work performed. It is recommended to use universal putties when working with walls that do not have significant flaws.
- In specialized stores you can easily purchase both ready-to-use mixtures and dry putties, which are affordable, easy to use and have a long shelf life.
- Ready-made putties are easy to use, since you do not need to use a mixer, and the mixture already has a homogeneous structure. Working time is saved, and there is virtually no dust during repair work. At the same time, it is necessary to take into account that prepared putties have a slightly higher cost than dry ones. You should also take into account the fact that ready-made putties shrink slightly, so they must be applied in a large layer. The shelf life of ready-made putties is several months, so they must be quickly used in repair work.
Attention: When choosing a material, you first need to think about the coating's environment. If there is high humidity in the room. Then, when purchasing, you should study the instructions for the material. It must be moisture resistant.
Preparing walls for work
When applying putty, you need to monitor the condition of the walls:
Preparing the walls for puttying
- The surface must be absolutely clean, so any stains of soot, paint or grease must be removed. If there are traces of peeling plaster, it is necessary to carry out deep surface preparation. It is also not recommended to start work if there are frozen sections of the walls, which impairs the quality of the putty applied.
- Before starting repair work, it is necessary to coat the wall with a primer. This will ensure maximum adhesion between the wall and the putty solution. The walls are primed using a small roller, which allows you to evenly apply the primer solution. One coat of primer is sufficient.
In specialized stores you can purchase starting, lighthouse or finishing putty. Let's consider the scope of use of each material.
Starting putty
Coarse material with a large grain size is used as a starting putty. As a rule, there are no difficulties in finding and purchasing such material.
Apply starting putty
- Starter putty is designed to work with walls that have significant differences and numerous defects. Depending on the specific conditions, the thickness of the starting putty layer can be 1.5 centimeters.
- The material can be applied in several layers; you just need to wait until the previous layer has completely dried.
- To maximize the quality of the work carried out, special painting nets are used, which allow the putty to be firmly fixed on the surface of the walls and do not allow the material to subsequently crumble and delaminate. When using a painting mesh, the walls are completely plastered. The surface becomes smooth, which reduces the complexity of subsequent surface treatment.
Lighthouse wall putty
The difference in the use of this type of putty is the need to use beacons, which can be a metal, plaster or wooden lath.
We use lighthouse putty
- All beacons are leveled and attached to the walls using a gypsum mixture. Surface treatment with putty can be started only after the gypsum fixation of the beacons has completely hardened.
- To apply putty, spatulas and a long rule can be used, which makes it easier to work with large walls.
- To control the quality of work performed, it is necessary to use a level
Final wall putty
After applying the starting or beacon mixture, they begin to perform the finishing putty.
Apply the finish in a thin layer
Attention: This work is carried out using special compounds that have minimal grain size, which after appropriate processing allows you to obtain a perfectly smooth wall surface.
- It is necessary to apply the finishing putty in a minimal layer, which will ensure an effective appearance of the coating and save costs on repair work.
- To reduce material consumption, it is necessary to level the surface even when applying the starting putty, which will reduce the labor intensity of the work performed. In this case, you will be spared the need for a lengthy and labor-intensive sanding procedure.
Puttying cracks in walls
To eliminate existing cracks in the walls, it is recommended to use special gypsum putties.
This material is flexible and easy to work with:
- One of the features of gypsum plasters is their hardening time and the need for pre-treatment of surfaces before applying the plaster.
- To improve adhesion, it is recommended to scratch existing cracks with some sharp object, which will subsequently improve adhesion to gypsum plaster.
- You can also use a primer and then fill the cracks.
Attention: Priming the walls must be done. Then the adhesion of surfaces will significantly increase and this will increase the service life of the finish.
Putty application technology
If you use dry putty, you must prepare it in full accordance with the instructions. Sequence of preparation of putty:
- Pour a small amount of water into the container you are using.
- Using a spatula, mix the mixture.
- Next, you will need a drill with a mixer attachment, with which we will mix the mixture and gradually add water.
Attention: The consistency of the prepared solution should be elastic and stick to the spatula.
- Apply the prepared starting putty to the walls. The easiest way to do this is with a large spatula.
- It is necessary to apply the mixture in medium portions, distributing it evenly over the surface.
- It is necessary to hold the spatula at an angle of 30 degrees to the surface.
- To avoid the appearance of bumps and transitions, subsequent layers must be applied overlapping.
- If there are certain defects when applying the starting putty, they can be eliminated by using the finishing material.
- For the highest quality application of putty in the corners, it is recommended to use a small corner spatula. With the help of such an angled spatula, you can carefully level the applied mixture in hard-to-reach places.
Attention: Remember that the putty dries after a day, so you can start working 24 hours after applying the previous layer. The thickness of the starting putty layer should be about 2 centimeters.
- Before proceeding with further finishing of the walls, you must wait until the material has completely dried. It takes about 12 hours for the finishing putty to dry. Only after this can you start sanding the surface with sandpaper. Sanding can also be done using a special sanding machine, which simplifies this work.
Attention: If you plan to apply several layers of putty, you must treat the surface with a primer before applying each new layer.
How to putty walls for wallpapering or painting
Now we’ll talk about how to apply finishing putty before wallpapering. The walls must be leveled using two layers of putty. If the walls have significant differences, it is recommended to use three or more layers of material:
- If you plan to paint the walls, they must be leveled not only with starting plaster, but also with finishing.
- Sand the surface as carefully and carefully as possible, which will allow you to get rid of existing surface imperfections.
- Apply a thin first layer of leveling putty.
- Next, two or three more layers of putty are applied.
- Wait about a day for the material to dry.
- Finishing putty is applied, which allows you to eliminate minor defects.
- After the putty has dried, rub the wall with sandpaper.
You now know how to apply putty on walls. The price of the material is not so high, but everything must be done with high quality. Then the coating will please you and not change for a long time.
Graduated from the Faculty of Architecture of the Penza State Institute of Architecture and Construction. For the last ten years, he has been a leading specialist in a large construction company in Penza, engaged in the construction of multi-storey residential buildings. Total work experience in the specialty is 18 years. Consults on design issues, selection of materials for interior and exterior decoration, and technology for finishing work.
How to properly putty walls with your own hands
High-quality preparation of walls for various finishing works consists of obtaining a flat, smooth surface. To do this, you need to properly perform priming and puttying. Puttying is not a difficult task. The main thing here is to follow the procedure and be able to handle construction tools correctly. We will look at how to properly putty walls yourself without resorting to the help of specialists in this article.
What tool is needed for puttying?
To putty the walls yourself, prepare a minimum set of tools. What tools can you not do without?
1. A drill equipped with a special attachment – a mixer. As a rule, putty is sold in the form of a dry mixture. Water is added to this mixture in a certain proportion. Only with a special mixer can you mix the putty mixture perfectly. The output should be a homogeneous putty without lumps.
2. Set of spatulas. Be sure to choose a spatula of different sizes. In your work you will have to use both large spatulas (40-50 cm) and very small ones. After all, in problem, hard-to-reach places, it will not be possible to properly putty the wall with a large spatula. This is exactly what small spatulas are used for.
3. Rollers and brushes for priming walls. It is not advisable to skip the priming step. After priming, the wall is covered with a thin film. This not only further increases its strength, but also ensures excellent adhesion of the treated wall to any facing materials (adhesion).
4. Rule. It will be needed in case of uneven walls when you have to apply putty in a thick layer. To level thick layers of putty, it is convenient to use a long metal rule.
5. Alcohol or laser level. Often the wall surface is very uneven. Before starting the initial puttying, test beacons are installed using an alcohol or laser level to check.
6. Sandpaper. If you want to get a beautiful surface that is pleasant to look at, use fine sandpaper for rubbing. For example, grouting with 240-grit sandpaper will allow you to get the perfect result. Use the finest sandpaper only when performing finishing putty. And at the stage of the initial initial putty, it is correct to rub the wall with coarse coarse sandpaper.
7. Manual skinner. Sanding will become much more convenient if you use a manual sander. This is a tool with special clamps on the handle for securing the skin.
8. And, of course, you can’t do without a container in which the putty is mixed.
List of tools that you may need when plastering walls. Photo – srbu.ru
Which putty is better to putty on walls and how to choose it
Classification of putties by composition: gypsum, polymer (acrylic) and cement.
Let's consider their disadvantages and advantages.
1. Gypsum putties are attractive at an inexpensive price, are easy to level, and do not shrink. The only drawback is poor resistance to moisture. Only this limits the scope of their use.
2. Cement putties have excellent moisture resistance, but have a significant drawback - a high degree of shrinkage.
3. And finally, polymer putties. Undoubted advantages: excellent moisture resistance, do not shrink at all. Using polymer putty, high quality treated wall surfaces are obtained. The only drawback is the high price.
According to their purpose, putties can be divided into starting (leveling), decorative (finishing) and universal.
1. Characteristics of leveling (starting) mixtures: high strength, excellent adhesion, large grain size. Recommended: for leveling walls after applying plaster. Application thickness: 3 -20 mm.
2. For high-quality decorative finishing, it is advisable to apply finishing putties to the surface to be treated. With their help, you can get a perfectly smooth, even surface, hiding small flaws. The strength of the finishing putty is less than the starting putty, its processing is not difficult. Apply in a small layer up to 4 mm.
3. Universal putties combine the properties of decorative and leveling mixtures. They cost more, although their properties are slightly inferior to finishing and starting coatings. We recommend using it when treating walls without large flaws.
The modern market offers dry and ready-to-use putties. The low cost of dry putty and the possibility of its long-term storage are attractive.
Ready-made putties are convenient to use. You don't have to use a mixer to prepare a homogeneous putty mixture. This saves time and virtually eliminates dust. But ready-made putties are much more expensive than dry ones. Please note: such putties shrink greatly. If a layer less than 2 mm thick is applied, ready-made putties cannot be used. They also do not boast a long shelf life. It is significantly less than dry construction mixtures.
Dry in bags and ready to use in a bucket of putty.
Preparing the wall surface for putty
The main thing is to make sure that the surface of the walls is absolutely clean. Be sure to remove stains of grease, paint or soot. Of course, there should be no falling layers of plaster, residues of scale, wax or parts of the formwork. Don’t even start puttingty on frozen ceilings and walls. This is strictly not recommended.
Before applying putty, coat the walls with a primer. This will ensure good adhesion (connection) of the putty solution to the walls. Prime the surface using a special roller. Try to apply the primer solution evenly, avoiding gaps. One layer is enough.
There are the following types of putty: finishing, lighthouse, starting. Let's look at the properties and scope of application in detail.
Starting surface putty
Putty is performed using coarse starting material. It's not difficult to find. When purchased, it is called “starting putty.” To remove large differences in walls, to hide grooves and holes, this putty is convenient to use. The thickness of a layer of such putty applied at a time can reach 1.5 cm. Allow the previous layers to dry completely. Only then proceed to applying the next layer of putty.
In order to obtain the highest possible quality of putty surfaces, a special painting mesh is installed on the wall, and the putty is distributed evenly over the entire surface. In this case, the walls are completely covered with putty. The advantage of this technology is that when using a painting mesh, the putty fits perfectly onto the surface of the walls. And the surface itself becomes stronger and smoother. Moreover, the coarser the painting mesh, the smoother the treated wall surface.
Starting wall putty.
Lighthouse wall putty
The materials are no different from the starting putty. The only difference is that beacons are used. A lighthouse is a wooden, plaster or metal strip, which is set strictly vertically, checking the verticality with a level. The beacons are attached to the walls using some kind of gypsum mixture; it dries quickly, after which you can proceed directly to puttying. The same applies to alignment along horizontal lines. In this case, a rule will come in handy for leveling the putty layer. By following these recommendations, after starting work, a flat surface is obtained. To ensure the quality of the work, you can check it with a level. This type of finishing is used quite rarely. Reason: its cost is significantly higher than the starting putty, although visually they are almost the same.
Puttying walls along beacons. Photo – vipconstruction.kiev.ua
Final wall putty
After completing the starting or lighthouse putty, proceed to the finishing putty. It is done with finishing putty mixtures. It is this putty that gives the wall surfaces perfect smoothness. The smallest cracks or pores are eliminated. It is important that the finishing putty completely coincides in plane with the previously prepared surface, so it must be applied in a very small layer. If the starting or final putty is done poorly, you will not be able to correct the situation with the finishing putty. Therefore, first try to make the surfaces of the walls perfectly smooth. Only then proceed with the finishing putty. Its main goal is a beautiful smooth wall surface.
The finishing putty is carried out under special lighting, this allows you to see the smallest irregularities. Photo – vipconstruction.kiev.ua
Puttying cracks in walls
To hide cracks in the walls, we recommend using gypsum mixtures for putty. The material santegypsum is much more elastic in work, but hardens much longer. Advice from competent specialists: at first it is recommended to slightly widen the crack, slightly increase its depth and thickness. To increase the roughness, you can scratch it with a knife or other sharp object along its entire length. Then carefully treat it with a primer. Only after this should you begin to putty.
Repairing cracks for putty. Photo – dekoratik.com
How to apply putty on walls
1. If you use dry putty, you need to properly prepare the putty mixture.
- pour a small amount of water into the container;
- add putty;
- mix with a simple spatula;
- To obtain a homogeneous mixture, use a drill with a mixer, gradually adding water if necessary.
Please note: the readiness of the putty should be determined by consistency. It should become elastic and stick slightly to the spatula. If the putty mixture flows, it means it is runny. Add dry mixture little by little to correct the situation. If there are clumps in the putty, it means the putty is too dry. Add water little by little, stirring thoroughly to achieve perfect homogeneity.
2. Apply starting putty. It is convenient to use a large spatula. Apply the putty in medium portions, spreading evenly over the surface. Hold the spatula at an angle of about 30 degrees. The putty is applied diagonally in one motion. Recommendation: to avoid transitions and bumps, each subsequent layer should be applied overlapping.
Attention: when making the starting layer, mix the putty in small portions. This will avoid the appearance of dried-out dry particles, which will reduce the quality of work. Don't be too alarmed by unsightly stripes from the spatula. The stripes are perfectly hidden with finishing putty.
3. To process smooth corners, we recommend using a corner spatula. Working technology: first, using a small spatula, apply a small layer of putty along the entire height of the corner or slope. Then carefully level the surface with an angle spatula. The putty layer should dry well within 24 hours.
To putty corners you will need a special corner spatula.
4. Once the starting putty has completely dried, proceed to the finishing putty. A large and a small spatula are used for work. Using a small spatula, apply putty in small portions onto a large spatula. Then apply the putty mixture evenly to the surface. The layer thickness is about 1.5 - 2 mm.
5. Before you putty on a wall for painting or wallpaper, wait until the previous layers have completely dried. The starting and first layers of finishing putty must be completely dry. This approximately takes about 12 hours. Then you can apply the finishing putty.
6. Once completely dry, proceed to final sanding with sandpaper.
Attention: before applying each next layer of putty, it is advisable to treat the previous one with a primer.
How to putty walls for painting and wallpaper
The walls are first leveled using several layers of putty. If the wallpaper is thick, it is advisable to apply putty in two layers. When using thin wallpaper, we recommend applying three leveling layers of putty. This will allow you to paste the wallpaper on a flat surface without wrinkles or bubbles.
Video: Puttying walls under wallpaper
Painting walls requires more careful preparation. The paint does not hide even the slightest unevenness. Therefore, to level the walls, it is necessary to use finishing putty.
The puttying procedure is carried out in five stages:
- apply the first thin layer of leveling putty with a spatula;
- for large unevenness, use another 2-3 layers;
- allow the putty to dry;
- perform finishing putty to eliminate minor defects;
- After complete drying, rub the wall with sandpaper to obtain a perfectly smooth surface.
Video: Puttying walls with a long spatula
- How to dilute putty for walls proportions How to properly dilute putty for walls at home Leveling walls and preparing them for…
- How to properly apply finishing putty on walls Technology of applying finishing putty on walls Repairs require careful preparation. And before we start...
- How to properly putty a wall How to properly putty walls Properly puttied walls are the key to any quality repair Puttying is a process...
- How to properly apply putty on walls Finishing putty: how to apply it efficiently How to apply putty on a wall How to apply putty on a wall…
We remove cracks
Removed with plaster mixture. You can use santegypsum. It takes longer to dry, but good plasticity during operation allows you to achieve a good result.
Experienced specialists recommend first removing the overhanging particles, making the crack rougher by digging a little wider and deeper. Next, apply a primer, and only then putty.
The difference between plaster and putty
Starter plaster is a coarse powdery mixture that builders use to level walls. Before plastering, measurements are taken using a level and the degree of deviation of the wall from the ideal vertical is determined. In other words, this is done to ensure that the wall is level. The maximum thickness of the applied layer is about 5 cm. After drying, this mixture has roughness.
Putty is a powder used after plastering. Hence the name – finishing putty. It is plastic and makes the wall smooth. You can apply it in a maximum layer of 1-2 mm (and you won’t be able to do more). Finishing putty fills in small imperfections in the plaster, preparing it for painting or wallpaper.
Putty application process
Finishing walls with finishing putty or any other requires proper preparation of the mixture. For this:
- Fill the container with water;
- Apply putty material;
- Mix first with a spatula and then use a drill with a mixer attachment;
- Add water if necessary.
The putty is considered ready when the mass has sufficient plasticity and does not flow off the spatula. This situation can be corrected by adding dry material.
Avoid lumps as this indicates that more water and more thorough kneading are needed.
After each use of the solution, wash out the used container and only then mix fresh material. If you ignore this advice, do not be surprised that the solution will harden faster, since you have not removed the main catalyst, which are the old particles.
Using a wide spatula, distribute the starting putty portionwise over the surface. Each new movement must be overlapped to avoid unevenness.
We recommend mixing in portions, as this will prevent the mass from drying out and forming lumps. Don't worry about possible streaks, the finishing coat will remove them perfectly.
To form even corners, use a special spatula, first spreading a moderate layer of putty material over the entire height.
After the starting putty has completely dried, you can begin finishing work. To do this you will need 2 spatulas. Use a small tool to apply the solution and apply the putty evenly with a large spatula. We monitor the thickness of the layer, which should be no more than 2 mm.
Do-it-yourself finishing putty on walls for wallpaper or painting should not begin without thoroughly drying all previously applied layers. For those who do not know how long it takes for finishing putty to dry on walls, you need to know that it takes about 12 hours for the starting and first finishing layers to be ready.
The time has come for the final work - sanding.
We recommend priming each new layer of putty.
Technology of applying the finishing composition
The whole process consists of several stages. Each of them is important and cannot do without each other. The sequence does not change. Since this is a finishing coating, we skip the thorough preparation of the walls, which includes removing the old coating, eliminating cracks and irregularities. Let's look at each stage in more detail.
Preparing the walls
In fact, the walls are already ready for further application of putty, because the base layer was initially applied. The only thing you need to do is wipe down the starting layer. A coarse grater is used for this. The next step is to clean the surface from dust. This will allow the material to adhere well to the surface.
Preliminary priming of the walls will help improve adhesion to the surface and reduce putty consumption. The surface is processed without gaps using a roller. Hard-to-reach places are treated with a brush. Only after drying can you start using the finishing putty.
Application technique
When working with polymer mixtures, you just need to open the jar and start applying the contents. As for gypsum putties, they are first mixed. How to properly dilute finishing putty? Instructions are indicated on the packaging. But the technology is simple: first, the specified amount of water is poured into the bucket, and then the putty is poured. The sequence cannot be changed. The composition is mixed to the desired consistency, reminiscent of thick sour cream. All that remains is to let the mixture stand for 10 minutes, mix again and begin puttying.
Next you will need a spatula for finishing putty, even two. One is wide, the other is narrow. Use a narrow spatula to spread the putty onto a wide one from a bucket. Now all that remains is to apply a thin layer of the mixture, spreading it over the surface. Work starts from the corner. The spatula is held at an angle of 20°, moving from bottom to top. It is important not to leave marks from the tool. The process is controlled by a flashlight and a rule. All shortcomings are immediately eliminated. To create even corners, use a corner spatula.
When the first batch of mixed putty is finished, a second batch is made. At the same time, both the container and the tools are cleaned of the remnants of the old mixture. Otherwise, it may ruin the new batch.
How long does finishing putty take to dry?
Once the room has been treated, all you have to do is wait for it to dry. No further work can be carried out. Typically, the drying time is indicated on the packaging from the manufacturer. In addition, this indicator is affected by room humidity and temperature. Some mixtures can take two days, 24 hours or even 4 hours to dry.
Surface grinding
After the finishing putty has dried, you need to give it a finished look. A grater is used for this. The surface is polished. Fine-grained sandpaper. This will help remove tool marks and smooth the entire wall, preparing it for further manipulation. Sanding is done in a circular motion. You should not get carried away so as not to erase the applied material.
Preparing the surface for painting and wallpaper
Now let's look at how to putty the walls with finishing putty for wallpaper, or how to putty the walls with finishing putty for painting.
This process requires several leveling layers. Thin wallpaper requires at least three. This will allow you to paste the wallpaper without the appearance of unsightly errors.
Preparations for painting require more careful measures, since even the smallest bumps, roughness, etc. can appear through this decorative coating.
How to putty the walls with finishing putty? The procedure for applying putty comes down to several steps:
- Leveling material is applied layer by layer;
- Allow time for drying;
- To eliminate minor errors, finish puttying is carried out;
- Rub with sandpaper to achieve a perfectly smooth surface.
Now you know how to putty walls with finishing putty for painting or wallpaper. The process is clear and simple, but only if you follow the described recommendations. Don't be afraid to experiment, try working with small areas, and remember that every time you do it you will get better and better.
What mixtures can be used to putty?
Finishing compounds are not suitable for fragmentary rough finishing and are applied as a layer before painting, plastering or wallpapering. Requires preliminary application of a starting putty solution. There are 3 types:
- cement;
- polymer;
- plaster.
Cement
It is made on the basis of cement with the addition of polymers and mineral fillers. It can be facade, internal and thermal insulating. The finishing material contains fine sand, which allows it to be applied in a thin and uniform layer. Available dry or ready-made in two basic colors - gray and white.
Advantages:
- easy to apply due to soft consistency;
- cement is a strong and durable material;
- does not change appearance and performance characteristics during the service life;
- suitable for uneven surfaces with a difference of up to 15 mm;
- resistant to moisture, frost, temperature changes;
- low price, decent quality.
Flaws:
- due to the increased granularity, cement does not provide the most smooth surface;
- white cement may give a yellowish tint after drying;
- increased consumption as the material shrinks;
- not tinted in bulk.
Cement putty is universal, suitable for finishing any premises on the inside and outside of the house. However, craftsmen do not recommend it as a topcoat for large areas. You won't be able to achieve a perfectly smooth white surface with it. Apply in 1–2 layers up to 1.5 mm thick. In the second case, a break will be required for drying and priming.
Attention
When choosing, give preference to high-quality materials from the brands Bolars, Veronit, Ceresit, Kreps.
Polymer
Polymer compositions are made on the basis of synthetic resins with the addition of PVA or other plasticizers. Due to modifying additives, it is antiseptic, adhesive to most building materials, and fireproof. After drying, it forms a film on the surface, so it is easy to care for.
There are 3 types:
- acrylic;
- latex;
- polymer-cement.
Advantages:
- does not shrink, does not crack when drying;
- adhesive to most building materials: drywall, concrete, etc.;
- vapor permeable, does not require additional thermal insulation;
- plastic, easy to apply, forms a smooth surface;
- durable, resistant to mechanical stress;
- maintains working consistency for 12 hours;
- moisture-resistant, environmentally friendly, fireproof;
- provides sound and heat insulation.
Flaws:
- high price;
- does not adhere well to wood and metal.
Polymer finishing putty is used for interior and exterior work.
- Acrylic compositions are universal, while latex compositions can only be used indoors.
- Polymer cement is made specifically for facade finishing.
- Latex putties are recommended in rooms with high humidity. In this case, it is advisable to choose dry mixtures, but they are poorly represented on the market.
Important
Unlike the cement analogue, polymer compositions can be tinted. This can be useful when preparing the surface for painting or plastering.
Plaster
Its base is made of gypsum with very fine crumbs (up to 0.5 mm). Gypsum compositions are universal and are recommended for wallpapering or painting. Such mixtures can only be used inside dry rooms or with normal humidity. After hardening, it becomes snow-white and provides a smooth, uniform coating.
Advantages:
- easy to apply due to the fine crumbs in the composition;
- does not crack, delaminate, or shrink;
- vapor permeable, prevents the formation of condensation;
- highly adhesive to most building materials;
- consumption is 3 times lower than that of analogues;
- easy to sand, resistant to mechanical stress;
- environmentally friendly, durable, plastic, fireproof;
- has a moderate price in relation to good quality.
Flaws:
- not recommended for kitchens, bathrooms, not suitable for rooms with high humidity;
- susceptible to temperature changes, can deform in heat, crack in frost;
- not used for finishing facades;
- requires timely start of grinding;
- sets quickly, requires prompt work.
After mixing, the plaster should be used within 20–30 minutes. Otherwise, the composition will harden and will be unusable. Ready-made putty cannot be diluted. Tinting in bulk is not recommended - only surface painting. Therefore, craftsmen recommend gypsum putty for painting.
If the coating has gained sufficient strength, it cannot be sanded. Therefore, sanding begins a maximum of 24 hours after application.
Advice
Do not choose universal gypsum compositions that combine “start” and “finish”. They are poorly oriented towards various types of roughing and finishing.