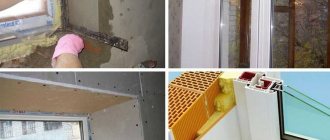
Which plaster is better to plaster brick walls
It is quite difficult to navigate the variety of compositions. You need to purchase a material that is easy to apply, durable and not affected by moisture.
Many craftsmen choose mixtures based on price and ease of use, but do not know what is the best way to plaster the walls inside the house so that it is safe for its inhabitants.
When performing interior work, the composition of the material should not release harmful substances into the air; the finished coating should be vapor-permeable, resistant to humid environments and biological destroyers. Have sufficient viscosity to be applied to the wall and strength to provide surface protection.
Plastering brick walls is done with special mixtures
Cement-sand mixture
The most popular material. The binder gives the layer sufficient strength, fire resistance and immunity to destructive factors.
Plastering brick walls with cement-sand mortar creates a monolithic coating on the surface that meets all safety parameters. The solution does not require special skills to operate and is economical.
Advantages of using the composition:
- strength and resistance to mechanical damage;
- good tolerance to high humidity, it is often used in the kitchen and bathroom;
- affordability;
- The solution can be prepared and applied to the wall yourself.
Among the disadvantages, several points can be highlighted - this is a long setting and increase in the strength of the layer, and susceptibility to cracking. If the building is new and has not gone through the shrinkage process, it is not recommended to use it for plastering.
To prepare the mixture, use cement grade M400-500, fine sand 1-3 mm and clean water.
Advice! Functional additives should be added to the composition, with the help of which you can improve noise and heat insulation properties, change the plasticity coefficient and increase or decrease the hardening time.
Limestone
A universal composition that is often used for leveling walls indoors. The material has good adhesion to brick substrates and is easy to apply, but does not have the strength of cement mortar.
Lime plaster is used in the kitchen and living rooms. The coating is hygroscopic, easily absorbs moisture and also releases it into the air, which makes the walls “breathable” and creates a good microclimate in the room.
It is not advisable to apply a coating to level the walls under ceramic or stone tiles in the bathroom. The heavy weight of the material and high humidity will quickly render the plaster layer unusable.
The solution is sold in ready-made dry form, which must be diluted with water. You can also prepare the mixture yourself from cement, lime and sand or clay.
Lime plaster is only suitable for interior decoration
Choosing plaster by rating
Almost always, on the building materials market or in a specialized store, an unprepared buyer is faced with a problem: most dry mixes fall under the given criteria. What should we do in this case? Which plaster for walls is better if only the name is known? There are two approaches here:
- focus on popularity among the population;
- buy based on its operating conditions and technical characteristics.
Rating of sales of dry plaster mixtures (based on statistical data on the amount of building materials sold for 2017):
- "Knauf"
- "Volma";
- "Ceresit";
- "Unis"
- "Osnovit";
- "Glims";
- "Prospectors";
- "Caparol";
- "Mapei";
- "Concrete".
Selection based on application conditions, area of operation and price (assessment by professional builders) gives a slightly different rating result:
| Name | Consumption kg/m 2 with a layer thickness of 1 mm | Application area | Bag, kg | Compound | Price from, rub. |
| Ceresit ST 29 | 1.8 | Concrete, brick walls | 25 | Cement, sand, mineral additives | 470 |
| Volma Canvas | 0,9-1,0 | Concrete, brick, aerated concrete, foam concrete walls | 30 | Gypsum | 320 |
| Prospectors | 1,2-1,3 | Wet areas, concrete, brick | 50 | Cement, sand, mineral plasticizers | 420 |
| Knauf Rotband | 0.8 | Concrete, brick, cement plaster, DSP | 30 (5, 10, 16,) | Gypsum | 410 |
| Caparol Capatect Leichtgrundputz | 1.2 | Light brick, expanded clay, pumice, porous concrete | 25 | Mineral | 750 |
For reference: the higher consumption of Ceresit ST 29 plaster in kg/m2 is due to the higher specific gravity of cement relative to gypsum.
It is up to the customer to decide which plaster to choose for the walls, based on the information provided.
Preparation of brick surfaces for plastering
The mixture is applied only to a clean, dry surface, so before finishing work, several steps must be carried out to create optimal conditions to improve the adhesion of materials to the base.
Preparation for plastering brick walls involves cleaning, removing dust and degreasing the surface. If the house has not yet been finished, then the order of work is reduced.
The durability of the coating depends on the quality of preparation.
New wall
Does not require completion of all preparation activities. Before plastering, you need to clean the surfaces from mortar protrusions, construction dust and wash the walls with a degreasing compound. The remains of the masonry mixture are knocked down with a chisel and hammer, the seams are slightly widened and notches 4-5 mm deep are applied to the brick. Next, the surface is vacuumed and heavy dirt is removed. Degrease with a 5% hydrochloric acid solution and dry.
old wall
It requires a complete preparation process and depends on the type of mixture that will be used for plaster and the condition of the old layer. If the brick was covered with cement-sand or perlite mortar, only the flaking areas can be removed. It is advisable to remove gypsum and lime plaster completely.
Surface preparation steps:
- Cleaning of old plaster layer. You need to go over the entire surface with milk and beat off all areas that can be removed.
- If there are any violations of the integrity of the seams between the bricks, you need to clean and remove the old mortar.
- Rinsing the surface with water and a stiff brush. This will remove dust and old dirt.
- Degreasing the surface with a 5% hydrochloric acid solution.
Note! If it was not possible to clear the walls of old plaster, and there are violations of the seam joints, you need to apply primer with antifungal drugs to the surface.
Next, the base is leveled with a cement-sand mixture and dried for 24-48 hours until the layer completely sets with the base.
Cracks in brickwork must be repaired
Preparatory work
How to plaster a brick wall with your own hands? To begin plastering work directly, you should perform a number of sequential operations:
- prepare the wall surface;
- install beacons;
- apply a primer to the brick or install a mesh.
Its durability completely depends on the quality of the preparation of the wall for applying plaster. Remains of old plaster mortar, oil stains from paint, poorly cleaned surfaces of bricks from wallpaper residues are the main reasons for the lag of the plaster layer.
Experts believe that high-quality plastering is only possible if a third of the time for facing work is spent on preparing the walls for plastering.
The technology for preparing a wall for applying plaster involves performing a cycle of work.
- Complete all general construction and installation work related to the wall: lay hidden electrical wiring; install door and window frames; attach various kinds of hooks and pins to the wall for hanging furniture and household appliances.
- Thoroughly clean the wall from any remaining paint, wallpaper, or old mortar. Traces of oil paint can be cut off or removed using oily clay. If this work is carried out poorly, the solution simply will not stick to the wall in poorly cleaned areas.
- Seal cracks - they reduce sound insulation, increase heat loss, serve as a source of condensation, open masonry seams for better adhesion of the plaster to the wall.
- Apply notches to the brick to create adhesion between it and the mortar.
- Treat the entire surface of the walls with a penetrating primer.
Attention: step-by-step instructions for preparing walls for plastering work are set out in the material “Preparing surfaces for plastering.”
Tool
Before spreading the plaster, you need to prepare a full set of necessary equipment. The viability of the solution is 30-60 minutes, during which time it must be applied to the wall and leveled, so all tools must be at hand.
What is needed to perform plastering work:
- hammer, chisel, scraper and brush for preparatory work;
- stepladder or sawhorses for safe climbing to the top;
- perforator with a nozzle for mixing mortar;
- screwdriver, dowels and screws for attaching beacons;
- metal profiles, tape measure and building level;
- container for mixing the solution;
- ladle, trowel, trowel, grater for plastering walls;
- smoother and a set of spatulas for final leveling of the surface.
All these tools will be useful at different stages of plastering walls in a brick house. They will help you quickly apply the solution to the surface and give it the desired smoothness.
Also, do not forget about respiratory and eye protection during dusty work on cleaning the base from the old layer.
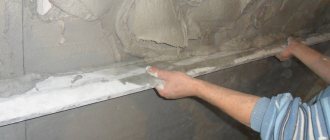
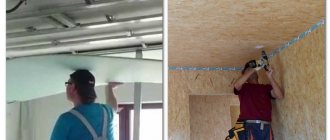
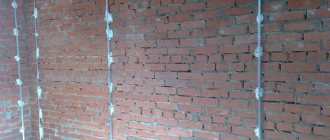
Marking and installation of beacons
For novice finishers, it will be very difficult to plaster a wall with high quality without using beacons. In order for a beginner to figure out how to properly plaster a brick wall, he will have to start by setting up guides that will allow him to apply and level the mortar at the same level.
Marking for beacons using the hanging method.
A laser level is used to accurately position the beacons. It is installed on the floor in such a way that the beam reflects the required distance from the wall, which is planned to be leveled with plaster.
A metal profile is used as guides, which is attached to the brick base with mortar. To do this, dilute a small amount of solution to which gypsum is added so that setting occurs faster. To secure the beacon, you need to throw several piles of mortar vertically and drown the profile in them, focusing on the beam of the laser level.
The number of profiles is selected based on the length of the wall and the distance between the beacons of 1000 mm. This gap allows you to effectively and efficiently apply and level the solution. To install the first beacon, 100 mm are removed from the corner. After applying the plaster, the metal profiles are removed and the installation sites are leveled with mortar.
How to plaster a brick wall with your own hands
To make the coating strong and durable, you need to strictly follow the production technology. Many novice craftsmen do not know how to properly plaster a brick wall and make mistakes that affect the quality, which will lead to premature repair of surfaces.
How to prepare a mortar for plastering a brick wall
Stores sell mixtures to which you just need to add water and mix thoroughly. But preparing solutions yourself saves a lot of money, so DIY is often practiced by craftsmen.
For proper mixing, you only need to know the proportions of the components and the stages of introducing them into each other.
Preparation of different types of plaster for brick walls:
- Cement-sand mortar. Cement of grade M400-500 is used - one part, clean sand, washed to remove clay and silt deposits, 3-4 parts and water is added. For spraying, the solution is made more liquid; for leveling and the base layer, the solution must correspond to the consistency of thick sour cream.
- The lime mixture is prepared in a ratio of 2-3 parts of filler and 0.5 parts of cement and lime. Water is added until creamy.
- Gypsum mortar is prepared differently for different stages of work. For spraying, mix 1 part lime, 2-3 parts sand and 0.5-1 parts building gypsum. For working layers, mix 1.5-2 parts of sand and gypsum in equal proportions and add water to the desired consistency.
First, all dry ingredients are mixed until smooth, then liquid is added to the composition. Additionally, plasticizers are added to the mixture to improve the plasticity of the material, antifungal drugs and components that slow down the setting of the solution so that you can work calmly.
The technology for preparing the solution is the same for all types of mixtures
Wall cleaning
The preparation of a brick surface for plastering must be approached responsibly. If the wall is new and has not been finished, it is enough to make small notches, remove dust and start priming.
It is advisable to completely clean the surface that was previously plastered from the old coating. Hidden defects in the form of cracks and destruction of seams lead to heat loss and increased humidity in the walls, which affects the strength of the plaster layer.
Identifying deficiencies and eliminating them
In old houses, the integrity of the seam joints is often compromised, the brick may crack, and in some places sagging, delamination and deflection of the brickwork occurs. Before plastering work, all surface imperfections must be eliminated.
Types of brick wall repairs:
- Cementing cracks and cracks. To prevent expansion and increase in defects, the surface is treated with waterproofing compounds. Cover with cement-sand mortar, and cover the top with deep penetration soil.
- Partial replacement of bricks. If there is deformation of the seam and the old masonry mixture is crumbling, it must be removed and replaced with a new one. The brick needs to be dismantled, new mortar applied and put in place.
- Wall injection. It is carried out by specialists if the surface is severely damaged with partial destruction. For injections, polyurethane resins and polymer gels are used. The masonry is expanded, and compounds are introduced into large cracks that strengthen the structure.
For your information! If the wall has no visually identified defects, you can proceed to the next stage of work.
Surface primer
The brick base has a porous structure that quickly absorbs moisture. Priming the surface is a mandatory step, which ensures good adhesion of the mixture and the wall during the setting process.
For processing, acrylic or silicone aqueous solutions are used. To improve absorption, the primer is applied twice with intermediate drying for 10-12 hours at a temperature of +18-20 degrees.
Reinforcement
Reinforcement is necessary in new buildings so that the shrinkage process does not destroy the layer of plaster and in old houses, to strengthen the structural elements of the building. When applying a cement-based coating, a galvanized metal mesh is used; for gypsum and lime mortar, a fiberglass reinforcing sheet can be used.
To align and fix the corners, you need to purchase special profiles. When attaching the plaster mesh to a brick wall, you need to overlap the sheets with each other so that there are no uncovered areas. Fixation is carried out with dowels or nails in the masonry joints of at least 10 pieces per square meter. meter.
Reinforcement is performed during external work
Marking and installation of beacons
The work process is necessary to determine the curvature of the walls and correctly calculate the required amount of mortar. Beacons for plaster are set if the layer thickness differs by 1 square meter. m. is more than 2 mm.
Step-by-step instructions for installing guide profiles:
- Installation of plumb lines in one vertical plane in the corners of the walls.
- The horizontal line is stretched, and the heads of the fastening dowels are leveled using a building level.
- Beacons are cut to the height of the wall and placed in increments of no more than 1 m along the leveling cord. The profiles can be attached to mortar or nails.
After the plaster coating has completely dried, the profiles are removed and the places where they are fixed are covered with the mixture.
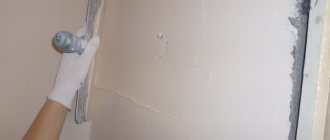
First layer
Plastering brick walls begins with spraying. To do this, prepare a slightly liquid solution, which is spread on the wall in a thin layer. This creates a rough surface so that subsequent coverings will adhere better. The spray is applied to a slightly moistened wall, not leveled, but allowed to set for 24 hours.
Second layer
The second layer is the base, which is made for rough alignment of the wall along the beacons. The solution is applied to the surface from bottom to top in equal parts and leveled along the profile slats using a rule or a trowel. This creates an even layer, but small defects are acceptable. At this stage, the outer and inner corners of the wall are straightened with a spatula or trowel, and the excess mixture is cut off. The base is applied with a thickness of no more than 2 cm, and sets in 12-48 hours, depending on the type of mixture. If the second layer is made as a base for subsequent covering and leveling, then the drying time is reduced by 3-4 times. The next stage of work is carried out on the unset surface.
Third layer
The third layer prepares the surface for finishing wallpaper and is applied with a thickness of 1-2 mm. To do this, prepare a slightly liquid consistency, as for spraying. The second layer is sprayed with water, the mixture is applied to the wall and, using the rule, all residual defects and irregularities are smoothed out.
The coating is applied in a thin layer
Final grout
This is done if the walls are to be painted and smooth plasters are applied, then the slightest irregularities will be visible. The final grouting is done with a float on a damp surface. First, perform circular movements with the tool, then horizontal, and then accelerated movements so that circles do not appear on the surface.
Features of plaster with gypsum mixture
When choosing this type of material for leveling walls, you need to know the subtleties of application. The gypsum mixture is very plastic and is easy to apply to the surface, but dries quickly. The solution must be diluted in the amount that can be produced in 30 minutes. When the top layer dries and it needs to be leveled, you can moisten the plaster with water.
If the walls have large defects and a larger coating thickness is required, then the work is carried out in stages, applying 20 mm of the mixture, leveling and priming. Subsequent layers are applied after the surface has completely dried.
Attention! If the number of applications is 2-3 with a maximum thickness, it is recommended to further strengthen the coating with another layer of fiberglass mesh.
Features of sand-lime brick plaster
Walls made of this material strongly absorb moisture, so gypsum mixtures are not used on them. It is better to plaster sand-lime brick with a cement-based mortar with the obligatory use of a metal mesh.
Before carrying out work, notches are made on the wall to improve the adhesion of the smooth surface and the mixture, and primer is applied in 2-3 layers. The number of plaster mesh fastenings is increased to 20-25 pieces per square meter. m.
The adhesion of plaster mortar on sand-lime brick is significantly deteriorated
Differences between plastering walls outside and inside
The main difference is in the choice of composition: gypsum mixtures are not used on facades; they are unstable at high humidity. The best materials for finishing will be cement, lime and perlite mortar.
On facades, external corners must be reinforced; indoors, this stage of work is carried out if the layer of plaster exceeds 4-5 cm.
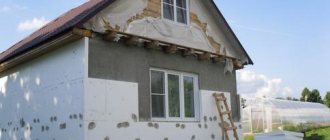
Outside, before plastering, the spray is additionally treated with a primer to improve adhesion to the base coat, which is applied no more than 1.5 cm thick at a time.
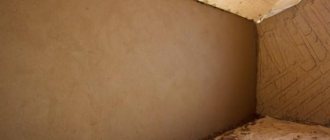
What is the best way to plaster brick walls inside a house?
The best choice for dry rooms would be gypsum mortar - the composition is environmentally friendly, safe, easy to work with and does a good job of leveling.
In rooms with variable humidity, it is advisable to use cement-based mixtures; they are not affected by water and can withstand the loads of finishing materials such as ceramic tiles or stone cladding.
For the finishing layer, silicone and acrylic-based compounds are used, which are intended for any room.
How to plaster the facade of a brick house - nuances
The finishing of surfaces on the street is influenced by negative factors, so it is necessary to carefully follow the entire technological cycle and choose the appropriate material for finishing.
Nuances in working with external plastering of walls:
- The total thickness of the applied layer should not exceed 30-40 mm.
- Bricks on the facade before plastering must be covered with deep penetration primer and have notches 4-5 mm deep.
- The optimal temperature for applying the mixture is +18-20 degrees with a humidity of 70%.
- For external work on bricks, a mortar with the appropriate technical characteristics is used.
- When using a cement-sand mixture on a façade, additional lime is added to the composition in a volume of 10-15% of the batch.
Fact! When all stages of work are completed and the layers are dried at the optimal temperature, the plaster will serve for a long time without peeling or repair.
Working with external walls has its own characteristics
Differences in technology
The stages of applying the mixtures are the same for both internal and external walls. The main thing is that when working outdoors in hot and sunny weather, cover the fresh layer with shields or awnings and, if necessary, wet the surface during the first day of drying.
Indoors, the plaster, after being applied to the wall, is protected from drafts and the windows are curtained from the penetration of heat. The coating must dry under optimal conditions without speeding up the process.
How to prepare the solution
A common option is to use ready-made dry mixtures to level brick walls inside and outside the house. Solutions are prepared by adding water in the amount indicated on the package. The instructions usually indicate the required volume of liquid per 1 kg and a whole bag of the mixture.
When preparing the solution, do not forget the recommendations regarding how to plaster the internal and external surfaces. When a gypsum-based mixture is used, the resulting solution sets faster compared to a cement composition. Therefore, it is necessary to dilute the gypsum material in limited quantities in order to have time to use it all before it dries.
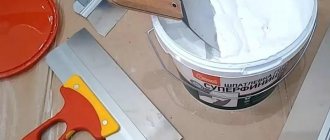
A solution from any plaster mixtures is prepared as follows:
- water is poured into the container;
- the dry mixture is poured into the liquid;
- the ingredients are mixed using a mixer;
- the prepared solution is left alone for 3-10 minutes, depending on the brand of material;
- the mixture is stirred one more time.
To save money, you can purchase all components separately. Then they are mixed. A high-quality solution is created from 1 part of M400 cement and 2 parts of sand. The ingredients combined with water are mixed until the consistency of thick sour cream. When using soil, the solution should resemble a thick dough.
Note! It is forbidden to add water to thickened material if it is not used up in time. Otherwise, the proportions of the plaster ingredients will be disrupted. This will lead to a decrease in the quality of the leveling layer.
Mechanical plaster
When the solution is applied to the wall under pressure, the work time is significantly reduced. A mechanized plastering station allows you to make the correct mixture and apply it to the surface in an even layer. This improves the quality of the finished coating, but the work must be carried out by trained specialists.
Algorithm for performing work with mechanized plastering
The equipment is used only for mixing and applying the mixture, so all preparatory and intermediate stages are performed manually.
How does the mechanized wall plastering station work:
- All components of the solution and water are poured into separate bins.
- On the equipment, a batch preparation program is selected: for spraying, base or finishing layer.
- All preparatory work is carried out, including priming the surface and attaching the mesh.
- When starting work, the equipment makes the solution in the required quantity. One person applies it to the wall, the other does the alignment with the beacons.
The plastering station operates under pressure, which improves the adhesion of the mixture to the base. The mechanized process has its pros and cons, which must be taken into account when ordering a team for work.
Applying plaster using a machine is a fairly new method.
Advantages of machine application
The advantage is a significant reduction in application time; the setting process is not accelerated, so breaks in work will take the same number of hours as when doing plastering manually.
Advantages of machine application:
- high productivity, which is 4-5 times higher than the volume of the processed surface from manual plastering;
- good quality of coating, the station does not allow defects during operation;
- saving on materials, equipment saturates solutions with oxygen, which affects the consumption of dry components;
- saving workers' labor; usually two people are enough to service the station.
The disadvantages include the cost of equipment, which affects the entire decoration of the room. When doing the work yourself, plastering will cost half as much, but the time to complete it will also increase significantly.
Decorative plaster on a brick wall
The most popular finishing is on facades, but it is also often used indoors. Using decorative plaster you can create a smooth surface, embossed or “stone-like”.
The procedure for applying decorative coating will not change. It is necessary to carry out all the preparatory work, reinforce the walls with mesh, apply a spray and a base layer.
The plaster is applied to a completely dry base: on the facade it should be a cement-based mixture; indoors it is permissible to use gypsum and lime mortars.
Note! Smooth decorative coatings are applied in layers with intermediate drying, the time depends on the thickness and manufacturer’s requirements.
The textured finish is created with the help of special rollers, which are rolled out over wet plaster and leave a certain pattern on the surface.
Relief coating is more often used on facades or as a separate decorative element of walls indoors. Especially popular is the “stone” finish, which is created using stencils on a wet base.
When the decorative layer dries, it is painted in different colors or coated with varnish compounds.
Preparing a wooden wall
Probably, the question of whether it is worth covering wooden walls with decorative plaster sounds somewhat strange. But different situations happen in life, so it’s worth considering the option of preparing wooden walls for this decoration. What should you do first? As always, determine the extent of the defects.
If there are more defects than the plaster can cover, then the wooden wall will have to be lined with either plasterboard, plywood, chipboard, or OSB. If there are not very many defects, then you need to cover the surface in three layers with a primer liquid. In this case, each layer must first be dried. At this point the preparation can be considered complete.
Most common manufacturers
When purchasing mixtures, many manufacturers deserve consideration. The following manufacturers are especially popular: Ceresit, Knauf, Bolars, Glims, Kiilto, Unis; they guarantee the quality of their products.
But you shouldn’t mark them specifically when purchasing materials. Small companies producing building mixtures offer equally decent quality.
The main thing when choosing is to pay attention to the store that offers the formulations. Ready-made solutions cannot be cheap, and if you save, you can incur large costs for repairing surfaces.
Decorative plaster is applied in one or several layers
Prices
The cost of the material is determined by the composition of the mixtures and the manufacturer. For global brands, the price may differ significantly from Russian manufacturers with the same technical characteristics of the finished coating.
Average cost of plaster in stores:
- cement-sand 25 kg – 200-250 rub. per bag;
- gypsum 30 kg – 200-230 rub. per packaging;
- limestone 25 kg – 200-250 rub. per bag;
- perlite 15 kg – 200-230 rub. per package.
Having knowledge of what material is needed on the facade and inside the premises and how to properly plaster the walls, you can do the work yourself. Create a unique decoration for your home yourself and in a design that will be comfortable for the whole family.
Was this information useful to you? Share in the comments!