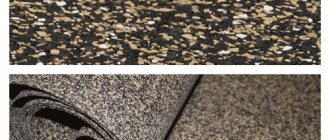
Types of materials for cladding the basement floor
Clinker tiles for finishing the basement
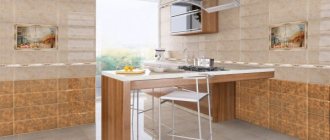
The most common material for exterior finishing of buildings is clinker tiles. This material has gained popularity in the domestic market due to its high performance indicators and long service life. Clinker tiles are resistant to temperature changes, so they can be used even in the most unfavorable regions from a climatic point of view. The material provides excellent waterproofing for the base of the building, since it does not allow water to pass through at all.
If you decide to finish the base of your building with clinker, then you need to know that the modern market offers a choice of two types of this building material:
- handmade material;
- clinker tiles made using a press.
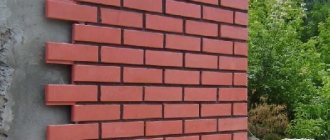
Clinker tiles
In appearance, the material data is identical, but there is still a noticeable difference. Here we are talking about the density of the material. It goes without saying that the material, which was made by machine pressing, has a much denser structure than handmade clinker. The higher the density, the higher all other indicators of the facing material. That is, machine-made tiles demonstrate a higher degree of resistance to weather conditions and water. Therefore, in this regard, it is better not to try to save money, but to purchase really high-quality material that is produced using a press.
Other types of cladding materials for the plinth
In addition to the building materials described above, other building materials are used for the exterior decoration of various buildings, which will be discussed below.
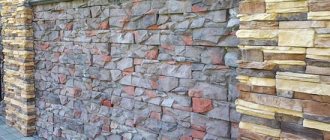
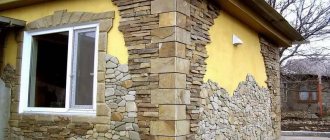
A natural stone . This facing material is expensive, but it has significant strength and can last for many years. It should also be said that this material is almost impossible to damage mechanically. It also does not enter into chemical reactions. The stone is also environmentally friendly and looks very natural. Despite the impressive list of advantages, natural stone also has some disadvantages. The first thing that catches your eye is the price of the material. It is also very heavy, which greatly complicates transportation and installation. Installation is also complicated by the fact that the size of natural stone tiles is arbitrary, so you will have to match them to each other. We must not forget about the design of such cladding, which may not be compatible with the appearance of the building. For example, if the building is sheathed with inexpensive plastic, then the base, trimmed with natural stone, will look ridiculous.
Natural stone for cladding
Bassoon . This material is an artificially created stone. The following components are used for its production:
- sand;
- cement;
- additives to improve the visual effect and improve performance properties.
The main advantage of this building material is the huge variety of colors and shapes. However, there is also a significant drawback that you need to be aware of before purchasing building materials. The bassoon absorbs water very well, so such tiles must be laid in accordance with the technology and strictly following the instructions, otherwise in the cold season the bassoon lining will crack and crumble. To eliminate this possibility, you need to soak the material in water before installation work.
Polymer sand material . This tile for cladding the basement of a house looks quite similar to natural stone. The tiles also have a high level of strength, which can be compared with strong clinker and natural stone. The most important advantage of this building material is its very easy installation. The fact is that such material can be placed not only on the adhesive composition, but also on fasteners.
Flexible stone . This is an artificially created building material, which is made on the basis of various resins. The advantage of this material is that it can be used to cover even the most complex base from an architectural point of view. This material is produced in the form of tiles or rolls. Once heated to a certain temperature, the material becomes very malleable and can be given any desired shape. It should be mentioned that flexible stone is used not only for external work, but also for interior decoration. The material can be easily cut into pieces of the required sizes, which greatly simplifies installation.
Flexible stone
Hyperpressed tiles . This building material is quite similar to clinker in its technical characteristics. Only this building material differs from clinker in that it has a much lighter weight and an impressive margin of safety. The building material is produced on the basis of various bulk substances, which are mixed during manufacturing and then combined through a set of binding particles and water.
Hyperpressed tiles
In very rare cases, ceramic tiles . When choosing this material, it is extremely important to pay special attention to its technical indicators. The fact is that for such finishing work it is necessary to use exclusively temperature-resistant material. The box of material suitable for such work must have an icon. Such tiles have a significant disadvantage - they offer virtually no resistance to mechanical stress. The impact will most likely break it into pieces. In addition, ceramic tiles are expensive, but their range is truly amazing.
Return to content
Surface Requirements
Before you start finishing the base, you must prepare the surface in accordance with the basic requirements:
- Be sure to have a dry base.
- Finishing is carried out only on the most flat surface possible. Additional leveling is recommended.
- Monitor the condition of the foundation. It must be durable and have no damage to the surface.
- The surface of the base must be cleaned of accumulated dirt, plaster, layers of paint, dust, etc.
- The procedure is carried out only after complete shrinkage of the base.
Subtleties of laying tiles on a plinth
The main difficulty of this work is the following - the plinths of the buildings are quite long, so even a qualified specialist cannot always maintain strict horizontal lines in the rows. In order for the tiling of the plinth to look attractive and securely fasten to the base, it is necessary to make every effort to create the first layer of material. To achieve strict horizontality of the first row, you should mount a metal profile on the bottom edge of the wall, which will help create an even first row. After finishing the finishing work, the profile can be dismantled.
Before you begin work on the plinth cladding, you need to choose the right adhesive with which to install the tiles. The quality of laying the material, as well as its service life, depends on this choice. You need to understand that the simple composition that is used when laying tiles indoors will not work here. Firstly, such glue is not able to withstand a lot of external finishing materials, and secondly, it must be frost-resistant, not afraid of temperature changes, and not react with water. Otherwise, the cladding will not last even a season. Sometimes waterproofing mixtures are used for installation work, but the adhesive compositions Ceresit CM17 and Ceresit CM117 are still the most popular.
Reinforcement is one of the most important steps during the finishing of the base. Some people miss this stage due to their ignorance or even laziness, but this should never be done. The fact is that the metal network will ensure tighter contact of the building material with the wall. Even if defects begin to appear during work and part of the tile material moves away from the base, they will still be securely held in place by the reinforcing mesh.
Metal reinforcing mesh
During installation work, do not forget about low tides, which can protect the cladding from the harmful effects of water. The arrangement of these elements is a necessary step if the wall is finished with a hydrophilic material, such as a bassoon.
Return to content
Base finishing methods
There are two ways to lay the outer part of the foundation - “dry” and “wet”, which differ from each other in materials and execution technology.
Dry method
A tile or fragments of several tiles are mounted on the base, firmly fixed on a base made of a sheet of extruded polystyrene foam of a certain shape. The edges of the base have mounting locks for connection with adjacent fragments. This cladding, which has a layer of insulation, is mounted directly on the base or on a frame pre-fixed to it using special self-tapping screws. After installation is completed, the joints between the tiles are filled and grouted with a cement mixture to protect the polystyrene foam at the joints.
Wet finish
The wet tiling method is more common and consists of traditional laying of tiles on an adhesive mixture, followed by grouting the joints.
Wet method using adhesive when installing ceramic tiles
In most cases, the base is faced over previously completed insulation and waterproofing of its outer surface to prevent freezing of the foundation and the appearance of condensation on the walls of the basement.
Reinforcement
Before reinforcement begins, the surface of the waterproofing is primed with one of the compounds that increases adhesion, for example, Novol Plus 700. After the primer has dried, a layer of a special reinforcing mixture, for example, “Baugut” 3-5 mm thick or tile adhesive on which it is planned to be laid, is applied on top of the waterproofing layer with a spatula. tiles Then, without waiting for the mixture to set, a steel or nylon armored reinforcing mesh is embedded in glue over the entire base and reinforced, which will increase the load-bearing capacity of the adhesive layer.
Reinforcing mixture, such as Baugut and Novol Plus 700
For this purpose, you can use, for example, alkali-resistant reinforcing mesh for external insulation systems SSA 1111 or SSA 1111 Valmiera. The reinforcing mesh is attached to the foundation with steel dowels or concrete screws using large diameter washers, so that there are no bubbles on its surface.
The adhesive layer is leveled over the surface of the recessed mesh with a wide paint spatula. After a day, the base is ready for cladding, the beginning of which should not be delayed - adhesion with a fresh adhesive mixture is better, and the base does not require priming.
Laying tiles
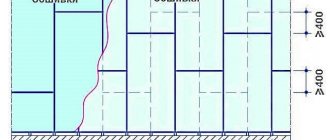
Taking into account the large length of the foundation and possible deviations of the interface between the blind area and the wall from the horizontal, the first row of tiles is placed on a support bar attached strictly horizontally along the perimeter of the building. The plank should be as narrow as possible, since after its dismantling there will be a gap that will need to be sealed with grout.
If there are ventilation windows in the base, then the ceramics between them are laid according to pre-made markings, leading the rows from slope to slope towards each other so that the tiles cut if necessary do not end up on the corner.
The tiles are cut using a grinder with a dry cutter.
The high density and frost resistance of porcelain stoneware or clinker does not mean a complete absence of temperature deformations, therefore, laying tiles is carried out with the obligatory installation of joints, the minimum width of which must be 2 mm.
When choosing ceramics, it is very important to pay attention to its performance characteristics
If the artistic finishing solution involves seamless installation, then the grouting composition is selected to match the color of the tile. To make tile joints of a fixed thickness, plastic crosses of the appropriate size are used.
Having brought the finishing to the level where the plinth extension ends, you should fill the space between the last row of tiles and the wall with cement mortar or tile adhesive. The last row of ceramics is laid on top of the end of the plinth with an outward slope of 10-15 degrees. The joining ends of the tiles of the last vertical and horizontal rows are ground down at an angle with a “rubber cutter” until there is no gap in their connection.
The adhesive is applied to the back side of the tile with a flat spatula and evenly distributed, after which its excess is removed with a “comb” with tooth sizes selected for the adhesive layer. The thickness of the adhesive mixture on the tiles should be from 5 to 10 mm.
2-3 days after the installation is completed, they begin to fill the tile joints.
Grouting joints
The technology for filling the joints of the plinth cladding does not differ from the identical execution of internal work. Grouting of joints, depending on their width, is done with a rubber spatula or a construction syringe, followed by compaction of the mixture and giving the joint profile a certain shape using a jointing spatula.
The final stage of tiling the plinth is grouting the joints
When finishing with gres, excess mixture is removed 15-20 minutes after grouting, when the bulk of the glue in the joint has set. It is better to remove excess glue and dirt from clinker tiles immediately, since later it will be more difficult to clean its porous structure.
Preparatory work
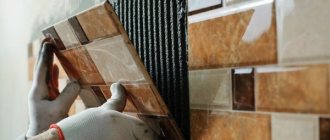
Covering the base with clinker tiles occurs more often than finishing work with other materials, so we will look at all the key aspects of installation using its example. When installing clinker tiles, it is very important to carefully prepare the base on which the tile material will ultimately be installed. The service life of the finish depends on the condition of the base. The surface of the material that will come into contact with the wall must be perfectly flat, the same applies to the wall surface.
Clinker tiles are also used for cladding the facades of houses. During tiling work, you will need crosses for tiles; more details about them are described in the article.
To prepare a level base for the tiles, it is necessary to remove all irregularities, bulges, depressions and other defects, after which it is necessary to clean the surface of the wall and dust and dirt. If any contamination remains, the contact between the tile and the wall will not be 100% tight, which is why the material will fall off very soon. To check the evenness of the treated area, you must use a building level
Return to content
Advantages and disadvantages
After reviewing and getting to know the tile, you should highlight its advantages and disadvantages. The first includes:
- strength, reliability, durability;
- resistance to aggressive environments;
- harmlessness;
- cleanable;
- attractive appearance.
Clinker is made from natural substances, without the use of any carcinogenic elements, so its use is possible in all indoor and outdoor areas. Smooth edges and surface make the tiler's work easier, while at the same time the result is a very attractive coating. Resistance to chemical reagents allows, if necessary, the use of various solvents when cleaning it.
There are only two disadvantages of clinker samples:
- Expensive.
- Difficulty in installation.
During production, clinker samples undergo rather labor-intensive processes, which is why their price is high. The second point is related to the poor absorbency of the tiles. Because of this, it is necessary to use special adhesives that can hold it. The high cost of products forces you to resort to the services of experienced craftsmen who can perform high-quality work, and this again means additional costs.
Features of laying clinker tiles
After high-quality and thorough preparation of the base, you need to give the wall some time to dry. Then you will need to apply a primer to it. This is done to reduce the hydrophilicity of the wall structure, as well as to ensure maximum adhesion between the building material and the wall. After priming, you need to wait a little longer until the material is absorbed.
After the wall has dried, you need to start marking the work area. As mentioned above, it is better to start from the level of the first row of tiles and install a metal profile there.
Laying clinker tiles
To calculate the location of the first row, you need to measure the height of the base and divide it by the width of the tiles, not forgetting to add the width of the joints. Also using this method you can calculate the amount of material required.
The first row of clinker should be laid below ground level. During installation work, a small gap will inevitably arise. There is no need to worry about this; after installation is completed, it will need to be sealed with a sealing compound.
Return to content
Consumption of materials
The need for tiles is calculated depending on the type and format of the material.
If the material is flat tiles, then its consumption is equal to the area of the plinth with an addition of 5% for trimming, and the area of the plinth is determined by multiplying its perimeter in meters by the height.
If the base is planned to be finished with clinker “like a brick,” then the need for flat cladding (in square meters) and the consumption of corner elements (in linear meters) intended for laying on slopes are determined separately. As a rule, there is no need to make such a calculation yourself - the salesperson in the store, having received the quadrature of the base and the linear length of the corners and slopes, will name the amount of material required for finishing.
The consumption of adhesives for laying tiles and grouting is indicated on the packaging in kilograms per square meter, therefore, knowing the quadrature of the base, it is not difficult to calculate the need for adhesive.
Subtleties of working with tile adhesive
One of the most important stages of installing clinker tiles is applying the adhesive mass to the surface. So, first you need to take a shaped spatula and scoop up the composition with it, and then transfer it to the wall. The width of the tool teeth directly depends on the finishing material used. For more or less light tiles, you will need a tool with teeth no more than 8 millimeters wide; for heavier materials, you need teeth with a width of up to 1.2 centimeters.
As a rule, the adhesive composition dries in half an hour, based on this fact, you can roughly estimate the area that needs to be covered with the composition at a time. It is very important to ensure that the glue stain does not begin to dry out around the edges, since the fresh mass must adhere well to the already applied one. If you still miss the moment and the composition begins to dry out, it is better to clean it off and start the operation again. Sometimes it is considered acceptable to apply the adhesive composition not to the wall, but to the tile itself.
It is important to know! Contrary to popular belief, it is strictly forbidden to dilute the hardened adhesive composition with water and use it for installation of finishing material. The fact is that such a mixture will lose all its qualities, which will lead to early destruction of the cladding.
If the adhesive solution that you have already applied to the wall sticks too quickly, then you need to take measures to increase its shelf life. To do this, you can use a spray bottle and plain water. Every ten minutes after applying the glue, you will need to spray a small amount of water in the area. Also keep in mind that if you start repairs in the summer, the glue will set very quickly under the influence of high temperatures, so think in advance about some kind of shelter to create shade, constantly use a sprayer, and try to apply less glue at a time.
Tile adhesive
If suddenly any fragment of the cladding was installed unevenly or, as they say, “floated,” then such an error can be corrected within 20 minutes, but no more. Excess adhesive mass must be immediately removed from the surface of the material using a rag and hot water. If you missed the adhesive mass on the surface, then you can later remove it by resorting to a solvent.
Return to content
Manufacturers and material prices
Clinker products are in great demand, so they are produced in different countries and by many manufacturers. The price indicator has a wide range from 100 to 2500 rubles per m2. First of all, the price is influenced by the popularity of the brand or company. These include manufacturers from Poland, Germany and Spain. The price can also be influenced by distance, terrain and the number of intermediaries. But no matter what you choose, a high-quality cladding will serve for a long time and will attract with its appearance. Other features of tiles made from clinker are described in this video:
Average score of ratings is more than 0
Share link
Comments There are no comments yet, but you could be the first...
Grouting joints between facing tiles
Covering the base with ceramic tiles or any other material should end with grouting the joint space. To obtain attractive and even seams, during installation of the tiles, stretch the cord before each next row of finishing material. Plastic crosses are placed at the corners of the tiles.
It will take about three days for the adhesive solution to dry completely. After this period, you can safely begin to process the seams. This stage is also important for creating a reliable and strong surface, since liquid can penetrate into the seam cavities, which has a detrimental effect on the adhesive composition, and bacteria and fungi can begin to multiply there. To grout joints, you can use a variety of compounds that must be applied with a special rubber spatula. To remove air and eliminate problems such as the formation of bubbles between the tiles, jointing should be done. A regular cable is perfect for these purposes. The only important thing is that its diameter matches the width of the seam. This cable must be pressed firmly into the still fresh solution.
Grouting joints
After the grout material has completely dried, it is necessary to remove its remnants from the tiles with a brush. For the first 24 hours, it is necessary to organize shelter from possible precipitation for only the treated surface, after which you won’t have to worry about rain. You will also have to figure out how to protect the wall from direct sunlight for at least a week. After grouting, you need to wait a day and then clean the lining with a damp cloth.
As a grouting material for tiles on the plinth, it is necessary to use only those compounds that are not affected by low or high temperatures and have increased elasticity. Don’t forget about the appearance of the structure, so try to choose a grout color that suits the wall.
Now you know how to tile a basement with your own hands and you can save a little on the services of construction companies.
Return to content
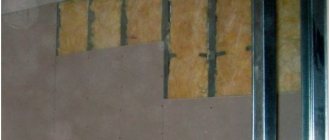
How to insulate the basement of a house?
To insulate the base, polystyrene foam or mineral wool is most often used.
Expanded polystyrene
– consists of polystyrene granules, under the influence of hot steam, its granules expand, “sintering” and filling with air. As we know, air is the best thermal insulator, and all types of foam have minimal thermal conductivity.
Mineral wool
– made by melting natural basalt stone of volcanic origin. The cost of such insulation is much higher than polystyrene foam. Although the “naturalness” of this insulation compensates for this “disadvantage”.
Insulation of the base with mineral wool or polystyrene foam is carried out using the “wet facade” technology.
Average prices for raw materials and labor
The cost of clinker tiles depends on the manufacturer and its type. For example, in Moscow, clinker from Poland will cost 2,066 rubles per square meter, and clinker from Germany will cost 3,300 rubles per 1 sq.m. In Krasnodar, for 1 square meter of clinker you need to pay from 2800 rubles, and in Nizhny Novgorod - from 2150 rubles. In Yekaterinburg, the cost of a square of clinker tiles starts from 2,600 rubles.
Prices for the work of laying clinker on the plinth also differ . For example, Ekaterinburg companies offer to finish the base with clinker at a price of 600 rubles per square, while in Taganrog the cost of work starts from 1,400 rubles per square, while workers also charge for grouting joints - from 400 rubles. In Murmansk, they charge 1,600 rubles for finishing work: in addition, you will have to pay 90 rubles per square meter for preparing the walls.
Clinker thermal panels for the base: advantages and disadvantages
Facade or basement thermal panels are structures consisting of a layer of insulation (polyurethane foam, expanded polystyrene) and a cladding of clinker tiles. This is an alternative solution for exterior finishing, which greatly simplifies the work of thermal insulation of walls and installation of piece clinker.
Among the advantages of thermal panels for the base:
- There are no “wet” processes and associated inconveniences - there is no waiting time for strength gain, exposure to low temperatures is excluded, and no glue preparation is required.
- High degree of readiness of the panels - the tiles are already professionally glued to the base.
- Simple installation that does not require specialized skills.
- A layer of thermal insulation additionally protects the base from the cold.
- The tongue-and-groove system creates a continuous coating without gaps or cracks.
- The imitation of brick or stone masonry is very reliable.
- Thermal panels can be used for finishing brick, wood, cellular concrete and frame walls.
- The service life declared by the manufacturers is more than 50 years.
Disadvantages of thermal panels:
- high price, although it is lower than that of coatings made from piece materials;
- unworn seams that need additional processing;
- slight curvature, characteristic of two-layer panels; products made from 3 layers do not have such a defect.