→ Materials
The concept of “dry” construction implies the design and construction of lightweight frame-sheathing structures, the installation of which requires a minimum of money and physical effort. The German company KNAUF produces high-quality materials necessary for such work and is a kind of legislator that sets standards for this type of activity. The KNAUF system for plasterboard partitions is known to any professional builder. Now it’s our turn to get to know these structures in more detail.
Peculiarities
Working with KNAUF plasterboard sheets is practically no different from installing other gypsum boards. However, the manufacturer produces the necessary components to create a plasterboard surface. All materials assembled into a set for wall cladding are called a system. This simplifies the work because all components are made for each other. There is no need to think about installing non-standard additional elements.
Pros of using technology
The KNAUF complex includes all the necessary elements for cladding a wall or creating a partition. This has advantages:
- the use of high quality materials, which guarantees a long service life;
- ease of calculation of the necessary materials for installation;
- KNAUF kit includes detailed assembly instructions;
- If you purchase gypsum boards and components separately, some small details are often forgotten. Everything is included in the kit.
Each structure has its own purpose: ordinary partitions, double cladding, and so on.
Types of plasterboards used in KNAUF systems
The gypsum plasterboard kit for wall cladding has the following types of sheets:
- Gray plasterboard – thickness from 9.5 mm. used in rooms with moderate humidity.
- Green moisture-resistant sheet - systems with such sheets are used in wet rooms.
- Green with red inscription, combined - a combination of moisture-resistant and fire-resistant materials.
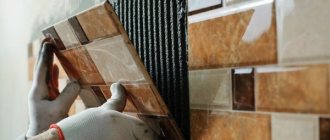
Wall cladding systems are carried out using 2 methods: frame (metal lathing from profiles) and frameless (gluing sheets to an adhesive composition).
Partition C112
The Knauf S112 system is a composition of materials that create a partition with a two-layer cladding and one metal frame. Partition features:
- the frame is made of metal profiles and sheathed on both sides with two layers of plasterboard;
- with the help of the created product, an important task is solved - dividing the room into zones;
- installation of a plasterboard partition is carried out without the use of “wet” methods;
- the surface of the product is fireproof;
- the ability to create a design solution;
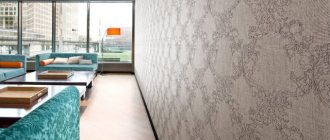
- the finished partition can be covered with any material: wallpaper, paint, tiles;
- when creating a partition, thermal insulation and sound permeability are improved.
Considering all the features of Knauf, we can say with confidence that its service life is long.
Names of Knauf partition elements
Installation of partition C112
The partition installation technology is carried out in compliance with step-by-step instructions. Installation work should begin when all work with electricity and laying all cables under the drywall has been completed. After completion of repair work on the flooring, as well as completion of water procedures in the required room. Installation of the Knauf partition is carried out as follows:
- Using a laser and upholstery cord, markings are applied to the clean surface of the floor, walls and ceiling.
- The lines mark the location of the rack profiles, as well as the doorway.
- The guide profiles are attached first. Metal cutting scissors are used to cut the profile to the required length.
- To improve sound insulation on the NP, it is necessary to glue a sealing tape according to the width of the profile.
- Using 35 mm dowels, the profile is attached to the floor. The fastening step is no more than 1 meter.
- Similarly, the NP is mounted on the ceiling.
- After this, you should measure the length of the rack profile from the ceiling to the floor.
Example of fastening rack profiles - The length of the rack profile should be 1 cm less than the height of the room.
- Sealing tape is glued to the rack profiles that are attached to the wall.
- If the wall is made of Knauf plasterboard, then the profiles are fastened with self-tapping screws. If the brick or block is made of cellular concrete, then dowels 35 mm long are used. The spacing of fastening dowels or screws is no more than 1 meter.
Scheme for fastening Knauf plasterboard sheets - For doors weighing 35 kg, it is necessary to mount a double rack profile, by attaching one profile to another.
Diagram of a double rack profile device - Door racks are mounted in guide profiles and secured with self-tapping screws 9 mm long.
- A horizontal lintel for the door is cut from the guide profile. It is installed between the door post profiles, at the top of the door height and secured with 9 mm self-tapping screws.
- From the resulting door frame to the ceiling, you should install a cut-out rack profile in the amount of two pieces. These racks are fastened using the perforation method with a bend.
Rack connection diagram - From floor to ceiling, rack profiles are installed every 60 cm, fixation is carried out using the cutting method.
Drawing with dimensions for mounting rack profiles - The backs of the profiles should be turned to one side, and the holes for the cables should be at the 1st level.
Plasterboard covering of partition C112
After the metal frame has been installed, the gypsum board cladding begins. The sheet should be fixed at a distance of 1 cm from the floor. If it is necessary to cut a sheet of drywall, you must use a construction knife. The cardboard is cut along the intended line and the plaster is broken.
On the other side, the cardboard should be cut along the resulting fold line. The cut part of the gypsum board is processed and a 22 degree chamfer is created. And also for cutting the sheet, cutters are used - small (the width of the cut sheet is 12 cm), a large cutter is 63 cm.
Installation of drywall is carried out using a special device. The sheets are pressed against the frame and secured with screws. They should be at the same distance from each other - 7.5 cm, and also from the edge at a distance of no more than 15 cm. The head of the screw should be recessed into the gypsum board by 1 mm.
In the place where 2 sheets are connected vertically, a jumper from the profile should be installed. Adjacent horizontal joints are shifted by 40 cm.
After installing the plasterboard sheets, electricity and other cables should be pulled through the holes in the metal studs.
Example of wiring under drywall
The next step is to lay Knauf Insulation material on the open side of the partition. And covering the partition with plasterboard sheets. But, the drywall joints on one side should not coincide with the joints on the other side. In this way, the strength of the structure is created.
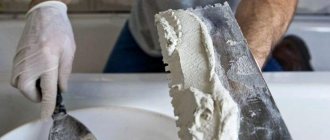
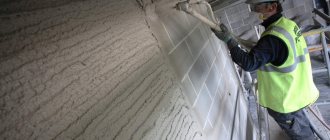
The final step in the first level is to seal the drywall seams. To do this, the joints should be made with a home-made chamfer on the drywall and the gypsum board should be treated with a primer. After which you need to make a solution for sealing joints from the Knauf Uniflot dry mixture. The putty is evenly applied to the joints with a narrow 15 cm spatula.
The process of puttying a plasterboard partition
After puttying, you should begin installing the second level of drywall. In this case, the joints of the first layer of plasterboard should not coincide with the second level of plasterboard covering of the partition. Using special equipment, it is necessary to cut holes for electrical boxes for switches and sockets in the plasterboard at the designated points.
Drilling holes for sockets
The joints of the second layer of drywall must be sealed using Knauf reinforcing tape. After the putty has dried, it is necessary to grout the joints with the reinforcing tape to remove excess pieces. After grouting, the entire surface should be primed with Knauf Tiefengrund.
Detailed process for installing holes in drywall for sockets
If the partition is to be painted, then before painting the entire surface should be puttied with Knauf Multi-Finish. When the surface is dry, it should be rubbed and coated with a primer.
Watch the video for the process of installing the Knauf partition.
Knauf installation technology: drywall, walls and partitions
Knauf installation technology is not much different from the generally accepted work on wall cladding and creating partitions.
When assembling the structure, you must adhere to some rules:
- plasterboard sheets are fixed to a metal or wooden frame from the center or from the corner. This is done so that the fox does not become deformed. For fixation, use NK 11 screws.
- To create a strong joint between the sheets, they are mounted close to each other, without leaving a gap.
- GKL is mounted so that there are no cross-shaped seams. Sheets on the surface must be shifted.
- To use the frameless method, you need to choose 12.5 mm sheets.
- To glue the sheets, use PERLFIX glue. After gluing, the master has 10 minutes to level the sheet on the surface.
- When laying thermal insulation material for attaching gypsum boards to the frame base, the kit includes 35 mm screws for a wooden base and 25 mm screws for metal profiles.
- The KNAUF profile is cut with metal scissors.
- Before fixing, soundproofing tape is applied to the guide profiles.
- For good sound insulation, you need to retreat at least 50 mm from the rough wall to the guide.
- If a Knauf system partition is created, with a room height of 2.80 m, the door leaf should be 90 cm wide and weigh up to 25 kg.
Knowing these rules, the assembled assembly will be a strong, rigid structure.
Types of structures provided by Knauf
The sets differ from each other in the number of skins, thickness and frame design. All partitions use proprietary insulation based on mineral wool. The following kits are available:
- C 111 - with one layer of cladding. The minimum thickness and instability to loads do not allow such a structure to replace a full-fledged wall; its function is decorative and zoning.
- C 112 – sheathing in two layers on each side on a single frame.
- Sets C 121 and C 122 are similar to the two described above. The difference is that instead of profiles, they use wooden beams for sheathing.
- C 115 is a set with a double frame, lined with two layers of plasterboard. This allows, by increasing the thickness of the partition, to place a double layer of mineral wool in it. In terms of its characteristics, this design is close to an ordinary wall.
- C 116 - also performed on a double spaced frame. The internal cavities remaining inside it allow for hidden installation of communications. Two-layer cladding set away from the wall is implemented in kit C 626.
- C 113 or C 367 - sets with triple skin. They are intended for those cases when it is necessary to use different types of plasterboard: moisture-resistant, fire-resistant and regular in many combinations.
- C 118 – used for extra-strong walls and partitions. In it, sheets of galvanized steel 0.5 mm thick are laid between layers of plasterboard.
- C 361, C 362, C 363 - sets on a single frame, sheathed in 1, 2 or 3 layers, respectively, with Knauf gypsum-fiber supersheets. From 365–369 – modifications of partitions with gypsum fiber on different frames.
- C 386.1 and C386.2 - kits that provide for the laying of ventilation or other communication ducts.
USEFUL INFORMATION: Why do you need crabs for drywall: method of attachment to the profile, types, application
Various combinations of frames and skins are possible. All of them are presented in the product line.
A single frame is used when you do not plan to hang anything heavy on the wall, and also if significant insulation or sound insulation is not required. But in order to attach heavy weight household appliances to the wall, you will have to make a double frame with reinforcement.
On what surfaces is cladding acceptable?
The Knauf design is applicable in various areas: walls, ceilings, floors.
Frameless method applicable for concrete and brick walls. When installing the system using this method, you need to choose the right primer.
The frame method is used if the room is damp, the walls tend to become damp, and there is a desire to improve sound and thermal insulation with the help of additional material.
Ceilings:
- There are kits for creating suspended ceilings;
- kits for working in the attic - fastening from the rafters.
KNAUF plasterboard kits are mounted on various surfaces. Each of which has its own requirements and compliance with certain rules.
conclusions
Zoning premises using Knauf products has a number of advantages:
- affordable price;
- absence of “wet” processes;
- the ability to control each stage;
- compliance with European standards;
- long service life.
Most technologies are within the capabilities of most private developers; all you need to do is acquire the necessary tools. Using moisture-resistant plasterboard, you can build a partition in a bathroom or toilet without much risk - it is only important not to deviate from the design principles.
How effective is Knauf drywall/walls/partitions technology: heat consumption standards
Knauf kits use heat and sound insulation materials in accordance with GOST 9573-96, 21880-94, 10499-95, as well as materials included in the “List of polymeric materials and structures approved for use in construction by the USSR Ministry of Health” - M. 1985. Having a conclusion on compliance with sanitary standards of the Legislation of the Russian Federation.
To maintain indoor heat consumption standards, KNAUF systems have materials that are calculated individually for each case (dry but cold rooms, wet rooms).
The thermal insulation layer is placed only in the frame base. It is impossible to use insulation in the frameless method.
Factors influencing the choice of partition
The Knauf company offers a large selection of partitions. And each of them is unique in its own way. Each partition is designed for different rooms, with different temperatures and humidity levels. Before purchasing a Knauf partition system, you should pay attention to:
- The height of the room where the partition will be mounted.
- How noisy is the room, and should the noise be removed? If yes, then a Knauf acoustic baffle is required.
- Load on load-bearing walls or a wall lined with plasterboard.
Knauf plasterboard partition frame - Condition of the base wall.
- The need to hide communications with a box in the partition.
- Will there be a door in the partition?
- The height of the structure itself - it will be up to the ceiling or a decorative element of the interior of the room.
Scheme for attaching a plasterboard partition to the wall - Temperature regime.
- What functions will the partition perform?
Scheme of covering a partition with plasterboard sheets
When choosing a Knauf partition, you should think about everything. After all, this design should fit into the room, and not become an obstacle for the people living there. The interior of the apartment should emphasize the zoning of the room. The partition can be equipped with lighting, covered with paint or covered with wallpaper. If desired, you can make through windows or niches for decoration in the partition.
Examples: video tutorials
The use of the frameless method is shown in the video:
Soundproofing walls with 1-layer cladding in the video:
Assembly of the KNAUF gypsum board partition and 2 layers of sheets:
KNAUF is a global manufacturer of mixtures, profiles and plasterboard sheets, widely used in various installation and repair work. Knauf systems allow you to reduce the time for purchasing materials, make your work easier when doing it yourself, and prevent mistakes that will subsequently affect the entire structure.
Features of the formation of corners from plasterboard
The corners play an important role in the construction of a plasterboard structure. If they are assembled incorrectly, then after a short time cracks will appear in these places, and the fastening of the sheets will be unreliable.
GCR structures can have both internal and external corners. To form each of them, their own techniques are used. First of all, the frame is assembled.
External corners are made as follows:
- Two vertical posts forming an edge are installed in the guides so as to form a single angle. It is unacceptable to install them offset: in this case, there will be a void under the joint of the drywall sheets.
- The racks are fixed in the guides with a pair of screws at each fastening point. Professionals prefer to use a cutter: such a connection does not contain any bulges that interfere with the tight fit of the plasterboard.
- Fragments of plasterboard sheathing are screwed end-to-end, so that the plane of one element overlaps the end of the other, and are reinforced with a special corner profile. You can fix it with putty or PVA glue.
Curvilinear ribs are reinforced with a flexible plastic corner.
Internal corners are formed slightly differently:
- At the initial stage, a corner is made from the profile by twisting two posts so that the side back of one is attached to half the back of the other. In this case, LB19 mm self-tapping screws or similar ones are used. Fastening is done every 25–30 cm.
- This structure is inserted into guides on the floor and ceiling and fixed with metal screws.
- Before installing the drywall, chamfers are made with an inclination of 45˚; they will make it easier to putty the corner.
- The internal rib is glued with reinforcing mesh and puttied. After drying, it is treated with a drywall primer.
in his designs he recommends using a slightly different scheme:
- First, a fragment of plasterboard is mounted, forming one of the sides of the corner.
- A vertical guide profile is attached to it directly through the drywall with a self-tapping screw.
- The necessary horizontal jumpers are fixed in it, after which the drywall is screwed on.
The result is a T-shaped connection of sheets. Further processing of the internal corner is carried out in the same way.
If the design uses several layers of drywall, then they are offset. In this case, it is important to place the fastening points correctly.
Kits for the construction of walls and partitions are deservedly popular in the market. Ease of assembly and high quality material will ensure the desired result is achieved.
GKL partition on a double metal frame with space for communications
Composition of the complete system - quantity per 1 m2:
- (1) KNAUF-Fireboard – 1.0 m2;
- (2) KNAUF sheet GSP-A (GSP-H 2, GSP-DF) – 3.0 m2;
- (3) KNAUF profile PN 50×40 (75×40, 100×40) – 1.4 linear meters;
- (4) KNAUF profile PS 50×50 (75×50, 100×50) – 4.0 linear meters;
- (5) screw TN 25 – 18 pcs.;
- (6) screw TN 35 – 29 pcs.;
- (7) KNAUF-Fireboard putty Putty for KNAUF-Fireboard or KNAUF-Uniflot slabs - 0.05 kg;
- (8) KNAUF-Fugen putty for KNAUF sheets – 1.0 kg;
- (9) fiberglass reinforcing tape for KNAUF-Fireboard slabs – 0.75 linear meters;
- (10) paper reinforcing tape for joints of KNAUF sheets - 1.5 linear meters;
- (11) dowel K 6/35 – 3.2 pcs.;
- (12) sealing tape – 2.4 linear meters;
- (13) mineral wool slab – 1.1 m2;
- (14) KNAUF profile PU 31×31 – according to customer needs.
It is used in premises for various purposes as an internal enclosing structure in new construction and reconstruction. This design, in addition to high strength and fire resistance, makes it possible to hide sanitary communications (heating, water supply, sewerage) and equipment. After installation, the surface of such partitions requires additional finishing (painting, wallpapering, tiling, panels, etc.).
Installation
Installation of a gypsum plasterboard partition on a double metal frame with space for communications almost completely repeats the technological process of installing a two-layer partition, only sanitary communications are installed inside along with electrical wiring and equipment.
All work on the installation of gypsum plasterboard partitions using Knauf technology is carried out at operating humidity and a temperature of at least 15 degrees.
Hello, dear readers! Not long ago, the following situation happened: a friend finally got into the hands of an album of standard drawings from a materials manufacturer. For the first time, a person learned that using Knauf technology, drywall is sometimes mounted on profiles in two rows! He came to me for an explanation, and I said that the manufacturer offers different options so that builders can reduce the likelihood of cracks. If you do not set yourself the goal of saving on important nuances, but want to install a durable structure, study all the intricacies. I’ll help you figure them out now, since drywall is my favorite material.
Installation stages
KNAUF specialists have developed a step-by-step technology for installing plasterboard systems, implying a strict sequence of all work. So, let's look at brief instructions for installing a plasterboard partition:
- Marking. We mark a straight line on the floor with a dye cord, and then, using a plumb line or laser level, transfer this mark to adjacent walls and ceiling.
- Installation of a partition frame from a profile. We attach the PN profile to the floor and ceiling using dowels (every 80–100 cm). It must be secured to the ceilings by laying sealing material. In the PN we install and fasten the rack profile. The maximum distance between posts should not exceed 600 mm.
- Equipment installation. We install embedded elements in the frame structure (supports for cabinets, shelves, lamps, etc.). We install electrical wiring and all necessary communications.
- Frame cladding. We mount sheets on one side of the frame for the plasterboard partition, securing them with self-tapping screws every 250 mm.
- Laying sound insulation. We lay soundproofing material between the racks (as tightly as possible).
- Full lining. We attach the gypsum board to the remaining side of the frame. If the type of partition provides for multi-layer coating, each layer of sheets must be installed, shifting it by 600 mm from the previous one.
- Finishing. Having finished covering the frame, you need to putty the seams between the sheets and the heads of the fastening screws. Drywall must be primed for final decorative finishing.
This brief overview of plasterboard systems developed by the famous German company KNAUF is a kind of instruction that must be followed when installing partitions. Additional questions that arise during your work will be carefully considered by our experienced specialists. Rest assured, we will give you an answer that will provide a “pleasant” result in such a difficult task as home renovation.
Profile types
Depending on the purpose, Knauf profiles are divided into rack-mount, guide and arched. Rack structures have a cross-section in the shape of the letter “C” and are located vertically in the frame. The racks are installed together with guide profiles of the appropriate size. The ends of the products are equipped with two holes through which utility lines are laid (hidden in the walls). They are attached to the guides with self-tapping screws, which are easily centered thanks to the longitudinal grooves.
The guide profiles have a cross-section in the shape of the letter “P” without curved edges - this allows for a tight fit of the racks to the upper and lower elements. They are needed not only for fastening rack parts, but also for installing jumpers between them. During manufacturing, holes are drilled in the structures into which dowels are inserted during installation.
Knauf partitions, the technical characteristics of which are indicated in the table below, can also consist of arched profiles, which serve as the basis for curved structures. They are made of different radii, and the shelves can be wrapped inward or outward.
| Knauf partition system | Sheathing thickness, mm | Partition thickness, mm | Frame thickness, mm | Fire resistance limit |
| C111 | 2×12,5 | 75 100 125 | 50 75 100 | EI30 EI45 |
| C111 | 2×12,5 | 125 | 100 | EI30 EI45 |
| C112 | 4×12,5 | 100 150 150 | 50 75 100 | EI60 EI90 |
| C112 | 4×12,5 | 150 | 100 | EI60 EI90 |
| C118 | 6×12,5 | 127 | 50 | EI60 EI90 |