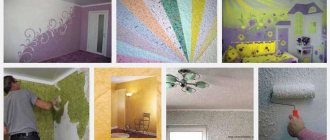
Why is it better not to glue new wallpaper onto old ones?
In the old days , when wallpaper was entirely paper without any protective films or coatings it was possible to glue new wallpaper onto an old, smooth, undeformed, but simply boring coating with a clear conscience. Sometimes there are so many layers of old wallpaper that from them, like tree rings, you can determine the number of repairs and remember different periods in the life of the owners. If over old Soviet paper wallpaper that miraculously survived, then you can take a risk and do without the dismantling procedure. In all other cases, it is better not to do this.
Firstly, if you plan to decorate the walls with plaster, photo wallpaper, paint or any other finish, then the layer of old wallpaper must be removed without fail . Secondly, even if you are going to glue wallpaper again, then when applying one layer to another you can get lags in the new layer, wrinkles, bubbles and other defects . This happens because the old layer may no longer hold on very well, and there is also an increased load. Moreover, the glue you will use will soften the old layer of wallpaper. As a result, the drying process will be delayed, and if the wallpaper in two layers is of different quality, then the lag from the walls cannot be avoided.
- It’s great if you still have labels from the rolls , which indicate the type of dismantling , for example, “remove wet” or “delaminate when removed.”
- Before you start removing old wallpaper, remember how it was applied . If it was ordinary wallpaper glue that was applied to primed walls, then most likely the entire dismantling process will not be very difficult.
- Problems may arise if the wallpaper was glued with non-standard glue , such as PVA, or was mounted on an unsuitable surface. The most difficult surface is considered to be unputtyed drywall.
- Some difficulties may arise if the top layer does not absorb moisture (vinyl and washable wallpaper), but effective methods have been invented for this case.
In any case, remember that nothing is impossible. There are many ways to remove old wallpaper from walls; you just may have to put in a little more effort than planned.
How to replace some of the wallpaper in a room
After renovation, as a rule, there are always remnants of wallpaper, which should be saved just for such cases. The easiest way to update your wallpaper is to stick new ones on top of the old ones. But in a well-lit room, this area will be noticeable, as it will become denser than the rest of the wall surface. Therefore, the best option is to install a patch. With this method, the main thing is to achieve complete alignment of the wallpaper pattern. To do this, there is a procedure for how to correctly replace part of the wallpaper:
- carefully cut out the problem area from the wall in the form of an even figure (this will make it easier to select a patch);
- measure the size of the problem area;
- cut the patch slightly larger to achieve perfect alignment;
- cut the patch with a utility knife or sharp scissors;
- apply glue to the peeled wall;
- glue the cut fragment, pressing it down with a soft rag;
- remove remaining glue.
For work, you can use any suitable glue. The glued patch can be dried with a hairdryer or left to dry naturally.
How to prepare for wallpaper removal?
The process of removing old wallpaper is often a messy process. Plaster will crumble, water and some special products will splash, so it’s better to prepare the room in advance:
- try to remove as much furniture as possible ;
- if it was not possible to remove all the furniture, move the remaining items to the center of the room and cover with film;
- is also recommended to cover floor with film, and to prevent it from slipping, you can put old newspapers or cardboard on top of it:
- You should definitely cover the baseboard . The same film, which is secured with masking tape, will come to the rescue;
- if you plan to remove the wallpaper using water, then you need to turn off the power to all sockets and switches , or even better, additionally cover them with film, which is secured with tape;
- You can put a damp cloth on the threshold so that dust does not spread to neighboring rooms;
- all the necessary tools in advance.
How to replace part of the wallpaper in the hallway
The same techniques are used in the hallway as in the kitchen or any other room. If there are areas in the hallway where the wallpaper has partially peeled off, this can be corrected by following these steps:
- Remove dust and plaster that has fallen off the wall from under the “falling off” wallpaper.
- Restore the plaster layer and prime with a suitable compound.
- Glue the wall and a piece of wallpaper, carefully align it with the sheet of wallpaper on the wall.
- Press, smooth, release air, remove remaining glue.
To make the wallpaper dry faster, you can warm it up with a hairdryer. If the joints are separated, the defect can be corrected by painting these places with paint to match the wallpaper. The joints are practically invisible after the paint has dried.
Wallpaper removal tool
The last point is the most interesting. What devices may be needed in the process of removing wallpaper?
Scroll:
- two sharp spatulas of different sizes;
- bucket, water, detergent;
- sponges, roller, rags;
- garbage collection bags;
- gloves;
- ladder;
- perforation roller, wallpaper tiger, knife;
- special means for removing wallpaper/steam iron and a piece of fabric.
The set of tools can be reduced or expanded depending on the chosen method.
Self-production
The maximum effect is achieved when using special industrial compounds. At home, it is also possible to prepare a glue destroyer.
Based on laundry soap
An easy way is to rub a sponge with soap and wipe the wallpaper with it.
When you have time, you can prepare a soap solution:
- Finely chop the bar of laundry soap with a knife. For convenience, you can use a grater.
- Pour the shavings into a bowl and pour warm water two fingers above the shavings. Leave to soak overnight.
- For better dissolution, the composition must be stirred periodically.
- Before use, strain through two layers of cheesecloth.
Read more ► How to wash crystal tableware and a chandelier so that it shines like new
For application use a spray bottle or roller.
Dish detergent based
Soaked fabrics can fall off on their own under the influence of their own gravity
. You can use any detergent. Pay attention to the consistency: when using a thick gel, you need to take 1 part of it and 50 parts of water.
When using a thinner gel, you need to take a little less water. Stir gently to prevent the formation of foam: it will dissolve excess dirt. If foam does form, wait for it to settle.
Vinegar based
For preparation, use ordinary acetic acid and water. The proportions that must be observed are 1:8. The caustic composition must be taken outside or onto the balcony for 15 minutes, then it can be applied to the wallpaper.
Based on fabric softener
An excellent option is to use conditioner , as it produces little foam. Ratio of product and water: 1:2. If the conditioner is concentrated, more water will be required than for a regular conditioner.
An excellent option is to use air conditioning.
The conditioner should be poured into the water and mixed lightly. Pour the finished mixture into a spray bottle and spray the wallpaper.
Based on washing powder
You need to take a bucket of water and 1 kg of powder. A good choice is powder designed for automatic washing machines: it foams less.
You need to thoroughly stir the composition and wait until the foam settles. The wallpaper remover is ready.
No. 1. Removing wallpaper with bare hands
This is an option for those lucky ones whose old wallpaper is already peeling away from the walls . To remove old canvases, just pull the top edge, and if some parts do not give in, then pry them off with a spatula or knife. Strips of wallpaper may come off entirely. Old wallpaper has most likely already lost its strength, so you shouldn’t pull it to prevent the canvas from crumbling. Shoot carefully. If the wallpaper is securely attached in some place, then pry it off with a knife or spatula. If this does not help, then use one of the following methods.
We use water
The classic version with water almost always helps. Moreover, this is an environmentally friendly method that will not harm anyone. And there will be no dust during work. This is ideal if the wallpaper is paper. Sequence of work:
- Preparing the room: sockets, baseboards and switches are protected.
- The principle of operation is as follows: the wallpaper is generously moistened until it swells and gets wet. To speed up the release of the glue, add soap, dishwashing liquid or conditioner to the water. Ideally, heat the liquid.
- There are several options for wetting: with a sponge or a spray bottle. There should be enough liquid, but not in excess. Leaking onto the floor is not our option. All you have to do is wait half an hour and start tearing off the material until it dries. You need to work in separate sections.
- Before you peel off and wet the wallpaper, you can speed up the process of swelling and high-quality impregnation. To do this, the surface is perforated with a needle roller, knife or wallpaper tiger. This is especially true for canvases with a protective water-repellent layer.
- After impregnation, the strip is pryed off with a spatula or knife and torn off the wall. It is better to start work from the seam. Problem areas are moistened with water again.
- It is important to remove areas near switches and sockets with care so as not to touch the wires.
- How to tear wallpaper off the wall if it doesn’t come off after all the steps? Need a scraper. The canvas is removed carefully so as not to damage the plaster layer.
- The removed pieces are put into garbage bags.
When the work is done and you have managed to remove everything, you need to wipe the surface with warm water (clean) using a sponge. Single-layer paper wallpaper can be removed using this method in 10 minutes. It's better to work from the bottom up. Two-layer ones can be removed in 15 minutes, however, it is important to be careful not to tear off only the top layer. The procedure is repeated.
If the trellises are waterproof, vinyl or non-woven, then much more effort will be required. Perforation in such cases is simply necessary. Otherwise, you will need a non-woven wallpaper remover.
No. 2. Traditional method: removing wallpaper with water
The wet method works in most cases . Moreover, it is more hygienic compared to the previous option, since less dust will be generated during the process.
The procedure is as follows:
- prepare the room, seal the baseboard, sockets and switches;
- The essence of the method is to wet the wallpaper enough to soften the material itself and dissolve a significant part of the glue , so you need to prepare water. It is better to take warm water, and to be sure, you can add a little soap, dishwashing liquid or fabric softener to it. These substances will significantly speed up the process;
- It is best to wet the wallpaper with a sponge (but you can use a spray bottle, a spray bottle, a rag, a roller), trying to apply enough liquid to soften the wallpaper and glue, but not overdoing it so that the water does not flow onto the floor or flood the sockets. After 20-30 minutes , you can begin to remove the wallpaper itself, until everything is dry. to treat the surface in parts ;
- for better penetration of water into the wallpaper and under the wallpaper, the top layer can be perforate using a needle roller, knife or wallpaper tiger. If the wallpaper has a protective moisture-repellent layer, then you can’t do without such a trick;
Wallpaper perforation with wallpaper tiger
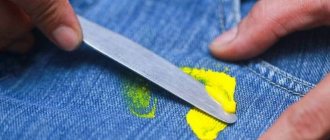
- When the canvas is sufficiently saturated with water and begins to move away a little from the surface, you can pry it off with a spatula and begin to tear it off . It is better to tear it off from the seams . If some areas are stubborn, re-wet them;
- The edges of the spatula should be sharp, so they can be pre -sharpened with sandpaper ;
- take special care to remove wallpaper near sockets, switches and meters ;
- if some areas still do not give in , then you will have to arm yourself with a scraper , just work carefully so as not to damage the layer of plaster;
- Experts advise using laundry soap when removing wallpaper that was glued with PVA . The block is grated, poured with 4 liters of water and boiled. An alternative is 9% vinegar : 450 ml per bucket of water will be enough. If you add both vinegar and soap, you can get a product that can even cope with wallpaper that is ingrained into the wall. To remove waterproof wallpaper, add fabric softener at the rate of 300 ml per bucket of water;
- Immediately put all removed fragments into bags or sacks. After finishing work, wipe the walls with clean warm water and a sponge.
This method is ideal for paper wallpaper : single-layer wallpaper soaks in literally 5-7 minutes and can be easily removed from top to bottom; double-layer wallpaper will take 10-15 minutes, and only the top layer can be removed. If you are going to glue wallpaper, then you can leave the bottom layer of the old ones. If not, then the procedure will have to be repeated. In the case of paper wallpaper covered with a protective moisture-resistant film , as well as in the case of vinyl, non-woven and washable wallpaper, you will have to try a little more. At a minimum, perforate , and at a maximum, use special compounds and other tricks.
Types of coatings
The surface with which we have to work also determines the vector of our actions and the methods that we can use:
– Concrete covering.
Usually, when we deal with concrete walls, we are faced with a tightly glued wallpaper layer. However, concrete is the most unpretentious surface and we can use any available method. For example, you can resort to special solutions for removing wallpaper, but you need to approach this option wisely. If you do not follow all the instructions, some of the solution may remain on the surface of the wall and add difficulties when gluing new wallpaper. The next option is a sanding machine, a long and dusty option, choose it only if a small part of the old wallpaper layer remains after working with a spatula.
– Drywall.
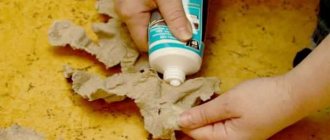
One of the most unpleasant options. It is worth considering that options with wetting with a solution or water can damage the base itself and you will also have to deal with the reconstruction of the walls. And if no primer was used when gluing the wallpaper, then removing the old layer of wallpaper simply and quickly will not be possible in principle. Here, we will need to resort to a special wallpaper remover that will not damage the drywall. Or, you can use the traditional method. Several packages of construction adhesive are dissolved with warm water to form a thick mass, stirred until the lumps completely disappear. Then apply a thin layer to the wallpaper to prevent the solution from being absorbed into the drywall. After 3-4 hours, you can begin to carefully remove the old wallpaper.
-Wooden surface.
When working with a wooden surface, you need to follow the advice when working with drywall. Wood also does not like moisture very much. You should also be careful with aggressive removers and chemicals so as not to harm our walls.
Complex option with paper wallpaper
Follow these tips:
- When wetting the wallpaper with solution/water, do not overdo it, otherwise you can seriously damage the plaster/base on which the wallpaper is glued.
- Be careful when wetting wallpaper around outlets and switches, even if you have taped them together. You can also turn off the electricity in the room while doing rough work.
- When removing double-layer wallpaper, proceed in stages. First, remove the first layer, and then, wetting the second, also clean it off with a spatula.
- Be careful in general when working with a spatula. Try not to leave deep furrows. In addition, a piece of iron can chip off and remain on the wall, which will later lead to a rusty stain, which will appear over time on the new wallpaper.
It is worth mentioning separately the moment when the wallpaper is pasted using PVA . Options with wetting and using special solutions will not work here. You need to arm yourself with a spatula and a grinder. Use a spatula to clean the most accessible places, and after that, sand the remaining layers. Be careful with the plaster. But, in any case, you will need to level the walls with putty.
Note! If your choice fell on paintable wallpaper, be sure to read the article - How to paint paintable wallpaper.
Self-removal of wallpaper
By following these tips and following all the instructions, you can easily cope on your own without the help of specialists.
No. 3. We use a special wallpaper remover
If the wallpaper is glued tightly, or you simply don’t want to waste time and effort soaking it with water, then you can take a special composition for removing wallpaper. Such products are inexpensive, non-toxic, and are absorbed into the wallpaper structure much better than just water or soap and water.
Procedure:
- the purchased product in the form of a powder or gel is diluted with the specified amount of water, stirred ;
- using a roller (you can also use a sponge ), the resulting solution is applied to the wallpaper in the usual way;
- leave the product to absorb and penetrate for the time indicated on the package . The period can range from several minutes to 3 hours ;
- After a while, the wallpaper sheets themselves lag behind the walls and you won’t have to make superhuman efforts to peel them off. For convenience, it is better to remove wallpaper using a spatula ;
- cut waterproof wallpaper with a knife or wallpaper tiger;
- Among the popular products, we highlight the drugs Zinsser, Quelyd Dissoucol and Atlas Alpan . One bottle should be enough to treat approximately 100 m2 of surface;
- The product is suitable for removing paper, textile, vinyl, non-woven and other types of wallpaper.
Review of popular brands
Professional wallpaper removers are available in construction supermarkets. The most popular brands from well-known manufacturers are presented below.
Methylane
The most commonly used product that can deal with wallpaper glue in 10 minutes. The preparation method is indicated on the package: just dilute it with water.
For application it is recommended to use a brush, roller or sponge. When applying the product to the ceiling, it is important to use safety glasses.
Methylane loses its properties when frozen, this must be taken into account when purchasing and storing.
DISSOUCOL
The drug is used to remove wallpaper, paint and whitewash.
Advantages of the drug:
- Versatility. The product will even cope with liquid wallpaper.
- Easy to use. You just need to dilute it with water and you can get to work.
- Complete removal of the old layer. Leaves absolutely no traces.
- Safety. Contains only organic, harmless ingredients.
Read more ► How to prepare dishwashing liquid at home: simple recipes
No. 4. Steam method
The most common iron, steam iron or steam generator can help deal with old wallpaper:
- if the farm only has regular iron, then you will have to additionally prepare a piece cotton fabric.
It is thoroughly moistened and applied to the wall. It is better to act together: one person holds the fabric, the second irons the area, setting the heating of the iron to maximum. Iron the fabric several times, remove it and pry up the wallpaper with a spatula. Moisture and hot temperature contribute to the rapid dissolution of the glue and softening of the wallpaper; - even better to use steam generator or iron with vertical steam function. Steam is applied to a certain area of the wallpaper, you can apply a thin cloth;
- steam generators facilitate the process and make it simpler.
penetrates much fasterthan water, and the risk of damaging the plaster is reduced. It is much more convenient to work with a steam generator than with an iron or steam iron. The method is best suited for paper wallpaper, from the rest you will have to first remove the protective film, or perforate it very carefully.
Steam
Steam removal
Steam is the same water, but in a different state. It penetrates better into the trellis structure. To operate, you need a household iron or steam generator. Instructions:
- When working with a simple iron without steam, you will have to stock up on a piece of cotton fabric. It is moistened in clean water and applied to the surface. Ideally, the work should be done by two people: one will hold the fabric, and the other will iron it with a heated iron. The fabric is ironed several times. All that remains is to remove it and use a spatula to pry off the strip. Moisture and steam will allow the glue to quickly dissolve and the wallpaper to soften.
- The easiest way is to use a steam generator or a household iron with the ability to release steam. The steam is directed to a specific area, after which the strip comes off. The plaster will not be damaged.
This is an ideal way to peel off paper wallpaper. Moisture-resistant ones, according to tradition, need to be perforated.
No. 5. "Mole" versus wallpaper
The following method is often used in construction. It is a variation of the traditional method of removing wallpaper by soaking. If the wallpaper is glued tightly , then the “Mole” pipe cleaner . To 1 part “Mole” add 2 parts water. Using a roller, this solution is applied to the wallpaper, and after 5-10 minutes the wallpaper should come off in whole sheets. The effectiveness of this method is excellent; you just need to wet the wallpaper very carefully and wear gloves.
Folk remedies
- Laundry soap is ground into powder, diluted with 3 liters of water and allowed to brew for 10-12 hours. Or boil the solution to quickly dissolve the soap. Next, the resulting solution is applied to the wall using a sponge.
- Add 500 grams of vinegar to 5 liters of water. We wet the walls gradually so that the applied liquid does not have time to dry.
Table 2. Types of wallpaper.
| Name | Properties |
| Paper | Remove with a spatula; if difficult, wet with water or a special solution. |
| Vinyl | Easy to remove, if necessary moisten with a little water. |
| Non-woven | Double-layer wallpaper, it is advisable to use a special solution. |
| Washable | Because have a protective layer that does not allow moisture to pass through, you should use a needle roller, and only then use a solution/water. |
| Liquid | It is enough to wet the wall. |
| Glass wallpaper | A special liquid will significantly simplify the work. |
Types of wallpaper
Prices for different types of wallpaper
Wallpaper
No. 6. How to remove wallpaper glued to PVA
PVA glue is a water-insoluble composition, so traditional methods do not work well with it. You can try adding laundry soap or vinegar , or both together, or you can do it a little differently.
Use a spatula and a sander. Using a spatula, try to carefully remove those parts of the wallpaper that give in. Residues and large pieces can be removed using a sander , but in this case it is worth remembering that you are running the risk damaging the main surface. Most likely, after completion of the work you will have to level the walls.
Also, do not forget about the most effective method - steaming .
How to use liquids
Methylane loses its properties when frozen, this must be taken into account when purchasing and storing.
Using the products is very easy, just read the instructions and dilute the liquids in certain proportions.
Step-by-step instruction:
- Dilute the solution as indicated on the package.
- Using a convenient tool, apply along the entire perimeter of the wallpaper.
- Wear goggles and gloves to protect your eyes and hands.
- Leave the liquid for some time to act.
- The wallpaper will either fall off under its own weight, or it can be easily peeled off using a spatula.
No. 7. How to remove vinyl wallpaper
Vinyl wallpaper is a layer of polyvinyl chloride film glued to paper, or less often to non-woven fabric . The traditional method is suitable for removing such wallpaper, but several nuances should be taken into account:
Wallpaper tiger
- vinyl film does not allow water to pass through , therefore, in order for moisture to get to the glue and soak it, it is necessary to break the integrity of this outermost layer . Use a knife, spatula or wallpaper tiger;
- after that, moisten with water and wait 15-20 minutes ;
- Due to the fact that vinyl film is very durable, the wallpaper will be removed in entire strips.
Each of the canvases must be cut from above with a knife or spatula , and then carefully pulled down; - in some places a paper base , but it can be easily removed using the same soaking and scraping with a metal spatula;
- Heavy multi-layer vinyl wallpaper more difficult to dismantle ; you will have to slowly and systematically get rid of each layer;
- masters suggest using not just water for wetting, but a weak glue solution . Thanks to this, the liquid becomes thicker, lingers longer on the surface of the wallpaper and is more effective. On waterproof vinyl film, even perforated, ordinary water will flow very quickly. Add two times less wallpaper glue to the water than when gluing wallpaper;
- In place of water and glue solution, you can use special wallpaper removers .
Preparing the necessary tools
Necessary tool
The work ahead is dusty, we remove everything unnecessary from the room and cover everything that remains with foil. It would not be amiss to cover the floor with oilcloth in order to protect it from contamination and the ingress of chemicals that we may use. We prepare in advance:
- putty knife
- stationery knife
- paint roller
- large soft sponge
- ladder
- needle roller
- spray
- garbage bags
- molar tape
Be sure to cover sockets and switches with masking tape to prevent moisture penetration .
To shoot or not to shoot?
Next, we will determine the complexity of the coating to be removed. If the wallpaper is non-woven , most likely it will be easily torn off as a single piece. If we see vinyl or paper wallpaper , we have to suffer, because... they will tear and leave marks that we must completely remove. If you are convinced that the wallpaper is difficult to remove, you should immediately think about a solution for removing dried glue. You can get by with a regular aqueous solution with the addition of vinegar or laundry soap. But for the most problematic options, it is advisable to buy a special product. Such solutions have a more targeted effect, absorbing under the wallpaper, they destroy the structure of the adhesive and make it easier to deal with problem areas where the adhesive has tightly adhered to the wall.
Special wallpaper remover
No. 8. How to remove non-woven wallpaper?
Non-woven wallpaper can be made purely from non-woven material , or from non-woven material and a layer of other material. In the latter case, paper , textiles or vinyl are attached to a non-woven base. The tactics for dismantling non-woven wallpaper are not much different from the traditional method described above.
The non-woven base is much stronger than paper, although it is also natural. It will be filmed in whole canvases. It is most convenient to use a spatula ; if necessary, the wallpaper can be moistened .
If there is an outer vinyl layer, it is first perforated , then moistened, and after 15-20 minutes remove using . If the non-woven bottom layer remains intact and has not been removed, you can leave it - it strengthens the surface of the wall and will be an excellent basis for new wallpaper.
How to fix loose joints on wallpaper
The next problem is loose or poorly joined seams. The defect is formed after gluing paper wallpaper, which can stretch slightly under the influence of moisture. After drying, such stretched canvases shrink, leaving a gap between the joints.
Even small gaps are clearly visible on bright or dark wallpaper if the base plaster is gray or white. Experienced craftsmen prefer to paint the joints with paint that matches the color of the rolls being prepared for gluing.
Joints can be corrected using putty and color when complete masking of unsuccessful joints is achieved:
- select a color that is close in tone to the glued canvases;
- tinting the putty;
- apply it to the joints;
- Even before drying, remove the residue using cleaning materials.
After drying, the joints can be visually noticeable only from a very close distance, but are absolutely indistinguishable from afar.
No. 9. How to remove washable wallpaper?
Washable wallpaper is chosen for those places where water can get in, or where there are constant sources of pollution. This coating can be washed with a damp sponge, and nothing will harm it. Cool, right? But this advantage becomes the main problem when trying to remove washable wallpaper. Experts advise doing the following:
- First, you should try peeling the wallpaper. Make notches , wet the surface, wait. The top layer can be easily removed, but the bottom layer will have to be removed with a scraper . Be prepared that you may need to moisten the surface several times , because such wallpaper is protected from such exposure, and it will not be easy to break such protection;
- if the water has poorly soaked the wallpaper, it is better to use a steam generator . Often, old washable wallpaper does not respond to either water or a special liquid, so only steam remains.
How to shoot?
Let's look at how to quickly and easily remove old wallpaper from the wall (read about how to quickly remove remnants of wallpaper from walls here). The easiest way is to buy wallpaper remover and follow the instructions on the package. For relatively small areas this method is the most popular.
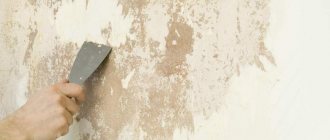
- In any case, in order for the old paper to come away from the wall well, you need to wet it and wait a little. If you decide to cope with water, it is recommended to use it hot and with the addition of soap. Gently apply with a brush or roller and let it absorb completely.
- You can also resort to using a special steaming mop, or steam the wallpaper using an iron, placing a layer of cotton fabric between them.
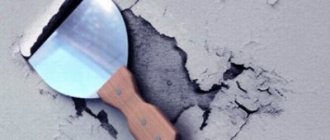
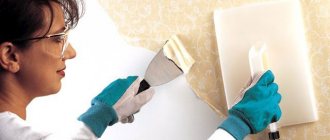
- When the wallpaper softens, remove it using a wide spatula. Small tools can be used in corners and hard-to-reach places.
Important
When all the wallpaper is removed, you should carefully remove all residues and dust using a stiff brush and water. Then fill any visible cracks. After the putty has dried, smooth out all rough spots. This way the surface will be leveled and the new material will hold tightly.
Find out how to easily and quickly remove washable, liquid and photo wallpapers from your walls.
Preparatory work
- As with any renovation work, this process generates a large amount of dirt and debris. To prevent damage to furniture and floors, you should use plastic film or a tarpaulin covering. Move all bulky furniture to the middle of the room and cover it, also cover the floor.
- It's better to change into clothes that you don't mind ruining. Additionally, cover your hair so that you don’t have to wash the dust and solution out of it later.
- All sockets and switches in the room should be de-energized - turn them off on the common panel. After turning off, make sure that everything is turned off.
No. 10. How to remove liquid wallpaper?
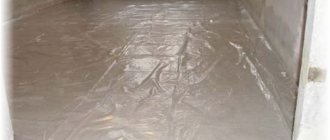
In terms of composition and method of application, liquid wallpaper is more reminiscent of decorative plaster . They consist of cellulose fibers, silk, cotton, adhesives, dyes and specific additives such as fungicides. The surface of such wallpaper is strong and durable , and if you are tired of its color, you can change it using acrylic and water-based paint of the desired shade.
If you decide to completely get rid of liquid wallpaper and change it to another type of coating, then
removing it will difficult . It is enough to soak the coating with warm water , and when it begins to swell, remove the mass with a spatula.
Experts say that liquid wallpaper can be reused. If it so happens that the wallpaper does not soften under the influence of warm water, then you can prepare a weak primer solution.
Or maybe not remove the old wallpaper?
No matter how beautiful the wallpaper may seem initially, sooner or later you realize that it’s time to change it. There can be many reasons. For many owners, new fashion trends become an important motivation. Children grow up, and the decoration in their room also has to be changed in accordance with their age and their personal preferences. Wallpaper can get dirty, wear out, fade, and lose its aesthetic appearance over time. Often, pets – cats or dogs – also make their “mite” in approaching the need for cosmetic repairs.
“Master, aren’t you tired of this dull old thing? I’ve done my part – the rest is up to you...”
So, the task has been set - we need to re-glue it. And often there is a temptation - maybe not to “bother” with deleting old ones? Maybe stick it directly on them - it will take very little time?
Such doubts may partly arise also because many people are familiar with pictures where there are entire “archaeological deposits” on the walls. That is, many layers of old finishing, through which you can trace the history of repairs over several decades.
Sometimes there are such “cultural layers”. Glue another one on top? - this is hardly reasonable...
Maybe we should do that? No, this is highly undesirable! This was possible in those days when all wallpaper was exclusively paper-based, did not vary in thickness, and did not have special protective coatings or impregnations. And the requirements for the quality of finishing, we admit to ourselves, even twenty years ago were completely different, incomparable with modern ones.
Of course, no one can forbid the owner of an apartment, if he is carrying out renovations himself, to paste new wallpaper without removing the old ones. But then all that remains is to hope that, as they say, it will “carry over”, and the finish will turn out to be both neat and durable.
But it can also happen differently:
- Applying glue to old wallpaper often causes it to swell, and as a result, achieving a smooth new finished surface is simply unrealistic. Obvious wrinkles and bubbles appear on the walls.
A very common consequence of sticking new wallpaper over old ones is the appearance of wrinkles and bubbles, which are extremely difficult to deal with
- It is not always possible to know for sure what kind of glue was used when gluing the old trim. That is, it is difficult to predict what its reaction will be with the composition that will be used when gluing new wallpaper. It is possible that the next morning after the repair, all the wallpaper will be lying on the floor, that is, hopelessly damaged.
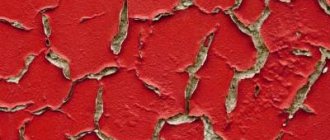
- The paint on many old paper wallpapers is not durable. That is, when it gets wet again (when gluing it on top of new canvases), it may well seep through and appear in spots on the fresh finish.
- It has already been mentioned above that the requirements for the evenness of walls in past times are still not comparable with modern ones. Previously, they often tried to hide even very significant surface defects with wallpaper - cracks, chips, sinkholes. And some defects could progress over time. And to close it without even inspecting the wall and without carrying out repair work, if necessary, is not at all businesslike. In addition, there is a high probability that after gluing the new finish, these flaws will appear and spoil the entire impression of the newness of the interior.
- Whatever one may say, the old wallpaper has already become saturated with fumes and odors, and it is hardly worth carrying all this “wealth” with you “to the future.”
Under old wallpaper, signs of fungal attack on the wall can sometimes be hidden. Naturally, there can be no talk of any high-quality finishing without preliminary “treatment”.
- Under the wallpaper, pockets of mold or mildew may appear on the wall. At the initial stages they may be invisible, but in the future they will definitely make themselves felt. That is, it will never be superfluous to check the wall for its “biological health”, and, if necessary, carry out appropriate antiseptic treatment.
So, it has been decided that the old wallpaper must be removed. How this is done will be described below. And here, depending on your luck, completing a task may require an hour of time and turn into a very protracted action. But nothing can be done…
No. 11. How to remove wallpaper from drywall?
Drywall allows you to very quickly level the surface of the walls. For this convenience, the material has become ubiquitous. However, removing wallpaper from drywall is more difficult than removing wallpaper from brick and concrete . The material should not be wetted with water, and you must act as carefully as possible so as not to damage the top paper layer.
You can remove wallpaper from drywall like this:
- using special products that dissolve the glue, but this is an option if there is putty under the wallpaper . However, gluing wallpaper onto drywall without prior putty is a very reckless decision;
- You can apply the cheapest wallpaper glue ; it will dry very slowly, and during this time it will have time to saturate the wallpaper with moisture, which will swell and move away from the wall on its own. All that remains is to pick them up with a spatula ;
- in rare cases, when none of the methods above helped , you will have to use abrasive materials and machines, but this is a very dangerous option, as you can damage the drywall;
- If you don’t want to resort to crude manual dismantling, you can try steaming the wallpaper .
Gluing paper wallpaper onto drywall without prior putty means dooming yourself to eternal contemplation of the same wallpaper, or gluing other paper wallpaper on top of it, or demolishing walls, but this is fundamental. Paper is tightly glued , and almost impossible to tear the layers . If you save on putty, then use non-woven wallpaper . In this case, when the top layer is removed, a durable layer of non-woven fabric remains, on top of which you can even putty.
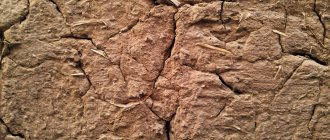
Many people complain that the old Soviet paper wallpaper literally ingrained into the walls and cannot be removed either with water or steam. If all methods have been tried, and some of the wallpaper remains firmly glued to the walls, then such a half-prepared wall can be puttied to level the surface for subsequent finishing. If the remnants of the old wallpaper are held tightly, tightly, then there will be nothing for them under the putty, and they will not affect the new coating in any way.
Composition and features
You can speed up the process of dismantling the old coating using a special tool. It consists of surfactants, preservatives and foam suppressants.
One of the stages of renovation in an apartment is the removal of wallpaper.
Wallpaper glue contains starch and polymers of natural origin. To dissolve the glue, you will need a composition that is good at destroying organic matter.
The surfactant together with the defoamer prevents the formation of foam, resulting in less dirt being released. The substances quickly penetrate the paper or non-woven layer and soften the glue.
Soaked canvases can fall off on their own under the influence of their own gravity.
The main advantages of liquids:
- Quick preparation - just add water and stir.
- Absence of harmful acids, alkalis and toxic substances.
- Safety for humans and animals.
- Availability due to low cost. A container with a capacity of 500 ml costs around 200 rubles. This volume is enough for 100 m2.
- No negative impact on the wall material.
- Double efficiency. Some products have antiseptic and fungicidal properties: they protect walls from corrosion and fungus.
- Nice smell.
Attention! When applying products, you must use protective gloves!
Folk remedies. We make the composition with our own hands at home
It is better to carry out the work with rubber gloves. Homemade liquids contain aggressive substances.
- Warm water is mixed with vinegar essence in the ratio 8:1.
The mixture is thoroughly mixed, then the composition is applied to the surface of the walls. After 20-30 minutes, the sheets will move away from the base without much difficulty.
- Water is mixed with fabric softener in the ratio 2:1.
The mixture is shaken and poured into a spray bottle for ease of application. After this, the old wallpaper is generously moistened with the resulting liquid and removed from the wall.
- On 10 liters of hot water, add 1 kilogram of washing powder.
Treat the surface of the walls with a soap solution, wait a little time, allowing the liquid to be absorbed into the structure, and remove the old wallpaper.