During a major renovation, one of the main tasks for the craftsmen is the quality preparation of the premises. It begins with removing the old coating, including putty. After many years of service, the material loses its strength and technical characteristics, begins to crumble and peel off. This negatively affects the subsequent application of finishing materials. Therefore, it is important to remove the old putty completely. Knowledge of various stripping methods allows you to minimize labor and time costs for preparing walls.
Why remove old putty?
Any repair involves removing decorative coverings - paint, wallpaper or tiles. There is putty underneath. During stripping, it may crumble, swell, or develop other defects. Therefore, it is important to assess its quality and carry out restoration.
Reasons that indicate the need to completely remove the putty include:
- loss of strength characteristics;
- the appearance of dark spots on the surface and signs of fungus or mold;
- detachment from the base.
If the quality of the old coating leaves much to be desired, it must be removed.
Poor quality coating will be destroyed during subsequent finishing. This will lead to the fact that the finishing materials will not work well and will last a short amount of time.
The purpose of complete stripping is to ensure a reliable and durable adhesion of the new layer to the base. The new putty will create a perfectly smooth surface on which small defects will not be noticeable.
Cleaning the wall from old putty
Sometimes, in order to save money and time, they decide to finish the walls directly over the old coating, but this is strictly not recommended, otherwise you can ruin the entire new renovation. To make the finishing of the walls more reliable, it is highly advisable to remove the previous putty.
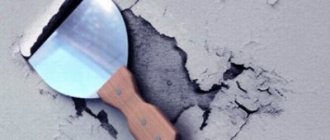
Before cleaning vertical surfaces from cracked putty and plaster, it is recommended to test them for the strength of the coating. This is done with the handle of a spatula: every 40-50 cm of the wall the sound is tapped and analyzed - if it is loud, then the putty is holding well, and you will have to work hard to remove it. If the blows sound dull, the coating is fragile and can be brought down, without much effort, in entire layers. The most commonly used way to quickly remove putty from walls is to remove only such poorly attached areas of the finish. The crack is widened into a V-shape and filled with grout.
Important! To be on the safe side, you should always clean a slightly larger area (0.2 m in each direction), even with a well-fitting coating.
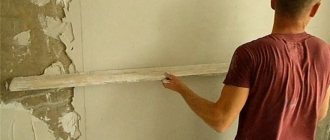
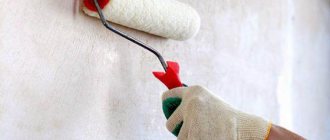
One of the main points of preliminary work on removing the putty layer from the walls is to moisten the entire treatment area. The procedure should be carried out using a regular roller until the absorption of moisture completely stops and the old putty is loosened (the edge of the spatula easily fits into it).
In what cases is this necessary?
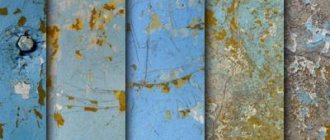
In almost all cases (of course, this does not apply to new buildings), it is necessary to remove the previous coating, since over time the putty peels off, loses strength, abrasiveness, and adhesion is impaired. In addition, this multi-year coating layer becomes very unstable to changes in temperature and humidity (this is especially critical, for example, for a bathroom). Cracks with crumbling edges on the walls, strange color and swelling are signals that all putty needs to be removed.
If the walls were puttied not so long ago, but with technological violations, then such a coating will not last long - it will begin to peel off. Wallpaper, tiles or paint cannot be attached to such walls - it is better to remove this layer, prepare the surface and putty again.
Reference! The scope of work to remove old putty is determined not only by the quality of its application, but also by the material from which it is made and the type of base.
What are the types of putties: types, compositions and classifications
When working with finishing materials, you need to know exactly their classification, purpose and features. This will allow you to choose the right composition for specific purposes and get the desired result.
Experts classify putties depending on their purpose, area of application and composition.
The compositions are distinguished according to their intended purpose:
- basic – designed for initial leveling of walls, filling cracks, potholes, seams;
- finishing - have a fine fraction, allowing you to create a smooth coating.
Types of putties according to their intended purpose are divided into basic and finishing
Depending on the area of application, putties are available for interior and exterior repairs. The first ones are used indoors. External ones are suitable for finishing building facades. They are resistant to external influences.
Depending on the composition, there are materials based on:
- gypsum;
- cement;
- polymers.
Popular putty mixtures can be divided into gypsum, polymer and cement
Gypsum solutions have a fine texture. They are used inside buildings and premises. Easy to apply and sandable. Cement materials are distinguished by increased resistance to aggressive external factors. They withstand temperature changes and are impervious to moisture.
Polymer compositions combine the advantages of gypsum and cement putties. Their main disadvantage is their high cost.
The initial stage of working with putty
When renovating, preparation is important. At the initial stage of working with putty, it is necessary to determine the quality of the old coating. To do this, tap it with the handle of a screwdriver, hammer or other tool. A dull sound means that the finish has peeled off, a ringing sound means the layer is good and strong. However, not every master can determine the quality of the fit by sound.
The putty can be checked for strength by tapping
The putty should be removed if:
- an unpleasant dark shade or the formation of local spots;
- swelling in one or more places;
- the appearance of signs of fungus;
- shedding of material.
Experts recommend removing the old coating, even if it looks quite reliable. This approach guarantees high-quality results.
Why remove old putty?
It will be easier to remove the coating with special tools.
Very often, when carrying out cosmetic repairs, residents are faced with the question - is it worth completely removing the layer of old putty or can a new one be applied directly on it?
Often, to determine the possibility of resuscitating the old layer, they use the method of tapping the putty surface. However, this method does not always give 100% results.
Even if the putty seems to hold quite tightly at first glance, one should not forget about such nuances as the surface’s strength to mechanical stress, abrasive resistance, etc. After several years of operation, these indicators for the old mortar will be many times worse than for the freshly applied one.
Consequently, the new putty, having an old layer at its base, will be significantly weakened, therefore, to carry out high-quality repairs, it is recommended to completely remove the old base and replace it with a new one.
Tools needed to remove previous coating
Any work goes faster if you prepare the necessary tools and materials before cleaning the walls. Depending on the situation, type of base and type of putty, the list may differ.
To remove the old coating you may need:
- spray;
- plastic container (bucket or basin);
- roller, sponge, brushes;
- putty knife;
- hammer;
- chisel;
- metal brush;
- sandpaper;
- table, stool or stepladder;
- starch or copper sulfate solution;
- electric grinder.
Tools for removing old coating
Be sure to prepare a set of clothing, a respirator and safety glasses. The entrance to the room is covered with plastic film or a damp cloth.
Preparatory work
As you know, the main difficulties with ceiling repairs arise when the finishing is replaced. For example, you decided to replace the old paintwork with new wallpaper or change the color of the ceilings, which will be in harmony with the overall design of the apartment. But how to prepare the surface and remove worn coating?
The main thing to remember is that they begin finishing the ceilings first, that is, before starting to repair the walls and floors.
- First, you need to remove, if possible, all the furniture from the room (of course, if you are not going to send it to a landfill after repairs and buy new ones).
- The floor, door and window openings, window sills, as well as lighting fixtures (chandeliers, lamps that cannot be dismantled) should be covered with any available materials: plastic film, newspapers or old sheets.
- If repairs are carried out in the cold season, then the room temperature should not be below +5o
Ceiling cleaning tools
No one will dispute the statement that the quality of repair depends not only on the materials, but also on what tool is used for this and how the master uses it.
To prepare the ceilings you will need:
- rollers;
- paint brushes;
- a set of metal spatulas;
- light and reliable stepladder or sawhorses.
Advice! When starting work, do not ignore personal protective equipment: put gloves on your hands and a cap or beret on your head. And don’t forget about eye protection - glasses will come in handy here (the ceiling is not the floor - you’ll have to look up).
In the old days, the most popular type of ceiling finishing was whitewashing or painting. However, over time, wallpaper and polystyrene tiles began to be glued to them, and only recently they began to install suspended structures.
Each of the finishing materials leaves its own “indelible” marks on the surface. Therefore, their removal requires an individual approach.
How to deal with a layer of old whitewash
This material can be quite an impressive layer, so it is recommended to remove whitewash from the ceiling gradually so as not to damage the base (putty) and to do everything efficiently.
To do this, use a sharp, medium-sized metal spatula. To make the work progress more fun, the surface should first be moistened with water.
As the area is cleaned, use a spray bottle or roller to moisten the following areas. Cleaning must be done thoroughly, without flaws.
It is much easier to remove a thin layer of whitewash:
- To do this, again, the surface is sprayed with water and cleaned with a spatula;
- After completing the work, you must carefully check the entire ceiling area: perhaps there are untreated areas left somewhere;
- If this is the case, then they should be wetted with a wet sponge and removed.
Old putty and plaster
Sometimes it happens that layers of putty and even plaster become unsuitable for further use. They can peel off from the ceiling, threatening not only to ruin the new finish, but also to fall down on the residents’ heads.
If such a picture is observed in the room being renovated, then all layers must be removed. Only an external visual inspection with tapping will show whether this is done in whole or in part. In any case, everything that does not hold well is removed.
For such work, in addition to a spatula, you will need a more serious tool:
- Hammer;
- Crowbar;
- Durable stretchers with handles or iron buckets for removing heavy garbage.
We see no point in describing the procedure, since we think that everything is already extremely clear.
Removing the water emulsion
Remember the recommendations from the first section and use protective equipment. Be sure to wear glasses, as you will have to use a roller to remove the layer of water-based paint, which may cause splashes to get into your eyes. How to remove water-based paint from a ceiling quickly and effectively?
- To do this, the surface must first be moistened with warm water. The tool used is a paint roller mounted on a telescopic rod.
- After dipping it in water, you need to thoroughly moisten the layer of water-based paint. If water is not absorbed, but rolls off the surface in drops, it means that paint with a water-repellent effect was used to decorate the ceiling. Therefore, it is unlikely that it will be possible to soak it in one pass.
- After re-processing with a damp roller, you need to wait 15 minutes, which will allow the moisture to soften the coating and completely penetrate its structure.
- Now all that remains is to take a spatula and scrape off the swollen layer of paint down to the plaster. The spatula must be kept parallel to the surface so that its sharp corners do not damage the ceiling.
- Moisture-resistant water-based paint can be removed either with a spatula or a sanding machine.
- The last method is recommended to be used if nothing else helps to cope with the coating. The main disadvantage of mechanical treatment of ceilings is the abundance of dust, which can penetrate even through tightly closed doors into neighboring rooms.
There is another method for removing water-based paint, which is simple and convenient. To do this you will need old newspapers, PVA glue or starch paste.
Its essence is as follows: glue is applied to the ceiling using a roller and newspapers are pasted. After the adhesive has dried, the paper can be easily removed along with the paint. If you have difficulty removing newspapers, you can use a narrow spatula.
Advice! Experienced finishers recommend sanding the ceiling with sandpaper after removing the layer of water-based paint.
How to remove wallpaper and traces of glue from the ceiling
After removing old wallpaper, glue streaks and yellow stains usually remain on the ceiling.
To get rid of these “rudiments” we do the following:
- It will be easier to remove the wallpaper if you pre-moisten it with water. In order for moisture to penetrate the material faster, it is recommended to trim them in places and pierce the vinyl coating with a needle roller.
- Problem areas can be treated with a special compound designed for removing old wallpaper. It is quite convenient to treat the surface using a roller.
- Processing begins no earlier than half an hour later. For this we use spatulas and all kinds of scrapers.
Next, let's look at how to remove glue from the ceiling and prepare it for further work:
- To do this, apply a stripping solution to the cleaned surface using a paint brush and give it time to absorb.
- Glue and old whitewash are removed with a wide spatula or a metal brush.
- At the final stage of work, the surface is washed with a wet brush, which allows you to remove various small particles of finishing and dust from the ceiling.
- It is recommended to wash the cleaned ceiling with soapy water and dry it thoroughly.
Methods for cleaning walls
Complete removal of the old layer is necessary in case of major repairs. If the walls are partially crumbling, then local restoration of the coating may be sufficient. Before starting work, experts recommend inspecting the surface and identifying problem areas. After this, tap the surface to determine how tightly the layer holds. Then choose a method for removing putty from the walls.
There are two main methods available to specialists: chemical and mechanical.
There are two ways to dismantle the old layer of putty - chemical and mechanical.
Chemical
Chemical removal involves the use of chemicals that dissolve the finishing layer and facilitate its easy removal.
To work you will need:
- plastic container;
- large brush or sponge;
- starch;
- copper sulfate solution;
- spray.
Tools for chemical removal of old coating
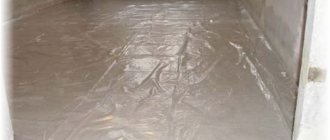
A starch solution is the most affordable method of cleaning walls. The powder is diluted in warm water and applied to the base with a spray bottle, sponge or wide brush. The proportion taken is 2 tablespoons per liter of liquid. For 5 liters of hot water you will need 10 spoons. After the surface is completely saturated, it is cleaned with a spatula.
Work begins with the most damaged areas, sequentially moving to the rest. A solution of copper sulfate acts similarly to starch. To prepare, you will need a liter of hot water and 50 grams of powder.
A solution of starch and water helps to quickly soak old putty
It is important that the putty is saturated with moisture. Only after this will it easily lag behind the base.
Mechanical
The mechanical separation method is the most labor-intensive. It involves cleaning the surface with your own hands.
To remove a small thickness, it is enough to use a metal brush, scraper or spatula. The walls are first moistened with water. If the layer is held tightly, use a hammer and chisel to remove it. They are also used in cases where the adhesion force of the material to the base is not great. In other cases, it is recommended to use electrical equipment.
You can remove the old coating with a scraper or spatula
How to remove old putty using chemical methods
Going by the principle - from simple to complex, first you should try to remove the previous coating using a starch solution (starch is dissolved in water at a temperature of at least 30-350C).
Preparing a solution for removing putty
Next, using a spray bottle, brush or sponge, apply the solution, which has been left standing for 10-15 minutes, to the surface of the wall, starting from visible cracks and other surface defects.
Applying the solution to the surface
After the surface has darkened, a spatula and/or scraper are used. You should not treat the entire wall in this way; it is enough to find out the effectiveness of the technology on an area with a small area. It should be noted that if there are seams between individual bricks or concrete partitions in the putty layer, it will be much more difficult to remove the old putty. In such cases, it is better to leave these areas for subsequent mechanical cleaning.
Clean the surface: water and scraper
Copper sulfate removes old putty more intensively. 50 g of the product is dissolved in hot water, and then applied in three steps using a brush or sponge to the surface to be cleaned. The time intervals between applying each layer should be at least 5 minutes so that the vitriol is well absorbed into the surface. In most cases, subsequent mechanical cleaning with a spatula or scraper occurs without any effort.
Features of removal from walls
Removing putty is a mandatory procedure when carrying out major repairs. This is necessary to ensure that the new coating adheres securely to the base. It is more difficult to remove old multi-layer material than new material.
Work begins with problem areas where the solution peels off. It is picked up and cleaned off with a spatula. If necessary, a starch composition is used. The cleaned surface is treated with sandpaper.
Removing old multi-layer putty
The most difficult thing to remove is multi-layer old coating. A power tool is suitable for cleaning it: a grinder or grinder with a diamond disc. A thick layer can be tapped with a puncher. This promotes detachment of the putty from the substrate. After this, the material is removed with a sharp spatula or chisel.
The most effective way to remove old coating is to use a sanding machine.
An angle grinder with a diamond blade showed high cleaning efficiency. It allows you to remove the coating in even layers. The main disadvantage of this method is the release of a large amount of dust.
Cleaning walls from new putty
The new coating is much easier to remove. The procedure does not require the use of special equipment. The walls are sprayed with warm water or starch solution and allowed to stand. After this, clean with a spatula or wire brush. Finish the work with coarse sandpaper.
Warm water can be used to remove the new coating.
Removal instructions: how to quickly remove?
Before removing the old layer from the wall, you must first determine the service life of the putty, understand its strength, and measure the thickness of the layer. The amount of work will depend on these indicators. If removing the peeled parts with a scraper or spatula is not possible, then the entire surface should be moistened with warm water .
If plain water could not completely soak the putty, it means that its layer is quite thick. It is necessary to prepare a more effective solution based on starch.
Use it to treat the entire wall using a roller, brush or spray. If the thickness of the putty layer is 2–3 mm, any of the listed methods is suitable. If it is applied thickly, use a roller or brush.
After pre-treatment of the surface, you should wait 10–15 minutes so that the liquid is absorbed into the pores . Only after this, with a metal spatula, can all old overlays be removed without visible damage.
Advice
When the plaster has hardened and been tightly laid on the wall, a more radical method of removing it with a chisel and hammer is possible. Before work, the surface is divided into separate sectors to make it easy to work. The chisel is positioned at an angle of 45 degrees and hit with a hammer. With this method, parts of the coating will split one after another along a chain.
They begin work from the most vulnerable areas - where the plaster is already clearly peeling off the surface. The same method is used to remove putty between slabs and floors. But in these places it is usually the strongest and difficult to remove. After such work, the residues are removed with sandpaper, and the wall is washed with warm water.
You can use an even more effective method if you take a grinder with a diamond blade . But here the layer to be removed will not be removed in layers, but by gradual elements. The grinder is held so that the circle is parallel to the wall. After removing the main plaster layer, the surface is sanded with coarse sandpaper.
Use a damp sponge to remove dust, dirt, and settled construction debris, and then allow the work area to dry for subsequent work.
Features of removal from the ceiling
During repairs, putty is removed not only from the walls, but also from the ceiling. This work is more labor-intensive and complex. The main problem is related to inconvenience.
Experts recommend cleaning the ceiling in several stages:
| 1. Inspection and tapping. At the first stage, defective areas are identified. When tapped, part of the putty falls off on its own. | |
| 2. Starch treatment. The ceiling is generously moistened with a solution of starch or copper sulfate. If they are not there, spray with warm water. | |
| 3. Stripping. The impregnated surface is cleaned. If the material holds tightly, cut it with a grinder. |
If the task of removing all the old coating is not worth it, then you should clean all problem areas and remove the layer that does not adhere tightly. If this is not done, the finish will not stick.
How to remove old putty from the ceiling
Often it is necessary to remove cracked old putty from ceilings, and here the opinions of builders differ sharply. Some claim that the ideal method for ceilings is starch treatment and a good old spatula, while others believe that only a grinder can remove the putty layer quickly and effectively. And yet, how to remove old putty from the ceiling?
To choose the option that's right for you, take a good look at the ceiling. If the putty sticks to its word of honor and begins to fall off even when tapped, it is quite possible to get by using the starch method. But if the coating is thick or holds tightly, and you need to clean the ceiling, use a grinder: it’s both faster and more reliable.
Whether to completely remove old putty from the walls or not is up to you. However, if you want to get the perfect room with trendy wallpaper or even paint, it is better to clean everything “down to the ground”, choosing the method that is suitable specifically for your wall.
Depending on coverage
When removing putty, consider the type of substrate. The subtleties of the procedure and possible restrictions on the use of chemicals or instruments depend on it.
After sanding
Sanding is the final stage of finishing the wall before applying paint or wallpaper.
After this, the layer securely adheres to the base. It is not always possible to remove such coating using improvised means. To clean sanded putty, use a chisel:
| 1.Identify the area that needs to be cleaned. | |
| 2. The tool is applied to the area at an angle of 45 degrees. | |
| 3. The handle is tapped with a hammer, forming a zone of swelling of the layer. | |
| 4. Tap the swollen putty with a hammer. | |
| 5. The separated material is picked up with the sharp edge of a spatula and completely removed. |
A perforator on the walls allows you to speed up the process. With its help, a fine notch is made, after which the old layer is removed.
With gypsum board
Non-moisture resistant gypsum solutions are suitable for finishing drywall preparation. To remove them, the surface is moistened with water and left to soak for 30-40 minutes. During this period, the layer has time to swell. The mass is removed with a spatula.
To get rid of putty coating on drywall, just spray the surface with water from a spray bottle or wipe with a wet sponge
When using moisture-resistant finishing solutions, the soaking method with starch showed high efficiency. For its effect, the room is left for at least 20 minutes. After this, the composition is removed from the surface. In more complex situations, experts suggest diluting copper sulfate.
It is not recommended to use a perforator or hammer on walls. Strong impact can lead to damage to the plasterboard.
From the tree
Wood is easily damaged and swells when exposed to water. Therefore, experts recommend a mechanical cleaning method without wetting. For work, use a metal brush, sandpaper, or spatula. The movements are made without strong pressure. It is possible to use a grinding machine.
Remove putty from wooden surfaces using a spatula
With gypsum plaster
Gypsum plaster is not a moisture-resistant material. It has shown effectiveness for interior decoration. Therefore, to remove putty from it, it is necessary to use only mechanical methods, without the use of soaking.
Mechanical methods are used to remove gypsum putty.
It is best to clean with a spatula or wire brush. If the layer is thick, then use electrical equipment: a drill or a grinder.
From concrete
Concrete flooring is the strongest type of foundation. It is not exposed to moisture and is resistant to mechanical damage. Therefore, both mechanical and chemical methods are used to clean concrete floors.
The concrete surface can withstand both chemical and mechanical treatment
If the layer thickness is small, a spatula along with soaking with water or starch solution is suitable. When the thickness is large and polymer putties are used, electrical equipment is used.
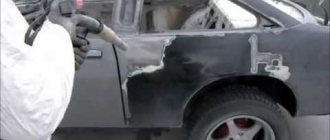
From a metal door
During the renovation of the hallway, pieces of putty may fall on the metal entrance door. Fresh solution can be easily removed immediately and the area wiped with a damp cloth.
If the solution has time to dry, then it is pre-soaked. Then remove with a sponge, soft brush or rag. The stain remaining on the surface is washed with soapy water.
You can remove traces of putty from a metal door using a damp sponge.
It is not recommended to remove material with a sharp spatula or wire brush. They can damage the varnish layer.
From tiles
Ceramic tiles are not only used in the bathroom. It is used to finish the floors in the hallway, kitchen and other rooms. It is used for ceiling cladding. The surface of the material is wear-resistant, but it is not recommended to clean it with a spatula. It may scratch the glaze. To soak the dried solution, use water or starch. The remaining mixture is removed with a soft brush.
Cleaning the ceiling is a less pleasant task. This is due to the inconvenience of carrying out the work:
| 1. First, evaluate the area of work, the type of composition and the quality of its fit. | |
| 2. If the area is large, then it is treated with a starch solution from a spray bottle. | |
| 3. The mixture is removed with a tool. If the putty is polymer or fits tightly to the base, use a grinding machine. |
This algorithm is used to clean any type of ceiling.
Does the covering need to be removed?
The answer to the question is unequivocal - of course, it is necessary. To make it clear why this is necessary, the following needs to be explained.
- Firstly, the service life of the putty is limited in time: over the years it begins to fall off on its own. But this happens unevenly, in pieces, so sometimes the owner of the premises has the idea of simply restoring the damaged areas. This cannot be done, because the old putty remaining on the wall or ceiling will begin to burst very soon.
- Secondly, when painting or whitewashing, the putty gets wet and falls off. And since this only happens with an old, many-year-old layer of finishing, it’s better to get rid of it before painting.
- Thirdly, during long-term use, an air pocket may appear between the putty and the wall, invisible from the outside. It seems to the owner that the wall is still smooth and strong, but an attempt to simply paint it or decorate it with another material leads to the collapse of the old putty. As a result, all work will have to be done again.
In very rare cases, you may not need to remove the old putty from the walls. But its quality must be assessed by a professional. He will carefully check the putty layer, tap the wall for voids, and assess the depth and width of existing cracks. The presence of mold matters. If it is there, the putty can definitely be removed.
But if the quality of the coating is still good, as confirmed by a specialist, then after minor cosmetic work with the cracks, you can paint or otherwise process the old putty.
How to remove dried compound from a spatula
The spatula is most often subject to contamination during repairs. If it is not cleaned immediately, the mass hardens and removing it becomes problematic.
To remove putty, use the old method, known back in the USSR:
| 1. Prepare a plastic container for the tool, into which the entire metal part can easily fit. | |
| 2. Pour hot water into the container and add citric acid. 5 packs are enough. The solution is thoroughly mixed. | |
| 3. The spatula is immersed in water and left for 12-24 hours. | |
| 4. After soaking, wipe the instrument with a damp cloth or brush and rinse with clean water. |
This method allows you to clean pieces of mortar not only from spatulas, but also from the attachment of a construction mixer.
Work safety
Work on cleaning walls from old putty is associated with the formation of a large amount of debris. Fine construction dust is the most dangerous. It is formed as a result of scraping off material. During repairs, you need to not only know how to remove putty, but also how to protect yourself from injury. To do this, you should follow safety precautions and use personal protective equipment:
- To protect the skin from damage, wear clothes with long sleeves and pants made of thick material. It is recommended to cover all parts of the body as much as possible.
- A respirator and goggles are used to protect the respiratory system and vision.
- All work is carried out only with gloves. If they are absent, then experts recommend regularly washing your hands with cleaning products and wiping them dry.
- If a large amount of dust forms, ventilate the room.
- A protective curtain, which is hung at the entrance to the room being renovated, can be used to avoid the spread of dust and dirt into other rooms. Cotton fabric or film will do. For dusty work, it is moistened with water.
- Do not plug power tools into faulty sockets, do not use them if the cable is damaged or if there is high humidity in the room.
A respirator and glasses are necessary means of protection against construction dust.
Experts recommend disconnecting the room being repaired from the power supply. All necessary equipment is connected via extension cords.
Injury safety
There are also folk methods for quickly removing plaster from the ceiling - from chains on a hammer drill to spraying various homemade corrosive mixtures. These are quite dangerous options and it is better not to use them. But, in any case, it is extremely important to take care of work safety.
In addition to following the rules for working with power tools, it is necessary to use personal protective equipment:
- closed safety glasses;
- a respirator - from dust and to partially protect the face from small fragments;
- work gloves;
- workwear with elastic bands at the cuffs.
When cleaning plaster in corners where the ceiling meets the wall, special care . Sometimes the electrical wiring running along the wall is not, as it should be, 10 cm from the ceiling, but is located exactly at the joint and is covered only with plaster. When working with a spatula or hammer drill, there is a risk of damage and electrical injury. To avoid this, it is advisable to ring the place where the wires are located with a special device before work. If this is not possible, then it is necessary to disconnect the room from the power supply during operation.
Recommendations from experts
It is important to be able not only to quickly remove old coating, but also to identify problem areas. Recommendations from experienced professionals can speed up the process and avoid common mistakes:
- To identify loose areas, you need to tap the walls. The sound is dull - the coating holds tightly. If the sound is loud, the layer has moved away from the base.
- When cleaning walls, it is better to use a wide, reliable stand - a table or workbench. On a stepladder, the legs experience greater loads and get tired faster, and the structure is less stable.
- Corners and joints are processed with special care. Power cables often run in corners and can easily be damaged by a sharp edge or metal fluff.
- Dismantling of large areas is carried out with a power tool (grinding machine). It reduces labor costs and speeds up the coating removal process.
- If you need to clean metal tools quickly and efficiently, hydrochloric acid is suitable. It is sold in household stores. Spatulas are soaked in the solution for several hours, after which they are washed with running water.
- To ensure that the new coating adheres efficiently, the old layer on the wall is completely removed, leaving no bald spots.
To prevent the new coating from crumbling, it is necessary to completely remove the old layer of putty, without leaving bald spots.
To remove old putty, mechanical and chemical methods are used. The choice directly depends on the condition of the layer, the type of overlap, and the composition of the finishing material. A thoughtful approach and the use of tools, depending on the reliability of the layer fastening, allows you to minimize labor costs for cleaning walls and obtain a high-quality result.
Which method of removing old putty from walls do you think is the most effective and less labor-intensive? Share your opinion in the comments.
Recommendations
For better quality work, it is recommended to use the advice of professionals:
The thicker the putty layer, the more difficult it is to remove. Most often this is typical for the secondary housing market and old buildings.- It is necessary to clean off the layer completely, without leaving bald spots. The quality of the finishing coating will depend on the processing at the preparatory stage.
- If you need to remove fresh putty, you can do without using power tools - just apply the composition with starch and clean the surface with a scraper.