Laminate is the newest of all floor coverings, but its popularity has already surpassed all alternative, older materials.
An important role in this was played by the low cost of the material - in comparison with some other types of coating, laminate is quite a budget solution.
In addition, it is quite accessible for DIY installation, which provides great advantages and saves time and money.
Laying laminate flooring is an extremely simple task that does not cause any difficulties.
All issues that arise during installation are related not so much to the material, but to various related or related tasks that must be solved in conjunction with laying the floor covering.
One of them is wallpapering a room, or more precisely, the optimal sequence of operations.
Generally accepted procedure for repairs
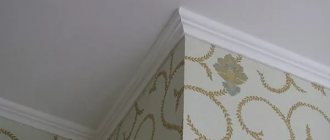
The generally accepted procedure requires that all operations be done from top to bottom. That is, first the ceiling, then the walls, and after that the floors. The exception is suspended ceilings, which are installed last.
Obviously, according to this logic, the laminate is laid at the end of all work, but there are some nuances that need clarification. The fact is that the preparatory work carried out before laying the laminate must be done in advance, before finishing the ceiling and walls.
Otherwise, a situation will arise when you need to sand the floor, screed or do other dusty or “wet” work in a room with already finished walls and ceiling, which will inevitably require repeat work.
This point must be taken into account and repairs must be made according to the following scheme:
- Preparatory work (the ceiling, walls, and floor are finished one by one).
- Ceiling finishing.
- Wall decoration.
- Laying laminate.
At the same time, it is also necessary to take into account the specifics of the materials used, which put forward their own requirements for supporting surfaces and can affect the progress of work. For example, suspended ceilings are often installed on finished walls. The same applies to laminate.
In some cases, it is more expedient to first lay the flooring and then cover the walls with wallpaper.
Important! In any case, it is necessary to establish such a procedure so that the dirtiest and dustiest work is carried out first. It is impossible to carry out finishing work on any area if preparatory work is to be done on another.
Requirements, rules and regulations that must be followed
Before starting this or that type of work, it is necessary to consult with specialists and analyze what the work procedure should be. All requirements must be studied in SanPin. This applies not only to the choice of building materials, but also to the quality and order of finishing work.
Repair work in a house and apartment should definitely be carried out in accordance with GOSTs Source strs68.ru
The most important thing in choosing a repair stage is compliance with standards and GOSTs. As a result, the owner will be able to achieve some results:
- The amount of time spent on repairs is reduced.
- Financial costs are reduced (if planning is incorrect, more money may be required).
- The budget is planned (all this is done in advance at the project preparation stage).
- Achieving maximum quality.
When repairs are carried out strictly according to the correct stages, the owner of the house can be sure that such a room will be used for as long as possible.
What is better to lay before
Most people in this matter are inclined to believe that the wallpaper should be glued first. The main argument that sounds in this case is this: if the laminate is laid first, then the high air humidity caused by the drying conditions of the wallpaper glue can affect the quality of the floor covering.
This argument is rather weak, since it can only be relevant for old coating classes that are no longer produced - 21, 22 or 23. All modern types of material are quite capable of surviving a rise in air humidity for a couple of days without loss, especially if the installation was carried out according to all the rules.
Another argument often heard in discussions is the possibility of damaging the wallpaper when laying laminate flooring. You can immediately hear statements that laying out wallpaper requires a flat and smooth surface, which only the laid flooring can provide, so first you need to lay the laminate.
These arguments are also frankly weak, since installation of the floor covering is simple and does not require actions that pose a danger to the walls (provided that preparation has been made in advance). To lay out the wallpaper, in any case, a plastic film is laid down, so talk about the quality of the floor is also untenable.
In addition, during the life of the floor covering, the wallpaper will still have to be changed several times, which in itself removes the question of the priority of operations.
Thus, it turns out that there is no fundamental difference in the procedure. If the craftsman’s qualifications (or simply accuracy) are at the proper level, then it becomes less important which material is installed first. The main condition is the quality of work and the thoroughness of all actions.
What should I do first - wallpaper or lay the floor?
Pasting wallpaper and laying flooring (linoleum, laminate ceramic tiles) are one of the final stages of any cosmetic renovation in a residential area. Therefore, sometimes the question arises about the sequence of production of these finishing works. What to do first - glue the wallpaper before laying the floor, or do it after you have prepared a flat, clean surface for rolling out and cutting the wallpaper.
There is no clear answer to this dilemma. It all depends on the professional skills of the finishers and the type of floor covering. Only one question can be answered unequivocally: you must first glue the wallpaper if you will be laying carpet on the floor.
First wallpaper, then laminate
First of all, you need to completely prepare the surface of the walls and floor.
To do this you will need:
- Clear the room of furniture, household appliances and other foreign objects.
- Remove old wallpaper
- Inspect and evaluate the quality of the wall surface. If cracks, peeling or crumbling areas are found, it is necessary to remove them and putty (plaster) the problem areas.
- Cover the wall with a layer of deep penetration primer (especially if there are a large number of putty areas).
- Remove skirting boards and old flooring.
Attention! In order to combine all dirty and dusty work into a single stage, you can clean the walls and floor of old coatings and layers in parallel. This will make it easier to clean up after taking out the trash.
- If necessary, old flooring may need to be removed. This is done if there are broken, rotted or cracked boards or joists.
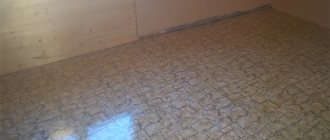
- Determining the horizontal and evenness of the floor plane. Decide on the alignment method if needed.
- Leveling the floor plane can be done by laying thick plywood (on joists or simply on the floor surface), sanding the surface (if the unevenness is small and sporadic), and in difficult cases, pouring a leveling screed.
- After the screed has dried, a polyethylene film (waterproofing) is laid on the floor surface. It is done with some reserve - it is wrapped on the wall by 10-15 cm.
- You must walk on the laid film in soft shoes.
- All vents or windows are closed and wallpapering of the walls begins. The procedure may vary depending on the type of wallpaper. The glue is applied either only to the walls, or to the walls and wallpaper at the same time.
- After pasting is completed, it is necessary to keep the wallpaper indoors for a couple of days to ensure that the glue dries evenly.
- If glue streaks have formed on the surface of the film, it is better to remove them. If damage to the film is detected, it must be repaired using tape. In difficult cases, you will have to replace the entire waterproofing membrane completely.
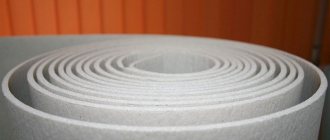
- The substrate is being laid.
- Installation of laminate is carried out using appropriate technology. Typically, the first row of panels is placed at a distance of 8-10 mm from the wall to provide a thermal gap. It is fixed using installation wedges.
- Subsequent panels are laid by attaching them alternately to the first row. To do this, the locking parts are inserted at an angle of 45° along the entire length into the corresponding grooves of the already laid panels, pushed into them tightly until they stop, and the panel is lowered to the floor. A specific clicking sound is heard indicating correct connection.
- All panels of the canvas are connected in a similar way.
- The protruding edges of the waterproofing film are trimmed.
- Upon completion of assembly, the canvas is compacted with wedges, then they are removed and plinths are installed.
The procedure may be slightly modified when using specific materials, but in general this is the sequence that is used.
Stages of repair work
Let's go through the main stages that must be implemented when performing various types of repairs and design.
It is important to plan the stages of home renovation correctly Source remontnik.ru
Project preparation
A renovation project is a diagram that describes all the details and nuances of the repair. It provides for the future design, quantity of building materials, their quality, size, and company. In general, the preparation of the project will be based on several significant stages.
- Precise layout of the room, taking into account every free centimeter after the finishing work has been completed.
- Location of communications (sewage drains, water risers, as well as other plumbing equipment).
- Placement of electrical equipment (for example, if it is a bathroom - boiler or washing machine, kitchen - microwave, refrigerator, multicooker and others).
It should be noted that the presence of every part, any equipment and even accessories will allow you to avoid mistakes in calculating the amount of materials and costs.
So where to start first?
Experts recommend starting with dismantling. First, the walls and partitions are freed from old building materials, then it comes to the floor. There is another opinion on this matter: sometimes they start by preparing the floor (tearing off the old coverings). But, this is only in cases where the materials on the partitions are too old and it is not possible to remove them immediately (you have to wet the walls and let them soak in moisture to make dismantling easier). In order not to waste time, at this moment they begin to work on the floors.
Floor repairs should begin with the dismantling of old finishing materials Source company-megapolis.rf
As for the start of repairs, the situation here is a little different. For example, if the floors are not very level and there is no horizontal plane, then a concrete screed is made to level the surface. This is done immediately after dismantling work and only after complete hardening do they begin to level the walls. In case the horizontal is still respected, then the initial work is carried out on the walls.
Preparing formwork for flooring Source pol-exp.com
Dismantling
Dismantling work should also be carried out in a certain sequence, observing the rules of your own safety. The entire dismantling process is based on the following steps:
- turning off the electricity and removing all kinds of electrical equipment (sockets, switches, lamps);
- removal of furniture and household appliances (if installed in the room), but if there are built-in items, they will have to be protected from dust and dirt, damage;
- removing old finishes. To do this, you will first need to remove the ceilings, then clean the walls, and only then start tearing off the floor covering;
- performing redevelopment, which also includes gating walls for laying new wiring;
- dismantling of doors, partitions, windows if a complete redevelopment of the premises is planned, as well as replacement of windows;
- periodic garbage removal. This procedure needs to be done more often, as waste from old building materials accumulates.
Remember that dismantling partitions in a room should be done carefully, after first making sure that they are not load-bearing structures. Otherwise, not only the room in which the renovation is being carried out will be at risk, but also the entire structure.
Dismantling of a house can begin with the elimination of walls Source rezka-prof.ru
Padding
After all the dismantling work is completed, the question again arises, whether to do the floor or the walls first. Here it is recommended not to start leveling the walls right away. It is advisable to use a primer and treat its ceilings, slopes, and walls for better adhesion of starting finishing materials.
It is convenient to prime the floor before rough finishing with a large brush Source kraski-net.ru
If the floors are in critical condition (there are potholes, unevenness, or chipped concrete), then the floors are also treated with a primer at this stage.
Plaster and screed
Everything here is strictly definite. If the walls are fairly smooth and do not require special treatment, then proceed immediately to the concrete screed. If the partitions leave much to be desired, then the first step is to plaster them.
It is more convenient to plaster walls using a spatula and a trowel at the same time, which will serve as an auxiliary Source alprom74.ru
After installing windows, there are often holes left on the slopes that need to be properly repaired. For this purpose, you can use not only cement mortar, but also sheets of drywall. Therefore, before you begin preparing the partitions, you will first need to work on the window opening.
After this, you need to start plastering the walls. The first layer (rough) can be made using a cement-sand mixture. Next, puttying is carried out and checking that the plane meets the building level.
Leveling the plaster can be done using a provil Source materik-m.ru
Installation of window sills
The installation of window sills must be approached only after making sure that the plaster in the window area has already completely dried. This is especially true in cases where the window sills are wooden, because they tend to strongly absorb moisture.
Installing a plastic window sill after performing rough work in the room Source Yandex.Zen
First laminate, then wallpaper
With this sequence of actions, the initial stage of work does not change:
- Preparatory work is carried out on the planes of the walls and floor. The procedure is similar to the above. It is necessary to completely remove old floor and wall coverings, fill up uneven areas or cracks in the walls, and level the floor (if necessary).
- A waterproofing film is laid on the prepared floor surface. The strips are overlapped by 10-12 cm, the joints are taped. The result should be a completely sealed canvas.
- Laying the substrate. The strips are laid end to end, without folds or overlaps. Fixed with strips of tape.
- Laminate flooring is laid according to the usual scheme.
Important! During installation, it is recommended to use a sealant that insulates the material from moisture.
- Upon completion of installation, the surface of the laminate is covered with plastic film to make it possible to spread the wallpaper and apply glue. All walking must be done in soft shoes.
- The walls are being wallpapered. This is done with the windows and vents closed.
- Upon completion of pasting the walls, a period of time is required to allow the wallpaper paste to dry completely.
- Skirting boards are being installed.
Gluing wallpaper
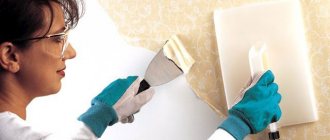
Most people are familiar with wallpapering technology. To complete the finishing you need:
- prepare the base, that is, level the walls using plaster mixtures, sand the walls with sandpaper;
- Apply a layer of primer to the sanded walls;
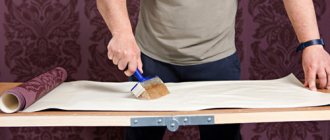
- take measurements and cut rolled wallpaper, matching the pattern;
- stick the finishing material on the walls. You can glue wallpaper in two ways. The first is to apply an adhesive composition to the wrong side of a measured strip of material. When using the second method, glue is applied to the wall.
What can happen to laminate?
Let's figure out what could happen to a new laminate floor if the owners decide to put up wallpaper:
- at the preparatory stage of preparing the walls, the floor may be stained with splashes of plaster mortar, and during the grinding operation it may become covered with a layer of dust;
- Before gluing wallpaper, the material must first be cut. Few households have a special table for cutting, so most people carry out this operation on the floor. During the cutting process, the new floor covering can easily be damaged;
- To start gluing wallpaper, you will need to use a stepladder or other device that allows you to reach the ceiling. During the work, the stepladder will have to be moved, and this may lead to scratches on the floor covering;
- it is necessary to glue wallpaper using adhesive compounds, and when applying glue it will be difficult to avoid that not a single drop of the compound gets on the floor;
- then you need to let the wallpaper glue dry. To do this, you need to close the windows and doors to avoid drafts. At this time, the humidity level in the room is very high, which is very harmful for the laminate.
What to do?
From all that has been said above, we can conclude that you should not lay laminate flooring before finishing the walls, since there is a high risk of damage to the new coating. But what to do if the floor has already been finished before? In this case, you will have to take measures to protect the coating, namely:
- the entire floor must be covered with thick plastic film, and the film must be laid so that adjacent strips form a wide overlap;
- It is advisable to lay thick cardboard on top of the film in one or two layers, this is necessary to protect the coating not only from splashes and dust, but also from mechanical damage;
Advice from the experts
When performing work, it is important to consider some points necessary to achieve the best result.
For example:
- It is recommended to put felt caps on the legs of a stepladder used for wallpapering or simply wrap them in soft cloth. This will help protect the laid laminate and protective polyethylene film from damage.
- After finishing pasting the walls, it is better to remove the plastic film from the floor so that condensation does not form on it.
Type of repair
Before determining whether laminate or wallpaper should be done first, the type of repair must be approved. As you know, major and cosmetic work is being carried out. Their complexity and volume are different. The sets of materials and tools also differ. To make the room bright and clean, it is necessary to carry out cosmetic repairs. It involves replacing wallpaper, whitewashing the ceiling, replacing old linoleum, and painting the walls.
If you want to eliminate everything unnecessary and old, then a major overhaul will do. Then you need to change the windows, level the walls, install new floors and ceilings. During this work, the shortcomings of the room are eliminated. The home will be new and beautiful. There is no need to refuse the help of professionals, especially if a modern design is being created or redevelopment is being carried out. By investing in this work, you can perfectly transform your home.
Design and plan
Before deciding what to do first, laminate or wallpaper, you need to decide on the design and work plan. You can contact specialists; a repairman will help solve many important issues.
Often a sketch is made before repairs. When compiling it, you must indicate:
- Furniture arrangement.
- Placement of lamps and chandeliers for maximum illumination.
- Location of equipment.
- Placement of decorative details.
It is necessary to decide on the type of finishing: wall covering, painting. To create various effects, designers use their professional subtleties.
Necessary materials and tools
When the design of the room has been chosen, you need to make a list of the necessary building materials. Their number and total price are determined by the volume of work and options for their implementation. If funds allow, you need to purchase materials with some reserve.
You will also need a list of decorative parts: these are holders, shelves, mirrors, paintings. If some element is missing, you can quickly replace it or create a new design project. When choosing materials, you must use the advice of experts.