What prerequisites precede the application technology?
The technology is the same as when applying decorative plaster, but differs in that the surface must be perfectly flat, smooth, without dents, scratches, or residues of other paint. The high absorbency of the material requires careful preparation of any walls in the room. Additional work is carried out before applying a layer of adhesive mass.
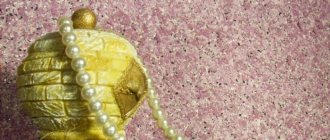
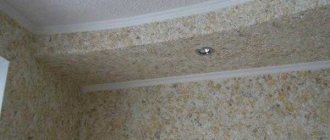
Liquid wallpaper on the wall
It can be conditionally accepted that the finishing material serves as a kind of indicator. It will show how correctly and efficiently repairs are carried out in an apartment, house, or office. If you do not comply with the technical conditions and deviate from the technology for carrying out repair work, then all the flaws in the finishing will immediately show up on the walls with the mixture applied to them.
Stages of wall preparation
Before applying liquid wallpaper, a number of preparatory steps should be carried out in the following sequence:
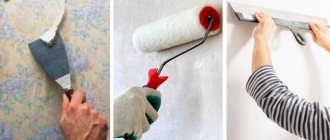
- Removing old wallpaper. This work should be done as carefully as possible so that not a single piece of the previous paintings or the glue to which they were glued remains on the surface of the walls. It is necessary to pay attention to all previously driven nails and screws. If they will not be used after the completion of the repair work, they should be removed immediately, since their further removal can damage the appearance of the completed finish.
- It is imperative to clean the surfaces being treated.
- Before applying liquid wallpaper, you should paint the walls. Completing this step is especially important if the surface being treated is dark or of a contrasting color relative to the coating. Otherwise, the base can be visible through the wallpaper pasted over it, affecting the final shade of the walls themselves upon completion of the repair work.
- The process of painting surfaces also has some peculiarities. In general, white paint needs to be applied twice, and areas where the coating has a rusty tint require more effort.
- When choosing a paint, you should familiarize yourself with its composition. It is not recommended to give preference to a water-dispersion mixture, since it is not able to hide rust. In addition, nitro paint should not be used to perform this work, which, after application, prevents the walls from breathing.
- To increase the level of adhesion of liquid wallpaper to the surface being treated, you can add a small amount of PVA glue to the paint before applying it.
Important! It should be borne in mind that the preparation of walls for the process of applying liquid wallpaper may need to be done differently depending on the type of coating: concrete, wood, brick, plasterboard or other, so it is necessary to consider each of them in more detail.
General rules to follow
When applying wallpaper, it is recommended to follow the general rules - regardless of what material the surface is made of.
The preparation rules are as follows:
- before starting work, you must carefully remove the old wallpaper, its remains, and paint (they will show through the wallpaper, and then the work will have to be redone due to the spoiled appearance of the coating);
- then all screws and nails are removed, leaving only those that are needed;
- the wall is protected and treated with a special primer mixture;
- after drying, the surface is painted white. This procedure is carried out several times, which helps to achieve a smooth effect. Do not use oil or nitro paints, as they are environmentally hazardous and do not allow coatings to breathe;
- Do not use water-based paint, especially if rust from the nails remains. The paint will turn yellow and the stain will appear during application and drying of the liquid wallpaper;
- PVA glue, which is added to the paint, serves as a means of adhesion of liquid wallpaper to the painted wall.
Application of liquid wallpaper
When preparing to apply wallpaper, you must follow the instructions: pour warm water into a plastic container, gently shake the bag with the mixture inside, pour it into the container, mix thoroughly with your hands and leave to swell for 12 hours. The mixture can be used within 2 weeks after mixing.
Choosing a primer for liquid wallpaper
Another important step in preparing walls for liquid wallpaper is applying a primer. It is needed in order to glue all the small particles together and give the wall and finishing material better adhesion.
The primer is applied in three layers. The next layer can be done only after the previous one has completely dried. This usually takes 2-3 hours.
For liquid wallpaper you need a good primer, but there are a lot of such options. The most popular of them are acrylic and quartz compositions.
Acrylic primer does not have a pronounced odor. It is easily applied to walls, quickly absorbing into them. This composition is white. Its only drawback is the impossibility of application at temperatures below five degrees Celsius.
Primer for liquid wallpaper is applied in three layers
If you don't have a primer, you can make your own by adding PVA glue to the paint. Based on two parts paint, one part glue.
Quartz primer has all the advantages of acrylic primer. It contains quartz particles, which contributes to better adhesion of the wallpaper to the wall. There is no temperature regime for applying such a primer; it can withstand absolutely any temperature.
Related article: Unglazed balcony: design and decoration
When asking the question: “Which primer to choose?”, know that it is better to spend money once on a high-quality composition than to redo the entire repair later. Moreover, the products you need are not that expensive.
Additional materials
On the building materials market there is a special primer mixture designed to work with various surfaces and is ideal for applying liquid wallpaper to it. This is a colorless or white primer and concrete contact. If the surface is too smooth, then use a priming mixture containing quartz dust. In this case, roughness will appear on the wall, which will provide a high level of adhesion. You can achieve this effect yourself by adding quartz dust and clean, fine-structured sand to the primer mixture.
It may happen that the wall surface was stained with grease. Oily stains will leave obvious marks on liquid wallpaper. Before general treatment, it is necessary to degrease the stain itself and the area around it. This can be done with a special mixture for removing silicone, which is sold at any auto store. If it is not on sale, then solvent No. 646, gasoline, will do. Grease stains are scraped off with a spatula, the surface is sanded and degreased. Dry before applying other materials.
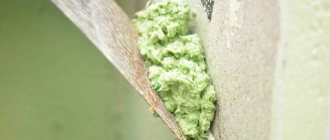
If there are cracks in the walls, they can be eliminated (sewn up) with a special mesh - serpyanka. It is placed on tile adhesive or repair compound. First, the crack is widened, then fixed. If it is large, then you can fill it with polyurethane foam using a gun and clean it.
If the room was previously painted, then the walls must be cleaned. Water-based paint is easily washed off with water, oil-based paint can be removed with a hair dryer. Under the influence of a hot air stream, the surface heats up and the paint is removed with a spatula. You can use a sander and a wire brush. Special solutions are used in extremely rare cases when the above methods do not help.
How to prepare liquid wallpaper yourself
Liquid wallpaper is sold in ready-to-use form or in powder form. In the first case, you can get to work right away, but in the second, you will have to prepare them yourself.
Related article: Repairing the walls of a wooden house
To properly knead the composition, you must act according to the instructions written on the package. All ingredients for such wallpaper must be from the same company. Typically, such wallpaper contains special glue, granules and base fibers. The composition is mixed with water, the required amount of which is usually indicated on the packaging. On average, one pack of dry matter contains 5-6 liters of water.
Liquid wallpaper is sold in powder form, and you can prepare it yourself
Liquid wallpaper can be prepared at home from scratch. To do this you will need torn paper, water, glue, plaster and coloring pigment. All substances must be mixed until creamy and allowed to brew in a closed container.
It's best to start making liquid wallpaper before you start applying primer. The mixed substance must be infused for another 12 hours. After this, it can be applied to the wall, but if for some reason you are unable to do this right away, the finished liquid wallpaper can be wrapped in polyethylene and stored for a few more days.
Walls of various types and preparation features
Various surfaces made of concrete, plasterboard, wood, concrete blocks and similar materials have their own specific characteristics, which must be taken into account when applying liquid wallpaper. The structure of materials reacts differently to coating. Some of them easily absorb the mixture, while others require an additional primer. Taking into account the surface features allows you to achieve high-quality results. You can do this yourself. In any case, you must have interior finishing skills. Otherwise, everything will have to be redone, which will entail significant costs.
Advantages and disadvantages of liquid wallpaper
The type of decorative plaster that will be discussed in this article got its name thanks to cellulose, which forms the basis of liquid wallpaper. By the way, it is the composition that forms the main advantages that characterize the presented coating:
- When applying liquid wallpaper to a wall, there is no need to carry out a whole list of labor-intensive operations that are typical for traditional paper wallpaper - taking measurements, cutting the roll into pieces of given sizes, applying glue, smoothing the canvas over the wall surface, etc.;
- when applying the presented coating, a minimum of free space is used (there is no need to spread the wallpaper throughout the room and perform various manipulations with it, smearing the entire room with glue);
- to finish the room, a minimum set of tools is used - a small container for diluting the cotton mixture, a spatula, a trowel and a grouting board (in some cases a special sprayer is used);
- the complete absence of joints on the walls and the ability to hide some defects of the surface being decorated (depressions, small cracks, etc.);
- liquid wallpaper allows the walls to breathe;
- by combining different colors, you can create entire works of art on the surface of the walls;
- liquid wallpaper, once applied to a wall, will serve its owners for more than 10 years;
- liquid wallpaper can easily be repaired by hiding the “marks” left by the claws of pets, or by a young artist exploring the world;
- possibility of reuse of source material;
- minimum maintenance (in order to keep liquid wallpaper clean, it is enough to vacuum its surface).
As you can see, liquid wallpaper has a lot of advantages, but this does not mean that they do not have disadvantages. The first of them is the high cost of the material. The second disadvantage can be considered their inability to wash. If the surface is heavily soiled, you just need to cut out the damaged fragment, soak it in water and apply the resulting mixture to the wall using standard technology. Also, to replace a damaged fragment, previously unused remains of the material can be diluted in water (if they are preserved, of course).
BricklayerFORUMHOUSE user
Liquid wallpaper is attractive because it is easy to restore in areas of damage. The damaged area is moistened and rubbed with a spatula again. In some cases, it is simply removed and a fresh coat is applied. After complete drying there are no traces of the work done.
Drywall and concrete - high absorbency guaranteed
Let's start describing the process with the simplest surface - drywall. It is believed that such a wall is already covered with white paint, and no additional processing is necessary. This is the first mistake. Plasterboard material guarantees a high degree of absorption due to its structure, so it is best to process it additionally than to waste expensive materials in double or triple amounts. It is important to consider the processing of joints and fasteners.
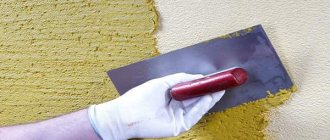
Smoothing liquid wallpaper over the wall
The ideal option is galvanized self-tapping screws. They do not rust when in contact with liquid, and yellow spots will not appear. If installation has already been carried out, then the self-tapping screws should be recessed properly, treat the fastening points with oil paint, apply another layer of putty and let dry. In cases of leakage or swelling of the surface, it is thoroughly cleaned, rubbed, covered with copper sulfate or oil-based paint, onto which another paint is applied. Then you can avoid dark spots.
The concrete structure has a high level of porosity, despite the fact that it may be made of high quality material. Preparing walls for liquid wallpaper on a concrete surface involves the use of water-based paint. This is explained by the fact that white paint is absorbed instantly, changing color. No matter how many layers are applied, it will still be dark gray. A water-based emulsion will help avoid this effect. The best way to obtain a uniform white color is to apply gypsum-based putty. It will perfectly level the entire surface and cover problem areas. A dense layer that is resistant to other environments will improve the quality of the repair.
Surface preparation in old houses
All old coating is removed from the surface. Particular attention is paid to areas with bright shades of old paint and so on. It is important to remove all flaking areas. To level not only the plane itself, but also the color, it is advisable to putty the walls with a gypsum mixture. The layer should be dense.
You can also paint the walls with paint for external work (facade) with the addition of PVA glue in a ratio of 1 part glue to three parts paint. It is not recommended to treat old walls with water-based emulsion, since over time the yellowness from it will seep through the wild finishing composition.
Previously, the walls were painted with a layer of plaster, which over time begins to peel off. You can check “damaged” places by simply tapping on the surface.
It is better to treat previously painted surfaces with a primer filled with quartz sand, which improves the quality of adhesion. It is better to work with a brush rather than a roller. Particular attention is paid to the color combination of old and new finishes. With the original light tone of the walls, liquid wallpaper will look much brighter and lighter after drying. Conversely, on a dark base, dried wallpaper of even the lightest colors will become faded and dark over time.
Sandpaper will help to roughen walls previously painted with oil or glossy compounds, which will not only remove the old coating, but also improve the adhesion of the surface for subsequent finishing.
To level not only the plane itself, but also the color, it is advisable to putty the walls with a gypsum mixture.
Old house - a lot of secrets and work
If renovations are carried out in an old house, then the material from which the walls are made is unknown. This means that it is necessary to approach the issue of preliminary work especially carefully. It is difficult to predict where the problem area will arise, but it is possible if you first carry out high-quality treatment. Otherwise, stains, dark, yellowed spots are guaranteed. In order to know how to prepare walls for applying liquid wallpaper, you must follow the rules in the following sequence:
Removing old coating from walls
- stripping of old coating;
- impregnation with a mixture of primer with a particularly strong composition;
- re-impregnation of the wall;
- painting with water-dispersed paint twice to obtain an even white shade, which will not create problem areas;
- in difficult cases, alkyd-based paints with protective characteristics are used.
Each wall has its own preparation
Walls can be built from a variety of materials. Each option is unique and requires a special approach. We have no choice but to consider all the options for materials and describe in detail the methods of preparation.
Concrete and plaster
In many cases, such surfaces are ideal for decorative finishing work. But in our case, the walls are prepared before applying liquid wallpaper. The problem lies in the ability to perfectly absorb applied liquid materials. This results in waterborne paint being absorbed even after repeated applications. The desired effect will not be achieved.
The essence of the preparation is as follows:
- apply primer to the surface;
- apply gypsum putty, carefully sealing the cracks and recesses;
- wait for it to dry and apply the primer again;
- We paint the surface with white paint, which will preserve the color of the new ones.
You know how to prepare walls for gluing liquid wallpaper, and now there is nothing stopping you from doing this work yourself.
Walls in “Stalin” and “Khrushchev” buildings
This situation turns out to be more complicated than the previous one. The surfaces in such old buildings are not durable and can peel and become stained. As mentioned above, you cannot apply liquid wallpaper to a bad surface; the preparation of the walls must be thorough and serious.
This situation can be fixed, but it will take a lot of effort and expense. But the result is worth it. Preparing walls for liquid wallpaper with your own hands in old apartments is carried out according to the following scheme:
- treatment with a primer that can penetrate deeply into the surface;
- applying plaster if leveling is required;
- applying water-based paint to whiten the wall.
Preparing walls for liquid wallpaper with your own hands is possible even in old apartments. Do this work and the result will surprise you.
Drywall
It is simply impossible to imagine interior work without the use of drywall. This material is widely used and found everywhere. It is logical that we decided to tell you how to prepare walls for liquid wallpaper in this case. The work is not difficult, but it has its own characteristics:
- apply a primer and, if desired, fill in a reinforcing mesh;
- joints that are typical for prefabricated structures deserve special attention;
- mix the putty and apply it completely to the surface, which will make the joints and fastener locations invisible;
- prime the putty surface (the primer can be replaced with a mixture of water-dispersion paint and PVA in a ratio of 3:1).
You know how to prepare walls before applying liquid wallpaper; all that remains is to apply the knowledge gained in practice.
Wood, OSB and other options
Now we have reached the most difficult case. The main problem is the fickleness of wood; it can change its original appearance from an excess of moisture or even from a lack of it. Moreover, the new building will shrink. In short, it is difficult to predict the behavior of wooden walls. But if you really want to decorate a wall with liquid wallpaper, then you should familiarize yourself with how to properly prepare walls for liquid wallpaper.
- We carefully check the fastenings of the structure; their strength and reliability should not raise doubts;
- the primer is applied in two layers, the wood must be well saturated;
- mix a special putty that is designed for working with wood;
- the putty is also applied in several layers, the first time the cracks and joints are carefully sealed;
- water-based paint will create a good basis for further manipulations with liquid wallpaper.
Other, complex situations
There can be different situations in life, especially when it comes to repairs. An ideal surface is a significant drawback that characterizes liquid wallpaper; preparing the walls and applying it step by step requires painstakingness and scrupulousness. Any unclear situation should be carefully studied.
We want each of your renovation plans to be completed quickly. Therefore, we decided to consider difficult situations that can confuse us.
- Multi-colored walls are in no way suitable for applying liquid wallpaper. Peeling off all the paint from a surface is blasphemy and a mockery of oneself. You can go another way. Its essence is to apply a deep primer, then putty, primer and paint. Liquid wallpaper can be applied to such a surface.
- Metal elements are often embedded in the walls, which are an obstacle to the application of liquid wallpaper. The location of the metal elements must be treated with oil-based paint. Areas of old smudges require similar treatment.
You know in great detail how to prepare a wall for liquid wallpaper. The chances of getting a positive result increase significantly. In the next conversation we will tell you how to work with liquid wallpaper; the preparation of the walls has already been revealed.
What to do if the walls in the house are wooden
Wood is an excellent material for interior decoration. In addition to wood, fiberboard and chipboard are used. Such surfaces are environmentally friendly, breathe easily, and allow you to create an atmosphere of naturalness and closeness to nature. There are no secrets in processing such walls. The work is carried out in the same sequence as under technical conditions in old houses. By following the preparation technique, the wooden surface with liquid wallpaper will be smooth and even. If you paint in one layer, the paint's absorption will be high, which will entail additional costs. In addition, you need to be confident in the quality of the wooden structure, since excess moisture can lead to additional stress and collapse under the weight of the applied coating.
Which walls can liquid wallpaper be applied to?
Liquid wallpaper can be applied to almost any surface. For example, for a similar coating, if the walls were previously treated with the same composition. The only thing you need to do is clean the surface of dirt. Wooden, concrete and plasterboard walls are a little more demanding to prepare.
Liquid wallpaper can be applied to almost any surface.
Solving problems with non-traditional surfaces
When making repairs, you may encounter non-traditional surfaces. Among them are those that are painted in different colors, contrasting with each other. This also includes metal elements of drywall joints, reinforcement elements, reinforced fasteners and guides. In this case, use the technique of double putty, priming and applying paint repeatedly, which will prevent stains from appearing when the wallpaper mixture is applied.
As you can see, during preparation it is necessary to take into account all the nuances, differences in textures, quality of processing, and preliminary preparation. When choosing materials for finishing, you must remember that wallpaper of this type is complex in application technique, but durable and wear-resistant. More than half of the success lies in compliance with the technology of preliminary work and the materials that will be used before applying the trendy material.
Preparing a concrete wall
The concrete surface has a high ability to absorb moisture, which is why paint applied to it does not provide the desired result. In addition, a similar effect will be obtained if the plaster is painted.
Given this feature, it is important to observe certain nuances during the execution of work. First of all, the concrete wall must be covered with a layer of putty, which will help reduce the level of moisture absorption by the surfaces. Upon completion of drying, you should make sure that the opening is complete and, if necessary, reapply the mixture, it is possible that even several times if they have too obvious defects.
At the next stage, the walls must be coated with a layer of primer. If the surface being treated crumbles or crumbles, then to perform this task you will need to buy special compounds that are designed specifically for them.
Once the primer has dried, paint can be applied to the walls. To obtain an optimal result, it will be enough to stain 2-3 times.
If using a primer does not work, then glue should be added to the paint container in a 2:1 ratio.
When the material is unknown
Since apartment buildings of the last century are distinguished by a wide variety of materials used, it is not always possible to understand which of them was used in a particular apartment. Therefore, we need to find out how to prepare walls for liquid wallpaper if the wall material cannot be determined.
The main thing for a craftsman working in such conditions is to determine where, after finishing, dark, rusty spots or stains may appear. Therefore, you should be careful when working in such a house: inspect all joints, nails protruding from the wall, or possible places where water is leaking. To ensure the best result, all walls must be carefully primed in 3 layers. You should wait until it dries before applying the next layer, and only then apply paint to obtain a lighter shade of the surface.
A brick wall looks like a smoother surface. One of the few pitfalls when finishing it with liquid wallpaper is plaster. If it was laid a long time ago, there may be air bubbles in its structure, which, when the material falls off, will damage the wall, so preparing the surface in such conditions involves first checking the reliability of the plaster using a wooden hammer.
Anything that is not securely attached to the wall will fall, and the master will be able to see a real picture of the condition of the surface. Any defects that appear must be covered with fresh solution. To keep it stronger, the brick can be pre-coated with a layer of primer. After leveling the wall with putty, the master works according to the standard scheme: priming, painting and applying wallpaper.
What kind of material is this?
Liquid wallpaper is a unique material that combines the properties of a paint coating, ordinary wallpaper in rolls and decorative plaster.
This finishing building material, according to its classification, belongs to one of the varieties of decorative plaster .
If you touch liquid wallpaper, you will feel that its texture is very pleasant to the touch. It's all about the composition of the building material. It is based on a cellulose mixture containing non-toxic and hypoallergenic decorative fiber components, and CMC glue is used as a binder in the finishing material.
An inexperienced consumer can easily confuse liquid wallpaper with decorative plaster. How are these finishing materials fundamentally different from each other? Decorative plaster contains sand, which is not among the components of liquid wallpaper.
How to prepare wallpaper yourself
Liquid wallpaper in finished form
To perform this action, no special skills are required. Ready-made mixtures for liquid wallpaper can be purchased at any hardware store. All that remains is to fill them with water 12 hours before use. The required proportion is indicated in the instructions.
At the preparatory stage, each package of paper wallpaper is filled with water and stirred separately. But immediately before placing it on the wall, the contents of all packages must be mixed in one container. It is worth considering that even if all materials were purchased in one place and from an identical batch, their color may still differ slightly. Using the described actions, you can achieve unity of the mixture and an even tone on the walls in the room.
Consumption of liquid wallpaper
When opened, the composition is suitable for use for several hours. However, if you are unable to finish finishing the surface in one go, it will be enough to put the unused remains in a plastic bag and seal it tightly. In this form, wallpaper can be stored much longer.
Since purchasing this material from a hardware store can be expensive, some people prefer to make their own liquid wallpaper. To do this, first take any unnecessary paper and shred it, and then fill it with water in a ratio of 3:4 (or 5 liters of water per 1 kg). After the mixture has been sufficiently soaked, it must be thoroughly mixed using an electric drill. During the mixing process, you should add PVA glue and dye to your taste. The finished mixture must be packed in a plastic bag and left for 12 hours. At the end of this period, the mixture must be taken out and stirred by hand. At the final stage, you can add glitter if desired.
Liquid wallpaper is a new phenomenon in construction and decoration, which has a number of advantages. Question: Do I need any special skills to do this job? Many have become convinced that mastering this technique from scratch is not difficult. To do this, it is enough to understand the principle of leveling and preparing the required type of wall before starting work. And if the preparation is done correctly, the wallpaper will delight both the owner of the house and his guests.
