Fans of natural materials will like OSB boards. They allow you to finish the exterior of your home, imitating wood flooring. True, to use them outside, you need to take into account many nuances and choose the right type of cladding. After all, outdoor conditions can easily spoil the finish under the influence of moisture, wind, aggressive substances and mechanical damage. What are the benefits of OSB boards for exterior home decoration and how to use them correctly?
Features of OSB boards
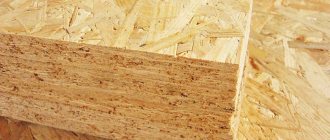
The abbreviation OSB means oriented strand board, you can see the abbreviation OSB, this is a transliteration from English oriented strand board OSB. This indicates their characteristics and composition. The cladding is made from lumber (shavings and chips). They are pressed and glued in several layers.
OSB boards obtained their characteristics thanks to a special creation technology, in which the chips in the structure are located not in one, but in different directions. Thanks to this, the material can bend a little, but not crack, and also perfectly holds nails, screws and other fasteners, even near the edge.
The surface of the panel is rough on both sides. This is both good and bad. It’s good in the sense that after finishing you get a beautiful texture. The downside is the need for additional processing using different materials and tools.
Several grades of OSB go on sale depending on quality:
You can only decorate a house from OSB with your own hands using OSB-3 or OSB-4. They are of the highest quality and can withstand the external environment. Due to the high cost of the latter type, builders use OSB-3. However, its surface needs to be refined. But the products can withstand the influence of moisture and UV rays.
Coloring
This option is the simplest, fastest and most economical. Even a teenager can cope with the task. However, if the paint and varnish material is applied incorrectly, it can ruin the surface of the slabs.
Tips for proper application:
- It is not recommended to paint slabs with water-based paint. The water content is unacceptable, since under the influence of moisture the slab will begin to swell.
- When painting a house, it is important to carefully process the edges of the products. They can become a weak point through which moisture can penetrate.
- The best option for protecting panels is alkyd or oil paints. They will create a protective layer and will not harm the structures that the cladding has.
- To completely paint the structure, you need to apply several layers of paint with a break for drying.
Often owners want to treat the slabs with fire retardants, however, not all paints can be combined with them.
When choosing paint, its decorative properties and performance characteristics are taken into account. Some people prefer to treat OSB with transparent coatings to preserve the texture of the boards. To do this, choose transparent paint with a UV filter. One option is Cetol Filter 7 Plus. The shade is semi-matte, the paint protects OSB from moisture and UV rays. Other options are clear varnish, glaze, wood impregnation.
Another way to decorate the stove is toning. This will highlight the surface texture. Stain is used for the work. To obtain a specific color, water or acetone is added to it. Tips for painting the panel: apply the composition with a spray gun or paint brush. After drying, a polyurethane primer is applied.
If we talk about conventional compositions, then covering enamels are used, the choice of which is more than diverse:
- Silicone based.
- Alkyd compositions.
- Latex based.
- Water-soluble acrylic paint.
- Pentaphthalic.
Oil-based paints are considered the most viscous. They will not be absorbed into the slab, so consumption is reduced. True, they take a long time to dry and do not withstand the influence of UV rays. But the covering layer will be durable, and the adhesion to the OSB board is excellent.
The peculiarity of OSB boards is that under the influence of fire they release caustic substances. And in case of fire, smoke causes even more damage. On sale you can find Soppka paint, which is made specifically for particle boards and will protect them from fire. Service life 15 years or more.
Before painting begins, the OSB board is prepared. First, it is cleaned; if it is new, then it is polished. Afterwards, primer is applied using the Ceresit ST17 brand (a high-quality and time-tested primer). The work is done with a roller or brush. After drying, apply pigment primer (with a tint of future paint). All that remains is to apply the paint and varnish material.
Slab preparation and painting technology
If you prepare OSB sheets, then any paint will lay on them more evenly. The slabs need to be painted when they are fully assembled and in place, since the installation process always requires adjusting the corners, followed by sanding, filing, and so on.
The slabs need to be painted when they are fully assembled and in place.
Stages of painting OSB boards
Having decided how to paint the OSB outdoors, the preparatory work should begin with sanding.
- The surface needs to be sanded to remove small irregularities and improve the texture. It is better to perform this action using a grinding machine, since the entire area needs to be processed. Both OSB-4 and OSB-3 boards especially need grinding;
The surface needs to be sanded to remove small irregularities and improve the texture. - Puttying is a process necessary for sealing microcracks and joints between slabs. However, experts do not recommend wasting putty and time on masking the seams and borders of the slabs, since after painting they will still remain. At the end of the work, it is better to cover them with profiles or planks;
When choosing OSB sheets, attention should be paid to the quality of the wood. There should be no small particles of bark on the surface, as they will subsequently peel off. Outside, this process will accelerate.
Puttying is a process necessary for sealing microcracks and joints between slabs.
- Priming is done using acrylic or water-polyurethane based varnishes. They are diluted with water in a ratio of 1 to 10. If an alkyd-based varnish is used, then it is diluted with a solvent. The main thing is that the composition is applied slowly, gradually, allowing it to be absorbed into the surface.
Priming is done using acrylic or water-polyurethane based varnishes.
Coloring and subsequent drying. You need to rely on recommendations from the manufacturer, taking into account the characteristics of paintwork materials. Painting begins from the edges of the slab and then spread over the entire surface. The edges are painted in 2 – 3 layers. Each subsequent layer is applied 8 hours after the previous one has dried. You can paint anything, fortunately the range of paints and varnishes allows you to do this. It is very important to comply with the conditions for coloring natural materials, taking into account their characteristics.
Plaster on OSB boards
An equally popular option for processing facade walls made of OSB boards. It's cheap, simple and effective. True, the entire structure and appearance of the OSB is hidden.
Features of plaster on slabs:
- Since the work is wet, the surface is additionally waterproofed with liquid rubber or roofing felt.
- To strengthen the layer, if it is more than 1 cm, a reinforcing mesh is used. It prevents the formation of cracks.
- The mesh needs to be plastered with a special compound for reinforcing work on the facade.
- The next layer is the finishing layer, which is also decorative. Performs two tasks: protects the walls of the house and gives them an original appearance.
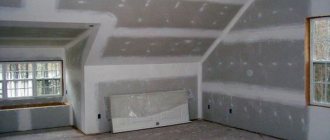
How to decorate a stove from the inside of a room
OSB walls inside the house require a fine finish. It is not recommended to leave the OSB board open. If you want to preserve the structure of the OSB, you should cover it with water-based varnish or paint.
Painting with acrylic paint and varnish
For painting OSB boards, compositions intended for painting wood are suitable. Taking into account the fact that OSB contains resins, paint or varnish from unsanded sheets may peel off, so you must first remove the top layer of OSB. If you want to emphasize the structure of the material, you need to use fine sandpaper. If a smooth surface is required, then sanding should take place in two stages: first with coarse sandpaper, then with fine sandpaper. Before coating, it is necessary to dust the surface with a vacuum cleaner or a special primer.
Is it possible to attach drywall to OSB?
You can attach gypsum board sheets to OSB using guides if the surface is not flat enough. If the walls are smooth and the room is dry, the gypsum board is attached with self-tapping screws directly to the OSB. Try to separate the joints of materials by joining the drywall offset relative to the OSB joints.
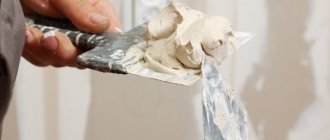
Puttying with gypsum putty
Binding resins have low adhesion to gypsum mixtures, therefore, for filling OSB, mixtures with increased stickiness to wooden surfaces have been created. Dry composition Rotband, containing polymer additives, is ideal for puttying OSB. Before you putty the wall, you need to prime it with a composition containing glue, putty and non-woven material. This measure will increase adhesion and prevent surface staining.
How to plaster a surface made of OSB boards
The walls need to be prepared, for which you need to glue the joints with sickle tape, putty them and let them dry. The next step will be the primer. After the primer layer has dried, a layer of plaster is applied, a reinforcing mesh is embedded in it, followed by the application of a covering layer. After the plaster has dried, it is necessary to check the evenness of the wall and, if necessary, apply a finishing layer.
Glass wallpaper sticker
Sticking fiberglass and then painting it allows you to choose the texture and choose the color in accordance with the design of the room. The OSB surface has a heterogeneous structure and poor adhesion due to impregnation. Before gluing wallpaper, you need to sand off the top layer, removing unevenness and impregnation. Apply two coats of primer, drying in between. After preparation, pasting is carried out in accordance with the recommendations of the wallpaper manufacturer. Painting is done in two or three layers with intermediate drying of each.
Important! Buy glue recommended for fiberglass.
How to glue ceramic tiles
In order to firmly fix the tiles on the OSB base, it is necessary to equalize the expansion coefficient of these materials. Select the appropriate option:
- Fix the mesh to the wall and lay out the tiles using regular tile adhesive;
- Lay the tiles directly on the OSB wall using highly elastic adhesive;
- Lay the tiles on an epoxy compound.
Attention! Use epoxy grout, it is more flexible than cement grout.
Liquid wallpaper
Before applying liquid wallpaper, you need to repair large irregularities, glue the seams with sickle tape and putty them. After the putty has dried, prime the base and apply liquid wallpaper according to the manufacturer's instructions. The advantage of liquid wallpaper is its ability to mask small blemishes and uneven walls.
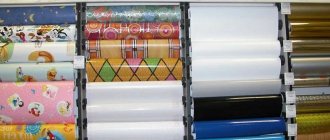
Siding
The use of siding for exterior work is very justified, since this material was created precisely for such purposes. The cladding reliably protects the walls. At the same time, the cost of materials is affordable, and the appearance is decent.
There is vinyl siding, metal, wood and cement. Most often the first option is used. Its surface can imitate other materials, such as brick or wood. Siding is convenient to use for OSB, since to fix it it is not necessary to form a frame, as with conventional wall cladding. But, everyone chooses for themselves which option is better: with or without lathing.
But what you don’t have to choose is the presence of a hydro- and windproof membrane. Without it, condensation will form between the OSB boards and the siding, which will be transferred to the surface of the boards. This will cause them to swell.
If the room needs to be additionally insulated, it is impossible to do without creating a frame. It is made of wooden or metal slats, between which insulation is laid. You can use polystyrene foam or mineral wool.
Siding is produced with a thickness of 0.8–1.3 mm and can withstand temperature fluctuations, moisture, UV rays and mechanical damage. After covering the walls, the cladding will last for decades.
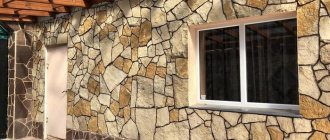
Decorative panels
The most difficult and expensive option is the installation of decorative panels. But, you can provide reliable and durable protection to your home. Everything pays off with interest.
- The surface seams are treated with sealant, the walls are primed to improve adhesion.
- PPS (insulation) is glued on top.
- It is puttied with façade putty.
- After applying the first layer, the surface is treated with glue, the mounting mesh is embedded in it and the second layer of glue is applied.
- A decorative stone is placed on the second layer.
Decorative panels are made from different materials, which determines their price. There are PVC panels on sale, which are cheap, but will not last as long. They have a high decorative component.
Here are some types of products:
- imitation brick;
- imitation stone;
- wooden panels;
- wood imitation;
- PVC panels;
- MDF panels.
Not all of them can be used for exterior decoration. It is important to take into account the property of the material to resist moisture, not fade and withstand temperature changes.
OSB boards are often used in frame construction to form walls. However, they cannot be left without proper protection. By choosing one of the above finishing methods, you can not only extend the service life of the structure as a whole, but also give the house an original appearance.
Oriented strand boards are very popular when carrying out various types of work, which is explained by their excellent technical characteristics. But to obtain a high-quality result, the sheet material must be installed taking into account all the nuances. In this case, the OSB finishing will not create problems in the future and will have a long service life.
Material quality criteria
Since these wood panels differ in production technology from other boards, the technical characteristics are also different. When choosing OSB boards for exterior finishing, you should be aware of all the nuances.
Moisture resistance and water absorption
Wood is a natural material that responds to increased humidity in the environment. Since the slabs are made of wood, they simply need to be reliably insulated from moisture. The presence of a polymer component in the composition does not protect the natural material from water.
If you immerse a slab in water, the material will absorb it over time. This will lead to a decrease in strength, resistance to negative factors, and will also reduce service life. In order to calculate how much OSB can resist moisture, they are placed in water and noted how much the material swells.
The lowest indicator is for slabs of the highest class 4. This type of material is used to build a frame house or other buildings.
Strength
The strength of the material may vary quite slightly between different manufacturers, since all enterprises operate according to the same standard and must comply with it. The slabs are checked for strength using the following indicators:
- Flexural strength along the main and lateral axis.
- Modulus of elasticity along the main and lateral axis.
- Tensile resistance.
All indicators are indicated in quality certificates. If at the point of sale they refuse to show the relevant document, you should not make a purchase here.
Ability to hold fasteners.
Due to the fact that the boards are strong and have a fibrous structure, OSB boards can be fastened with all known fasteners:
- nails;
- self-tapping screws;
- staples and others.
Manufacturers claim that fasteners can be placed at a distance of 10 mm from the edge without worrying about breakage, delamination or other negative consequences. If there is a need to fix the slab even closer, it is recommended not to cross the 6 mm mark, and even here you need to work quite carefully.
To secure wooden sheets correctly, several rules for choosing fasteners are followed:
- The length exceeds the thickness of the slab by 2.5 times. In this case, the minimum length is 50 mm.
- If a bracket is used for fixation, the thickness of the wire cannot be less than 1.5 mm.
- The material is secured with steel or stainless steel fasteners.
- The shape of the cap must be flat.
The instructions for using the material indicate that you should not push the fasteners deeper into the slab, since it will be very difficult to get them out later.
Insulating properties
Here we will look at how well OSB boards transmit steam. Most manufacturers do not indicate the vapor permeability coefficient at all. Among other characteristics, you can find a certain parameter that shows how poorly OSB boards transmit steam compared to air.
To the average person, these indicators mean absolutely nothing. But if you rummage through the literature and make certain recalculations, you can find out that the slabs practically do not allow steam to pass through. The coefficient is 0.0031 mg/(m·h·Pa).
Since the material consists of wood, it is able to retain heat indoors. But this indicator depends on both the thickness and density of the slab. The thicker the option, the more heat it will retain.
Large size, stable shape
OSB boards are quite plastic and pliable material. This is convenient when it is necessary to sheathe or erect a structure of a non-standard geometric shape. Plates can be:
- grind;
- drill;
- plan;
- sawing and so on.
For such processing, use any available or professional tools. The main thing is that the blades are sharp and made of hard metal, the surface on which the plate lies is flat, and the tool must be moved clearly and rather slowly.
Advice! When processing wood OSB boards, be sure to use personal protective equipment. The dust that is generated is dangerous to human health, so do not ignore this recommendation.
Environmental Safety
Most consumers are interested in the question, how dangerous are materials that contain synthetic resins? Manufacturers of OSB boards conducted their research and came to the following conclusion:
- The amount of resins in the composition is very small, only 3% of the weight of the dry slab.
- The largest amount of caustic vapor is released in the first year of operation, but it is still less than that of chipboard and MDF.
- Further, phenol is formed only with strong heating.
Every year the production of boards is improved, therefore the amount of phenol-formaldehyde resins in the composition is reduced and replaced with safer, but at the same time equally reliable components.
Fire resistance
Wood-oriented particle boards belong to the lowest class of flammability, that is, to those materials that are easily flammable and then burn independently without a fire source. Therefore, if the material is used as exterior or interior decoration, it is imperative to install a layer of a substance that can resist the effects of fire.
If it is insulation, then mineral wool is suitable, and decoration can be done with plaster or tiles. Without these measures, it will not be possible to protect the lives of the inhabitants of the building.
Manufacturers, in turn, are trying to increase the flammability class of the material by adding special non-flammable components. After complete polymerization of the binder, OSB boards are coated with special impregnations.
Aesthetics
The slabs do not have exceptional attractiveness, which is why they are used as bases for decoration. The material combines well with absolutely all methods of decoration. Plates can be:
- to paint;
- cover with plaster;
- cover with tiles or decorative stone and so on.
When choosing a decorative material, be sure to consider strength. An option that is too heavy will not be appropriate.
Material selection
To sheathe a house, you need to choose the right products. For every indoor and outdoor process, there is a product type that is most suitable.
OSB is divided into categories according to technical characteristics and size, so when choosing, you need to know the properties of the material, which must correspond to a specific situation.
Due to the interweaving of the chip elements with each other, OSB is also called bonded plywood
Types of OSB
There are four main types of products:
- OSP-1. The lowest class used for interior work. Such slabs are laid only in areas not subject to loads.
- OSP-2. This variation is more resistant to impacts, but is only suitable for dry rooms.
- OSP-3. The most popular type, which is used for work inside and outside. The products are able to withstand constant load and variable humidity.
- OSP-4. This option is characterized by increased moisture resistance and resistance to serious mechanical stress.
It is the products of the third class that are universal and suitable for all stages of work, which allows minimizing costs.
With a reasonable distribution of material, you can save up to a third of the budget, so spending money on moisture-resistant OSB-3 or OSB-4 for interior work only makes sense for cladding rooms with high humidity
Optimal size
Products are selected by thickness, depending on the design characteristics:
- For cladding a frame house, slabs of 9.5 and 11 (for one-story buildings) and 12 and 12.5 mm (2–3 floors) are used.
- Finishing vertical surfaces inside rarely requires the use of parts thicker than 9–9.5 mm, except in situations where the structure will experience loads or act as partitions.
- Products with a thickness of more than 15 mm are used for the construction of main and interfloor ceilings.
To sheathe a dacha for seasonal living, you can choose OSB-6 (the number indicates the thickness in millimeters).
On a note! The level of emission of harmful substances must be taken into account; the optimal indicator is E1.
OSB outside
If the external cladding of a frame house is being done with OSB boards, then you need to take care of the finishing in advance. Typically, siding is used for this or plastering is performed with preliminary reinforcement and insulation.
The recommended OSB thickness for a frame house is 11-13 mm. This is the best option. If the thickness of the OSB for the walls of a frame house is less than 10 mm, then additional jibs must be present in the frame.
OSB frame sheathing
Algorithm for cladding a building:
- The panels are attached to the frame in such a way that the joint of the plates is located in the center, and the gap between the sheets is 3-5 mm;
- Sheets of material are attached around the entire perimeter and grip the bottom trim, the edge of the trim is aligned with the edge of the material;
- For a multi-story building, the slab is placed so that it covers two floors at once, and the middle of the panel should cover the top frame;
- Window and door openings are cut from a single slab.
Frame wall pie with OSB.
To fasten the material, use spiral nails or self-tapping screws, and also combine both fasteners. To ensure the sealing of the structure, a sealant made on the basis of acrylic resins is used. It is used to process all joining seams and other cracks and gaps.
The construction of a frame house with OSB is made using waterproof and windproof materials. A superdiffuse membrane is suitable for this. This wall design will create a comfortable microclimate for living inside the room.
The exterior of a frame house with OSB should not contain glassine or films. These materials have low vapor permeability, which creates favorable conditions for the active activity of an aggressive biological environment.
If a frame house is insulated with OSB panels without the use of additional materials, then the inside of the building will be cool in severe frosts, even with good heating. For this reason, it is not recommended to ignore the use of heat-protective products.
Plating order
If we talk about how to properly sheathe a frame house with OSB, then the finishing looks like this:
- Panels are attached to the base;
- A vapor barrier layer is laid;
- The insulation is attached;
- Another layer of vapor barrier film is laid;
- The cake is covered with panels and the external finishing is done.
As an alternative to decorative materials, experts suggest using OSB boards for exterior finishing using the wet facade system, which involves the use of plaster to level the building base.
Finishing wet facade
The work algorithm in this case will be as follows:
- Thermal insulation material is fixed on the panels. Mineral wool or polystyrene can be used as such a product.
- Install the reinforcing mesh. This material increases the adhesion of insulation and plaster. The mesh allows you to apply the product even in a thick layer.
- Apply a layer of starting plaster. It allows you to hide surface imperfections and level the building foundation.
- Finishing is carried out. For this it is recommended to use decorative plaster. You can choose a material with different textures that create original textures on the surface - “fur coat”, “bark beetle” and others.
- If white plaster was used for decoration, it can be painted. For this purpose, paint and varnish material of any shade is used.
Wet facade on OSB.
When making a wet facade, it is important to remember that materials are applied only after the previous layer has dried. If an OSB frame house is lined with high-quality exterior, then the service life of the building increases without losing its visual appeal.
Installation of OSB on external walls
The technology for laying OSB on the street includes several stages that must be performed sequentially. The main goal is to obtain a flat surface.
Preparing the base
- If the old decorative coating interferes with the work, it is removed. Protruding objects are removed. Communication systems are completely replaced or transferred if necessary. The surface is cleaned of dust and dirt.
- The condition of the foundation is assessed. All cracks and cracks are opened, primed and sealed. If there are traces of mold and mildew, the areas undergo special treatment.
- Damaged areas are replaced or strengthened. When working with old buildings, it may be necessary to strengthen the foundation.
The supporting base does not require perfect leveling; it is enough to seal the cracks and treat the surface with a complex protective primer.
Further processes are carried out only if the base is well dried and residual moisture will not affect the structure in the future.
Construction of the frame and laying of insulation
The external walls are covered with OSB using lathing, which creates the possibility of additional thermal insulation of the house, so the process should be approached very responsibly.
- For installation it is better to use a wooden beam. In this case, the fixation is the most reliable, and the materials have similar thermal expansion rates.
- The frame parts must be prepared. The process includes drying, sampling and impregnation with protective compounds.
- The fixation of the sheathing elements is carried out according to the diagram. The outermost corner fragments are placed first.
- The placement step depends on several factors: the type of insulation, panel dimensions and direction. When using a sheet measuring 122*244, the optimal distance between the posts is 40.7 and 61 cm, and with dimensions 125*250 – 62.5 cm. Naturally, these parameters depend on the specific situation.
- If necessary, a vapor barrier is first laid. This is especially true when working with wooden bases.
- The racks are fixed vertically directly to the wall of the house. To level the edges, a cord is pulled and a level is used. To ensure the required evenness, boards are laid. In exceptional cases, hangers for metal profiles are used.
- The selected insulation option is placed without a gap in the resulting cells. If required, it is fixed with special dowels.
- The wind and hydraulic protection is being installed.
In order to ensure reliability and rigidity for the erected frame, a frame is first created in which the racks are placed.
You should know! The presence of a ventilation gap is not always necessary and depends on the climatic conditions of the area.
Installation of slabs
Before fixing the OSB to the sheathing, it is necessary to take into account a number of nuances:
- Fixation is carried out with the front surface facing out. It is not difficult to determine the desired side: it consists of larger fragments of chips than the wrong side.
- When using parts with a thickness of 9 mm on a one-story house, the placement is made horizontally. For taller buildings, 12 mm thick slabs are placed vertically. Many experts note that the first option provides better reliability due to a larger number of racks. It is taken into account that in this case the plates are spaced apart.
It is necessary to attach OSB to the frame according to the following instructions:
- The first part is set from the corner of the building. A gap of 10 mm from the foundation must be formed. To do this, you can use spacers that are placed around the entire perimeter of the building.
The cladding of the facade with OSB slabs begins from the corner, the first slab is aligned to the level
- For fixation, galvanized brushed nails or self-tapping screws with zinc coating and incomplete threads are used. Each option is suitable for any job site. It is taken into account that with a slab thickness of 9 mm, the screw size cannot be less than 45 mm. The screwing or driving step is 10–15 cm.
- Adjacent slabs must be fastened with a gap of 2–4 mm, all edges must fall on the frame posts.
- After laying the bottom row, the next level is laid. It is shifted one step between the racks.
- Fragments of adjacent sections of the wall must be nailed overlapping to form a straight joint.
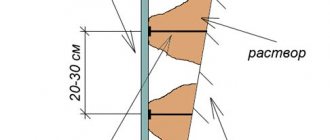
Fastening OSB boards to the wall over insulation using lathing
The slab is fastened to the wall using lathing, which is made from a wooden block or metal profile. The technologies for installing OSB boards on a wall with wooden sheathing and sheathing made of metal profiles are not fundamentally different. When choosing a block, it is advisable to choose a dry, planed block of 40-50 mm, then it will not twist or move after drying, which will have a positive effect on the evenness of the entire wall.
To attach the bar and profile to the wall, special metal plates (hangers) are used. Before attaching the hangers, it is necessary to draw vertical stripes on the wall, the distance between which should be half the width of the sheet, which will subsequently ensure the joint of the slabs right in the middle of the bar or profile and will make it possible to fix the OSB slab in the center along its entire length. After the lines are drawn, hangers are attached along them in increments of 30-40 cm.
A metal hanger is used to secure the sheathing.
Suspensions are attached along the marked lines. Hangers allow you to secure the sheathing over the insulation.
After this, the insulation is laid and covered with a membrane that protects the insulation from moisture, after which the sheathing is installed.
It should be noted that a vapor barrier is not needed on the outside of the building, since it prevents moist air from entering the insulation from inside the room, and from the outside of the building, excess moisture should freely escape outside.
Wall with sheathing. Insulation is laid between the sheathing and the wall.
After securing the sheathing, you can begin installing the OSB boards. For wall cladding, a slab with a thickness of 9 to 12 mm is most often used. If a facade is not mounted on top of the slab, then the slab must be moisture resistant. OSB slabs are attached to the wooden beam sheathing with nails at least 2.5 times longer than the thickness of the OSB sheet. For metal profile sheathing - use metal screws 10-15 mm longer than the thickness of the OSB sheet.
With this installation, the sheathing weighs above the insulation and does not create cold bridges in the insulation between the wall and the OSB boards. Thanks to this solution, maximum efficiency of the insulation is achieved. In addition, between the sheathing beams there is an air gap through which moisture is removed from the insulation, which also improves its performance. More detailed information about ventilated facade technology can be found in the article: ventilated facades, types of ventilated facades.
Finishing
There are quite a few options for finishing work on an OSB facade, which allows you to choose the best method, but the seams must first be sealed. For this purpose, elastic wood putty for exterior use is used. As an alternative, a self-prepared solution based on sawdust and PVA can be used, but in this case it is recommended to cover the joints with slats or special pads. This finishing will enhance the façade.
The simplest and fastest way to decorate an OSB facade is painting followed by upholstery with contrasting slats
The “Warm Seam” sealant has good stability, which is best applied at above-zero temperatures. When the slab thickness is more than 9 mm, a special insulating cord is additionally placed.
Various materials can be used as external cladding:
Important! For finishing OSB cladding, it is not recommended to choose products that are fixed with glue, because in this case it is not always possible to ensure reliability.
Cutting OSB boards
Product processing is not labor intensive, but requires the correct selection of tools. This will prevent damage (especially around the edges), which could complicate further finishing.
You can cut OSB boards with the following devices:
- Hand tool. This is the best option for small volumes of work. For the process, a hacksaw with medium teeth is selected, which must be well sharpened and set apart. To eliminate unevenness, the part is secured or held. When cutting long lengths, both parts must be supported so as not to pinch the blade.
- Electric jigsaw. The most preferred solution for household processes. The tool allows you to cut not only straight, but also in a shaped manner, which is especially important for bypassing communications indoors. To cut the slab without damage, special wood bits are used. To ensure evenness of the cut, a stop is installed, which can be used as a rail.
- Circular Saw. This device is suitable for large-scale work, but great care must be taken and personal protective equipment must be used: OSB has a chip structure and small fragments can fly out at high speeds of the tool.
For figured cutting, a jigsaw is used;
The cleanest, fastest and easiest cutting is done using a circular saw; unraveling OSB with a hand hacksaw is difficult and very inconvenient. In order to process products without damage, it is necessary to prevent vibration of the sheet and sagging of the last section of the cut.
Rules for cladding walls inside the house
This OSB flooring technology is not very different from exterior work, but has some nuances:
- To build the frame, you can use a wooden beam and a metal profile. The second option is preferable when facing concrete and brick walls, as well as areas made of experimental materials.
On curved walls and if insulation is necessary, it is convenient to use fittings for plasterboard, in particular perforated hangers and metal profiles
The sheets are placed facing the room. It is taken into account that OSB-3 has a moisture-proof impregnation, which will need to be removed before finishing cladding.
It is impossible to leave the damper gaps uncovered, so first they are filled with sealants and then puttied
Use of material inside
I am often asked the question, is it possible to use OSB for interior decoration? There are no obstacles to this, since high-quality material always has certificates confirming its safety for human health.
I strongly recommend that you use only OSB-3 and OSB-4 options, as they have high moisture resistance and the likelihood of problems when finishing them is minimal.
Options with increased moisture resistance withstand adverse effects much better
Wall cladding
OSB is ideal for interior wall decoration. It is important to collect all the necessary materials before work:
| Materials used | Characteristics |
| Frame material | Here we will need either wooden blocks or a metal profile. You yourself must choose the option that is most suitable for your home. Metal is more expensive, but it does not deform due to changes in temperature and humidity; wood is cheaper, but the frame can “walk” when temperatures fluctuate. Wood is most often used, but this does not mean that you cannot install a profile |
| OSB boards | The size of the sheets is 2440x1220 mm, as for the thickness, it can range from 6 to 30 mm, you need to choose the option that suits the specific situation. Most often, sheets with a thickness of 10-11 mm are used, but standards may vary. The quantity is calculated based on the area to be coated |
| Frame material | Here we will need either wooden blocks or a metal profile. You yourself must choose the option that is most suitable for your home. Metal is more expensive, but it does not deform due to changes in temperature and humidity; wood is cheaper, but the frame can “walk” when temperatures fluctuate. Wood is most often used, but this does not mean that you cannot install a profile |
| Fasteners | Interior decoration requires reliable fixation of each element, so close attention must be paid to fasteners. For work, you can use either self-tapping screws or screw nails; they fix the material much better than conventional ones, which means they will ensure high reliability of the finish. |
If you are purchasing OSB for finishing, it is better to purchase a material that has already been sanded at the factory. This will greatly simplify your life and save a lot of time when applying decorative coatings.
The choice of fasteners should be approached responsibly
As for the tools, in all cases you need approximately the same set; I will list everything you need here, but I won’t write about it in other sections, since this list will be relevant there too.
You need to have the following on hand:
- If the sheathing or frame will be attached to concrete or brick, then you need a hammer drill with drills of the required diameter and length. It can also be used as a drill by turning off the impact mode and placing the chuck under drills for metal or wood. This universal option is the most convenient to date;
- To twist individual structural elements and when attaching OSB sheets to the frame with self-tapping screws, you cannot do without a screwdriver - it is unlikely that you will be able to tighten the fasteners by hand, it takes too much effort. If nails are used for fastening, then you will naturally need a hammer; this tool is available at any construction site;
- It is impossible to carry out quality work without a measuring tool. You can use a variety of devices: from classic options, such as a plumb line and tape measure, to high-tech ones in the form of a laser level and the same tape measure. Marking is done using a regular construction pencil, although you can also use special options like felt-tip pens.
Laser tool – a new word in convenience and accuracy
Now let's figure out how the walls inside the house are finished using OSB boards:
- First of all, you need to mark the future position of the frame; for this, a level and plumb line are used; it is important to determine the position of the elements in advance, so that later you are not constantly distracted by controlling the plane . Most often, elements are placed close to the walls; here it is important to find the most protruding area and dance away from it when marking;
- It is important to clearly determine the distance of the vertical posts; they should run along the edges of each sheet and in the middle, creating a stiffening rib. Most often, the spacing of the frame elements is approximately 40 centimeters; the thickness of the block should be at least 40 mm to ensure the convenience of attaching our OSB boards to it;
It is important to correctly calculate the pitch of the elements
- The frame is fastened depending on the type of base: the structure is fixed to wood with self-tapping screws, and to concrete and brick - with dowels . To strengthen individual sections (the same openings), you can additionally install metal corners. If you have a frame house, then the structure will already be there and there is no need to build anything, the main thing is that the insulation is laid and the vapor barrier membrane is fixed;
Finishing inside OSB boards can also be done on a metal profile for plasterboard
- The material is fastened according to strict rules: there must be a gap of 10 mm between the OSB board and the floor, and the same is left along the ceiling. It is also important to place the sheets not closely, but at a distance of 3 mm from each other, this will prevent surface deformation due to changes in humidity, because the material reacts to them;
It is important to comply with all requirements indicated in this diagram
- As for installation, screws or nails are placed every 15 cm at the joints of the sheets and at a distance of 30 cm on the intermediate posts. Along the edges, that is, above and below, it is recommended to place the fasteners even closer - every 10 cm. The work is done carefully; you should not place the fasteners closer than 10 mm from the edge, since there is a high probability of cracking of the material.
This decoration of a room in the country looks very appropriate
Ceiling cladding
This option is most often used in country houses and country houses, but it can also be implemented in an apartment, if it suits the interior, the work is carried out in the following sequence:
This option is not suitable for all rooms.
- First of all, you need to secure the guides around the perimeter of the room; the easiest way is to pre-apply markings using a laser level or a construction cord in order to have clear guidelines. Installation is carried out either using self-tapping screws, if the structure is wooden, or using dowels for other bases;
- Next, you need to secure the remaining elements of the frame; here it is important to constantly monitor the plane and carefully fix each part of the structure. If the fastening is not made directly to the ceiling, but at intervals, then the easiest way to work is to use direct hangers for drywall; with their help, you can clearly align each rack and securely fasten it;
Indoor finishing can be done directly along the beams, but it is advisable to first fix the waterproofing material
- As for fastening the sheets, the process is similar to that described above; there is no point in repeating all the requirements. Here we can only note the fact that if you have built a metal frame, then you need to use screws with a fine thread pitch, and not with a large one, like for wood.
The easiest way to fasten the material is with a screwdriver
When working with the ceiling, it is important to plan for cable routing in advance, and it is best to lay it in a special corrugated box to ensure safety.
Flooring
A floor made of OSB boards is not only reliable, but also original, so this option is becoming more and more common. As for the work process, it can be divided into several main stages:
The workflow is very simple and straightforward
- First you need to determine how thick the sheet will be used; a lot depends on this . So, with a thickness of 15-18 mm, the distance between the logs should be no more than 40 cm, if the thickness is 18-22 mm, then the logs can be spaced in increments of 50 cm, and if the thickness is 23 mm or more, then there may be space between the logs up to 60 cm. That is, if you already have logs, then you need to select an OBB slab for them, otherwise your floor will turn out to be unreliable;
This floor needs to be done right
If you already have flooring in the form of a board or other material, then you can attach OSB directly to it; you just need to first level the surface if there are uneven surfaces.
- Next, it’s worth considering the location of the sheets; they are always laid perpendicular to the position of the joists, and all joints should be supported. As for the long side, for the floor it is necessary to use a special version of the OSB board with a tongue-and-groove connection system, since fastening the elements with staples or other fasteners is not the best solution, and the strength will be several times lower;
OSB board with tongue-and-groove connection is ideal for flooring
- Regardless of what base the floor will be placed on, the surface must be waterproofed; for this, a special film is laid that will protect the material from below . If insulation is needed, then the heat-insulating elements are placed in the frame as tightly as possible;
- The OSB is fastened using self-tapping screws, which must be recessed so that the head is located below the plane of the floor, this will simplify its further finishing. A deformation gap of 10 mm must be left between the slab and the walls to compensate for the reaction of the material to changes in humidity and temperature. Laying begins from the corner; this is also an important condition for reliable installation.
Work on fastening the material is not difficult
Options for decorating internal surfaces made of OSB
The resulting base can be finished using various methods, depending on the style of the interior. Naturally, you first need to seal all the seams. For this, acrylic sealants or self-prepared compositions of varnish and sawdust are used.
You can decorate a private house from the inside in the following ways:
- Painting. This is the traditional option. For application, special compounds with a high level of adhesion are selected. Laying requires a minimum of 2-3 layers with preliminary priming.
- Varnish coating. This design involves the use of colored or transparent compositions, but the result should be a decor in the form of a base made of wood chips.
- Wallpapering. Non-woven or vinyl varieties are suitable for work; paper ones require the use of plaster.
- Applying decorative putty. Although this method produces an attractive design, it is very labor intensive. It is difficult to achieve good adhesion with oriented strand boards, so a middle reinforcing layer will be required.
You can decorate the inside of a house in an original way using panels, a block house, or by combining various materials.
Features of cladding a frame house
For structures of this type, the correct execution of the cladding is the key to the durability of the structure, so during installation the following nuances must be taken into account:
- It is recommended to sew up the object inside and outside with OSB-3 boards.
- The facade installation is carried out first. Many craftsmen note that for additional rigidity of the frame, it is necessary to set the jibs. In fact, if the structure is assembled correctly and slabs with a thickness of 9.5 or 12 mm are used, this element is not necessary.
A frame house involves creating a cake from the following materials:
- Outer layer of OSB.
- Ventilation gap.
- Auxiliary sheathing boards.
- Superdiffusion membrane.
- The main pillars of the walls, between which layers of insulation are placed.
- Vapor barrier.
- Internal section of OSB-3.
The slab fixation scheme is similar to the processes for standard house cladding. At the final stage, finishing is carried out inside and outside.
Is it possible to sheathe a bathhouse and a garage inside with an OSB slab?
Garages and other outbuildings do not belong to the category of residential premises, therefore the requirements for the quality and environmental friendliness of building materials are lower. Finishing the interior walls of the garage with OSB slabs is allowed without further finishing. The requirements for the bathhouse are higher. The influence of high temperatures and humidity contributes to the destruction of OSB. As a result of temperature exposure, harmful compounds are released, so finishing the inside of bathhouses with OSB sheets is impractical. You can use them only as an element of rigidity of the frame, sheathing the building along the racks from the outside, and for interior decoration you should choose lining or imitation timber.