Whitewashing the ceiling is the most accessible, simple and cheap type of interior decoration, in contrast to adhesive ceilings. Today, of course, it is not as popular as it was ten years ago, but whitewashing has not become a thing of the past. And if you decide to transform your ceiling with its help, then this article is for you.
Lime whitewash
Like chalk mortar, lime can leave various streaks and stains on the surface, but it is more durable. Due to this quality, this material is preferred in most cases. However, there is one caveat: do not use lime on surfaces with rust or greasy stains!
Step 1. Preparing the base
Before applying lime white to the ceiling, make sure the base is clean and solid. To do this, it needs to be primed and puttied.
Step 2. Preparation of lime solution
To obtain a pleasant bluish tint of whitewash, add 25 g of ultramarine to a container. The mixture is prepared from 400 g of slaked lime and 600 ml of water. To make the solution more durable and water-resistant, add 5 g of salt and 0.3 tablespoons of drying oil. Then all components are thoroughly mixed and filtered through a sieve. This amount of solution can cover 2.5 m2.
Step 3: Finishing
Before whitewashing, the ceiling should be slightly wetted. Then the first layer of lime mortar is applied. While it is still wet, apply the next layer. In this case, the whitewash will be stronger. If the weather is too hot, repairs should be postponed until it gets colder, otherwise the finish will turn out to be rather weak.
Factors affecting the quality of lime whitewash
The ceiling must be wetted with water before applying the solution. This is done so that the whitewash retains moisture for some time. Then suitable conditions are created for its carbonization, and it becomes stronger.
To crystallize the solution, add table salt. Sodium chloride helps to accumulate additional moisture from the air in the lime film.
Positive and negative qualities
The ceiling covered with lime mortar contains small pores on its surface. They absorb moisture well and then evaporate moisture, so the surface has excellent disinfecting quality. Thanks to it, lime coating is used for outbuildings.
When using lime whitewash, a film is created on the surface. It makes the finish more durable and resistant to wear.
A properly prepared solution retains its original qualities for 3 years, or even longer. For durability and mechanical strength, aluminum-potassium alum can be added to it.
Composition of the solution
To prepare lime white you will need the following components:
- 10 liters of water,
- table salt – 100 g (or 0.2 kg of aluminum-potassium alum),
- 3 kilograms of lime dough.
Preparing whitewash
Lime dough is diluted in 5 liters of water. Dissolve table salt (or aluminum-potassium alum) in a liter of hot water. Then they are mixed. Pigments of the desired shade are diluted in water separately and then poured into the solution. Just before starting work, water is added to the mixture to obtain a volume of 10 liters. The lime solution is mixed and filtered.
Finishing new plaster
Pure milk of lime, diluted with water, is used to coat new plaster. The concentration depends on the intensity of moisture absorption by the coating. In order for the solution to be applied evenly to the base, it should not be too thick.
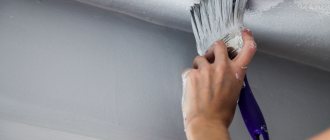
To apply white, use a well-moistened brush and cover the surface in two layers. The first one is applied first, and after it has completely dried, the second one is applied. First of all, the ceiling is finished, and then you can proceed to the walls.
Whitewashing old plaster
If you plan to cover old plaster with lime, then clean it well first. Then the surface is treated with lime milk, to which 2-4% drying oil is added. After this, the solution is rubbed over with a flat, wide brush. The longer the coating dries, the longer its service life will be.
Buying lime - which one to buy and how much
Before going to the store, you need to find out what kind of lime to buy for whitewashing - slaked or quicklime, how much of it is required and what other components will be needed. This will save you from going to the construction market again if suddenly the solution is not enough or its properties do not meet your requirements.
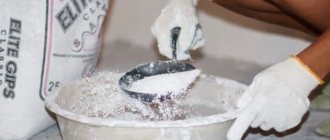
How to make slaked lime with your own hands
As you already understand, slaked and quicklime are completely different substances, which are united only by the consonant name and the presence of calcium in the composition. For household repair work, slaked lime is used. It is sold by weight in any hardware store or agricultural department.
Kipelka - lump lime
However, there are often situations when the farm has a fairly large supply of quicklime and it is advisable to use it rather than buy slaked lime. In this case, you can extinguish it yourself, especially since this chemical process does not require the skills to conduct such experiments in the laboratory.
So, how to prepare lime for whitewashing from lumpy quicklime. First you need to worry about personal protection. Since you will be dealing with a rather aggressive alkali, take care to protect your eyes (goggles), respiratory organs (respirator), and exposed skin (closed clothing and gloves). This must be done in the air.
Video: How to prepare a whitewash solution
You will need a deep container, such as a bucket, and a mixing tool - traditionally a stick. The list of ingredients is also short:
- lump quicklime;
- water.
Quenching process
The water must be cold, this is the only condition. Even a first-grader will remember the proportion – 1:1.
Step-by-step instruction:
- For 1 kg of calcium oxide, take 1 liter of cold water.
- Combine all this in a container and mix. Almost instantly you will be able to observe the beginning of a powerful chemical reaction with the release of a large amount of heat. When extinguishing, the mixture sometimes heats up to 150 degrees; it is not for nothing that the substance is popularly called boiling water - the solution literally boils.
- When the reaction stops, heat and gas cease to be released, the lime can be considered “fluffy”, that is, slaked. However, it is not yet suitable for whitewashing.
- The solution should ripen for 2-3 weeks under a lid in a cool, dark place.
Solution proportions and consumption per square
To start whitewashing with lime yourself, you need to prepare at least the following set of materials:
- powdered fluff or lime paste;
- water.
Packaging of fluff
In addition, various auxiliary substances are often added to whitewashing, which give it certain properties. The base solution is prepared in a ratio of 1:3. For every kilogram of fluff, take 3 liters of water. As a result, 4 liters of solution can be prepared from 1 kg of substance.
The consumption of lime per 1 m2 during whitewashing directly depends on the type of surface on which it is applied:
- The largest consumption - about 1 liter of ready-made mortar per square - will be used when whitewashing untreated brickwork.
- A flat prepared surface requires approximately 0.5 liters per square meter of area.
Preparing the premises
Another criterion that affects consumption is painting tools. More often they use a regular flat brush or a round brush. These tools are wasteful, the mass is applied in a thick layer, and drips and drops can form. The spray gun can significantly reduce material consumption and operating time. Often, instead of a spray gun, a vacuum cleaner with reverse airflow and even hand-held tree sprayers are used.
How to calculate the amount of fluff and water
Before diluting slaked lime for whitewashing, you need to perform some calculations. An approximate calculation of consumption is as follows.
First you need to calculate the area of the walls and ceiling that you plan to whitewash. For example: a room 3 by 5 m, ceiling height 2.5 m. It was decided to treat the ceiling and part of the walls from mid-height to the ceiling with lime whitewash.
Wall area: (3*2.5+5*2.5+3*2.5+5*2.5)/2=20 m2.
Ceiling area: 3*5=15 m2.
Total area: 35 m2.
A solution of the required consistency
Based on the average consumption of 1 liter of solution per 2 m2 of surface, it is easy to calculate the required amount for whitewashing - 17.5 liters of lime mortar. You can round up to 18, or better yet, to 20, because average consumption is a fairly flexible concept.
That is, 20 liters of solution are required, and this is 5 kg of slaked lime powder. It is worth noting that ready-made lime dough, which is sold in construction stores, is diluted in the same proportion, which means the calculation is correct for it as well.
Whitewashing leaves marks
Supplements to improve durability and combat deficiencies
Since lime has been used in construction for a very long time, there are many “folk recipes” and methods that improve the properties of this substance. After all, modern water-based paints appeared not so long ago, and craftsmen were forced to practice chemistry right in their dacha or home.
The first problem that is solved by adding a secret ingredient to the lime whitewash solution is shallowing. A dried surface tends to stain everything and everyone who touches it. What to add to lime to prevent it from smearing? This ingredient is found in every home - table salt. It has a good bonding effect. Add 100 g of salt per liter of solution.
Salt - so as not to smear
Another problem, especially when using whitewash for exterior work, is that the composition is quickly washed off with water. It has long been known what to add to lime so that it does not wash off - a fatty component is introduced into it - drying oil. Drying oil repels water and allows whitewash to last longer. Proportion 1:10, 100 ml per liter of solution.
They practice adding laundry soap, grated on a coarse grater, PVA glue, wallpaper glue, and acrylic primer. All this is done in order to ensure maximum adhesion of the whitewash to the wall, to prevent its swelling and bubbling.
Drying oil - so that it does not wash off
White is not the only color possible
To prevent the lime coating from becoming yellowish, an ordinary blue dye is added to it - methylene blue. You will need 10-20 g per liter. The whitewashed ceiling will become snow-white. But sometimes it becomes necessary to obtain lime mortar of other colors. This mass can no longer be called whitewash, and not every dye is suitable. Only those pigments that are resistant to an alkaline environment are used - mineral, but in no case organic.
Pigments used for lime paints:
- ocher (yellow tint);
- umber (greenish brown);
- red lead (orange);
- mummy (red-brown);
- chromium oxide (green);
- titanium dioxide (white);
- lithopone (white);
- ultramarine (blue).
Pigments are used for preparation
To prepare good quality lime paints, it is not recommended to add pigment in its pure form - powder. It is first diluted with water to obtain a paste. Then the pigment paste is allowed to infuse for about 24 hours. And only after this the dye can be added to the solution. This is because grains of pigments often do not dissolve well and can drag on the brush, forming unsightly streaks of color.
Do-it-yourself whitewashing of the ceiling with chalk - step-by-step instructions.
Step 1. Preparing the ceiling for whitewashing.
So, as with any other decoration, the first thing you need to do is prepare the ceiling. This is the most time-consuming and crucial moment. It is necessary to wash off the old whitewash, remove traces of grease, remove wallpaper from the ceiling, if any, rust stains and water stains, and also repair all irregularities.
Thus, rust and smudges can be eliminated with water, after which a solution of copper sulfate is applied to these areas. To prepare it, you need to dilute 50-100 grams of copper sulfate in one liter.
And traces of fat can be easily removed using a boiled two percent solution of soda ash. You just need to soak a clean rag in it and then hold it on the greasy mark until it disappears. After this, the areas cleaned in this way should be thoroughly wiped with plain water.
How to quickly remove whitewash from the ceiling?
And you can remove old whitewash in different ways. I will give the most popular of them.
- If the whitewash layer is very thick, then it can be easily cleaned off with a regular spatula.
- You can also remove old whitewash using paste. To do this, apply a small layer of it to the ceiling, let it dry and again, clean it off with a spatula.
- You can remove whitewash with soapy water. By the way, this is the most popular way to remove it. Prepare a soap solution as follows: dilute five tablespoons of soda and two tablespoons of grated soap in ten liters of warm water. Then we moisten a sponge or roller in this solution, read about how to choose it here, and wipe the ceiling with it until all the whitewash is washed off.
- You can also use a washing vacuum cleaner for removal, but only at your own risk. Because the equipment may not be able to cope with such a volume of chalk and simply fail.
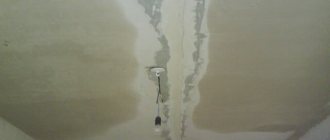
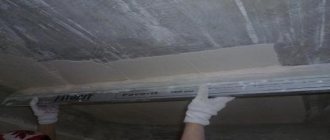
Sealing cracks and leveling the ceiling.
After we have cleaned the ceiling and removed all kinds of stains, we begin to seal the cracks. To seal cracks and level the ceiling, we use putty; its types are described here. By the way, it is not necessary to buy putty; you can prepare it yourself. To prepare it, mix in a ratio of 1:2:2 (by weight): chalk, gypsum and diluted wood glue (30-50 g of glue per 1 liter of water), respectively.
We fill the cracks with putty using a spatula, then smoothly move it across the cracks, and then along them. This process is comparable to smoothing out small cracks in a concrete floor.
Ceiling primer.
Now the putty surface needs to be primed. Ceiling primer is necessary in order, firstly, to level the ceiling, and secondly, so that nothing falls off during the whitewashing process. The concrete must be saturated enough to become a monolith.
When whitewashing with chalk, as a rule, they use a “soap maker” primer, which is prepared independently from 3 kilograms of slaked lime, 100 grams of drying oil and 200 grams of forty percent laundry soap.
Step 2. Technology of applying whitewash to the ceiling.
And only now, when the surface is primed, can you apply whitewash, or rather its first layer.
How to dilute chalk to whitewash the ceiling?
The following composition is recommended, necessary for whitewashing a surface of 10 m²:
- 60 grams of laundry soap,
- 2.3 kilograms of chalk,
- 90 grams of wood glue, previously dissolved in water,
- 17 grams of ultramarine (blue)
- and 3 - 4 liters of water (to working thickness).
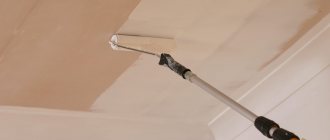
The consistency of the prepared mixture should be such that it can be applied using a spray bottle. But the first layer still needs to be applied with a roller or brush. But to apply the second and third layers it would be better to use a spray bottle. But remember that only small drops of this mixture should reach the ceiling, otherwise the ceiling will be streaked.
Whitewashing the ceiling with a roller.
If it is not possible to apply it to the remaining layers, you can also use a roller. It is first lowered with one side into a bath of color, then to remove excess paint and distribute it evenly, roll it several times along an inclined mesh surface. Then they work with it like a brush. After painting with a roller, the ceiling usually has a nice matte finish.
Now the whitewashed ceiling should dry well. But you shouldn’t help him with this - you’ll only make it worse. Eliminate the possibility of sunlight penetrating the whitewashed surface or causing drafts in this room. Otherwise, the whitewash may simply peel off.
Re-dyeing
Move on to the 2nd layer after the first has dried. When a roller or brush is chosen for painting, it is better to apply it perpendicular to the previous one. Then the stains will not appear.
When working, you should not rush; if you have little experience, then acting quickly will make it difficult to avoid divorces.
When a roller or brush is chosen for painting, it is better to apply it perpendicular to the previous one.
Advantages of applying whitewash to the ceiling
The positive use of this material is ensured due to a number of the following qualities:
- Cheapness. Whitewashing the ceiling will cost an order of magnitude cheaper than installing a suspended or plasterboard ceiling covering on it.
- Environmentally friendly. It contains natural substances (lime, chalk) that are not capable of harming human health. In addition, lime has disinfecting properties.
- Reliability. The ceiling coating layer acquires sufficiently high strength and wear resistance.
- Duration of operation. A whitewashed ceiling can last from 3 to 5 years, after which re-application of whitewash can be done just as easily and cheaply.
- Ease of work. You can whitewash the ceiling yourself, taking into account only a few recommendations and the correct sequence of actions.
Whitewashing process
Let's look at the sequence in which you should whitewash the ceiling if you use a roller.
In principle, the process itself remains virtually unchanged, even if you use other tools to apply the solution to the ceiling surface - only some minor steps are omitted:
- pour the solution into the tray;
- lower the roller into the container and roll until the paint is completely distributed over the tool;
- We carry out the whitewashing perpendicular to the window opening;
- wait for the layer to dry;
- We carry out whitewashing parallel to the window opening;
- we process the joints with the wall surface with a brush;
- waiting for it to dry.
If you use a sprayer or vacuum cleaner, then you need to apply the solution in a circular motion, moving from one wall to another.
water-based paint to decorate the ceiling surface
. There are many excellent paints on sale, but it is best to prefer silicone options for painting over the old layer - in this case, you can even do without the traditional primer for preparing the base for painting. Latex water-based paints are also excellent, but they are much more expensive, and such expenses are not always justified.
The painting technology is no different from what we described above. The only thing that changes is the material we use. In any case, you can learn more about the technology of painting the ceiling from the article, which is called “Painting the ceiling with water-based paint: subtleties and tricks.”
Tips for beginners
Below are a few important tips that will help make your workflow easier:
- Eliminate the possibility of drafts and direct sunlight on the surface to be treated: the whitewash may crumble.
Correct application of the solution
- It is better to apply the second layer of solution perpendicular to the first: it reduces the number of streaks.
- Additionally coat the corners of the room with a brush.
- To determine what kind of solution is on the ceiling, you need to moisten it: if the surface is darkened and does not remain on your fingers, it is limestone; after contact there are white traces - chalk.
Considering all of the above, you can easily answer the question yourself: how to whitewash a ceiling with chalk?
YOU MAY ALSO BE INTERESTED
Preparing the ceiling for whitewashing
If this step is not completed, the freshly applied whitewash will soon begin to crumble.
It is especially important to carry out preparatory work if the surface of the ceiling was whitewashed with lime, but now there is a desire to open it with chalk or paint, or in the reverse order. In addition, before whitewashing the ceiling with your own hands, you need to wash off any existing stains of grease, dust, and remove other mechanical contaminants.
Note! To find out what kind of whitewash was previously applied to the ceiling, you should wet the old coating. If it darkens and if a finger passed over it does not get dirty, then it is made of lime
A slight abrasion of the coating from the ceiling indicates that a chalk-based whitewash was used. The applied water-based paint will not undergo any changes.
Next, we will consider step by step the option of how to quickly wash off whitewash from the ceiling:
- First of all, before removing the whitewash from the ceiling, it is necessary to cover the entire floor surface in the room being treated with polyethylene or other similar protective material that does not get wet. In addition, in the same way it is necessary to secure the pieces of furniture that remain in it.
- Next, you need to prepare a warm soapy solution and a sponge or brush, which will be used to apply the liquid to the whitewash.
- When starting removal, the first step is to moisten the old coating, but this must be done sequentially in small sections, since if the entire ceiling is wetted at once, it will dry out and this procedure will need to be repeated.
- When removing wet whitewash, it is necessary to use a hard spatula, as well as place a tray in the area where the coating is removed, which will prevent contamination of the floor as much as possible.
- The remaining minor areas with whitewash must be washed off with a dampened sponge.
Even when the old coating is not contaminated, it should still be wetted, since this will allow the fresh whitewash to be better absorbed.
After the final removal of the whitewash from the ceiling, you can proceed to the next stage, during which you may need to perform several actions:
- If necessary, you need to glue serpyanka to the joints of the ceiling tiles.
- After washing, uneven ceilings and those with cracks must be covered with a layer of putty.
- Once the putty mixture has dried, it must be sanded with sandpaper to make the entire surface smooth.
- The entire ceiling must be coated with primer.
After the primer mixture has completely dried, you can proceed to the next stage.
New surprises and surprises
In order to hide unevenness on the ceiling, they must be covered with putty.
During the repair process, after you wash off the ceiling, there is a high probability that slab joints, chips and cracks will become visible. In this case, you will need a small amount of putty to cover the uneven areas. Serpyanka will help hide the tile seam.
After the putty has dried, it must be sanded with sandpaper. This way you will level the surface of the ceiling, making it almost perfect.
Ceiling primer is an important step in renovation. The primer can be applied after the putty has completely dried.
How to prepare whitewash for the ceiling: choosing the material
Having finished the preparatory work, you can begin painting the ceiling. But first you need to answer the question, what is needed to whitewash the ceiling? Of course - whitewashing. Today you can find two types of it: water-based paint and lime (chalk) whitewash.
Water-based paint The composition includes non-aqueous substances: resin, varnish or drying oil, as well as emulsions and water. The paint is non-toxic, so it can be used in residential areas. Many experts prefer water-based emulsion as a material for whitewashing the ceiling. Before using a coloring composition, you need to pay attention to some nuances: - Coverability is the ability of paint to cover a dark background
In other words, if you have a dark ceiling, then the paint should have high coverage. Important: Manufacturers of the composition usually produce products with different shades. In these conditions, it is important to stock up on material in time, as well as prepare a tool for whitewashing the ceiling and a sprayer for whitewashing the ceiling
— Application environment – rooms with high humidity will require you to purchase washable paint.
Whitewash from lime or chalk
How to whitewash a ceiling, more details in the video:
Safety precautions when finishing ceilings
Before answering the question of how to whitewash a ceiling surface with chalk, let’s pay attention to observing several important points that will help avoid injuries and injuries:
- First, you should prepare protective equipment, such as gloves, a respirator and goggles. This is due to the fact that small particles of chalk, when applied to the ceiling, can fall down, and it is possible that they will not get into your eyes. Plus, if you inhale them in large quantities, they will begin to irritate the walls of the mucous membrane.
- Secondly, check the integrity of the scaffolding and stepladders from which work will be carried out: if they wobble, dangle and behave as if they are about to fall apart, put them aside, do not skimp on your health.
- Thirdly, it is better to take newborn children and animals out of the apartment during whitewashing.
Cleaning the ceiling
Whitewashing with chalk “Video”
For more “videos” of completed work, see the Video Gallery. For more “photos” of completed work, see the Photo Gallery.
Using professional whitewashing machines, we perform high-quality whitewashing of walls and ceilings with chalk in a short time.
Price from 14 UAH/sq.m. (with material) See the full price list in the section “Prices for Whitewashing"
We work not only in Kyiv and the Kyiv region. ready to travel to any city in Ukraine (delivery of a work team with equipment outside the Kyiv region - 3 UAH/km, example: object in Vinnitsa - delivery - 250 km x 3 UAH = 750 UAH)
See reviews from our clients in the section “Reviews about whitewashing"
Is it possible to paint whitewashed substrates?
In principle, it’s possible. But, only when the existing coating layer adheres well to the base and is not too thick.
In general, it is better to go through many difficult and not the most pleasant moments that will accompany washing off the old whitewash, than to be upset later by the sight of the fruit of all your efforts and labors coming away from the ceiling slab.
It is also important what type of whitewash was applied - lime or chalk. With lime, everything will be much simpler - if it is not cracked and holds tightly, then you can simply clean them of all existing dirt with a damp cloth and, after drying, proceed to priming and painting
When a chalk coating is applied to the ceiling surface, everything will be much more complicated. Sometimes, a specially developed whitewash primer, which is well suited for ceilings, can solve the problem.
But this can only be done when the chalk does not crumble or crack and its layer is very thin. In other cases, it is recommended to completely wash off the chalk whitewash and then carry out the rest of the work.
Stage 2. Material selection
When choosing what you need to whitewash the ceiling correctly, start from your skills and the characteristics of the room
The question of how to whitewash the ceiling in an apartment should not fade into the background. Believe me, a lot depends on the choice of material. I offer you two least expensive and simplest options.
Chalk
For those who love a snow-white finish in a small or large room, chalk will be just right. It will provide a perfectly white ceiling and will fit perfectly into almost any interior.
One of the most popular materials for whitewashing is chalk.
Preparing whitewash for a chalk ceiling will not cause you any particular difficulties. I will give an example of a recipe intended for 10 square meters. m., and you already calculate the proportions for your own square footage. All you need to do is:
- dilute 30 g in a small bucket of warm water. ordinary glue or finely planed laundry soap;
- Without stopping stirring, pour about 3 kg of sifted chalk into the solution;
- to enhance the whiteness of the paint, pour 20 grams into it. blues.
In total, after 10 minutes of your time, the question of what can be used to whiten the ceilings will be resolved. Chalk solution will allow you to achieve ideal whiteness of ceilings
Lime
Whitewashing with lime has its main advantage - its bactericidal properties. In addition, it copes well with small cracks. To prepare a limestone solution for 10 square meters yourself, you will need: Lime is popular due to its powerful bactericidal properties
- dilute 1.7 kg of lime in a bucket of warm water;
- add 40 g to the solution. blues;
- determine the required consistency. To do this, lower any metal object into the solution and observe. If the whitewash flows freely from it without leaving a trace, then it is too liquid, in which case add a little more lime.
Lime-chalk whitewash compositions
Unlike lime whitewash, which does not have a pure white color, chalk is added to lime. The proportions of chalk to lime may vary, with options ranging from 0.25/1 to 1/1. At breeding 1.5 kg. chalk with 2 kg. lime with water produces a mixture with excellent coverage and non-smearing. It is possible to supplement the composition with glue and soap for better coverage.
Unlike lime whitewash, which does not have a pure white color, chalk is added to lime.
How to make chalk solution for whitewashing?
There are two types of mortar that are applied to the ceiling: lime and chalk. In our case, we will consider all the features and operational aspects relating only to the chalk solution. To make the required mixture, you will need the following ingredients and tools, all of which can be purchased at a regular hardware store:
Whitewashing tools
- Oilcloth, container (basin or bucket) and gauze: necessary at the first stage, when creating the solution.
- Stepladder (scaffolding).
- Brush or roller, or spray.
Spray
Putty knife.
You can use a roller with a long handle, then you won’t need a stepladder, it’s safer, since the risk of falling is reduced, and it’s more effective: you can move around the room calmly.
Ingredients for chalk solution
- At least 3 kg of chalk. Previously, you had to grind chalk, but today you sell ready-made powder or paste. The initial appearance of the chalk is gray, no big deal, it will turn white when mixed.
- A little more than 50 g of ground laundry soap.
- About 100 g of wood glue.
- More than 10 g of blue: it is necessary for the whitewash to remain “snow-white” and not change its color.
Based on the calculation of half a liter of solution per square meter of ceiling, it is easy to independently calculate how much of the finished mixture you will need. Don't worry if you bought a little more ingredients, and they will remain: the chalk does not lose its properties, so it will come in handy the next time you whitewash.
The process of preparing the solution
- Pour chalk (about 2-3 kg) into a container and fill with warm water (3-3.5 liters).
- Add the remaining ingredients and mix thoroughly. If you have a drill with a special attachment, this will simplify your task and speed up the cooking process.
- Filtration: the resulting mixture is passed through cheesecloth, then there will be significantly fewer lumps in the solution that can spoil the appearance of the ceiling.
To check the readiness of the solution, you need to lower a flat metal object into the liquid and pull it out: if the solution flows from the blade, it means there is a lot of water. This problem can be solved by leaving the solution alone for several (2-3) days: the chalk will settle, the water on the surface can be easily removed with a ladle. Place all the remaining chalk in the form of a paste on oilcloth: in layers no thicker than 5 centimeters - this is dry chalk, which will be ready for re-preparation in the near future, as soon as it dries.
Tools required for work
You can whitewash ceilings using either a roller or a brush. These methods are optimal for apartments and small country houses and premises.
Whitewashing using a spray gun is more labor-intensive and costly; it requires skill and ability to work with the unit; in addition, whitewashing with a spray gun creates a large amount of splashes that can interfere with work.
So, to carry out whitewashing work yourself you will need:
New brushes should be soaked entirely in warm water for several hours before use. Brushes prepared in this way will not “lose” their bristles during use. It is recommended to choose natural hard bristles with a width of 12-15 cm.
Rollers are selected individually, based on personal preferences. The main thing is to use a previously unused tool for whitewashing, in order to avoid defects and blemishes in the coating.
Diluting water-based paint is most often not particularly difficult, which cannot be said about preparing chalk or lime mortar.
The solution is prepared based on the approximate calculation that for each square meter of the ceiling to be painted in one layer, half a liter of the mixture will be required. But most often the component compositions are given for an area of 10 square meters. m. The finished mixture can be stored for no more than 36 hours, and dry ingredients can be stored for several years without spoiling or losing their properties and qualities. If possible, the solution is mixed using a construction mixer.
- To prepare a chalk solution you will need from 30 to 100 ml of glue (PVA or carpentry), a piece of laundry soap weighing 50 g rubbed on a fine grater, as well as 3 kg of chalk sifted through a sieve (sifting is a necessary step to remove debris and the largest particles from whitewash material) and 10-20 g of ordinary blue to enhance the whiteness of the color and prevent possible yellowing of the coating. First, soap shavings and glue are dissolved in warm water, then chalk, previously mixed with blue powder, is poured in in a thin, even stream with constant stirring.
The lime mixture is prepared somewhat more simply: 1.75 g of pureed lime, 100 g of table salt and 40-45 g of blue are diluted in warm water. However, this mixture does not produce rich white light, paying for it with its masking properties.
The amount of water is taken arbitrarily. Approximately 1 kg of chalk or lime requires 2 liters of warm water. To determine the optimal consistency of the mixture, they use this technique: a metal object with a smooth surface (a pin or a knife) is vertically lowered into the solution; if, when pulled out, the mixture flows down without leaving traces, the solution is not thick enough and chalk or lime should be added. In this case, the concentration of the mixture is increased gradually, checking the quality of the solution after each addition.
The finished mixture is left for 10-15 minutes, after which it is filtered through a sieve or a layer of rags. A well-prepared mixture has no lumps and, as it flows, paints the metal white. Immediately before whitewashing, the solution is mixed well.
Before whitewashing, the room must be emptied as much as possible: all objects must be removed, cornices, chandeliers and other lighting fixtures must be dismantled. Large furniture and built-in items and decorative elements should be thoroughly covered with plastic wrap and covered with tape. You need to lay the floor covering with special care - this will significantly save cleaning time later.
The floors can be covered in several layers with old newspapers or sheets, and the floor skirting boards can be covered with masking tape. If necessary, cover ceiling skirting boards and moldings.
We destroy ceiling defects - create an ideal foundation
Firstly, if the old layer of whitewash is crumbling and contains many defects and cracks, it absolutely requires removal and cleaning.
Secondly, stains on the old surface must be removed, as they may appear on the new layer
Particular attention should be paid to mold, grease, rust, and smudges. How to deal with them?
- Mold. The most common problem in rooms with high humidity is the appearance of mold. Before applying an anti-mold solution to the work surface, use soap and water to remove the most obvious areas of fungal growth and allow them to dry thoroughly!
- Rust. First wipe with a damp cloth, and then treat the area with a 10% solution of copper sulfate.
- Fat. A large concentration of soda ash and water can remove stubborn grease stains.
- Streaks and yellow spots. Streaks are difficult to remove, so there are several options for masking them. The first, using a mixture of synthetic drying oil and lime (ratio 1:20). The second can be painted over using a water concentrate with liquid glass (ratio 2:1) and, third, the drip can be treated with hydrochloric acid (3% solution). Yellow stains are removed with warm water with the addition of White.
When cosmetic defects have been removed, we proceed to cracks and determine differences in height. First of all, we putty all the cracks, after drying we apply a 2 mm layer of finishing putty over the entire ceiling. To give the surface maximum smoothness, you can go over it with sandpaper, thereby removing unevenness and “sagging” of the putty. At the end of the work, you need to remove dust and wipe the ceiling with a dry cloth.
Let's proceed to the next step - in order for the whitewash coating to lay down without streaks and evenly, it is necessary not only to putty the ceiling, but also to prime it. It is best to use a deep penetration primer; it will ensure maximum adhesion between the new and old layers.
Thanks to the above manipulations, we not only eliminated defects in the ceiling, but also created an ideal basis for whitewashing the ceiling! If any of the procedures was not clear to you, then you can use video advice from specialists.
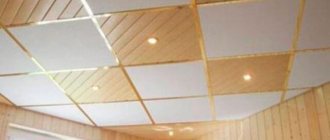
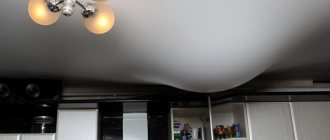
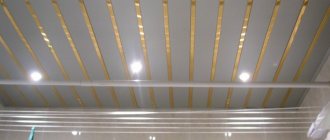
Suspended ceilings: variety and beauty
The basis of this type is a frame that needs to be suspended from the ceiling and walls in order to create a fairly reliable structure. Then the covering material should be installed on it.
Such ceilings come in a variety of types: gypsum, cassette, glass, plasterboard, mirror. But with a wide choice of subspecies, any suspended ceiling has undoubted advantages:
- you will find great design solutions using differences and different heights of the tiers;
- By installing lamps of various designs, you will thereby implement original and competent zoning;
- the space between the ceiling and the surface of the decorative structure allows for excellent sound insulation, and the use of additional materials will only improve it;
- the use of a wide variety of materials will make it possible to choose the most practical;
- the ceiling will not require any special repairs; it is enough to eliminate the most significant defects.
But such ceilings also have disadvantages:
- Loss of space. The main disadvantage is that installing this structure will “take away” part of the ceiling height. Of course, even in apartments with an old layout with their modest dimensions, you won’t have to touch the ceiling with the top of your head, but there’s no talk of large chandeliers and spaciousness in the room.
- Complexity. Compared to the same painting, such a choice will take a lot of time to install the structure. In addition, the work is very complex and requires certain skills.
Nevertheless, such a solution remains one of the most optimal, since it offers you very affordable quality.
All types of ceiling finishing in a house or your own apartment have both undoubted advantages and less desirable properties. Carefully study all the characteristics and correctly assess your own strengths in order to choose the most suitable option from the variety of offers.
How to whitewash the ceiling in an apartment
It is believed that lime has antiseptic properties that block the development of pathogenic microflora. For an apartment with normal dry walls and ceilings, using a lime base is not always advisable; a chalk mixture is best, especially since you can whitewash the ceiling yourself with chalk in an hour and a half, while finishing with lime will take at least a day.
Whitewashing the ceiling with chalk
The advantage of using a chalk mixture to apply a decorative coating to the ceiling is that chalk itself is an absolutely neutral substance. It is known that in an apartment the ceilings, walls, and floors are in more comfortable conditions than in a house - minimum moisture, good ventilation of the room, absence of dampness and temperature changes from the ground. Therefore, it makes no sense to use lime where you can whitewash with ordinary chalk.
It is known from practice that an open ceiling with a decorative layer of chalk or lime applied is always dusty, that is, a significant amount of microparticles gets into the air. Chalk does not cause any harm to the furnishings or furniture, and especially to the residents of the apartment. The only inconvenience is that you will need to whitewash the ceiling at least once a year; moreover, you have to adjust the composition in order to hide yellow spots and dirt.
The material can be purchased from craftsmen at construction sites
Lime white for ceilings
Anyone who has ever whitewashed at least a small section of a wall or ceiling with lime mortar at least once in their life knows how capricious and inconvenient lime can be to work with, even if soap or glue is added to the solution.
Whitening the ceiling with lime makes sense for sanitary purposes, for example, in a bathroom. The second option is if the neighbors above have a bad habit of not repairing sewer pipes, as a result of which stains regularly appear on the ceiling.
In addition, you need to understand that the process of whitening with lime requires more effort and time. It will take twice as much effort to remove the old lime coating.
What else is used to whiten the ceiling in an apartment?
An alternative to lime and chalk mortar is to use ready-made paste and chalk paints. It cannot be said that they are very different from ordinary chalk, but, as practice shows, whitening with this composition is much easier than with a homemade mixture. In addition, it is possible to tint or buy ready-made colored material that does not fade, unlike blue, in the sun, and perfectly masks yellowness and brown house dust.
It's better to buy special material
What is the best way to whitewash the ceiling?
The apartment will be safer if you whiten the ceiling surface with ready-made chalk paste. Of course, chalk does not give the whiteness that can be obtained using lime, but the prospect of inhaling calcined dust is not very encouraging. Moreover, approximately 10% of people living in apartments have an allergic reaction to lime.
Chalk turns out to be less resistant, but no special requirements are placed on it. Traditionally, they tried to whitewash the kitchen and recreation areas with chalk. If stains of unknown origin appear, then perhaps the best option would be to use chalk whitewash with the addition of volatile ammonia compounds. The smell of such material is not particularly pleasing, but, as a rule, the disinfectant aroma disappears after a day, and the coating itself perfectly eats away all the microflora on the surface of the ceiling, remaining white for many months.