Putty is a faithful friend in leveling walls
This finishing composition differs in type of binding component and is:
- cement;
- plaster;
- polymer (acrylic).
Each of the compositions is intended for starting or finishing types of work. The starting layer masks defects, chips, and removes imperfections. The thickness of the finishing layer is much thinner, it creates an absolutely smooth surface. There are also universal powders, the use of which is acceptable in both cases.
In stores you can find both dry powders that require dilution with water, and ready-made pastes. The puttying process is simple, even a beginner can handle it. The price of the product is affordable.
Types of putties sold
The modern building materials market offers for sale several types of putty mixtures, both dry and ready-to-use. Dry formulations are usually packaged in paper bags or bags. Ready-to-use materials are supplied in closed plastic buckets or other sealed containers. They are more expensive than dry powders and therefore are purchased for small volumes of work.
Based on the type of base for preparation, the following types of putty mixtures are distinguished:
- gypsum;
- water-dispersed;
- oil-glue;
- cement;
- acrylic;
- polyvinyl acetate (PVA).
Due to their low cost and excellent quality, gypsum mixtures are the most popular material for leveling walls. However, they cannot be used in rooms with high humidity.
Water-dispersed compositions are more expensive, but they allow you to create an ideal matte surface of higher strength. Oil-adhesive base and cement compositions are used in rooms with high humidity. Negative qualities include a long setting process and an increase in repair time.
Acrylic mixtures are intended for finishing building facades, as well as for rooms with possible changes in temperature and humidity. The material has proven itself in restoring old coatings and sealing large cracks. PVA- based compositions are universal and have an antifungal effect. They are sold only in ready-to-use form (we compared polymer putties with gypsum putties here).
How to dilute with a mixer: proportions
A small amount of clean water at room temperature is gradually poured into the dry powder.
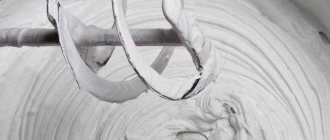
The mass should be mixed with a special construction mixer, initially at low speeds, then the number is increased by changing the speed to a more powerful one. The power tool must be clean so that the remnants of the old product do not fall on the surface being treated. Then you should take a short break, about 15 minutes, and then continue kneading. In total, you need to mix until a homogeneous mass is obtained.
The speed of the mixer during mixing should be kept relatively low to avoid excess air getting into the composition and thereby the formation of bubbles on the wall at the time of applying the putty.
The proportions for mixing the solution are taken from the manufacturer's instructions supplied.
Tips from the experts: tricks and secrets
Following the usual rules, sometimes it is still not possible to make a uniform mixture. Therefore, it is worth paying attention to the long-term experience of builders. I always have a couple of secrets in stock, which many masters have long and successfully used:
- The preparation of materials must comply with existing rules, the main of which is the purity of the materials. Experienced workers recommend thoroughly washing the container before making the mixture.
- If the water is not from a tap, but from a pond, then carefully filter it, at least through a layer of paper.
- The putty should be prepared in small portions to prevent it from drying out. Calculate so that it is enough for 20 minutes of work. After this time, the mass begins to thicken.
- If the solution begins to harden, it can be softened - a small portion of cool water can delay this process for a couple of minutes. But this can only be done once, because the next time there will be no suitable effect.
- If you see that the mixture is hardening and thickening very quickly, and you have already added water, do not waste your energy. Better stop, throw away the solution, and clean and rinse the bucket well. Then start again. It’s better to lose a little powder than to later see a sloppily puttied wall that no amount of sanding can remove.
- For making putty, a nozzle with spiral blades will be ideal. If there is only one spiral, then it should be left-handed, twisted clockwise. This nozzle does not allow light particles of cement and gypsum to rise to the top; it seems to press them down, so the solution comes out homogeneous.
- In particular, a whisk with two spirals in reverse direction is not bad for putty. And then the reverse function is not needed.
How to properly dilute finishing putty for walls at home without a mixer
To knead manually, you will need a dry, clean container. You need to pour the required amount of powder into it. After this, add water in accordance with the required proportions.
It is imperative to knead in this sequence, otherwise lumps may appear, which will be extremely difficult to get rid of later.
The resulting solution is thoroughly mixed, after which a three-minute pause is made. The solution swells. Then mix again until smooth. The resulting mass should be more liquid in consistency compared to the starting one.
How to dilute and mix the finishing
For the final putty, the procedure is similar, but there are some aspects that are worth paying attention to. You should be aware that the finishing putty is applied in a thin layer, so its mixture should be watery. If it comes out like sour cream, you should add more water.
To find out how to dilute dry putty and clarify the proportions, you should read the instructions. In fact, even without abilities in this area, you can prepare a suitable consistency by eye.
When making the final putty, you should pay special attention to mixing, this includes not only the first mixing, but also the upcoming hardening. You will have to stir the resulting mixture from time to time or prepare it in small quantities.
If you need to re-dilute the putty, use another container so that the remnants of the previous batch and water do not affect the quality of the solution. If there is no suitable container, you should wash the bucket with boiling water from the previous use.
Wipe containers and tools dry, otherwise the dry mixture will stick to the edges and complicate the mixing process.
To find out more clearly how to dilute the final putty, you can read
What is important to observe proportions for different mixtures?
The putty is diluted depending on the following factors:
- what component is it based on: gypsum, cement or polymers;
- what type of work needs to be done: starting or finishing;
- what surface should be treated: wall or ceiling;
- type of room where renovation work is carried out: wet or dry, inside the building or outside.
Standard proportions look like this:
- 1 kg of gypsum powder is mixed with 0.8 liters of water;
- 1 kg of dry cement mixture with 0.4 liters of water;
- 25 kg of polymer composition is poured into 10 liters of water.
An excessively liquid consistency, which will lead to smudges on the wall, is avoided. It is also unacceptable to use powder that is too dry. As a result of kneading, the resulting homogeneous slurry should not contain lumps.
Before preparing the composition, you need to read its instructions, since the proportions of some manufacturers may differ from standard standards.
Breeding
How to properly dilute dry putty without a mixer at home
In general, when it comes to the question of how to properly mix starting putty for walls, there are two main methods, both of which are actively used. Now let's look at the first method. The principle of how to mix putty for floors and walls in this perspective is very reminiscent of kneading dough.
It is enough to take a container, but it must be dry, and pour in the required amount of the mixture, usually determined by eye. Next, water is added in small portions.
In this case, it is necessary to observe exactly this order; when pouring the putty into the water, it is taken in pieces that will have to be pressed manually. To learn how to dilute gypsum putty, you need to consider the issue step by step.
Putty can almost perfectly level any surface, as well as give the layer additional strength. Here you will find out how long it takes to dry.
Sand is a loose mixture that is formed as a result of the destruction of rocks under the influence of water. Here is the calculation of the volume of sand in a ton.
Cement is a mineral material that, when combined with water, becomes durable and plastic. By clicking on the link, you will become familiar with the density of M400 cement.
How to dilute and stir wall putty without a mixer:
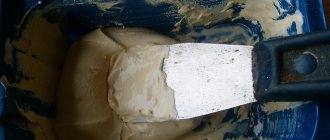
- take a small container, plastic containers work well, but must be clean. Pour about 7 trowels of starting putty and add a little water. Everything is thoroughly mixed. A necessary condition for preparing a high-quality mixture is ideally clean dishes;
Pour putty
- if dust, dirt, or pieces of organic matter get in, the mixture will quickly harden, and you will not have time to work it out before that moment;
- After thorough mixing, add the rest of the dry putty and pour in water. Now mix everything again, a homogeneous mixture should come out. Pay attention to the bottom and sides of the vessel, as there is often unmixed putty there;
- When preparing gypsum putty, you should be aware that it dries quickly, but you should not apply it immediately after mixing. You should wait 3 minutes for it to acquire quality properties. Then it is mixed again;
- It’s now clear how to mix wall putty, but the proportions can vary greatly depending on the type of work being done. Most likely, after mixing, you will have to adjust the consistency by adding the necessary ingredients;
- the mixture hardens quickly, so you need to prepare such a quantity of putty that it can be worked out in 20-30 minutes, after which the putty begins to harden. You will have to knead the mixture little by little, which is better than struggling with the dried mixture and ultimately throwing it away;
- There is another nuance in the question of how to properly dilute putty, which lies in the specifics of the gypsum mixture. It absorbs moisture well , which is why it swells somewhat;
- thus, during the hardening process, it dries out a little, which can cause cracks in the corners, which are eliminated using finishing putty;
- it can be used for rooms with humidity, since gypsum absorbs water, but it is better to prevent constant changes in moisture, as well as the transfer of liquid into the walls;
Also, too thick a layer can be a problem, as uneven hardening occurs. Cracking is possible due to the type of material on which it is applied; putty does not stick to wood, or rather, it falls off over time, and cracks will appear in the near future.
In this case, destruction can occur due to poor preparation of the wall, especially if it consists of bulk materials.
In this case, particles of the wall are drawn behind the spatula, and they fall into the mixture, which leads to unevenness of the material, and therefore its fragility.
How to mix and dilute wall putty with a mixer by hand
This option is used much more often if the household has a drill or screwdriver with a mixer attachment. How to properly dilute and mix putty at home:
- pour a little water and add the mixture, add putty until the desired thickness is obtained;
- depending on the type of putty base, it may form lumps, but the mixer easily removes them;
- if you have experience, you can prepare putty in large quantities, but of higher quality;
- prevent the penetration of air in large quantities, otherwise cracks or bubbles in the putty may occur. Use a rotation speed of about 800 rpm . At first, when there is still a dry mixture, it is necessary to knead extremely carefully, otherwise part of the putty will be blown up with air.
Repeat the stirring procedure every 15 minutes if preparing a large portion. This will preserve the diluted putty before it begins to harden.
Dilution with a mixer
Before diluting the putty and specifying the proportions of water and the mixture, it is necessary to determine the purpose and size of the application layer.
Usually the proportion is determined by eye, take a trowel, tilt it at an angle and watch how it stretches.
Definition of proportion
If the entire mixture immediately falls off in one clump, this indicates poor mixing, since there is a layer of water on the trowel, which will greatly interfere with application to the surface.
The prepared mixture should be left for a few minutes and only then applied. Also re-mix to increase the elasticity and plasticity of the putty.
How long does it take for the finished mixture to dry?
The drying time of the putty depends on:
- type of putty mixture;
- thickness of the applied layer;
- air temperature/humidity;
- the base on which the composition is applied.
The average drying rates are:
- starting gypsum mixture with a layer thickness of up to 30 mm – one week;
- finishing composition of gypsum – 4-6 hours;
- starting cement mortar – 5 hours;
- finishing layer up to 3 mm – 1 hour.
Regarding polymer putty solutions:
- epoxy – 8 hours;
- latex – from 12 hours;
- acrylic starting layer up to 1 mm thick – 3 hours, finishing layer 3 mm – 24 hours.
The leveling mixture can harden quite quickly, so to save money it is better to knead it in small quantities.
During repair work, the process of filling walls cannot be ignored, since only after completing this stage can the desired result be achieved. Knowing the rules of kneading and the technology for applying the leveling agent, the implementation will not require much effort and will be within the control of even a novice master.
Some tips on what proportions to stir the material in, how to preserve it so that it does not dry out
Beginning builders often ask, is it possible to dilute dried putty? No. It is taken in one lump and can no longer be diluted (this is its main essence). Therefore, to clean vessels and instruments, you will have to use a mechanical method.
Please note that lumps may form when loose mixtures are picked up from the wall, especially from the back of the spatula, or if there is residue on the nozzle or in the container. Everything needs to be cleaned in a timely manner.
It is convenient to wash the mixer by immersing it in a bucket of water and setting high speeds, so the mixture will dissolve itself in the water, but you will have to wipe the surface a little.
It is necessary to exclude even small lumps, since the layer thickness is often about 1 mm.
Any lumps will be clearly visible. If it was not possible to prevent the appearance of lumps and they have hardened a little, so that the mixer no longer picks them up, you can use a little trick.
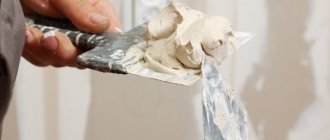
Place a medium amount of mixture on a spatula and apply it to the wall in thick layers. Then turn the spatula at an angle of 60° and, using pressure, remove excess and also crush the pieces.
Don't be afraid to use large spatulas, they are more convenient when working on a large area without external elements that get in the way, like a gas pipe.
They are not only convenient, but also practical; it is easy to see areas with unevenness on the wall using a spatula as a level. It is advisable to have an arsenal of spatulas of different sizes.
Glue-based putty
Adhesive putty is used to cover both ceilings and walls after plastering.
To prepare the material you will need:
- drying oil – 25 g;
- glue solution 10% – 2 kg;
- sifted chalk – 2 kg.
Preparation:
- Heat the glue. Mix with drying oil until the solution is homogeneous.
- Add chalk and stir until a suitable consistency is formed.
To make the putty spread easily over the surface, laundry soap is added to the mixture.
PVA and chalk putty
The composition of chalk and PVA glue is quite simple. Ingredients needed:
- PVA glue;
- chalk;
- sawdust.
Preparation:
- Dilute crushed chalk in PVA. Stir the composition until smooth. The consistency of the mixture should resemble sour cream.
- If you need to eliminate seams, add sawdust to the mixture.
The applied layer of putty will dry within 24 hours.
Equipment for preparing putty
Before starting work, you should prepare the necessary tools. This will eliminate sudden difficulties when mixing the solution and further working with it. To prepare the mixture you will need:
- Construction or household bucket 7-15 liters.
- Drill or screwdriver.
- Mixer attachment.
- Putty knife.
- Water.
- Dry putty.
Having the right tool at hand makes the work process more comfortable. After completing the work, you should thoroughly wash the tool. So that the solution does not remain on it. Otherwise, the old material may get into the new batch, and then scratches will form on the surface, and pebbles will get into the mixture.
We dilute putty for different purposes
According to its purpose, putty is divided into starting and finishing, specialized and universal, and the optimal consistency of the solution for these groups is somewhat different.
- Starting putty is designed to level the surface of the wall. It is applied to hide significant defects such as cracks and scratches. The mixture of such putty should be moderately liquid. It is recommended to apply the starting putty in several layers. It has good penetrating properties, which allows it to fill the surface structure and create the necessary adhesion.
- The finishing putty can be applied either directly to the surface or on the starting putty. It can only mask minor unevenness and is usually applied in a thin layer. Its main function is to make the base for painting or pasting as smooth as possible. The technology of how to dilute finishing putty is practically no different. However, in this case, the consistency of the putty must be perfect, without even small particles and lumps. It is applied in a 1mm layer, so even minor defects will be immediately visible. Before mixing a new portion of putty, you must thoroughly rinse and dry the tools, container and nozzle.
A highly specialized putty is used to finish certain areas to hide their imperfections. There is also a universal putty , which can be used in any type of work, slightly inferior in quality to the above. In this case, when solving the problem of how to dilute putty for walls, the proportions need to be clarified on the packaging, since the ratio of water and dry components may differ among different manufacturers.
Diluting the dry mixture is one of the simplest stages of puttying, which anyone can handle if they have the necessary knowledge. Armed with the information provided in the article, you can save on the purchase of ready-made putty compositions, and enjoy the pleasure of creating beauty and comfort in your home with your own hands.
Sources:
https://newsu.ru/stroitelnye-materialy/varianty-kak-razvodit-finishnuyu-shpaklevku-svoimi-rukami-bez-miksera-v-domashnih-usloviyah-proporcii-osobennosti-struktury-rekomendacii.html https://remontmechty .ru/otdelka-kvartiry/sten/kak-razmeshat-shpaklevku-bez-miksera
Benzene based putty
A unique putty composition can be prepared using benzene. Suitable for wooden and concrete surfaces, as well as plasterboard walls.
Required components:
- rosin – 50 g;
- benzene – 130-150 g;
- castor oil – 25 g.
Preparation:
- Stir rosin and castor oil in a container.
- Add benzene in a thin stream. Mix the solution thoroughly.
This putty can be stored for several days. Therefore, knowing the amount of work, you can prepare the required amount of composition the first time.
Preparing the ceiling for putty
The product is applied only to a dry, even surface. Therefore, all old finishing, if present, must be removed. The decoration is removed completely down to the floor slab. This will be most difficult to do if there are several decorative layers.
Sequence of work
- Wet the coating generously with a sponge or roller.
- After some time, we repeat the processing. The old design should be saturated with water and “limp”.
- Take a spatula and carefully remove the swollen decor in layers.
- We wash the base, freed from deposits, with clean water. Leave to dry.
- If the finish cannot be removed the first time, we wet it again and repeat all the procedures.
The ceiling tile is carefully lifted from the edge with a spatula and then removed. The wallpaper is soaked in warm soapy water, then removed in strips. If they stick too tightly, wet them again, then scrape them off. It is not always possible to wash off the water-based emulsion. Then it is better to remove it with a grinder. Oil paint is removed with a special remover. To a beginner, this may seem like an unnecessary operation, but otherwise the new design will not stick. After all the old finishing has been removed, they begin to inspect the base. To do this, it is best to climb on a stepladder.
Instagram perfect_house_israel
Height differences are determined using a building level. They should not be larger than 25 mm. In this case, you will have to put too large a layer of putty mixture, which is not allowed by technology. All cracks and cracks are revealed.
Small defects in the form of bulges or dents are clearly visible when illuminated with a flashlight. No matter how many there are, the location of each needs to be remembered or noted somehow. All identified defects must be removed.
How to cover up a crack
- Use a sharp tool to open the crack. That is, we remove the remnants of the old coating from it and expand it to 2-3 mm.
- Using a hard brush, remove dust and dirt.
- Carefully cover the crack with a repair solution, polyurethane foam, or primer.
- Cut off the required amount of serpyanka tape. This is a reinforcing mesh, produced in the form of strips of different widths. It should completely cover the crack. Apply tape over the defect.
This step is skipped if you plan to putty the plastered base. It is already leveled and prepared for further work. Next you need to prime the base. The primer will improve the adhesion of the materials. For best results, the composition is selected according to the type of base. Thus, for concrete, a deep-penetrating preparation is recommended, for drywall - one that maximizes adhesion, etc.
The selected product is applied to a dry surface. The easiest way to do this is with a roller. In corners and near walls, the composition is applied with a brush. The number of layers is recommended by the manufacturer; information will be on the packaging. If you need to lay more than one layer, the next one is applied only after the previous one has completely dried.
Finishing mixture
In the opinion of an amateur, everything is simple with the finishing mixture, since it is sold ready-made, that is, diluted. This is another mistake, since practice says that factory breeding does not always satisfy the master.
As a rule, the finished material in a bucket has a thick consistency initially, and if the material sits, the mixture becomes even thicker. In any case, we recommend that after purchasing the putty in finished form (in a bucket) before use:
- Mix the composition with a mixer,
- Dilute the mixture with water for a thinner consistency (up to 50 ml of water per 1 kg of solution).
The first point will help get rid of lumps that form during storage of the material; following rule No. 2 will allow you to quickly apply the putty and reduce its consumption.
We recommend finishing putties Bostik Finspackel F, Acryl-Puts finish and SHEETROCK. All three mixtures are sold ready-to-use and require only vigorous stirring before use and, depending on the condition, slight dilution with water to the ideal consistency.
Facade
For the facade, we recommend ACRYL-PUTZ FD12 FACADE putty surface, which is a polymer material and is well resistant to the vicissitudes of the weather. The consumption of the brand is about 3.5 kg per m2 with a layer thickness of 3 mm and an average consistency. The material is diluted with water in the proportion of 400 ml of water per 1 kg of material, but often a little less or more liquid is required for normal thickness. The optimal consistency of ACRYL-PUTZ FD12 is a condition when the putty does not flow off the spatula, but is easily scooped up from the bucket .
FARBITEX facade mixture and Typhoon Master putty No. 32E are also good for exterior work. FARBITEX is sold ready-made and requires mixing with a mixer before applying to the façade, and Typhoon No. 35E is diluted with water to form a thick paste before application.
Methods for preparing the solution
As a rule, the instructions do not disclose all the nuances that may arise while mixing the solution. For example, when applying a thick layer of putty to a wall, the solution needs to be made thick. Then it will be easier to work with it, and it will not slide off the wall. To do this, you just need to add a little less water than indicated in the instructions.
When the question arises of how to dilute putty for plasterboard walls, you should understand that the manufacturer’s instructions talk about creating a layer for sealing small irregularities. Therefore, as a rule, the solution should be applied in one thin layer. In this case, the mass should be more liquid.
It should also be understood that a thicker solution hardens faster. The manufacturer's instructions do not indicate this. Therefore, it is recommended to prepare the mixture in small portions. This is necessary to have time to work it out before it hardens. It is strictly forbidden to re-dilute already hardened putty, this reduces its technical properties and minimizes the service life of the final finish. It's better to get rid of the frozen batch. Repeated repairs will cost much more.
The process of mixing the solution should be approached with the utmost seriousness, so that at the most inopportune moment the water does not run out or the necessary tools are not at hand. If there is a delay during the preparation of the solution due to a shortage of one or another component, the material may begin to set ahead of time, and this will affect the quality of the finish in the future. Manufacturers also indicate this fact in the instructions, but it should be recalled that when mixing the solution, water is added to the dry mass, and not vice versa.
Wall treatment for painting and wallpaper
Puttying walls for painting has its own nuances. The final coating of paint does not hide a single flaw. Therefore, for high-quality painting it is necessary to carefully level the walls. The following operating procedure is recommended:
- Apply the first layer of leveling putty.
- Leave the putty until completely dry. It’s better to spend at least 12 hours on this.
- If there are noticeable unevenness, you can apply a couple more layers.
- Leave each layer to dry.
- Apply a layer of finishing putty to remove cracks, irregularities, and other minor defects.
- A smooth surface is achieved by finishing the wall with sandpaper.
The amount of mixture used and the number of layers applied depend on the density of the wallpaper. If you plan to glue thin wallpaper, it is enough to apply the preparatory mixture in three layers. If the wallpaper is thick, then you can reduce the number of layers to two. This way you can paste the wallpaper without blistering.
Preparation of tools and materials
The set of tools required for work looks like this:
- Spatulas (you need to select spatulas of different sizes so that there is at least one wide and one narrow);
- Metal half-polish (recommended length – 50 cm);
- Roller;
- Container for mixing the mixture;
- A construction mixer or drill with an appropriate attachment for stirring the mixture.
The materials you will need are a dry mixture - and you need to be very careful in choosing it. The putty is designed to eliminate height differences of no more than 50 mm. If the differences are of greater importance, then the ceiling must first be plastered. However, there are some types of compounds that can be used to putty on a ceiling that has quite serious unevenness. In any case, one of the components of how to properly putty ceilings is the correct choice of materials, so you need to pay attention to this point.
Putty made of varnish and chalk
A mixture based on water-soluble varnish can be prepared without large financial outlays. In this option, inexpensive varnish is used instead of PVA. To give the solution color, you need to add color.
Required components:
- water-soluble varnish;
- chalk;
- sawdust;
- color;
- water.
Preparation:
- Mix varnish and chalk to form a dough-like mixture;
- If the mixture is too thick, add a little water;
- Add sawdust if you need to seal seams and do other starting work.
It is better to mix the ingredients in the evening so that you get the finished mixture in the morning. This putty can be used to work with chipboard or OSB. Drying time – up to 12 hours.
Tips for beginners on applying putty
Puttying walls is a very difficult process for beginners. Sufficient experience is required to obtain a smooth surface and correct application. To dilute wall putty correctly, obtaining a homogeneous mass without lumps, you need certain skills. Otherwise, errors can be fatal. To avoid such a situation, you need to prepare in advance.
You need to buy a spatula, the recommended width of which is 30 cm and length - 15 cm. Then you should knead a small amount of the solution to practice applying the putty to the surface. As soon as it starts to work out, you can start working. The putty must be applied to the walls at a certain angle. As a rule, the larger the angle, the thinner the layer of putty. During work, it is recommended to transfer the solution from one spatula to another. This will maintain its elasticity.
What tools are needed
Before mixing the working solution, all materials should be cleaned and laid out. To work you need:
- bucket;
- dry mixture;
- water;
- mixer;
- putty knife.
It is important to check the cleanliness of the instrument and container. In a dirty container, the solution sets faster and loses its characteristics.
The process of diluting putty begins with the preparation of equipment
Starting surface putty
Putty is performed using coarse starting material. It's not difficult to find. When purchased, it is called “starting putty.” To remove large differences in walls, to hide grooves and holes, this putty is convenient to use. The thickness of a layer of such putty applied at a time can reach 1.5 cm. Allow the previous layers to dry completely. Only then proceed to applying the next layer of putty.
In order to obtain the highest possible quality of putty surfaces, a special painting mesh is installed on the wall, and the putty is distributed evenly over the entire surface. In this case, the walls are completely covered with putty. The advantage of this technology is that when using a painting mesh, the putty fits perfectly onto the surface of the walls. And the surface itself becomes stronger and smoother. Moreover, the coarser the painting mesh, the smoother the treated wall surface.
Starting wall putty.

