What is ceiling whitewashing
Whitewashing the ceiling is one of the simplest finishing methods. Due to its simplicity and low cost, it is quite possible to do it on your own. For the most beautiful and high-quality result, the procedure is repeated several times a year.
For the most beautiful and high-quality result, the procedure is repeated several times a year.
Benefits of whitewashing
Do-it-yourself whitewashing is a cheap and quick finishing method. Some consider it a relic of the past. However, a number of advantages make whitewashing very popular today:
- A simple process algorithm. I follow fairly primitive rules; you can do everything yourself;
- Availability. Materials and technical equipment are cheap and readily available;
- Environmentally friendly. This method of surface treatment is rightfully considered the most hypoallergenic and clean;
- Beauty. The color after this treatment is even, white and pure;
- It has a pronounced bactericidal effect, thereby preventing the formation of mold;
- Water resistance. Condensation cannot damage the whitewash layer or cause color changes.
This method of surface treatment is rightfully considered the most hypoallergenic and clean.
How to whitewash a ceiling
There are several options for whitewashing the ceiling. These include working with chalk, lime and water-based paint. Each of the materials has a number of features and has rules for use.
Each of the materials has a number of features and has rules for use.
Chalk
Easily available, inexpensive and hypoallergenic. It is often used in public places (schools, kindergartens, residential premises, shops and administrative buildings). The service life of the chalk coating is 2 years. This material is not capable of covering up small cracks. Chalk should not be used in cold or damp areas.
Easily available, inexpensive and hypoallergenic.
Lime
It has a strong bactericidal effect, and therefore is widely used in areas where animals are located, in basements and workshops with high moisture. When renovating an apartment, whitewashing with lime is suitable for the bathroom. It is able to cover up minor cracks and does not smear. This whitewash protects well from mold. You can work with lime in cold or damp conditions. Service life – 4 years.
Has a strong bactericidal effect.
Water-based paint
It is quite dense, which allows you to achieve a good uniform color in one thin layer. Has low vapor permeability. It is odorless and ready for use after a few hours. Unlike chalk and lime, water-based emulsion can be made into any color or shade thanks to additives.
It is odorless and ready for use after a few hours.
Water-based paint
Before painting with water-based paint without streaks, you need to familiarize yourself with the pros and cons of such painting.
The main advantages of water-based paint are as follows:
- It will be possible to visually enlarge the ceiling.
- The paint has different shades. Thanks to this, the design can be made quite interesting.
- This paint does not require any preparation.
The main disadvantages of this type of material are:
- This paint is quite expensive. It is worth noting that the cheaper the paint, the greater its consumption.
- Before the composition dries, breathing in the room is allowed only with a respiratory mask.
Currently, water-based paint is produced with the addition of various substances. Such substances include:
- Latex.
- Acrylic.
- Acrylic copolymers.
Thanks to latex, the solution becomes waterproof, and thanks to acrylic, it becomes elastic and durable in its composition.
What tools and protective equipment will be required?
To whitewash the ceiling with your own hands, you will need a brush up to 20 cm wide, a roller with a long handle, a bath, clean lint-free rags, adhesive tape, plastic oilcloth, a bucket (or other large container for the solution), a vacuum cleaner with a special attachment and a spray gun. For protection you will need: a respirator, glasses, closed special clothing, thick rubber gloves.
For protection you will need: a respirator, glasses, closed special clothing, thick rubber gloves.
Required Tools
In order not to rush around looking for the right tool while working, prepare everything in advance. You will need:
- wide brush (15 cm) or roller;
- narrow brush (5-7 cm);
- plastic containers;
- stepladder or table;
- latex gloves;
- old newspapers, rags.
Depending on the situation, you may need:
- spatulas;
- sponges;
- serpyanka;
- sandpaper.
Which is better, roller or brush?
In any case, it will not be possible to do all the work with just a roller or brush. You will need both items. To choose the right tool, you should turn to the knowledge of experienced painters.
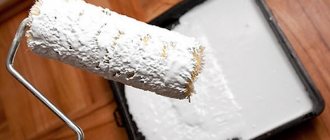
It is better to buy a roller with long pile, because foam rubber and neoprene absorb excess paint, which then remains streaks and bubbles. To buy a truly good quality product, you should pay attention to some characteristics. The roller should not deform when squeezed by hand. No obvious seams or protruding fibers.
It is better to buy a roller with long pile, because foam rubber and neoprene absorb excess paint.
Ceiling whitewashing process
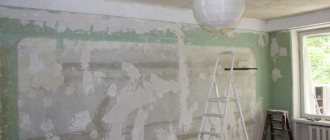
Before proceeding directly to the whitewashing itself, you need to prepare the work area. All things and furniture should be taken out, and what cannot be removed should be covered with oilcloth. All areas that should not be painted should be sealed, and all electrical wires and outlets should be insulated. It is better to dismantle the chandelier, but if this is not an option, it is also insulated and covered.
It is worth considering a source of additional lighting in advance. It is better to also cover the floor with old newspapers or film. Then you should prepare the wall before painting. To do this you need to level the surface. Using putty and primer, we bring it to the desired state and move on to the main part of the whitewash.
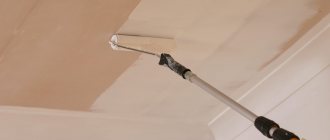
The technique for applying chalk, lime and water-based paint is the same. At the first stage, all corners, joints and hard-to-reach places are painted with a brush, and then the main part. For a wide area, use a roller with a long handle. To whitewash the ceiling with a roller without streaks, strokes must be applied perpendicular to the window opening. When using a roller, paint in 2 layers.
Before applying the second coat, the surface must be completely dry, otherwise bubbles will form.
When using a roller, paint in 2 layers.
Applying water-based paint using a brush and roller
Construction specialists know very well how to whitewash a ceiling with water-based paint without streaks. Paint may be suitable if the ceiling surface is lined with wallpaper or ceiling tiles. It is worth noting that water-based paint is easy to apply. The only thing is that you must follow the instructions.
Before whitewashing the ceiling with water-based paint without streaks, it is recommended to familiarize yourself with the stages of work:
- First of all, it is recommended to prime the surface with a deeper penetration compound. This improves the adhesion of paint to the ceiling. Particular attention should be paid to hard-to-reach nodes and places.
- Next you need to prepare the coloring composition. It is recommended to mix the solution thoroughly until a homogeneous mass is obtained. Then, about an hour after the surface has dried, it is necessary to paint. The paint should be applied in 2 layers. After the primer layer, the paint must be diluted with water until a liquid consistency is obtained. As for the 2nd layer, it is recommended to use the solution undiluted.
- It is recommended to start painting work from one of the corners of the room. The very first layer should be applied parallel to the window opening. At the same time, it is very important to track the presence of unpainted areas and try to eliminate them. If this is not done, the surface will look uneven.
- After the water-based paint has dried, it is recommended to check the ceiling again for uniformity, as well as the absence of stains and splashes.
- After 24 hours, you can apply a second coat of paint. This must be done perpendicular to the window openings.
Is it possible to whitewash over old whitewash?
Whitewashing “the old way” is a fairly common task, because in order for the ceiling surface to remain white and smooth, it needs to be updated at least once a year. This can only be done if the walls are well preserved.
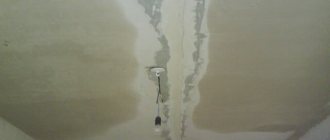
If there are stains, cracks and shabby areas, you should not try to hide it all. You need to completely wash and level the surface, and then paint. To remove the old layer you need to make a solution of non-hot water and a few drops of lemon juice. Actively wet a small area and remove the old layer with a spatula. You need to do the same with lime, but you will have to work a little with a brush.
To remove old water-based paint, you need to wet a small area with 60 water and let it soak. Remove everything with a spatula. If the paint is waterproof, then before wetting it you need to scratch it well with a metal brush. It is strictly forbidden to apply lime to chalk or vice versa!
Actively wet a small area and remove the old layer with a spatula.
How to whitewash a ceiling with your own hands
It would seem like a simple thing to whitewash the ceiling, but without experience and knowledge of the specifics of the technology, getting a more or less high-quality coating is not so easy. Moreover, chalk and lime, the most traditional and frequently used materials for whitewashing ceiling surfaces, present unexpected surprises in practice.
You can whitewash anything with a spray gun
How to find out what was applied to the ceiling before
There are two main ways to determine what kind of whitewash there was before:
- External characteristics. If you run your hand over the surface, the chalk smears, but the lime does not. In the case where the ceiling was painted with water-based paint, the coating simply peels off, but leaves no traces;
- We use lemon juice. Ordinary chemistry. Chalk will hiss under the influence of acid.
If you run your hand over the surface, the chalk smears, but the lime does not.
Outdated options
Option 1: lime
First you need to understand the advantages and disadvantages of this whitewash option. Previously, lime was used to finish ceilings, both in residential and non-residential premises.
Advantages of lime:
- whitewashing the ceiling with lime is good because of its low cost;
- for ceilings, lime is a bactericidal material;
- the finish is resistant to different temperature changes and humidity levels.
- the mixture adheres well to brick, stone and wooden surfaces.
One of the disadvantages is that the material is not very safe if it comes into contact with the skin, as a burn may occur.
Option 2: chalk
Chalk is considered to be an environmentally friendly natural material. It is also not expensive and ideally whitens the ceiling surface. But don’t praise the chalky whitewash of the ceiling, because it’s not suitable for all rooms. So, for example, in a bathroom or other room with high humidity levels, whitewashing the ceiling with chalk is quickly washed off and the surface loses its appearance.
What to do with cracks
To achieve a beautiful, even color, you must level the surface. After removing the old layer, cracks or bumps often become noticeable. To eliminate this situation, it is best to use adhesive putty. It is quite easy to prepare. You need to take 1 liter of warm water and dilute 50 g of glue in it. A mixture of gypsum, wood glue and gypsum in a 1:2:2 ratio is added to the liquid. We wait until the putty is completely dry and carefully rub the entire canvas. After this, it should be primed.
To achieve a beautiful, even color, you must level the surface.
How to remove stains
After removing the old whitewash, you need to very carefully get rid of all stains, otherwise they will appear after fresh whitewashing. It is necessary to clean the surface from mold, rust and dirt. Warm water will do a great job of removing rust. However, to prevent the reappearance of water, you need to wash the area with a solution of copper sulfate in water in a ratio of 1:50.
Grease stains are removed using regular soda ash, which is sold at any hardware store. You need to apply a rag soaked in the solution to the stain. When the stain has completely disappeared, wash the problem area thoroughly.
Grease stains are removed using regular soda ash, which is sold at any hardware store.
How to choose water-based paint
In order to understand how to paint a ceiling with water-based paint without streaks, it is recommended that you read the following information. To do this, first of all, you need to make the right choice of paint. In order to choose a suitable water-based emulsion, it is recommended that you carefully read the information. Currently, there are a huge number of varieties of these paints on the market. They differ from each other in properties and composition.
In order to paint the ceiling without streaks with water-based paint, you need to familiarize yourself with what types of water-based paint there are in general. There are several types:
- Paints with acrylic additives. Today they are the most popular. Their main advantage is that they are suitable for almost any surface. In addition, they are abrasion resistant.
- Polyvinyl acetate. They are the most affordable.
- Silicone water-based paint. This paint fits perfectly over old whitewash. Due to its high vapor permeability, it is ideal for painting ceilings in the kitchen or bathroom.
- Water-based paints with latex. Such paints have fairly good water resistance. They are easy and simple to clean using detergents. In their price category they are superior to all other water-based paints.
It is recommended that you read the label carefully before making your choice. It indicates information about the purpose of the paint, as well as the degree of its hiding power; in addition, on the label you can find out the consumption per 1 square meter and many other parameters.
Primer for better application
It is very important to prime the ceiling well before whitewashing. In this way, the applied material will adhere better to the old layer, minor irregularities will be hidden, and the service life will increase. The soil also has moisture-resistant properties and is bactericidal. The primer will make the surface less porous, which means that the amount of chalk, lime or paint solution will be significantly reduced. For processing it is better to use a strengthening mixture.
It is necessary to dilute the primer in accordance with the instructions, and then carefully and evenly apply it to the surface to be prepared. It is impossible for smudges or “bald patches” to remain. After waiting for complete drying, if possible, it is advisable to apply another layer.
The soil has moisture-resistant properties and is bactericidal.
Features of whitewashing
The process itself is quite complicated, but even if you have no skills, if you follow the instructions, you can achieve a good result without the help of professionals. Before starting the main work, you should inspect the ceiling and carefully prepare it. First of all, the surface is cleaned.
Old whitewash is removed in the following cases:
- Previously, lime mortar was applied, but now chalk mortar is used. If this advice is neglected, “dirty” stains may appear on the surface due to mixing chalk with lime.
- When the surface has a yellowish tint. This mainly happens when whitewashing with chalk solution without adding blue.
- Visible heavy dirt - grease stains, dirt, soot.
How to properly dilute the solution
If water-based paint is used, it is either not diluted at all, or a small amount of warm water is added, bringing it to the desired thickness. Color is also introduced.
If water-based paint is used, it is either not diluted at all, or a small amount of warm water is added.
In order to make a chalk solution yourself for whitewashing approximately 10 square meters of ceiling, you take not only water and chalk. In order for the coating to be stable, even and long-lasting, you will also need wood glue and blueing.
- Dissolve 100 g of glue in 5 liters of warm (but not hot) water.
- Add 3 kg of sifted chalk powder
- Stir until smooth. It is important that there are no lumps, otherwise streaks will remain.
- Pour in 15-20 g of blue or ultramarine. This way we achieve a brighter white color.
- Check the consistency for density. To do this, pour a little solution onto the knife blade. If the knife remains clean, you should add a little more chalk powder. We bring everything to the moment when the blade begins to be covered with an even thin layer.
In order for the coating to be stable, even and long-lasting, you will also need wood glue and blueing.
Lime for whitewashing ceilings is sold in two forms: dry slaked lime, the so-called “Pushonka”, and paste. There is less dry powder in quantity, but slaked lime in the form of a paste dissolves easier and better.
You can also make slaked lime at home. To do this, take quicklime lump lime and add warm water at a ratio of 1:3. Next, cover with a lid and leave for 2 weeks.
To prepare a lime solution, you need to mix 2 kg of lime, 3 liters of warm water, 20 g of blue, 15 g of drying oil and 5 g of table salt. Stir everything thoroughly and strain through a sieve to remove lumps. Whitewashing is carried out in 2 layers.
There is less dry powder in quantity, but slaked lime in the form of a paste dissolves easier and better.
Modern options
Modern methods of whitewashing ceilings have a wide range of materials. Therefore, you should not focus your attention only on lime and chalk.
Modern technologies do not stand still and you can purchase paints for the ceiling surface. Their composition contains cement and calcareous material. These are so-called water-based emulsions. They have enough features to make you choose them.
Option 1: water-based paint
Advantages:
- Do not change appearance when exposed to moisture and different temperature conditions.
- Do not wash out or erase.
- Suitable for finishing any surfaces.
- Dries quickly.
- They have a waterproofing effect.
- Safe for the human body, thus used in all rooms.
Water-based paint for finishing the ceiling is a high-quality and long-lasting material. According to the designers, the surface painted with paints looks impressive and can fit into different interiors. If after some time you want to change the shade on the ceiling, you can do this without any problems.
Option 2: hydraulic lime
Manufacturers began to produce modern lime material.
It includes:
- white lime,
- fillers from various minerals,
- ether cellulose,
- clay,
- water.
The price of such paint is high, but all its components are natural. Hydraulic lime is suitable for finishing the ceiling of all rooms. It does not change its appearance under the influence of humidity and temperature factors.
Paint is applied to the surface using a roller. This type of material is not suitable for varnished, wooden and plastic surfaces.
Option 3: casein lime paint
To finish the ceiling, you can use natural paint in the form of a dry mixture. It's called casein lime paint. Before painting, it is diluted with ordinary water.
Suitable for finishing any walls and can be applied to plaster, wallpaper, stone.
The only drawback is that before using it, the surface must be treated with casein primer.
Option 4: colored casein lime paint
And another fairly widely used material, which is used as a color and as an independent mixture for ceiling surfaces. This is a colored casein lime paint.
The dry mixture is diluted with water and mixed with white paint. In order to obtain the desired shade, this procedure is carried out in special equipment.
Ceiling whitewashing technology
The DIY whitewashing technology is quite simple and anyone can do it:
- We clean the room and cover the floor.
- We clean the surface from the old layer.
- Level the ceiling using putty.
- We prime.
- Apply the dye perpendicular to the window.
Apply the dye perpendicular to the window.
Whitewashing with chalk or lime
Whitewashing using chalk or lime begins with preparing a solution. For chalk whitewash you will need 5 liters of water, 3 kilograms of chalk (or lime) and 20 grams of blue (ultramarine). All ingredients are mixed and filtered through cheesecloth to obtain a homogeneous mass. This amount of mixture will be enough to whitewash a surface area of 10-12 m2 .
Ultramarine (blue) is necessary in the solution to preserve the white color. If you neglect this substance, the ceiling will turn yellow over time.
For lime whitewashing you need 3 kilograms of lime and 10 liters of water. 100 grams of ordinary salt and 200 grams of aluminum alum are also added here. Preparing the solution may result in burns, so you need to be as vigilant as possible and wear gloves. It is better to wear glasses over your eyes and protect your mouth with a respirator. An important feature of whitewashing with lime is that this method protects the surface well from the occurrence of various “diseases” - mold and mildew.
Whitewashing is easier and faster with a spray bottle. But, if this is not possible, you can do it with a regular brush or roller. To do this, the tool is moistened in the solution, squeezed a little to remove excess solution and carefully applied to the surface with direct movements away from the window. After applying the first layer, you need to wait a little, and apply the second layer perpendicular to the first. In this way, all the shortcomings will be corrected, and the ceiling will acquire a rich white color.
Features of using a vacuum cleaner
Whitewashing a large area of surface is a rather labor-intensive process. Therefore, instead of a brush or roller, you can use a spray gun, a spray gun, or even a vacuum cleaner. To use such a household item, it is important that it meets certain requirements:
- There must be a hole for the exhaust air to escape;
- The power of the home unit must be sufficient for the paint layer to apply evenly.
For the whitewashing process, you will need a special attachment, which either comes in a factory set, is sold in a store, or you can make it yourself.
Most often, one of three attachments is used:
- Spray gun with attachment for vacuum cleaner;
- Nozzle in the form of a lid for a jar;
- Homemade nozzle from a nylon cap.
The whitewashing process requires a special attachment.
Safety precautions
Safety precautions are critically important so that repairs do not harm your health. You will need a respirator, as there will be a lot of dust and after just an hour of working without protection, coughing attacks will begin. You should protect your eyes with construction glasses. They can be found in any hardware store, they are not expensive - 150-200 rubles (the price is valid for March 2021), and the eyes will be safe, because the whitewash solution is quite acidic and can greatly irritate the mucous membranes of the eyes. It is also worth wearing closed old clothes (which you don’t mind) or a special suit to protect your skin. You can't do without gloves.
You will need a respirator, as there will be a lot of dust and after just an hour of working without protection, coughing attacks will begin.
Tips and tricks from the experts
Experienced malaria specialists claim that the whitewashing process is quite simple. Compliance with the process algorithm and a high-quality tool will allow you to get an excellent result. Experts recommend not saving on equipment.
The easiest and cheapest way to finish the ceiling is to whitewash it yourself. This method has a number of advantages: low cost, ease of process, so there is no need to hire specialists, bactericidal and water-repellent action, environmental friendliness and hypoallergenicity.
You can whitewash the ceiling using chalk, lime or water-based paint. It is better to use chalk for repairing residential and public places. Lime is useful for finishing damp rooms and sheds. Water emulsion is used for semi-open areas and attics.
The tools you will need are a bath, a brush, a roller and personal protective equipment. Whitewashing over old whitewash is possible only in rare cases when the surface remains uniform and even. In all other cases, you will need to clean the ceiling from the old layer, cover up the cracks and prime it.
Compliance with the process algorithm and a high-quality tool will allow you to get an excellent result.
The whitewashing technology involves first painting corners and hard-to-reach places, and then covering the main canvas perpendicular to the window. It is best to whitewash the ceiling in two layers. The painting algorithm is quite simple and if you do not skip important steps, the result will be quite satisfactory.
How to prepare a ceiling for whitewashing
The final result directly depends on how correctly the ceiling surface is prepared for the application of whitewash. In some cases, in order to properly whitewash the ceiling, it is not even necessary to wash off or strip off the old whitewash down to the concrete or plastered brick.
The preparation process consists of three to four stages, depending on the condition of the ceiling and the presence of the old finishing layer:
- We determine what exactly the ceiling was whitewashed with, the materials, the thickness of the layer, the presence of defective stains, rust, fungus;
- We erase or clean off the old layer of decorative coating down to the concrete or stone base;
- Using a brush and a water solution, we wash and remove the remaining whitewash that has ingrained itself into the pores of the surface.
In theory, you don’t have to wait until the washed ceiling is completely dry; it will be enough to wait for the average degree of drying, when there are no more wet spots, and the surface has acquired a color slightly darker than that of dry concrete.
An exception is the surface affected by rusty spots or fungal deposits. Typically, in such a situation, treatment is performed with copper sulfate or a special disinfectant. In this case, it is important to wait until the applied solution dries completely in order to identify missing areas and evaluate how much rusty deposits have been removed.
The edge of the spatula should not be sharp, otherwise you can make holes
In any case, before whitewashing the ceiling with your own hands, in order to obtain a good quality decorative coating, craftsmen recommend stripping the chalk or lime, as they say, to the very roots. This guarantees an even, uniform layer of new whitewash, without lumps of adhering dust and marks left by the brush.
You can determine what exactly is on the ceiling using a clean cloth. If you run it over the chalk, then traces of the chalk coating will remain on the fabric surface; as a rule, nothing remains on the rag from lime whitewash.
Preparing a new ceiling surface for whitewashing
It would seem that the simplest option is to apply the coating to a new, clean concrete or plaster surface. In fact, this is not entirely correct, especially if for sanitary reasons it is necessary to whitewash with lime, which adheres very poorly to new surfaces. Even if it is plaster or concrete, the brick on the ceiling is pre-treated with a primer, which in theory improves the adhesion of the decorative layer to the base.
Therefore, regardless of what exactly you plan to whiten the ceiling with, its surface must be wiped clean from dirt and dust, and this is done in a dry way, without water. As soon as the remnants of cement and everything that stuck during the renovation or construction of the room are removed, it will be necessary to perform priming that improves the squeezing out of micro-air bubbles that have settled on the surface of the concrete.
To do this, mix a small amount of warm water with liquid soap or detergent, ratio 1:50. A small amount of table salt is added to the resulting solution. It is believed that salt is a guarantee that the organic matter remaining from liquid soap will not interfere with the wetting of the ceiling surface with lime or soap solution.
Do-it-yourself “empty” whitewashing of the ceiling helps a lot. This is a method in which the surface of the ceiling is cleaned with a stiff brush with plastic bristles, plain water with a small addition of PVA. As a result, sand, cement particles, all dirt and dust are washed away before the primer is applied. The next step is to treat the concrete surface with iron sulfate, and only after the mordant has dried should the primer be applied.
How to whitewash a ceiling using old whitewash
There can be quite a lot of reasons for such a decision. Often the situation requires whitewashing the ceiling using old whitewash, regardless of the condition of the base surface. You just need to quickly whitewash the ceiling; there is no time to wash off, clean and prepare the ceiling surface in accordance with classic recipes.
It is clear that the old layer can be whitewashed with the same material that was used earlier, and preferably from the same reserves of chalk or lime.
To prepare, first wipe the surface dry with clean rags. This is done in order to remove the maximum amount of dust. You cannot wash off the dirt; the dust instantly sticks to the chalk or lime base, and if you try to apply a fresh layer, mud stains will definitely appear through it.
Sanding old lime helps improve whitewash adhesion
If you need to whitewash a lime base, then removing dust alone will not be enough. Lime itself easily calcinates to a very dense crust, to which moisture, and especially a fresh layer of whitewash, does not adhere well. Therefore, before whitewashing the ceiling, clean the surface with a dry, stiff brush and rag. This produces a small amount of lime dust, which is highly irritating to the mucous membranes of the eyes and skin of the hands. It is clear that in such conditions it is necessary to wear safety glasses and a respirator.
After such stripping, the old lime base becomes rougher, so it will be easier to whitewash even with ordinary pure lime, without the addition of laundry soap or wallpaper glue.
