Requirements for the ceiling in the country
Requirements for the ceiling in the country:
- Low cost of materials and ceiling installation;
- Easy installation, allowing you to do all the work yourself, using simple and accessible tools;
- Availability of materials required for finishing;
- Environmental safety of the materials used;
- Resistance to temperature changes;
- Long service life;
- Good decorative properties that allow you to implement the selected ceiling design in your dacha.
All options for finishing the ceiling in the country house meet these requirements to one degree or another. First of all, you need to evaluate the technical characteristics of the materials used, and only then pay attention to secondary parameters.
Options for finishing the ceiling in the country:
- Wood paneling;
- Sheathing with plastic panels;
- Formation of plasterboard structure;
- Chipboard finishing;
- Finishing with plywood sheets;
- Installation of suspended ceilings;
- Plaster.
Each of these finishing methods needs to be considered in detail to make it easier to decide how to finish the ceiling in the country house.
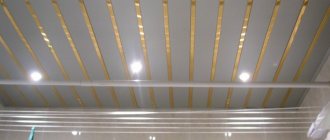
Wooden lining
A dacha is primarily a country house, the decoration of which most often uses “rustic” solutions. The predominant finishing material is wood. There are many options for wood finishing, but the most common of them is lining.
Advantages of wooden lining:
- Comparative ease of self-installation;
- Installation requires only simple tools that every owner has, and a small amount of consumables that allow you to mount the frame and planks;
- Possibility of hidden installation of communications - for example, electrical wiring for connecting lighting;
- Good decorative properties, which turn out to be especially relevant in country houses - a wooden ceiling in a country house looks very organic;
- Environmentally friendly material - natural wood is used to make the lining.
Disadvantages of wooden lining:
- Good lining is quite expensive;
- Wooden lining does not withstand constant temperature changes;
- When the air humidity in the room is high, the material begins to swell, rot and become moldy.
Having an idea of the advantages and disadvantages of wooden lining, we can put it this way - this material is suitable for quick and high-quality finishing of the ceiling. The installation technology is identical to the arrangement of various suspended structures, i.e. the outer parts of the ceiling are attached to the lathing, assembled from wooden slats or metal profiles.
If necessary, soundproofing materials and insulation can be placed in the cells of the frame. In addition, various communications can be located in this space, for example, wiring or fire detectors. If there is no need to fill the frame, then the lining can be attached directly to the ceiling. In this case, the ceiling height will practically not decrease. Lining also makes it possible to implement a retro style, in which the wiring is not under the covering, but outside, in special decorative channels.
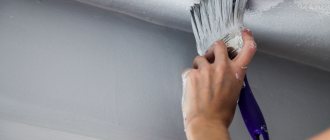
Before covering the ceiling in a dacha with clapboard, the sheathing must be covered with a layer of vapor barrier, which is easiest to fasten with a stapler. The lining itself is fixed to the ceiling using clamps, originally designed for fastening wooden parts, or ordinary self-tapping screws.
When choosing lining for finishing the ceiling in your dacha, you must be sure to remember the weak points of this material. Wood does not withstand temperature changes and high humidity. To protect the ceiling from the effects of these factors, all its parts must be thoroughly treated with an antiseptic before installation, and then covered with a protective varnish.
Advantages and disadvantages of wooden ceilings
The main advantage of finishing the ceiling with wood in an apartment is the environmental friendliness and naturalness of the material.
In addition, wood finishing boasts other advantages:
- Untreated wood is susceptible to damage by insects, quickly absorbs moisture, deforms and burns. Thanks to modern drying methods and special impregnations, the material is free of all these disadvantages, which extends its service life.
- The beauty of texture and color are also considered advantages of wood finishing.
- The material is easy to cut, install and can be processed in various ways.
- Natural wood regulates the microclimate in the room and maintains it at an optimal level for humans. This is ensured by the fact that wood absorbs moisture when the humidity in the room increases and releases it when it decreases.
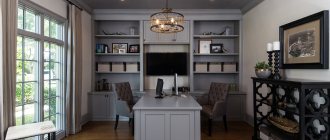
- Wooden ceiling trim additionally protects the room from cold and external noise.
- Wood finishing can be used to decorate interiors in different styles.
- Some options for wooden ceiling cladding can be made with your own hands from budget materials.
Plastic panels
If the key factor is the cost of finishing, then the best solution would be plastic panels - they are cheaper than other materials. Structurally, such panels are very similar to lining, but polyvinyl chloride is used for their manufacture, rather than natural wood.
Advantages of plastic panels over wooden ones:
- Almost complete protection from temperature changes and humidity, which is especially important in the case of housing that is used seasonally;
- Good protection from biological damage (but to realize this advantage, certain care is required, otherwise mold will form in the gaps between the panels);
- Simple operation and possibility of wet cleaning;
- Light weight of the entire structure, which allows you to make a less massive frame;
- A wide selection of colors and textures, which makes it possible to visually combine the ceiling with the decoration of other elements of the room.
In addition to positive qualities, there are also negative ones. Thus, plastic panels do not withstand exposure to ultraviolet radiation. When exposed to direct sunlight, the coating begins to turn yellow. It should also be noted that there is no vapor permeability; because of this, condensation may form on the ceiling if the room is poorly ventilated.
To install PVC panels, you can do without hardware - ordinary self-tapping screws will be enough. An important point is that the screws are screwed in so that their heads press the panel against the guides. This fastening method avoids damage to the panels, so they can be dismantled if necessary.
Floor preparation
Before finishing the ceiling in a private house, you need to prepare the base surface and the entire ceiling. Unlike an apartment in a high-rise building, the ceiling of a private house requires additional insulation and protection from condensation and moisture.
That is why before finishing the ceiling cladding, take care of the following:
- lay thermal insulation material between the floor beams (this is especially important if there is an unheated attic above);
- a layer of vapor barrier is laid above the ceiling to ensure the removal of condensate that accumulates in the thermal insulation material due to temperature changes;
- Below the insulation, a layer of waterproofing is attached to the beams, which will protect the structure from moisture evaporating from the room and rising upward.
Plasterboard ceilings
One of the most durable and reliable ceiling structures is a plasterboard ceiling. This design is perfect for cases where there is a need to integrate LED lamps or spot lighting. A distinctive feature of such ceilings is that there is no need for preliminary leveling of the ceiling - the box will completely hide it.
Advantages of plasterboard ceilings:
- Installation speed
. This parameter is largely determined by the large size of the material used. Standard plasterboard sheets have dimensions of 250x120 cm.. - Appearance
. A plasterboard suspended ceiling in a dacha in itself does not look very attractive, but a fine finish using putty and paint is done on top of the sheets. The final design will look great if you put some effort into it.
There are quite a lot of disadvantages, and they are especially relevant in dacha conditions:
- The material does not withstand seasonal use well due to its low resistance to severe temperature changes and high humidity;
- Proper installation of drywall construction requires experience;
- The cost of finishing is quite high;
- When using paint as a finishing touch, you will have to periodically repair the ceiling in your dacha, since such compositions are not very durable.
To install drywall on the ceiling, you must first assemble a wooden or metal frame. The sheets themselves on the ceiling are positioned offset relative to each other so that the final strength of the structure is higher. The sheets are fastened with self-tapping screws, which need to be screwed in increments of about 20 cm around the perimeter of the sheathing.
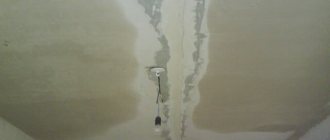
The assembled structure is finished with putty, and reinforcing mesh is used at the joints of the sheets. The putty layer must be sanded and treated with a primer, after which the casing can be painted. If there is a high level of humidity in the room, then instead of ordinary drywall it is better to take moisture-resistant one - it is more durable and reliable.
Drywall
For a suspended plasterboard ceiling you will need metal profiles CD, UD, as well as direct hangers - i.e. the same kit that was used when installing the clapboard structure. These parts will be used to assemble the frame for subsequent sheathing with sheets of plasterboard.
The technology for installing a simple plasterboard ceiling is as follows:
- Using a level, the lower level of the future frame is marked on the walls. In accordance with the markings, guide profiles are attached every half meter using dowel screws.
- Next you need to mark the overlap for the transverse profiles. When marking, you need to take into account that the width of a standard sheet of drywall is exactly 120 cm. If the step between the axes is 60 cm, then the seams will fall on the center line of the profile - the marking should reflect this point.
- At the same marks, made in 60 cm increments, hangers are attached to the base ceiling. After this, the transverse profiles are inserted into the guides and pressed against the lower edges of the hangers, which can be bent. If there is a need to splice several profiles along the length, you will have to use “crabs”.
- Cords or threads are stretched across the sheathing from one guide to another, along which you will need to be guided in the future so that all elements of the sheathing are positioned strictly level.
- The edges of the suspensions are bent back, and the transverse profiles previously held by them are lowered to the level of the cords. After this, the bent edges need to be screwed to the side walls of the profile using self-tapping screws, and the remaining free parts of the hangers are bent upward.
As a rule, 9 mm thick plasterboard sheets are used as finishing material. It is not easy to install them alone, so it is worth inviting an assistant for this work. The sheets are attached to the frame with special self-tapping screws, which are screwed every 15-20 cm along all profiles. The screws need to be screwed in so that they go deeper into the sheet by about 1 mm. An indent of at least 2 cm is made from the edge of the sheet.
When all the sheets of drywall are installed, you need to cover the seams between them with fiberglass mesh. In the future, the seams and screw heads must be puttied with two or three layers of gypsum mortar. The completion of the work will be sanding and priming the ceiling, after which you can start painting the plasterboard structure.
To make a multi-level ceiling instead of a regular ceiling, you can use one of the following solutions:
- Direct hangers can be combined with adjustable ones to make it possible to manually determine the installation height of individual parts of the sheathing;
- To create a rigid structure between the sheathing and the ceiling, you can use CW profiles;
- If necessary, you can combine a suspended ceiling made of plasterboard with conventional plaster - this ensures a minimal reduction in ceiling height.
Chipboard ceiling
Wood chipboards are chipboard and OSB. Both materials are quite suitable for arranging a ceiling, but it must be taken into account that they are characterized by poor resistance to moisture and a high concentration of formaldehyde. However, these shortcomings can be partially mitigated by covering the finished structure with putty.
When figuring out which ceiling is better in a dacha, it should be noted that particle boards are far from the best option. The problem lies in the seasonal use of the dacha. With constant changes in operating conditions, the coating layer will peel off and fall off.
Repairing ceilings in a country house with your own hands
Today we will talk about how to update the ceiling coverings in your own dacha on your own, in a short time and without significant costs.
Of course, there is a temptation to repair the ceilings according to the standards of a real country cottage, but in this case, saving money will be problematic. So we are changing the country ceilings. Well, now we will analyze a number of inexpensive, but at the same time practical and quite aesthetic options for replacing ceilings in a country house, as well as analyze all the work on arranging the ceiling and divide it into stages.
Plywood ceiling
To make the ceiling both reliable and durable, you can use a simple solution that involves the use of plywood. Of course, you need to take good material - laminated multi-layer plywood is quite suitable.
This material has a number of advantages:
- Environmental safety, which is determined by low formaldehyde emissions (at least in comparison with wood chip products);
- High sheet strength and moisture resistance;
- Good decorative properties that allow you to do without finishing;
- Relatively light weight, which reduces the load on the frame and simplifies the installation of the ceiling.
Perhaps the only drawback of plywood is its high cost; other finishing materials are cheaper.
Installation of a plywood ceiling can be done in two ways:
- Installation of plywood on a pre-mounted sheathing on the ceiling;
- Fastening directly to the floor joists (this method is only possible if the joists are even).
The first method is similar to the technology for arranging a plasterboard ceiling. The similarity lies in one of the advantages of this method - the unevenness of the floor will eventually be hidden. The second method is usually used if there are no plans to lower the ceiling.
After installation, the gaps between the individual sheets are sealed with putty designed for use with wooden parts. This method allows you to paint the ceiling in the future. In the case of laminated plywood, plastic joint strips can be used to mask gaps. It is best to cover the screw caps with plastic plugs.
Features of installation of multi-level ceilings
Installing multi-level structures is not much different from installing single-level ones. The main difference is that several types of canvases and profiles are used. After stretching the fabric, holes are made for lighting fixtures.
Installation of multi-level ceilings requires special accuracy in measuring the room and preliminary development of a design project. The principle of installation is as follows: along the edge of the room and in areas where one level will transition to another, a profile is fixed. After this, the fabrics are stretched and secured. Installation of a regular ceiling takes about 2 hours, and multi-level ones - 1-2 days. The step-by-step procedure for performing installation work looks like this:
- development of a design project, selection of materials;
- preparation of the rough ceiling;
- marking;
- fastening the baguette to the wall;
- fastening ceiling profiles;
- installation of the canvas;
- connection of lighting devices.
The process of installing a multi-level ceiling
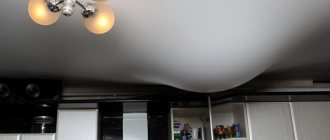
Stretch ceiling
Stretch ceiling is one of the best solutions for a summer residence. There are two main types of suspended ceilings - film and fabric. Of course, before you make a ceiling from fabric or film with your own hands, you need to carefully understand their features.
The cost of film ceilings is low, despite the need to invite specialists. Film ceilings are difficult to install yourself, since this requires special equipment and experience in working with it.
A ceiling with a stretch fabric is quite durable and practically does not lose its decorative properties over time. In addition, it can be washed without problems. If you have experience, installation takes a minimum of time. The only drawback worth noting is the smell of plastic, which will completely disappear from the room in about a week. However, even this drawback can be avoided by arranging fabric stretch ceilings with your own hands.
Fabric ceilings are quite good, but textiles do not withstand moisture very well and begin to mold over time. However, a fabric stretch ceiling can also be considered as a good solution for a summer house, but before making a fabric ceiling, it is worth studying in more detail the features of this design.
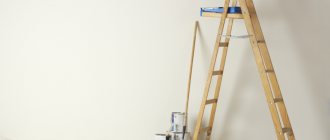
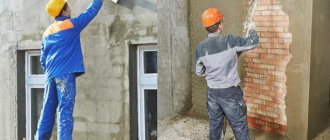
Finishing the ceiling with plaster
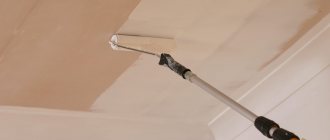
Finally, the last method, which was previously used to finish ceilings almost everywhere, is finishing with plaster. Structurally, this finish is a layer of plaster, a couple of centimeters thick, which is applied to the surface of the ceiling to completely level it.
Plaster can be used to finish any floors, regardless of the material they are made of. However, if we are talking about covering a wooden ceiling, then you first need to fill it with lathing or attach a reinforcing mesh. Plaster can be applied only after the ceiling has been prepared.