Classification of ceilings
Today, reinforced concrete floors (with or without a beam base) are most often used as the base of the ceiling, which are divided into three main types:
- Monolithic;
- Prefabricated;
- Prefabricated monolithic.
The classification of floors is not limited to these types - you can find arched or hipped structures, options made of wood, and a lot of other varieties. However, it is pointless to consider such options - they are used much less frequently, and the issue of alignment when using them is not so acute.
For the manufacture of monolithic floors, standard concrete pouring technology is used. The solution fills the formwork, inside which reinforcement is located, increasing the strength of the finished structure. The ceiling itself is initially located in the interfloor space and is poured right there.
Prefabricated structures are a slab or set of reinforced concrete slabs that are installed on beams or load-bearing walls and then fixed. Prefabricated monolithic foundations are structures based on hollow aerated concrete blocks. The connection of these blocks into a solid ceiling is achieved by pouring a layer of concrete.
Standard ceiling defects
Different types of floors have a characteristic set of advantages and disadvantages that must be used and mitigated accordingly. The leveling of ceilings depends on a large number of different factors, but the installation technology has the greatest influence on this parameter. The easiest way to deal with this is with monolithic reinforced concrete structures - such floors are positioned strictly horizontally and have no joints.
Prefabricated and prefabricated monolithic floors have a number of disadvantages. On prefabricated structures there are often differences in height, which are caused by different positions of the slabs. In addition, the slabs themselves may be placed unevenly relative to the horizontal plane. During the first construction, seams are usually masked by rustications, which disintegrate during use, and the ceiling has to be refinished.
In the case of prefabricated monolithic structures, everything is somewhat different. The individual parts of the base have a perfectly flat surface, which is covered with a layer of plaster. Damage to the ceiling occurs due to the different materials used in the manufacture of blocks, the characteristics of the installation and leveling composition. As a result, the finish becomes covered with a network of cracks that have to be removed.
The defects mentioned are only a small part of all the damage that the ceiling may have. Regardless of the type of ceiling, any ceiling requires regular maintenance, and sometimes complete repairs. All actions aimed at bringing the ceiling into proper form can be generalized into one category - leveling.
Use of dry finishing materials
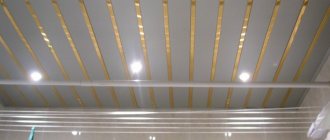
Many specialized companies, precisely based on these shortcomings, advise leveling the ceiling covering using dry finishing materials. They can be presented in a variety of options for each customer to choose from. A separate disadvantage is the difficulty of such alignment without special equipment and skills. Although this coating is an excellent option for those who plan to make renovations according to the latest fashion. The premises are immediately transformed as in designer advertising brochures, especially if the appropriate interior is selected.
Advantages of this method:
- Wiring and other communications are easily hidden.
- An excellent way to even out significant differences in ceiling levels; in the case of a stretch ceiling, a perfectly flat surface.
- In the event of deformation, recovery is quick, and individual elements of a suspended ceiling can be replaced without compromising the integrity of the structure.
- Minimum amount of debris after installation.
Although you cannot do without disadvantages - both ceiling options are expensive, self-installation is very expensive and difficult, synthetic materials are used, in the case of a suspended ceiling its height is reduced to almost 20 centimeters, a suspended ceiling can be subject to mechanical damage, especially from sharp objects.
Methods for leveling ceilings
First of all, you need to figure out how to level the ceiling - there are many solutions, so you have to choose. There are two main types of leveling methods - wet and dry. The first type involves the use of various compositions that harden some time after application. Dry ones, accordingly, do not have a liquid form, i.e. They are represented by plasterboard, suspended and tension structures.
The implementation of wet leveling methods includes the following steps:
- Cleaning the ceiling from a layer of old coating;
- Restoration or replacement of rusts;
- Elimination of all existing damage to the ceiling, such as cracks and cracks;
- Aligning the ceiling surface relative to the general horizontal plane;
- Finishing the ceiling.
To implement dry leveling, a different set of operations is required, including:
- Installation of a frame that levels out all the unevenness of the base;
- Installation of a finishing ceiling structure.
Both methods are quite popular, so they are worth considering in detail in order to know how to level ceilings.
Leveling with mixtures
- When the base is ready, you can proceed directly to applying leveling layers of putty.
They have their own operating characteristics that need to be mentioned:
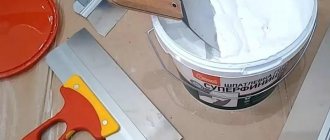
- When mixing putty, do not make a larger batch than you can use in 20-25 minutes.
- After the putty has been mixed and stood for several minutes, do not add water or dry mixture to it. This has a very negative effect on the quality of its structure.
- Do not dry the ceiling in a draft.
- The layer applied at a time should not exceed the permissible value (it is indicated on the bag).
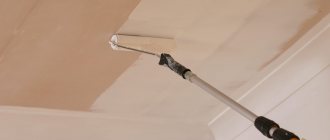
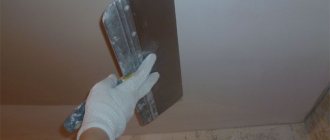
After kneading, apply the mixture to the ceiling with a small spatula and lightly level it.
Tip: Before applying each layer, it is very important to let the previous one dry completely. After all, if the technology is violated, all our work may simply fall off over time, despite the price and quality of the putty.
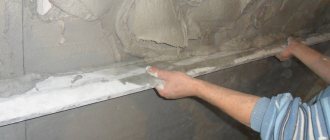
Each layer should be tightened using the rule according to the installed beacons.
Leveling layer application technology
- After the leveling layer has dried, it must be checked using a rule for the absence of unevenness. To do this, simply run the pressed rule along the surface of the ceiling - it should be completely adjacent. All protrusions are removed with sandpaper, and the holes should be filled with putty.
Ceiling preparation
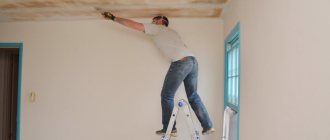
Before you pull out the ceiling, you need to do a good job of preparing it for repairs. The need for this stage is determined by the fact that the leveling solutions will experience a number of loads after hardening - and a properly prepared surface allows you to reduce these loads to a minimum.
If there is any covering on the ceiling, it must be completely removed. For example, whitewash should be thoroughly soaked in water and allowed to soak, and then cut off from the ceiling surface using a narrow spatula. To remove oil paint or enamel, you must first analyze the condition of the ceiling. You can simply tap a flat ceiling with a hammer and remove the paint only in those places where the plaster has begun to peel off.
If the ceiling has differences in height or deviations from the horizontal plane, then the paint will have to be removed from the entire surface of the ceiling. To cut, you will need a grinder with a metal disk. The paint will be cut off along with the plaster, and during the work it is also worth removing all noticeable unevenness in the coating. In addition, it is necessary to remove the damaged filling of the joints between the slabs by knocking it out with a hammer and chisel.
Upon completion of the work, you need to remove all construction debris, ventilate and vacuum the room. Now the ceiling can be primed using a solution suitable for finishing the ceiling. The primer layer must dry completely, which usually takes about a day. After drying, you can proceed to further leveling steps.
Ceiling cleaning
When you plan to apply or glue something to a surface, it must be clean. It is important not to leave a trace of the previous coating. This is necessary in order to ensure perfect adhesion of the wallpaper.
Removing whitewash
The ceiling is washed away with ordinary water if chalk has been applied to it. If it was covered with lime, which is known for its aggressive environment, then you will have to use alkaline solutions. Usually their base consists of an adhesive composition or laundry soap.
Whitewashed ceiling
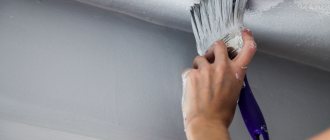
The work will require a minimum of tools and items. First of all, a solution is prepared. Then the ceiling is moistened with the composition using a brush or roller. Leave the surface to soak in moisture for a few minutes. Then use a spatula to remove the whitewash. Using water and a sponge, wash off all the solution from the surface, leaving no roughness or unevenness. I recommend working with large surfaces in parts.
Removing paint
Preparing the ceiling is a labor-intensive process. The paint will not release as much dust and dirt, but it is difficult to remove from the surface. We are not talking about oil paint, which can be easily removed with alcohol or a special solution.
If you have a different base, you will have to do this:
- We put on a respirator, special safety glasses and gloves. You'll be working with toxins, so it's best to stay safe.
- Apply industrial wash to the ceiling.
- We are waiting for the reaction to come.
- Remove pieces of paint with a spatula.
Ceiling painted yellow
If difficult areas appear, it is permissible to beat them off with a hammer. Don't forget to take a metal brush with you. It will come in handy when the ceiling is sanded.
Removing old wallpaper
How to wallpaper the ceiling if there is a layer of old ones left? It seems that they will be easy to remove, but not all types. There are materials that consist of two layers. The top one is not difficult to remove, as it gets wet faster. The bottom substrate is more capricious, you will have to tinker.
You can prepare the ceiling as follows:
- wet the top layer;
- wait a few minutes;
- remove it with a spatula;
- if the bottom layer is not removed, repeat the procedure with wetting the surface.
When all the elements are removed from the ceiling, you need to rinse it thoroughly. This is done with a damp sponge to completely remove all the details.
Removing stains from ceilings
Do not leave traces of mold or rust on the surface. You also need to get rid of the fungus. If you leave everything like this, there is a possibility that they will spread to the new canvas. We recommend removing stains so you don't have to worry about the beauty and durability of your new wallpaper.
Buy an antiseptic primer. It will help fight mold and mildew. The primer acts deeply, corroding mold and completely destroying it.
Universal primer
If the ceiling is covered with greasy stains, you can remove them with a solution of washing powder and water or turpentine. Copper sulfate is diluted with water in a ratio of 1 to 10 to remove rust. Experts advise getting rid of soot with hydrochloric acid. Choose a concentration of 2%.
How to level a concrete ceiling
The technology for leveling concrete ceilings consists of the following steps:
- First of all, it is necessary to repair the rust in the slabs. All joints are completely filled with polyurethane foam, which, after hardening, must be cut off, going 2-3 cm into the gap. When the foam is cut, you can begin to apply the starting leveling cement layer.
- If there are no unevenness or differences on the ceiling surface, you need to wait for the rustication to harden and start waterproofing the ceiling. After this, you can apply a layer of finishing gypsum putty, having previously reinforced the seams with a special tape. The number of layers of putty depends mainly on the experience of the master, but usually only two layers are enough. The second layer is applied after the first has completely dried.
- The hardened coating must be sanded and vacuumed to remove all dust and other contaminants. Next, the ceiling surface needs to be treated with a primer to improve adhesion in the future.
- If there are differences in altitude, leveling becomes significantly more complicated, and the amount of work increases accordingly. At this stage, it is very important to determine exactly how large the differences are - the choice of materials for leveling the ceiling directly depends on this. Wet leveling methods can only be used if the largest difference in height does not exceed 5 cm. This limitation is due to the fact that the weight of the plaster if the specified thickness is exceeded will be too large - and this is already a danger to human health.
You need to understand that using a cement-sand mixture to plaster the ceiling requires good skills. To apply such a solution to the surface of the ceiling and fix it on it, you need considerable experience, which only professional builders have.
This is why you shouldn’t do this kind of work yourself. If the height differences do not exceed 3 cm, then ordinary cement or gypsum mixtures are quite suitable - in this case, there will be no special problems in leveling the ceiling with your own hands.
What is better: plaster or putty?
This question arises among novice repairmen, since these are two completely different means, without which surface finishing is indispensable. Only plaster can be used to seal deep cracks, openings between slabs, and to level areas. The putty is designed to smooth out a small defect, to even out defects after plastering. This substance is applied in a layer of no more than a millimeter, when thick layers are possible for plaster, and if the procedure is performed exactly according to the instructions, no cracks or peeling will be observed.
To prepare the plaster mixture:
- fill a construction bucket with 3 liters of water
- pour powder (the exact consumption is written on the bag)
- stir with a drill until a homogeneous consistency is obtained
If the ceiling has a strong curvature, it is necessary to lay beacon profiles across the entire surface. They select a control point, make small bumps along the length of the plate, apply a beacon, determine absolute evenness with a level, then, focusing on the first panel, fill the entire ceiling with profiles with a distance of no more than 2 m from each other.
The three-meter rule determines the formation of errors, when somewhere there are fewer, they are raised to the desired level, the protrusions are reduced by tapping.
Each gap is filled with the mixture, the solution is pulled out using a two-meter rule, and at the end, a long bar is used to check how well the work was done. Then the putty is diluted to the consistency of sour cream, the first layer is performed, and the actions are completed with a second coating of the finishing material. If there are flaws, all areas are polished with special plates.
You need to work with gloves so that the solution does not damage the skin of your hands. It should be taken into account that only a master can putty well, as well as plaster; he gains his experience through daily work.
If desired, each person can learn at what angle to hold the spatula, pull correctly and apply the mixture to the wall. An excess putty layer or incorrect thickness will lead to cracks and complete separation of pieces. Putty is not used to smooth out differences in area, it gets rid of minor defects, which makes the ceiling mirror-like, smooth like polished furniture.
To those who think all this science is complicated, you can simply sheathe the ceiling, and it will not cause any problems for a long time.
Ceiling markings
Another stage of work is marking the horizontal plane of the ceiling. The main task at this stage is to bring the ceiling to the general level, to which all sections of the floor need to be lowered. The first step is to find the lowest angle of the ceiling. It is best to perform this operation using a laser level. This device is installed in the center of the room, leveled and rotated. On each wall you need to make one mark, from which the distance to the ceiling is then measured. The discovered lowest point is the same level at which the new ceiling will be located.
If a laser level is not available, it can be replaced with a water level. In extreme cases, even a simple transparent hose will do - the water in it will always be at the same level on both edges. Regardless of the devices used, the point of measuring the level is to transfer one mark to all other walls of the room.
To be able to visually monitor the future level of the finished ceiling, you need to drill holes around the perimeter of each wall in increments of 50 cm. Self-tapping screws are screwed into these holes, on which cords are pulled, forming the frame of the ceiling. If, during the process of tightening the laces, areas of overlap are found that are located below the expected level of the finishing structure, then it is necessary to either cut off these elevations or lower the general level of the cords.
When the contour of the ceiling is marked, you need to measure the maximum thickness of the coating layer required to fully level the structure. If the thickness is too large (over 3 cm), then it would be best to use the services of specialists. In other cases, you can level the ceiling with your own hands, using cement and gypsum compounds.
Gluing process
People choose this type of decoration for several reasons:
- Wallpaper has a soundproofing effect.
- A wide range of textures and colors that can satisfy a person’s wishes.
- Fairly low cost.
- Ease of work process.
- Durable to use.
- Easily restored.
- Possibility of gluing even on a surface that is not perfectly flat.
Gluing paper wallpaper together
Immediately before the gluing process, it is necessary to prepare all materials and tools that may be needed during the work. The main ones can be identified as:
- A roller, preferably with a long handle, so that you can reach the top without obstacles. Its type does not matter, but the longer the pile on it, the greater the amount it can apply at a time, which can not only save time, but also significantly reduce glue consumption, since it will not dry out in vain on the surface and will not require re-use. its application.
- To smooth out bubbles that may form during application, you will need a cloth, preferably with a soft structure, so as not to damage the structure.
- Ladder. If one is missing, it can be replaced with a high table. It will even be much more convenient; you will have to move it around the room less. To avoid contamination with glue and other solutions, cover it with film.
- Containers in which the glue will be diluted.
These components are necessary regardless of what kind of wallpaper will be applied. For better quality work, the presence of two people will be required, since it is possible, but very difficult, to do it alone.
The instructions include the following steps:
- The first step is to measure the length of the ceiling. A piece from the common tape is also cut to a similar size. It is important that it is no smaller than the intended size. It is better to leave a few centimeters in reserve, which can then be easily trimmed carefully.
Coating wallpaper with glue - The adhesive is applied directly to the ceiling and not to the paper base. This way they will hold better and stick more easily.
- The strip is applied to the edge, and gluing begins from there. It is advisable that the partner helping with this hold the other end, thereby adjusting the direction.
- From the end from which gluing began, you should slowly walk with a rag, thereby smoothing out any bubbles that have formed. This should be done slowly and very carefully.
- If the strip turns out to be a little longer, it is trimmed with a sharp knife or using a spatula.
Formation of beacons
As mentioned above, cement-based solutions will be used for leveling. A leveling layer of the required thickness is laid on top of a reinforcing metal mesh fixed to the ceiling surface. Reinforcement increases the strength of the structure and prevents it from collapsing even under the influence of external influences.
Beacons are formed on top of the mesh, which are cone-shaped protrusions made of cement mortar. The height of such cones should coincide with the gap between the cord and the ceiling in this area. When each beacon has hardened, you need to connect them all - the result will be convenient guides that make it easy to remove the remaining leveling compound using a rule.
Having prepared the mixture, you can begin to apply it. A wide spatula is used for work. As a rule, one coat of coating is not enough, so several passes must be made. In any case, each subsequent layer is applied only after the previous one has completely dried. It is recommended to run over the bottom layer with a notched trowel before application to improve surface adhesion.
After filling the areas between the guides, excess plaster must be removed. To do this, the rule is carried out along the guides along the fresh coating. The rule needs to be moved not only along, but also across the ceiling so that the material is distributed more evenly. The remaining solution is used to smooth out uneven areas of the ceiling.
The last stage of leveling the ceiling is applying the finishing putty. It must be applied in several layers (of course, each previous one must completely harden before applying the next one). The finished coating is sanded, primed with a suitable hydrophobic composition, after which the ceiling can be decorated with any finishing material - for example, whitewash or foam tiles.
Preliminary ceiling repair
If large cracks or potholes are visible on the surface, you will have to plaster or putty the walls. It is imperative to prepare the walls before work.
What should be done:
- tap the ceiling with a hammer along the entire perimeter to detect voids;
- We check corners and joints with a screwdriver;
- when problem areas are found, you need to clean them from dust;
- if the ceiling is uneven, there are many cracks and potholes, you need to evaluate the amount of work.
Most likely, you need to first prime the surface and then plaster the ceiling. Deep cracks are blown out with polyurethane foam. To remove minor defects, you will need rough putty. It is moistened in water. In order for the putty to adhere well, you must first apply it across the crack, and then along it, using a narrow spatula. When the composition hardens, the excess is removed with sanding paper.
How to strengthen the ceiling
In some cases, it is necessary to use fiberglass or paint mesh. These materials are needed to perfectly align a curved wall. By applying a mesh or fiber to the surface, you can create a rigid frame for the putty.
How the work is carried out:
- For ceilings with large differences and unevenness, use a 2*2 mm mesh. It sits on the same wallpaper glue.
- Rough putty is applied to the painting mesh. Allows time to dry.
- The ceiling is sanded with fine-grained paper.
- Dust after work is removed with a damp cloth or vacuum cleaner (if the suction is poor, read the article here).
- Wallpaper glue is used for priming.
If glass fiber is used, then squares with a thickness of 1.5-2 mm are selected. When working, joints must be treated with a wire brush. To prevent the material from crumbling, you need to cover it with oil paint. Once it is dry, you can continue working.
For a ceiling covered with chipboard, the mesh is glued to the joints. For more precise adhesion, it is impregnated with drying oil. After installation, the seams must be sanded and smoothed with putty.
Attention! When working with chipboard ceilings, pay attention to the screws. Their caps should be recessed inside.
Putty and sanding
To perfectly level the surface, use two layers of putty. They are applied perpendicular to each other. If you are going to use liquid wallpaper, then take this requirement into account. Apply the second coat only when the first is completely dry.
Preparing the ceiling for wallpapering is considered complete when all irregularities are removed with a sanding machine. Next, you need to remove the dust and prime the surface with the same glue that will be used for wallpaper.
The process of preparing the surface for wallpapering includes several stages. It is important to clean the ceiling from the old cladding, then level the surface and remove defects efficiently.
Dry ceiling leveling
Dry leveling most often means a suspended plasterboard ceiling. Unlike plastering, this method is quite simple, which allows you to perform all operations yourself, even if you have no experience in carrying out such work. However, this method also has a number of rules that must be followed.
First of all, you need to prepare the base. Remnants of previous coatings are removed from the ceiling surface, rust marks are removed and sealed. The next stage of preparation is the installation of a waterproofing layer, which will prevent flooding of the apartment by neighbors from above. Waterproofing is needed even when using moisture-resistant drywall, which, despite its name, cannot withstand direct contact with water.
Leveling the ceiling with putty yourself. Subtleties of the ceiling putty process
DIY repairs. how to level walls with plaster?
The ceiling plays a huge role in interior design, so its high-quality finishing requires a flat and smooth surface. The most popular method of preparing a ceiling is puttying. This process is characterized by its technological features and allows you to hide all the flaws, making the base ideal for subsequent construction work. In order to perform puttying correctly to obtain an effective result, you need to select the appropriate mixtures, and it’s good to have certain skills.
Process Features
Leveling the ceiling with putty is in great demand among craftsmen, as it can be performed on stone, concrete bases, brickwork, plasterboard sheets and building boards. And in order for the surface to be well prepared for decorative finishing, you need to putty on durable, clean and hard surfaces.
Ceilings that are covered with glass, metal and plastic are considered unsuitable for alignment. It is not recommended to use putty in rooms with high humidity, where the ceilings have been exposed to water for a long time.
This type of alignment is used in three cases, and each of them is characterized by the following features:
- Before painting the ceiling. In order for the paint layer to be evenly distributed over the base, the coating must be of high quality. Therefore, it is necessary to apply putty correctly, following all technologies. If even the slightest defects remain on the ceiling, the finish will be ruined. This task can be easily handled by professionals, but if construction work is carried out independently, then it is advisable to first learn how to do this in small and accessible areas, and then proceed to the ceiling surfaces.
- Under wallpapering. In this case, the ceiling does not require a high-quality base; it is enough to eliminate large flaws and hide irregularities. The same applies to preparing the surface that will be decorated with a suspended ceiling.
- Before applying decorative plaster. The finishing material itself is an excellent leveler, so using putty you can only remove large cracks and pits; plaster can easily handle the rest.
Frame marking
Next we will talk about a simple plasterboard structure, intended only to level out the shortcomings of the base floor. There are also more complex configurations, but they place serious demands on the skills of the master, and the repair costs will be disproportionately higher.
The marking is carried out in exactly the same way as in the previous case. Along the perimeter of the walls you need to draw lines that will indicate the level of the future ceiling. Marking is applied using a water level or level. The main thing is that the necessary marks are marked on each wall and exactly relative to each other.
Next, on the ceiling itself, the location of the frame parts is marked, which can be manufactured according to two basic schemes:
- Lathing with cells 60x60 cm, in which adjacent sheets are placed along one profile;
- A linear frame in which parallel guides are attached in increments of 40 cm, and the transverse parts of the frame are located only under the plasterboard joints.
Calculation of materials for the ceiling
There is no direct relationship between the type of frame and the cost of leveling the ceiling. Both types of frames are quite strong and reliable, so you should choose the option that is better suited for a particular situation.
To arrange the frame in accordance with the markings, the following quantity of materials is purchased:
- UD profiles - the total length must correspond to the total perimeter of the room, increased by 20%;
- CD profiles - these parts must have a total length that matches the number of lintels on the ceiling, increased by 20%;
- Suspensions - purchased in the quantity required for installation in increments of 60 cm.
Plasterboard sheets usually have dimensions of 2.5 x 1.2 meters. For a simple plasterboard ceiling, the calculation of the required number of sheets is carried out in accordance with the drawing, on which all structural elements should be displayed before work begins. The number of screws is also calculated simply - one sheet requires 100 fasteners. The total amount of dowel screws is equal to the sum of twice the number of hangers and the cost of fastening UD profiles in increments of 40 cm.
Frame installation
The algorithm for assembling a frame for a plasterboard ceiling includes the following steps:
- First you need to install UD profiles around the perimeter of the room at the desired level. After this, hangers are attached to the ceiling surface in accordance with the markings. After installing the CD profiles, the edges of the hangers will be bent to fix the jumpers.
- The connection of individual frame parts is carried out using a “crab” type fastening. To connect parts along the length, you can use either a similar fastening or conventional joining - the profiles simply overlap each other with an overlap of about 10 cm and are connected with self-tapping screws.
If the ceiling surface is initially flat, but not smooth enough, wooden beams can be used instead of profiles. In this case, the installation technology is increased by one stage - all wooden elements must be treated with an antiseptic and a moisture-resistant compound before installation.
Preparing the ceiling base
Removing existing coverage
When starting work, the first thing you need to do is dismantle the existing coating. The method of its removal depends on the original finishing material. For example, if it is whitewash or water-based paint, then a spatula or scraper will be needed.
To speed up the process, it is recommended to wet the ceiling and leave it for a while with the window open. After this, it will be much more convenient to clean off the old coating, and the work will go faster.
The wallpaper is simply torn off (dry or by soaking) or removed with specialized means.
Cleaning the ceiling
After the entire surface is completely cleaned, it must be washed. This must be done thoroughly so as not to leave traces of the previous coating. To do this you will need a regular sponge and a large amount of water.
Drywall installation
There are a number of rules that must be followed when attaching plasterboard sheets to the frame:
- You need to leave a small gap between the sheets and the wall (2-3 mm is enough);
- The sheets must be placed offset so that their transverse joints do not coincide;
- Self-tapping screws are screwed in every 20 cm and slightly recessed into the sheets - this will allow them to be covered with putty in the future;
- In the abutting areas, the sheets must be chamfered so that these areas are subsequently completely filled with the mixture.
To understand in detail how to install a plasterboard ceiling, it is best to read the corresponding article with a detailed description of all the steps. The same applies to puttying drywall - this work has many nuances that deserve careful study.
Plastering and puttying
Plaster will help level the ceiling and hide all visible unevenness. By the way, the degree of leveling will depend on the wallpaper material. For example, glossy wallpaper highlights any defects, so the ceiling underneath it must be perfectly smooth. But embossed non-woven wallpaper, on the contrary, hides the chalk unevenness of the base.
Watch a video on how to properly putty a ceiling :
For putty you will need the widest possible spatula. The plastering process was described in more detail in one of the previous articles here.
After finishing the previous stage of work, you should go over the unevenness or stripes remaining after filling the ceiling with a grater with a sanding mesh (sander). This is the final alignment and preparation.
IMPORTANT
Never glue wallpaper to a freshly putty ceiling. First you need to wait for it to dry completely.
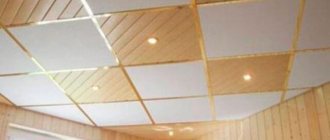
Leveling the ceiling with tiles
For dry leveling, not only drywall can be used. One option is plastic tiles, which allow you to hide imperfections in the base and level it. Installation of this material is carried out in the same way as in the case of plasterboard - first the ceiling is prepared, then the frame is formed, and the tiles are attached to it.
Perhaps the only difference is that the tile has a special lock, which allows you to do without putty on the finished finish. Among the advantages of this option, it is also worth noting ease of installation, complete resistance to direct contact with water and relatively low cost.
How to level the ceiling
There are two ways to make the ceiling smooth:
- using building mixtures, of which there are three main ones: putty, plaster, rotband;
- sheets of drywall.
The quality of the result obtained, a smooth ceiling surface, depends not only on the technology of performing each step, but also to a large extent on the quality of the materials used.
The use of special mixtures for leveling is justified when the surface area is small or the unevenness on it is small and there are few of them. You should also pay attention to the magnitude of the unevenness difference.
The construction mixture will hide a difference of 3-4 cm, but if it’s more, then it won’t. The size of the difference is determined by the building level.
Also in the process you will need a spatula, a hammer drill with a special attachment, and a roller (some use a brush).
Dropped ceilings
Various options for suspended structures are not only an excellent way to level the ceiling, but also a decent finishing touch. Suspended ceilings are actively used to implement a wide variety of interiors and design solutions, which is largely due to the high decorative properties of such structures.
Among the disadvantages, the first thing worth noting is the high cost. Of course, versatility and practicality are worth it, but the cost of repairs with the installation of suspended ceilings will be very high. In addition, there is a height limitation - it is not practical to install a hanging system in rooms with low ceilings. Independent installation of these structures is quite complicated, which will increase labor or financial (if specialists are invited) costs.
Stretch ceiling
Another solution based on the principle of masking an unsightly base is suspended ceilings. Such designs are distinguished by high decorative properties and allow you to hide any shortcomings of the base floor. There are two types of these structures - elastic and fabric, which differ in the material used to make the fabric.
It is quite difficult to install a suspended ceiling yourself due to the nature of the fabric - it is very easy to damage during the installation process. Correcting errors will worsen the appearance of the structure and the desired effect will not be achieved. To prevent such things from happening, it is best to immediately entrust the installation of suspended ceilings to professional builders.