The need for veneer finishing
Plywood is a type of laminated lumber made from natural wood. But, despite its natural origin, the raw materials for the production of plywood are inexpensive wood species with an inexpressive fiber texture and an insufficiently attractive color.
In order to refine inexpensive material, rare or even valuable species are glued on top. As a result, the price of lumber increases slightly, while the aesthetic design improves significantly.
Finished veneered plywood and products made from it look as if they were made entirely from rare wood. However, along with a more attractive and solid appearance, as a result of veneer finishing, plywood acquires improved technical and operational properties.
Furniture made from inexpensive materials (MDF, chipboard, plywood) can be given a noble appearance by imitating their surfaces to resemble solid wood. To do this, you need to learn how to glue veneer in order to achieve a high-quality result.
Impregnation for stone veneer
By its nature, slate is a porous material that can absorb moisture, fats and other substances. To minimize damage to the surface after installation, special impregnations - impregnates - must be applied to the panels. This treated flexible stone finish will not only last longer, but will also have a more attractive appearance.
The following compositions can be used:
- Water-based impregnations
are used on panels located in dry rooms and without large mechanical loads, for example Henkel Ceresit CT17. Such compositions protect the material from dust deposition. - Acrylic impregnations
, such as IPKOM (IP-01) EcoCristal, have greater strength and protection from moisture, therefore they are suitable for kitchen facades and aprons, panels for bathrooms, halls and corridors. - Polyurethane compounds
are considered the most durable and help protect canvases from external influences of an aggressive environment, such as atmospheric conditions. One of these is the façade semi-matte varnish IPKOM (IR-15).
Purpose of veneer
Veneer is a thin plate of natural wood obtained by peeling, planing or cutting. This material preserves the texture and decor of wood, which allows you to give the renewed surfaces the sophistication of ash, the presentability of oak, the splendor of mahogany, the delicacy of birch, etc.
The main purpose of veneer in a home interior is the cladding of doors and furniture. If necessary, cornices, portals of decorative fireplaces, picture frames and mirrors are finished in wood. If an apartment renovation project involves the use of wooden wall panels, then in this situation, veneer glued to a cheaper material will cost less.
Stone veneer – colors
This material is made from natural stone, therefore it completely matches it in color and texture, which can vary from layer to layer. Manufacturers warn that marbled stone veneer is uneven in texture and shade due to its natural origin, which even looks more advantageous and aesthetically pleasing indoors.
The predominant shades of stone veneer are pastel colors from beige to dark gray. There are pink, greenish and multi-hued panels. Each manufacturer will have its own palette, based on the characteristics of the raw materials used. This variety allows you to choose the material to match any design solution in the interior or facade of the house.
Preparatory work
Items on which veneer is to be glued must be wood-based. The doors are removed, decorative elements are removed, and the fittings are unscrewed. The old coating is removed with a heated spatula. All surfaces are carefully checked.
If coniferous materials were used as a base, it is necessary to treat the places where resin leaks appeared. They are cleaned with a knife and wiped with 25% acetone (you can prepare a solution of soda ash for this purpose).
Existing knots to which the veneer does not adhere well are first removed. The remaining small recesses are filled with putty. For large holes, corks from chipboard are cut to shape and placed on glue. If defects in the form of chips, cracks, or gouges are detected on the prepared surface, they are puttied with a special compound for wood. After the putty has dried, sanding is carried out.
First, fine construction sandpaper is used, and then zero-grade sandpaper is taken. The prepared base after sanding should have a velvety, slightly rough surface, ensuring better adhesion of the glue. The last step is degreasing.
The next step is preparing the veneer. It is unpacked and the sheets are laid out on a horizontal plane. This will allow you to study the texture pattern and select individual fragments to obtain a complete image. If you have artistic taste, you can select interesting combinations from different wood species.
Selected and carefully joined sheets are connected at the joints with adhesive tape. The total size of the set should be approximately 10 mm on each side larger than the surface prepared for gluing.
If the material was rolled up, after rolling it out on a horizontal, flat surface, it is necessary to evenly moisten it with a sponge, spread paper on top, which will absorb moisture, and lay a sheet of chipboard (plywood, MDF).
Without the skills to feel how to properly glue veneer, it is advisable to start with surfaces that have small dimensions and are not façade, for example, shelves.
From the video you will learn more:
Bonding methods
Studying information on how to glue veneer, we can distinguish three main methods for carrying out this operation.
Watch the video to find out more:
Cold contact method
Involves the use of contact adhesive, characterized by a short period of exposure and setting. Because of these features, problems may arise when applying the method to large planes, since it will be impossible to correct inaccuracies when applying veneer, which very quickly sticks to the base. Important for high-quality veneer gluing is the compression force applied at the initial moment. The contact method is not recommended for large planes, being considered the most difficult, but it does not require the use of additional devices.
Cold gluing method with pressing
When it is used mainly on small objects, the glued veneer is fixed to the base with a clamp and the time necessary for the glue to fully set is maintained.
Hot gluing method
The layer of glue applied to the planes to be glued must dry for some time. Then the veneer is carefully and precisely applied, which, using a heated lapping hammer or iron, is straightened from the center to the edges along the grain. Due to the high temperature (≈ 150°C), the glue melts and provides reliable, uniform gluing.
Find out more from the video:
When using this method, it is necessary to take into account that the glue is taken with a thick consistency. During grinding, it is recommended to moisten the veneer with warm water, preventing the glue from drying out excessively. If during work, in places where the layer of glue was insufficient, swellings form, then it is necessary to make a small incision in the air bubble with a blade, introduce a little adhesive and rub it in.
When determining the algorithm for gluing veneer at home, to achieve high quality, it is necessary to first glue the side edges. A veneer plate with 10mm allowances is glued onto the façade planes, which are then carefully cut and sanded.
Before gluing veneer from the rarest and most expensive wood species onto a particle board, it is advisable to first glue cotton fabric or cheap veneer to the base as an intermediate layer.
To avoid deformation of the finished cladding due to different shrinkage of the material from which the item being renewed is made and the veneer, it is advisable to glue it across the fibers of the base.
The veneer is sanded along the grain using sandpaper No. 3. After the entire surface is cleaned of dust, the veneer is immediately varnished to avoid its possible peeling due to its ability to absorb moisture. You can use quick-drying transparent furniture nitro varnish.
If you follow the rules for gluing veneer, you can independently update the interior by upgrading furniture and other items with a beautiful finish that imitates the texture of valuable wood species. It will cost less than purchasing new furniture, and the effect will be no less impressive.
Once, at one of the “shabits”, I noticed a huge oak table in the owner’s garage, with massive cabinets, drawers, one of which even had a secret drawer. The table is covered with green cloth, reminiscent of the covering of a billiard table.
According to the hostess, the table was “with history,” and almost Stalin was sitting at it.
His son brought it to her from Abkhazia, after another Soviet sanatorium there was liquidated and everything they could was taken away.
Despite the fact that it was all worn out and the cloth was torn in several places, the table looked great. It was finished with the finest natural veneer, which in narrow places (front and end surfaces of drawers, doors, tabletop trim) was almost completely worn off, but the rest of the veneer finishing of such parts as sidewalls and partitions was almost not damaged.
I bought the table from the owner, and even then I had to learn the technology of veneering, which turned out to be not so complicated - I had to run around the shops longer, choosing veneer that would look like “aged” and would match the “Stalinist” in color. At that time, I couldn’t find the required veneer in stores at all; I had to start searching on the Internet, as a result of which I got a pack of veneer of the required shade, also, by the way, still made in the Soviet Union. By the way, I also bought the cloth on the Internet, ordered it from a man who makes excellent billiard tables with his own hands to order (at first he refused, but then, having learned what kind of table we were talking about, he immediately sent it, and took the money only for the cost price, for which I bow to him).
The table, however, didn’t stay with me for long - it’s not intended for apartments - it’s too big, and my ex-girlfriend demanded that I get rid of it, so I had to sell it.
But the technology of veneer finishing or veneering (veneering) can be useful not for such rare furniture, but simply for any furniture that you make with your own hands - after veneering it looks amazing.
Veneering techniques and technology
Finishing with valuable wood veneers is a quick way to give a product made from ordinary plywood an elegant appearance.
This article will help you veneer a large product, for example, a wall table (read about how to make it yourself in one of the following articles in the “Furniture” section).
Editing veneer sheets
Natural solid wood veneer is so thin that it “remembers” how it was stored. Therefore, before working with it, the veneer leaves need to be straightened - to make them as flat as possible. Most often, the leaves will be curled or warped. This especially applies to veneer made from valuable species.
It is not very difficult to straighten the veneer.
To do this, use a small amount of water - just wet the back side of the veneer
with a damp sponge. The veneer will react almost immediately. But perhaps not as it should (it may curl like bacon in a roll). This is where the principle of flat laying comes into play. Simply place the veneer between sheets of plywood and press down the package with a weight (Fig. 1).
Note. To absorb excess moisture, place a layer of wrapping paper above and below the veneer.
Editing edges
Natural veneer is sold (nowadays you can buy veneer for almost any type of wood for veneering) in sheets of different widths (usually no wider than 300 mm). This means that in order to veneer large surfaces
, for example, the cover of a wall table, the leaves need to be fused. And to do this you need to straighten the edge of each leaf. Do not try to do this with a sharp utility knife along the ruler, as halfway the knife will choose the direction of the veneer grain rather than follow the ruler. Use a planer. Take two 50x150 mm boards and use clamps to clamp the veneer between them (Fig. 2). To get the necessary
Joining veneer sheets
If you use contact adhesive (it sticks almost instantly), it is difficult to get an unnoticeable, even seam. Use the edge pre-gluing method. The thickness of natural veneer is usually 0.8-1.0 mm, which is quite enough for gluing edges with PVA glue (Fig. 3).
Note. Transparent tape makes it easy to check the quality of the seam.
Core preparation
While the glue on the edges is drying, prepare the core (the material to which the veneer is glued). As a core, you can use maple, birch plywood, MDF, chipboard or dense fiberboard.
When gluing veneer, two rules must be observed: firstly, the veneer fibers must run across the core fibers, and secondly, the size of the veneer sheet must be slightly larger than the size of the core.
Note. If the veneer panel does not need to be mounted in a frame (for example, on the side walls of a cabinet), it is advisable to veneer both sides of the panel to protect the core from warping. The core must be cut to size in advance. The protruding veneer can be trimmed later.
Gluing veneer
When using contact adhesive, you do not need the clamps or clamps that are required when using other adhesives. Contact adhesive is sold in two types - water-based and .
When using water-based glue, there is a possibility that the seams on the veneer may come apart as the glue dries. This is due to the initial swelling of the veneer and its subsequent shrinkage as it dries.
Solvent-based contact adhesive does not have these disadvantages: with it, the veneer does not expand. This glue is easy to apply. Using a brush, apply an even layer to the core and veneer. When the glue has dried (usually it takes 15 minutes), a second layer is applied to the first layer of glue, and both glued surfaces are combined with light pressure. Please note that the veneer must be laid the first time.
To properly align the core and veneer, place sheets of wax paper between them. This way you can slide the veneer into position, then remove the paper from under the veneer and press it into place. For pressing, a heavy rubber roller is used, which is used to roll the veneer, starting from the joint lines to the sides. As a result, all air bubbles from under the veneer come out.
Sawing parts with veneer to size
When the veneer is glued to the core, you can cut the panel to size using a circular saw (Fig. 5). To keep veneer chipping to a minimum, you should use a disc with at least 50 teeth.
Note. If both sides of the panel are veneered, circular sawing is not suitable. Use a router with an edge bit instead, and you can trim both sides without breaking the veneer protruding beyond the core (Fig. 6).
Veneering
GBOU College of Industrial Technologies "Krasnoderevets"
Essay
On the topic: veneer veneering
Completed by: Glebov A.A. Checked by: Savelyeva N.G. Grade:
Saint Petersburg
Veneering
Sliced veneer is used to make face cladding. It is obtained from assortments of deciduous and coniferous wood, as well as from burls (wood growths) of all types of wood. The texture (pattern) of the front surface of the veneer depends on the type of wood and the direction of the veneer cuts relative to the growth rings of the wood. There are radial, semi-radial, . tangential and tangential-end types of veneer.
Types of veneer
| Designation | Types of front surface | |
| annual layers | heart-shaped rays | |
| "R" - radial | Straight parallel lines across the entire surface of the sheet | Stripes located on at least 3/4 of the sheet area |
| "PR" - semi-radial | Straight parallel lines located on at least 3/4 of the sheet area | Oblique or parallel stripes located on at least 1/2 of the sheet area |
| "T" - tangential | Growth cones, angular or curved lines | Longitudinal or oblique strokes or lines |
| "TT" - tangential end | Closed curved lines | Curved lines or strokes |
Due to the structural features of individual wood species, veneers made from walnut, pear, velvet wood, and mahogany are not divided into types; Pine veneer is produced only in radial and semi-radial types; burl veneer (growths) has a tangential end cut.
Sliced veneer thickness
| Wood | Veneer type | Thickness, mm |
| Deciduous species: finely dispersed-vascular (birch, beech, hornbeam, pear, willow, linden, alder, aspen, poplar, mahogany - dibetu, mako-re, moabi, sapeli) | R, PR, T | 0,4; 0,6; 0,8 |
| macrovascular (mahogany - aile, bose, limba, sipo, famire, tiama) | R, PR, T | 0,6; 0,8 |
| ring-vascular (velvet tree, oak, elm, elm, chestnut, ash) | R, PR, T | 0,8; 1,0 |
| conifers | R, PR, T | 0,8; 1,0 |
| caps (growths) of all breeds | T T | 0,4; 0,6; 0,8 |
Sliced veneer is produced as edged (cut on both sides to length), cut (cut on one side to length) and unedged. The marking of sliced veneer is deciphered as follows: for example, oak P1-1.3 (oak veneer, type of veneer P (radial), grade 1, sheet thickness 1.3 mm.
Peeled veneer is used as a sublayer and as a front layer when veneering. Peeled veneer is obtained by cutting a thin layer of wood in a spiral from a rotating log. Peeled veneer is made from birch, alder, beech, oak, ash, linden, aspen, larch, and cedar wood. When peeling, the resulting veneer has a texture close to tangential. The decorative qualities of peeled veneer are lower than that of planed veneer.
Depending on the quality of wood and processing, peeled hardwood veneer is produced in five grades: A, AB, B, BB, C. Softwood veneer is produced in four grades: AX, AXB, BX, CX.
For the front layers of cladding, veneer of grades A, AB, B, BB, C is used. Veneer is supplied in cut sheets with a width of 150 to 2500 mm, a length of 800 to 2500 mm, veneer thickness for hardwood from 0.35 to 1.25 mm, for coniferous species from 1.2 to 4.0 mm.
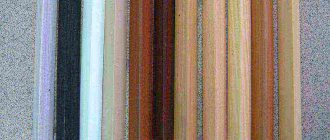
Veneer comes on sale with a length of about 500 mm, a width of up to 200 mm, of many species, most often mahogany veneer (reddish-brown color, mottled structure), walnut (beautiful and varied structure, color shades from light brown to dark brown can vary over a small area), oak veneer (has a yellow-brown color), beech veneer (has an expressive, rich orange color and light and dark lines scattered over the entire surface), ash veneer (has a very rich range of pinkish-yellow color and faint wavy texture).
Preparation of facings
Natural sliced veneer is supplied by its manufacturers in the form of knols - packs in which its sheets are laid strictly in the order of their removal from the veneer. This ensures uniform texture in adjacent sheets. But the length and width of the manufactured parts cannot correspond to the original width of the sliced veneer and must be cut to size into sections. The production uses guillotine shears and circular saws for longitudinal and transverse cutting of veneer with milling supports for jointing veneer edges in a bundle. Guillotine shears for longitudinal cutting of veneer can have one knife up to 4.8 m long. For transverse cutting, shears with a shorter knife are used - up to 0.8 m long. Both of these machines can be installed at right angles to each other so that the bundle , cut lengthwise, immediately moves along the table of the first machine to the second for cross cutting. There are also guillotine shears, equipped with two knives, in which the bundle is cut to a given width from both sides at once. In this case, one of the knives makes a working movement from top to bottom, and the second – from bottom to top. To obtain a pattern on the shirts made up of sections with different directions of wood fibers, the pieces cut to a given size and at different angles are glued together on an edge. There are about two dozen ways to create such a pattern (types of veneer set): longitudinal, transverse, “fishbone”, rhombus, envelope, oval, etc. Edge gluing of veneer is carried out on various types of machines: using a rubberized tape with perforated holes in it, using an adhesive thread (in sections or with a zigzag application) or by gluing end-to-end onto a smooth fugue. Edge gluing using rubberized tape has significant disadvantages: remaining after gluing the veneer (veneering the workpieces) on top, it is difficult to remove by sanding, and if it is placed under the veneer, the adhesive connection is weakened. In addition, as when joining with adhesive thread, the fugue remains open after veneering, and varnish is pushed into it during finishing. Previously, when applying thick layers of polyester varnish, this was not of decisive importance, but recently, when thin-layer varnishes are mainly used, the formation of cracks in the veneer joint area is unacceptable. This situation places special demands on the straightness of veneer edges, which today has forced furniture manufacturers to return to the use of edge jointers and ridge gluing machines for adhesive joints of veneer sections end-to-end.
Special Operations
When cutting veneer sheets to length, it is almost impossible to avoid the formation of short-length business waste. Therefore, in enterprises where their volume is quite large, installations are used for splicing short pieces of veneer onto a toothed tenon along the length. These units are produced by only four companies in the world: Kuper (Germany), Casati (Italy), Ludi (Holland) and Marunaka (Japan). The transverse joint of the veneer, due to the special shape of the stamped teeth, when properly glued, turns out to be practically invisible, and the glued sheets can be used for veneering non-facial surfaces of furniture products. Installations for longitudinal splicing are equipped with machines for duplicating a continuous web of veneer with fleece (non-woven material), which can cut the resulting web into sheets or lengthwise to produce rolled edge material. For splicing, the flatness of the material is important: the veneer of some wood species tends to shrink unevenly during the drying process, which leads to the formation of wavy edges that cannot always be removed when cutting. Therefore, such veneer must first be straightened, which is achieved by moistening it and placing it in a cold press for several hours. Only flat veneer can be subjected to high-quality duplication and used for veneering layers. Otherwise, it may become wrinkled or torn. Duplicated veneer, especially intended for veneering profile moldings, must be sanded. For this purpose, special wide-belt sanding machines are used, where in the grinding zone the veneer is pressed against a rigid support located under its strip and bent to avoid through sanding. Sanding veneer significantly reduces the cost of the production process: it becomes possible to refuse to purchase equipment for grinding veneered parts, especially profile moldings. However, intermediate sanding after painting or priming to remove lint remains necessary, but it is performed using simpler and cheaper equipment. An important operation when preparing shirts is gluing their ends to avoid the appearance of cracks that cannot be eliminated after lining the blanks with them. Sizing is carried out using rubberized tape using a simple unwinding device equipped with a wetting device and a rolling roller. Another method is to use a glue thread, applied along the end of the plot using a hand-held device, in which the thread is heated to the melting temperature of the glue and immediately rolled to the surface of the veneer using a roller. There are also double-sided machines for gluing veneer ends with glue thread, but they are not widely used in most enterprises due to the need for constant readjustment to the width of the veneer jacket.
Veneering of workpieces
Cladding is one of the groups of technological operations related to finishing. The operation of veneering with natural veneer was previously called veneering - from the original name of this material: plywood (from the Dutch faneer). What is denoted by the word “plywood” today was called laminated plywood until the end of the 70s of the last century, and veneer (until about the beginning of the 50s) was a sheet blank cut to size for the manufacture of laminated plywood. Then there was confusion in terms, and disputes about what was actually called “plywood” and what was “plywood”. But over time, the name “plywood” was assigned to glued plywood, which was then approved by GOST, while real plywood received the name “veneer”. But the term “veneering” remained, and attempts to introduce the concept of “veneering” among professionals can be attributed to another invention of laymen who have never read textbooks. The cladding of flat parts is always double-sided. As a last resort, paper can be used for the reverse side of the part, which is invisible during operation of the product - the so-called “counter-pull”. Moreover, the properties of the counterdraft must correspond to the properties of the veneer cladding. Otherwise, with asymmetrical cladding, the part will definitely warp. Before selecting veneer sheets, the front and back sides of the veneer must be determined for each plot. All pronounced cracks formed during planing should be on the wrong side. If any of the plots are accidentally turned over during assembly, this will affect the quality of the finished surface. The consumption of glue is important: if it is insufficient, local or complete detachment of the cladding from the substrate may occur, and if there is excess, penetration, that is, penetration of the glue onto the front surface, which leads to irreparable defects due to the appearance of stains and reduced adhesion of finishing paints and varnishes. Therefore, the application of glue to the surfaces of the parts to be coated in professional industrial production is carried out using roller glue-applying machines equipped with metering shafts that ensure uniformity of the specified glue consumption.
Veneer finishing - technology
Veneer can be finished like solid wood. First, the panel is cleaned to remove fingerprints and traces of contact adhesive (read more). Remember that you cannot clean the same place for too long (especially with a sander), otherwise you will quickly wear through the thin veneer!
Finally, cover the veneer with stain and varnish, as is usually done on any product.
The photo shows the techniques and technology of finishing with veneer-veneering. The numbers indicate the stages of finishing:
- Editing sheets
. Place the veneer between sheets of plywood, press down on top with a weight and leave overnight. - Straightening the edges
. To get an invisible seam, you need to straighten the edges of the veneer sheets being joined. Clamp them between the scraps of boards and run the whole bunch through the planer. - Gluing veneer edges
. To join the veneer sheets, apply a thin layer of glue to the edges with a brush. - Connecting parts
. When joining sheets of veneer end-to-end, before the glue hardens, glue them together with adhesive tape. - Sawing to size
. Using a circular saw, cut out the core with glued veneer to size. To keep chipping to a minimum (especially when cutting crosswise), saw with a fine-toothed blade. - Trimming with a cutter
. Trim the veneer protruding beyond the core with an edge mill. Mill counterclockwise.
One of the significant disadvantages of wood is that it quickly loses its attractiveness. Even if the conditions for its storage and use of lumber products are the most favorable, over time the surfaces inevitably change color and “fade,” that is, the wood loses its original appearance.
Many technologies have been developed for restoration and renovation of furniture and structural elements. One of them is veneering (the term veneering is sometimes used), which is quite accessible for DIY implementation.
There is no definition of the term “veneering” in various dictionaries. In essence, it means pasting materials with the thinnest layer of decorative wood-based coating. In principle (if you don’t go into specific details) this is the same lamination technology. The only difference is that, as a rule, products (objects, structural parts) made of wood are subjected to such surface finishing.
Veneer has a certain classification. Differences in production technology, as well as durability and specific use. A detailed description of the groups is unlikely to interest the reader. It is enough to note that if you plan to finish furniture with your own hands, then it is advisable to focus on peeled veneer (a natural product)
and fine line (the so-called reconstructed modification).
They have a lot in common - ease of working with the products (the layer is very thin), a variety of textures (especially fine-line modifications) and an affordable price.
Veneering technology is applied not only to wood, but also to materials (sheet, slab) based on it - chipboard, OSV and a number of others.
Therefore, talking only about furniture restoration is not entirely correct. With the help of veneer, you can give a “second life” to old door jambs and panels, wall panels, countertops - there are plenty of options for using such finishing.
There are several technologies for fixing veneer. There is only one available for DIY implementation - “hot”, which is based on the use of glue. This technology. The other two require special equipment and are not suitable for home use.
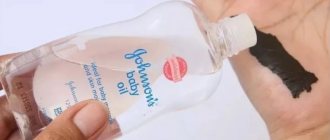
How to make veneer at home
To do this, an adhesive is applied to the cleaned surface, and when the glue dries, it is covered with another layer to ensure the best binding effect. Next, a veneer blank is placed on the glue and secured through damp gauze or a sheet of paper with a heated iron set to medium temperature when heating. To prevent the sheet from going in waves, after ironing, go over it with a roller. The veneer sheets are joined on the surface with an overlap of 3-4 mm.
At the final stage of the do-it-yourself veneering technology, the remaining veneer is removed, the edges of the cuts are sanded and sanded. If traces of glue are noticeable in the joints, they can be easily removed by walking with a soft cloth or cotton wool soaked in a solvent. And in order to improve the aesthetic and performance qualities of the surface for the future, the veneer can be additionally coated with varnish, and then the fittings can be returned to their place and the door can be hung on its hinges.
16.04.2018
Hot veneer technology
Preparing the base
- Removing fittings (if any) and structural parts. For example, a peephole from a door leaf, the rim of a keyhole.
- Dismantling the old layer of finishing on a wooden surface. It’s easy to decide what you’ll need – a spatula, an iron for heating the coating, and so on.
- Elimination of existing base defects. Methods and materials are selected based on their nature and “depth”. Basically, grouting agents, putties and adhesives are sufficient. Upon completion of the work, the base is carefully sanded so that no bulges, dents or folds are formed when the veneer is applied.
Veneer preparation
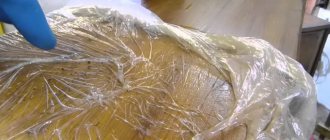
- Editing sheets. This thin finishing material is sold in rolls. Consequently, when straightened, it will try to return to its original position (memory effect). To restore their correct geometry, just walk along the reverse side with a damp sponge. The veneer will soften somewhat and straighten out. To consolidate the result, the sample should be clamped between two flat surfaces. For example, sheets of plywood, fiberboard slabs and the like, depending on the size of the fragment. To quickly remove moisture from the veneer, it is advisable to cover it with soft cloth or paper. After drying, it will remain in a straightened position.
- Editing edges. When restoring large surfaces, one sheet will not be enough. Veneer is sold with a blade width (with rare exceptions) of 30 cm. Consequently, splicing of fragments cannot be avoided. Edge straightening is nothing more than cutting sheets along a line. At home, 2 pieces of boards with treated ends are quite suitable for this (as an option). A sheet of veneer is placed between them so that only its edge protrudes. All that remains is to clamp the resulting “assembly” with clamps and trim off the excess (irregularities) with a sharp knife. It is advisable to work with a special tool designed specifically for cutting cardboard or thin plywood.
Veneering
Applying glue.
Recommendations for using the selected adhesive are always given by the manufacturer. But those who have already done this work with their own hands advise processing the base in 2 passes. First, the thinnest first layer - a short exposure until it “sets” - then the second. This technology allows you to see all the imperfections and distribute the glue as evenly as possible over the entire area.
Fixing sheets.
Experienced craftsmen recommend placing a sheet of paper (only waxed paper) first. The reason is that the veneer is thin, easily damaged, and it is unlikely that it will be possible to place it on the base immediately as needed. This means that it will inevitably have to be moved. When it reaches the optimal position, it is quite easy to remove the wax sheet without damaging the glue layer.
Processing of joints.
- Before the glue dries completely, in order to ensure the quality of the veneer, it is advisable to secure all joints with adhesive tape. Then it is easy to remove it.
- In some cases, it is advisable to first fasten the veneer strips into a single sheet, and only then lay it on the base. You will have to decide for yourself what to do best. But it’s worth considering (as one of the acceptable options).
- To avoid moisture absorption into the base, it is advisable to veneer not only the front part of the sample, but also the back and ends. This should also be taken into account when determining the course of action.
The final stage
After the adhesive composition has hardened (which implies reliable fixation of the veneer), a number of simple technological operations are performed.
- Inspection of the surface and identification of possible defects in the work.
- Removing excess (if any) glue.
- Sanding joints (edges). Extreme care must be taken here. The veneer is thin, and excessive zeal will lead to bald spots. Everything will have to be redone, since it is difficult to disguise the stains to match the finish, and it will not always work. Of course, the highest quality polishing is ensured by a grinding machine, but not every home has one. If possible, asking friends for some time is the best solution.
- Application of a protective coating. This is necessary mainly for peeled veneer. It is not difficult to choose a composition, depending on the design of the sample, its purpose and specific use. The range of various oils, varnishes, and stains is impressive.
Having dealt with all the nuances, it becomes clear that do-it-yourself veneering is not a very complicated process. Knowing the technology, anyone can implement it at home. And if you wish, you can bring some of your own “zest” to this work.
Good luck to you, home craftsmen!
There comes a time when wooden furniture or doors lose their original appearance. There is no need to throw away such products. Thanks to new technologies, a variety of finishing materials, and design developments, they can be given a modern look.
One of the finishing materials is veneer. To make it, wood is used, from which a thin layer is cut. At the same time, the material retains the structure of the tree.
You can decorate interior items using veneering technology. Making a new one out of an old product is not too difficult. If desired, repairs can be done by yourself. It is advisable to watch the video before starting work.
Advantages of the material
Natural veneer has a number of advantages:
- Veneer made from wood is an environmentally friendly material. Its qualities are equal to solid wood.
- Decorative trims with patterns, different colors and textures are available on the market.
- The surface after pasting is smooth, chips, scratches, and mechanical damage are almost impossible.
- Finished products covered with veneer are distinguished by sophistication and nobility.
- Plywood is made from veneer.
It is important to know:
When choosing the right material, read the composition. Today there are similar products made of plastic or eco-veneer (glued together pressed wood waste).
It is not advisable to replace wood veneer with them; they are less environmentally friendly and have a short service life.
Stone veneer - analogues
In addition to the fact that there is natural flexible slate, an artificial analogue was created to reduce the cost of finishing. This is a completely synthetic polymer material, which is approximately 2-3 times cheaper than its natural version. Other advantages of artificial panels:
- Lightweight and easy to install.
- A large selection of colors and patterns that will be the same on all panels.
- Easy to install and can be installed on a wide variety of surface shapes.
Preparatory work
To perform high-quality veneering you need to acquire:
- veneer and glue;
- ruler and paper for cutting out the template;
- plywood knife and veneer cutter;
- iron and syringe;
- with a wooden roller or iron.
Restoration should begin with the dismantling of fittings and decorative elements on furniture walls, doors or other products. The old coating, which has served its purpose, is removed with a spatula.
The surface must be carefully leveled, eliminating any defects with glue or putty.
. After complete drying, sand it with sandpaper.
Under each sheet you need to put soft paper (to absorb moisture) and plywood. Place a small press on top. This is clearly visible in the photo. Smooth sheets are cut into strips with a veneer cutter or plywood knife, in accordance with measurements.
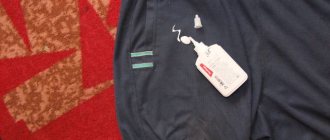
The facing material is glued to the base of the restored products using the hot veneering method:
- The adhesive composition is applied to the prepared tape, as well as to the required part of the product. To ensure that the veneer is glued, the glue application procedure is repeated again after the first layer has dried. If the glue is applied only once, then it needs to dry slightly for 10 minutes.
- Using an iron heated to 50 degrees, we iron our workpiece, using white paper as a backing. The glue should not boil so as not to lose its properties.
- We press the veneer using a roller to the place to be restored on the product.
- When joining, an overlap of approximately 4 mm should be used. In these places you need to work hard with the iron. If there are any defects left, you will have to trim the veneer and add glue by squeezing it out of the syringe.
- After this, the area is ironed again with a hot iron.