Cracks in the enamel and yellow spots are not a death sentence for an old home bathtub. The former gloss and perfectly smooth surface can be restored. Moreover, it is quite possible to do this on your own, without turning to the services of companies offering assistance in restoring bathtubs. How to paint the inside of the bathtub? There are several options at home. Let's try to figure out what is better: enamel, acrylic, bath in a bath or spray painting. Although the artisans, it seems, have already made their choice. They recommend that beginners who decide to paint a bathtub for the first time should opt for acrylic. Painting with enamel will require experience.
- 2 Preparing the surface for painting
2.1 Preparing an iron bath for painting with enamel - 2.2 Preparing the bathtub for acrylic painting
Epoxy enamel or acrylic
Painting a bathtub with enamel with your own hands is quite simple; you can cope with the task without the appropriate skills. The success of this event will directly depend on the dye. Not every paint is suitable for use in the bathroom, especially for painting the bathtub itself. And the problem lies not in contact with water, but in the humidity level, which is always high in this room. Therefore, the paint must have increased moisture resistance and good adhesion.
A hardware store can offer a choice of two types of compounds that are usually used to paint the inside of a bathtub: epoxy and acrylic enamels. Other paints will not give the desired effect; they will begin to flake and flake a few weeks after application. All the work will be in vain. Enamel is produced in different colors, so there will be no problems with selecting the required shade. But it is better to buy products from trusted manufacturers who have already proven themselves well in the construction markets, so that the question does not arise about how to paint the inside of a bathtub at home. These include:
- Dulux . A very popular composition that is in demand not only among ordinary consumers, but even among professional craftsmen. Well suited for updating an old bathtub and other similar surfaces.
- Tikkurila . The company is located in Finland and produces high-quality products for various types of surfaces. The manufacturer pleases its customers with options that contain moisture-proofing primers and coating dyes.
- Jobi . Produced by a German manufacturer. Refers to washing paints. Increased resistance to moisture and high quality make it very popular. At the same time, it is resistant to various mechanical damage. After painting, you can safely clean the bathtub with brushes - this will not affect the new layer in any way.
If you plan to paint a cast iron bathtub, then you need several layers, preferably three. But shabby and old products and three layers of enamel will not save you. Everywhere an individual approach is required. It is worth remembering that each composition is prepared immediately before starting work. If you mix the paint too much, it may become unusable after a couple of hours, the composition will no longer be so elastic, it will become tight, and even layers will not be obtained. The applied layer of enamel requires the time indicated on the product packaging to dry. Only after drying can a second layer be applied.
When working, the door to the room must be closed, as well as the windows throughout the apartment. This way you can avoid many problems. For example, the circulation of air masses provides not only fresh air, but also dust in large quantities. It is very important that when painting the bathtub, no small contaminants get on it. Changes in temperature and humidity levels can also have a bad effect on the painted surface.
You need to paint carefully , smearing the composition with a flat brush.
It should have natural bristles. It is with such a tool that you can avoid the appearance of stains on the surface. Proper technology for applying a coloring composition involves painting from the beginning of the sides to the bottom.
Benefits of using liquid acrylic
Acrylic bath paint
The use of paint for a cast-iron bathtub (or more simply, “liquid acrylic”) has become the standard when updating a bathtub. Thanks to the use of this material, the work budget is reduced. In addition, you will not have to destroy the ceramic tiles, as happens when installing the liner.
Painting a bathtub using liquid acrylic will take only a few hours; professionals only need two hours to complete the work. All elements of the plumbing product remain in place, only the drain structures are removed.
After applying acrylic, you can use the bathtub for another 15 years or more, without having to worry that over time the coating will peel off from the base.
All of the above reasons indicate that it is better to give preference to this material.
Preparatory measures
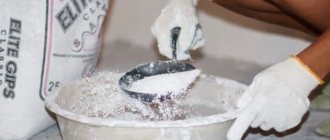
To paint a bathtub, you must first complete a number of preparatory steps. First of all, clean the inner surface of the bathtub itself from limescale and grease. To do this, you need to use an alkaline agent, the usual Pemolux or Sanox will do. But you cannot use substances that contain chlorine. Degreasing is simple: apply the substance to the surface with a dampened sponge and rinse off after 20 minutes.
Next, the surface needs to be cleaned of dirt, rust, and old paint, if any. Here you will need a grinding machine or electric drill. You need to protect your face with a respirator , wear safety glasses and gloves. A lot of dust and debris will be in the air from the sanding machine. But using an electric tool it is easy to remove the old layer. And in the drainage areas and in the inner corners you need to work with a wire brush or medium-grain sandpaper.
After this, the surface will be matte and rough, without corrosion and signs of old contamination. If there are significant mechanical defects (chips, cracks, dents), then they need to be puttied, otherwise in the future they will grow into large cracks. And then all that remains is to replace the bathtub with a new washing tank.
At this point the surface preparation can be considered complete. All that remains is to vacuum it, rinse it again with an acid solution to repeat the degreasing procedure. There should be no dust left in the air from previous work. No matter what paint is chosen, the surface preparation always remains the same:
- washing and degreasing;
- processing with electric tools;
- repeated degreasing and washing.
Then you will get the desired level of paint adhesion, due to which the service life of the new enamel layer will increase significantly. It is advisable to clear the room of nickel equipment and remove all earthenware items from there for a while. During the painting process, the enamel will release various volatile substances that will negatively affect nickel products. The washing machine is usually covered with plastic film to also protect its surface from enamel deposits.
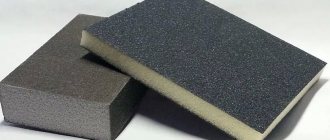
Required Tools
Painting an old cast-iron bathtub in an apartment by a specialist or with your own hands will not be effective without the following tools:
- Sandpaper with various grits;
- Paint thinner (No. 646) or alcohol (White);
- The putty is waterproof;
- A rubber spatula to carefully distribute the composition over the surface with your own hands;
- Roller for applying emulsion;
- Painting a cast iron bathtub with a spray gun;
- Grinding machine for processing the outside of the bathtub;
- A paint brush to paint the bath yourself;
- Drill;
- DIY nozzle for stirring enamel;
- Separate container for cast iron paint (bucket or basin);
- Container for diluting the primer;
- Bathroom paint.
Dyeing technique
After all the preparatory stages, you can move on to the most important thing - painting the surface. Some paints are heated first to increase efficiency. If you need to do this, then you just need to create the effect of a water bath: place an open can of paint in a container with warm water for half an hour. Then the warm mixture is stirred. That's it, it's ready for further use. To find out whether a certain type of paint needs to be heated, just carefully study the instructions from the manufacturer; all these nuances are usually indicated there.
- First, the composition for coloring is prepared in strict accordance with the manufacturer's instructions. Substances for mixing must be added in a strict order, and not in the way you like best. For example, first mix some of the paint with acetone, then add a hardener to this mixture - and then follow the instructions. If you add all the components at once to simplify the task, this will cause the composition to harden. And only properly prepared mass meets the necessary indicators and quality criteria.
- In terms of basic parameters, acrylic and epoxy enamels have few significant differences. But their application technology is different. The epoxy compound is usually applied from the sides to the bottom; the new strip should overlap the old one by an average of 50%. The acrylic solution is often applied in a spiral pattern with a paint roller.
- After the first layer has dried, the second is applied. And you need to start where the first layer began. Then the enamel will lie in an even, uniform and beautiful layer. This rule applies to both compositions.
After dyeing, be sure to check whether the cuffs and gaskets are suitable. Several layers of enamel can change the diameter of the drain hole and increase the thickness of the tank walls. Therefore, it is worth paying special attention to this.
Advantages and disadvantages
Painting a bathtub with enamel or acrylic has a number of positive qualities, but there are also some disadvantages. Let's take a closer look at all the benefits of capacity restoration:
- you can restore the original appearance of the enamel surface on the bathing container;
- there is the possibility of eliminating corrosion and accumulated rust on the corresponding container;
- subsequently, the structural element will keep the water warm for a long time;
- the service life of this design is significantly extended, since there is no direct contact between water and metal.
Despite a significant number of advantages, reconstruction also has some disadvantages. After coating the enamel layer, the service life is shorter than that of the initial coating. If you enamel a bathtub, its volume is significantly reduced. Restoring the structure when applying enamel requires significant material and physical investments; in addition, using the container for a certain period of time will be unacceptable.
Important. Before determining whether it is better to cover the bathtub with enamel or acrylic, you should evaluate the investment, and in addition, weigh the relevance of such work, since reconstruction cannot always be carried out.
Acrylic update
Of course, not everyone wants to paint their bathtub with enamel. Therefore, you can resort to the restoration method using poured acrylic. There is nothing complicated in this procedure either, and it is very easy to deal with.
First you need to carry out the preparatory work described above, then pour acrylic along the sides of the tank: the liquid will begin to flow down along the surface, filling all the old flaws. This method has significant drawbacks. For example, acrylic has poor adhesion to old enamel, so it must be carefully cleaned. In addition, if you scratch the acrylic surface too much, it will begin to deteriorate; over time, the water will simply wash away the new layer, tearing off the dried acrylic in whole pieces. But you can minimize these risks by covering the product in two layers. The thicker the applied acrylic layer, the more difficult it is to damage it.
In general, restoring an old bathtub is quite simple. This does not require a lot of materials and tools. It is necessary to approach responsibly the choice of paint composition and surface preparation, then the result will delight you with an unchanged appearance over a long period of operation.
Painting technologies and its features
Currently, there are two types of technologies that are used to cover the bathtub with this material. They differ from each other in the type of application of the restoration layer:
- enameling;
- pouring bath.
Enameling is done using a roller or brush, just like regular painting. In this case, the composition, which is usually available in ready-to-use form, is applied in two or three layers. The product dries completely within a day. Most often, this painting is used to update the color when the original shade has faded. In addition, this method is suitable for repairing minor enamel damage that does not involve iron.
The pour-in bath technology is based on the use of a two-component acrylic mixture applied to the surface without the use of special tools. In this case, the composition is evenly poured along the entire perimeter of the bath, it flows down the walls under the influence of gravity, forming a layer over the entire area. The result is an acrylic coating that is the same in thickness in different areas.
Thanks to this method, you can not only improve the appearance of the bathroom, but also protect its metal base. In this case, painting the bathtub with acrylic is carried out in one layer, after a day the coating completely hardens, and after three days the plumber is allowed to put the bathtub into operation. This method is used for damage of any complexity, cracks and holes, even if the metal base is affected.
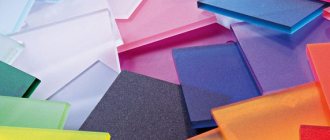
Which acrylic to choose for the bathroom
The domestic market offers many products designed to restore cast iron bathtubs. The most popular: “Plastol”, “Standard” and “Stakryl”. These are two-component enamels costing up to 1,600 rubles, packaged in 3.5 kg packages (the quantity is calculated for a bowl 1.5 m long).
Plastol. Stokryl. Standard.
The product is applied to the walls of the sanitary ware, where it polymerizes and becomes hard. High-quality coating is done in 24 hours.
Each enamel manufacturer has its own technology, the secret of which is carefully guarded. Depending on the brand, the product contains a hardener or degreasing liquid. It is recommended to purchase products from trusted manufacturers whose products are of high quality:
- "Stakryl Ecolor";
- "Plastol";
- "Ekovanna";
- "YarLi."
Ecovanna brand products have proven themselves in the market.
Developers who have technical laboratories at their disposal have experience in the production and sale of products. Unscrupulous competitors copy the products of these brands, producing inexpensive enamel that is vaguely similar to the original. Trying to save money, the consumer risks purchasing a low-quality product.
Restoration of acrylic bathtubs
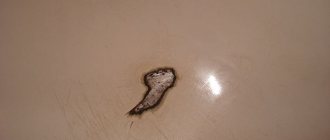
Cracks, scratches and other defects must be restored.
Before starting the restoration of an acrylic bathtub, you should determine the nature of the surface defects. They can be:
- Mechanical. Such deformations occur under the influence of shock loads, wear over time and careless handling.
- Chemical. In this case, the cause of damage is the detergents used for washing when soaking clothes and cleaning the coating.
In addition, you need to figure out how the sanitary ware is manufactured. An acrylic bathtub can be made from ABC polymer followed by application of acrylic in a layer of 5-10% of the total thickness of the product or by molding from cast acrylic. Models of the first type are easy to restore; it is enough to update them with a special restoration composition.
Repairing damage to bathtubs made of cast acrylic is more labor-intensive. First you need to select a restoration product so that its shade matches the deformed coating. Then the scratches and cracks are expanded, removing particles of acrylic and dirt, and the surface is degreased. A two-component restorative composition is applied to the damaged area, distributed evenly, covered with film and left to dry for 6 hours. Finally, the surface is treated with alcohol, sanded and treated with polish.
Preparing the base for repairs
Proper preparation of the bathtub surface for restoration is one of the most important aspects of this process. Even small, unnoticeable flaws at this stage can negatively affect the final result.
During preparation, it is necessary to solve the following tasks:
- remove dirt, rust stains, etc. from the bathtub;
- give the surface a uniform fine roughness;
- clean the base from any dust that has appeared;
- completely degrease the surface.
Thermal deformation is the main reason for compromising the integrity of the finished coating. These processes occur during drying of the coating due to the difference in the size of microroughnesses created on the surface of the base during pre-treatment.
Image gallery
Photo from
Pros of painting a damaged bathtub yourself
Eliminate complex and messy repair processes
Quickly change the tone of the interior
Advantages of hand-painted dyeing
Removal of contaminants from the surface of the bathtub is carried out using active detergents. Pemolux, powdered oxalic acid or another similar product will do. The powder is poured onto the bottom of the bath and a small amount of water is added to it to obtain a paste-like composition.
The ten best cleaning products for removing stains from the surface of the bathtub will be presented in an article entirely devoted to this issue.
Using a sponge or brush, spread this mixture over the surface of the bath and leave for about 10-15 minutes. It is best to use a new sponge, since the old one may still have some slight grease on it, which will complicate surface preparation.
After this, the cleaning composition must be washed off the walls of the bathtub and filled to the brim with hot water. The water is left for another 15-20 minutes and then flushed down the drain. When working with a cleaning agent, the bathroom should be ventilated, and the skin and respiratory tract should be protected with personal protective equipment.
The new coating will reliably fill chips and disguise areas with discoloration, but the base should still be thoroughly sanded, then cleaned and dried
This advice is especially relevant if oxalic acid or another equally dangerous agent is used as a cleaner. After this, you can begin cleaning the surface with abrasives. Traditionally, rust and stains are removed with coarse sandpaper and then treated with finer abrasives.
This way, cleaning the surface is faster and more efficient, but this is the wrong way when working with bath enamels. With this processing method, microroughnesses of different sizes are formed on the surface, although this difference cannot be determined visually or tactilely.
For initial cleaning of the bathtub surface, you can use Pemolux powder or another similar composition. It is poured onto the bottom of the bath, moistened with water and then smeared over the entire surface
When applying a coating to an uneven surface created in this way, the repair compound will not fill all the depressions. During drying, these microvoids will create excess stress, which will subsequently cause deformation of the coating.
To properly sand the surface of a bathtub under enamel, it is recommended to arm yourself with No. 1 sandpaper and a lot of patience. The work will go much slower, but the bumps will be almost the same size. This will have a positive effect on the drying process of the coating and will significantly improve its quality.
Before starting repair work, it is necessary to clean the surface of the bathtub and treat it with fine sandpaper to give the surface a uniform roughness
All places where there are streaks of rust must be sanded especially carefully. Of course, unsightly stains under a layer of thick enamel or acrylic will be reliably hidden. But the presence of iron oxide residues on the surface will disrupt the microrelief created during processing with abrasives.
As a result, there will be places where the likelihood of cracking of the coating is very high. In the presence of severe contamination, complete removal of the old enamel in such places is allowed, up to the exposure of the metal base.
After cleaning the surface, you need to perform one more operation: dismantle the drain and overflow. The resulting surface must also be cleaned. A drill with Durex is suitable here. The treatment is carried out until the contaminants disappear and the surface acquires the required dullness.
It’s easy to check the quality of the treatment: run your fingernail across the surface, it shouldn’t slip. Particularly meticulous craftsmen inspect the surface using an LED flashlight and re-clean areas that give shine.
For final cleaning of the bathtub before painting, use the Sanox cleaning agent or another composition based on acidic components
Now you need to remove the dust that has accumulated inside the bathtub, and also degrease the work surface. At this stage, you will have to restore the drain piping and dismantle it again.
The following recommendation must be followed: do not touch the work surface with your hands. Installation/dismantling of the drain is carried out using tools (tweezers, pliers, etc.), it is better to prepare them in advance.
First, the bulk of the dust from the bath is removed with a vacuum cleaner. After this, wipe the surface with a clean rag soaked in solvent until no dirt remains on the rag. Upon completion of the entire cycle of coating work, the tub piping will have to be restored.
Now you need to close the drain hole and pour approximately 500-1000 ml of active acid-based detergent, for example Sanox, into the bath. Alkaline cleaners are not acceptable at this stage. The composition is thoroughly rubbed over the surface of the bath using another new sponge. The bathtub, rubbed with an acidic cleaner, is left for about an hour and a half.
When preparing the surface of the bathtub for repair, it is treated with cleaning compounds, using clean rags or new sponges
After this, the bath is filled with water to the brim and kept in this form for another hour and a half. If everything is done correctly, the bath itself will heat up noticeably. If its surface feels barely warm, it means that the amount of acid cleaner is not enough; you need to pour about another liter of this product into the water.
You can drain the water only after the working surface has cooled down. After this, you need to rinse the bathroom with water two or three more times: draw water, wait an hour and a half, drain, etc. If the situation allows, washing it five times won’t hurt.
The quality of degreasing is checked as follows: wipe the surface with a rag soaked in solvent; it should remain clean. Then a hose with a shower head is connected to the tap and the walls of the bath are watered. If the water flows down in a layer and not in drops, then everything is in order.
Now the surface needs to be quickly and thoroughly dried with a hair dryer. Quickly, because dirt can get into the dry bath from above, and this is unacceptable. At this point, the preparation of the bathtub for coating can be considered complete.
Is it possible to paint a bathtub and how durable will the effect of independent restoration work be?
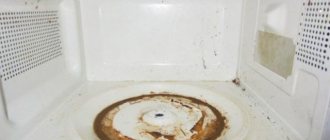
Is it possible to paint a bathtub yourself?
A new bathtub often costs a lot of money, and not everyone can afford to buy consumer goods. You must agree that it is easier and more profitable to purchase a practical and high-quality product once than to regularly buy something new! Therefore, the question arises: is it possible to renew an old cast-iron font, which still serves and serves, if not for these nasty yellow spots and “islands” of limescale.
You can update any thing, including your bathtub. You just need to know how to do it, what to do and what to pay special attention to. The result of the renovation will be a new coating that will last from 2 to 5 years. But you need to be prepared for the fact that restoration work will have to be carried out with enviable regularity.
Important! The service life of a new bathtub coating depends on many factors: intensity of use, bathing water temperature, choice of paint, etc.
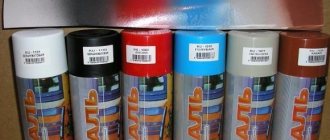
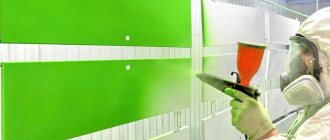
Spray enamel painting
Professionals recommend taking at least 1 extra can. Please note that you will have to cover the bathtub in 2-3 layers. With this calculation in mind, buy the material. How to paint a bathtub yourself with spray enamel? It's not very difficult.
The main thing is to take into account that this material dries very quickly, so it is difficult to correct defects. Follow these steps:
- Shake the can well. The consistency of the product inside should become homogeneous.
- Take the can in your hand so that it is comfortable for you to hold it. In this case, the spray nozzle should be located approximately 10 cm from the surface of the bath. Start applying the enamel. First of all, cover the sides with it. Then move on to the side walls. Lastly, coat the bottom of the tub. Try to apply the enamel evenly without leaving smudges. It is almost impossible to remove them.
- Let the first layer dry.
- Repeat the painting procedure 2-3 more times.
There are two ways to increase adhesion between layers:
1. Do not wait for the applied enamel to dry completely. It should “slow down” your fingers a little when you run them over the surface. If you apply a second coat at this stage, the adhesion will be very good.
2. Wait until the first layer of enamel has completely dried. Treat the surface with Scotch Brite. To avoid leaving any gaps, perform this operation 2-3 times. Vacuum. After this, you can apply a second layer.
How to paint a bathtub at home with your own hands
When figuring out how to paint a cast iron or other material bathtub at home, it is worth noting that the process consists of several main steps:
- Preparatory work;
- The process of painting a product;
- Drying the surface.
You need to choose the type of coverage based on your own wishes and financial capabilities.
Required Tools
First, you should prepare the necessary tools so as not to be distracted during the restoration process. For painting you will need:
- An electric drill equipped with a circle-shaped attachment for grinding the surface;
- Sandpaper with coarse and fine grains. This is an excellent replacement for metal brushes, which are more damaging to the surface;
- Acetone or solvent to degrease the entire area;
- Detergent;
- Roller and brushes, preferably flat ones;
- Masking tape;
- Textile. Suitable from microfiber or cotton.
You need to prepare your tools. They will be needed to clean the bathtub and protect adjacent surfaces from paint.
I also additionally use health protection products, such as gloves and a respirator, and tools for convenient mixing of the composition.
Preparatory activities
Begin by thoroughly cleaning the surface from various contaminants. Treat the product with a chlorine-free detergent. Then, using a drill, the top old layer of the bath is removed. Plaque and rusty areas are also removed. Additionally, you can sand some areas. Any dust that has formed must be removed with a soft cloth. Finally, the surface is degreased with acetone or solvent.
It is necessary to remove dust and degrease the surface on which the paint will be applied.
When using some types of paint, it is necessary to dismantle the drain system. Then you should start with this, and then remove the top old layer of the product.
Painting process
When using a one-component composition, apply several thin layers, no more than three. If painted with a two-component option, then one layer is sufficient.
You can use a spray can and cover the surface with aerosol enamel. The composition is shaken and spraying begins at a distance of 25 cm from the product. It is important to move easily and quickly, confidently, so that the paint lays evenly. Start from the sides, gradually moving towards the bottom of the product. After half an hour, apply a second coat.
When painting, first apply the first layer of enamel to the surface of the bathtub, it is called a primer.
A brush will be used to cover the surface with enamel or acrylic. There is no significant difference in the application of the compositions.
If necessary, the components of the painting kit are mixed. A small amount of the resulting mixture is poured onto the sides of the product. When the liquid has drained, you can begin to distribute it along the sides and sides with a brush, gradually moving towards the bottom. Vertical surfaces are painted first from above, then from below; the brush must be held in a horizontal direction, simultaneously removing smudges.
Then, after 15 minutes, a second layer is applied, in the same direction and from the same place where the primer layer was applied.