Types of possible damage
Depending on the type of bathtub and its material, damage may also vary. The most common are acrylic, cast iron and steel bathtubs. They may all have similar damage that you can fix yourself. Glass, wooden and marble bathtubs cannot be repaired: such models are considered exclusive, and without the help of a specialist, everything can only get worse.
Repairing chips in the bathtub with your own hands
The most common possible damages are:
- chipping is a fairly common type of damage. It is better to seal it immediately and not wait for it to increase;
- scratches – this problem is most serious for acrylic bathtubs, since deep scratches can lead to the bathtub splitting;
- splitting – applies only to acrylic bathtubs and may be the result of a deep scratch or a bathtub that is too thin;
- rust - can be present in almost any bathtub;
- a hole is a defect that is the most labor-intensive to repair. Only a specialist or a special insert can help here.
Advantages and disadvantages of coloring
One of the reasons refurbishment is popular is the cost savings, as the supplies needed are less expensive than buying a new bathtub. Other advantages of this method of eliminating coating deficiencies include:
- the ability to do without large-scale renovations and keep the bathroom interior intact;
- no difficulties in choosing a new model, which must match the dimensions of the previous plumbing fixtures.
If the application technology is followed, the coloring composition forms a durable layer, the service life of which is from 5 to 10 years, depending on the type of coating. The disadvantages of restoring a bathtub yourself include the laboriousness of the preparatory work and the need to relocate family members and pets during the repair.
Which paint to choose
Manufacturers offer many types of paints designed for finishing rooms with high humidity. They are used instead of tiles and differ in the type of base, application and operation features.
Most often, bathroom walls are painted with the following compositions:
Water-based coloring solution. The environmentally friendly material has no unpleasant odor and is easy to use. Water-dispersed compositions are resistant to moisture, but during operation a disadvantage is discovered - sensitivity to mechanical damage
Be careful when cleaning surfaces. Aggressive substances destroy the coating, washing off the paint from the base. Acrylic and latex
The coatings formed by such paints have water-repellent properties. A large number of colors and textures allows the material to be used to decorate any interior. This coloring agent is not afraid of mechanical influences and chemicals. Acrylic paint has a long service life. Chlorinated rubber. They appeared in our country recently, but have been used in Europe for more than 20 years. High resistance to moisture allows the use of rooms, swimming pools, baths. Oil paints. The obsolete material was previously used for finishing sanitary facilities in standard houses. The advantages of this composition are durability, resistance to scratches and moisture, and low price. Disadvantages include long drying times and a strong unpleasant odor.
When choosing paint, pay attention to the following points:
- Presence of shine. Glossy finishes go well with modern interiors. Shiny walls visually increase the area of a small bathroom. The effect is enhanced by mirrors and properly positioned lighting fixtures. Matte paint is used to decorate walls in large rooms. This material adds coziness to the design of the room.
- Color option. The choice of shade determines the perception of the interior and the mental state of the residents. It is not recommended to use aggressive colors to decorate bathrooms. This room is used for relaxation and calm. Light shades of green and blue work well. The milky color looks beautiful in combination with bright accessories.
Main stages
There are three main stages of painting, following which plumbing fixtures can be restored to their original form:
Preparation. If the work will be carried out in the cold season, then acrylic with hardener must be brought in advance. This is done in order to achieve the same temperature of the compositions and the air in the bathroom. If you deviate from this recommendation, the quality of the coating may deteriorate. Next, you need to remove from the bathroom all items that may interfere: hygiene products, a drawer for collecting dirty laundry, etc.
All surrounding tiles should be cleaned of traces of plaque, and the seams between the tiles should be cleaned of mold and any other contaminants. Next, treat the surface with degreasing agents, for which ordinary cleaning solutions are also suitable. Then the bathroom is thoroughly wiped with rags and time is given for it to dry completely.
Painting work must be done in a respirator and gloves.
Removing interfering parts on the bathtub. It is necessary to remove the drain drains from the plumbing, which are located at the bottom and at the top. Next, the enamel surface is cleaned using a grinding machine or using a grinder with an appropriate abrasive attachment. At this stage it is necessary to wear protective equipment
It is very important to remember that during the grinding process the surface of the bath must remain dry and water should not come into contact with it in any way. The work done will be considered high-quality when the entire surface feels rough to the touch.
If there are major defects in the bathroom, they must be treated carefully. During the grinding process, dust will be generated, which, upon completion of work, is removed with a vacuum cleaner or an ordinary wet rag. Residues not vacuumed up are removed with solvent
It is very important to remember: how well the old layer is cleaned, the new one will stick to it.
It will help emphasize the evenness of the lines. In order not to stain the floor during work, it is covered with old newspapers.
Next, you need to prepare the coloring composition: mix liquid acrylic with a hardener. The mixture is thoroughly mixed until a homogeneous consistency is formed. It should sit for about half an hour. It is necessary to paint the bathtub with acrylic within the first 2-3 hours after mixing the solution.
Painting. On each package, the manufacturer indicates the required amount of acrylic, which should be enough for individual bath sizes. Before you begin, you need to close the drain and place a tray under it. Since liquid acrylic is painted using the pouring technology, you should prepare an appropriate container (a glass or a ladle).
Painting with liquid acrylic usually starts from the edges, pouring it in a small stream along the entire perimeter. Thus, the coating will receive a layer of thick “fur coat”, which itself will flow down. The important point here is how carefully the bathtub was sanded. “Residues” will flow to the bottom of the bath, which, using a spatula, are evenly distributed over the entire surface. The width of the spatula is selected individually, depending on the convenience of the painter.
Painting using the "bath bath" method
Liquid enamel for the bathroom goes on sale as a standard set, consisting of a solid acrylic base and a liquid hardener. The kit is designed for a standard product up to 1.7 meters long. To obtain the compound, you need to pour the hardener into the base and mix it thoroughly for 10 minutes. It is important to ensure that the consistency of the mixture is uniform, especially on the bottom and walls of the bucket, otherwise the finishing coating will not harden in places. It is better to prepare the mixture by hand.
The compound must be mixed for at least ten minutes
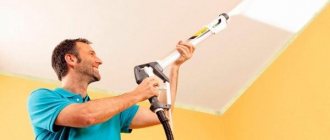
On a warm surface, the enamel for restoring the bathtub is distributed more evenly. To do this, you need to heat the product with a hairdryer to the required temperature.
Carefully, slowly, and with smooth movements, continuously pour the mixture in a narrow stream onto the side of the product. Once the acrylic coating is approximately 5 cm wide, you can carefully continue pouring, moving in a circle. When flowing down, the bathtub restoration enamel will cover the walls of the product to approximately half their height. Ignore any smudges or paint runs that appear. The surface restoration technology provides for their independent disappearance.
Fill carefully and slowly
Similarly, fill the lower part of the bathtub walls with acrylic. It is better to continue from the same place where you started pouring at the top and in the same direction. A container placed under the drain in advance will help collect the excess mixture flowing down.
After finishing the work, you should curtain the product with a curtain to avoid dust and grains of sand. The room is closed for several days to allow the coating to harden well. The slightest carelessness can ruin a job done correctly. Therefore, you should not use the bath until the spray has dried completely.
This is what the bathtub looks like immediately after filling.
Bathroom renovation 5 less details.
A large number of bright details in the interior of this bathroom visually reduced its size.
Therefore, during the cosmetic renovation, the walls were repainted to match the tiles, only a little lighter. A wide light stripe was added to the top of the wall to match the ceiling, expanding the space above. Also, a horizontal yellow line was made along the painted wall, also to expand the space. The shower curtains were replaced with white ones - symbolizing cleanliness and neatness. The curtain under the bathtub was replaced with a matte plastic screen. Instead of multi-colored runners, there are also white bathroom rugs on the floor. The old bathroom cabinets were replaced with new ones that have both open and closed shelves. Such a cabinet will allow you to put things that are not often used behind the door, which also visually lightens the space.
Bathtub enamel coating
The cheapest way to make an old bathtub look more beautiful is to enamel it. After restoration, such a bathtub will be no different in appearance from new plumbing. Its surface will become just as smooth and shiny, without any flaws. The advantages of enameling a bathtub are, first of all, cost-effectiveness, as well as resistance to chemicals and quick restoration work.
Preparatory work
Before the procedure, it is necessary to completely remove the old layer of enamel from the bathtub. To do this, take abrasive powder, apply it to a household sponge and thoroughly rub it into the surface of the bathtub. Then you should use sandpaper and clean the enamel from the bathtub again. Some craftsmen at this stage use a drill with an abrasive wheel, this significantly speeds up the preparatory process. But it should be taken into account that small particles of enamel will scatter throughout the room, and you will have to wear a respirator
It is very important to remove rust from the bathtub and thoroughly clean the chipped areas. After cleaning the bathtub from the old enamel, a degreaser is applied to its surface. It can be a specialized fat solvent or regular baking soda.
Then you need to wash the bath thoroughly and fill it with hot water. The plumbing should be left in this state for 10-15 minutes. Then drain the water and wipe the surface dry with a cotton cloth. Now the bath is ready for restoration work. Stripping the bathtub of old enamel is also required for acrylic coating
It can be a specialized fat solvent or regular baking soda. Then you need to wash the bath thoroughly and fill it with hot water. The plumbing should be left in this state for 10-15 minutes. Then drain the water and wipe the surface dry with a cotton cloth. Now the bath is ready for restoration work. Stripping the bathtub of old enamel is also required to cover it with acrylic.
Enameling technology
The second stage of restoration work begins with mixing the hardener with the enamel
The resulting mixture is applied with a roller in an even layer to the surface, and it is important to start from the top edge, heading down to the drain. This prevents the appearance of bubbles and unevenness. The first coat of enamel is a preliminary primer and must be given time to dry.
When the primer is completely dry, apply the second layer of enamel in the same way. Another advantage of enamel coating is the ability to apply several layers. Only after a week the bath will be ready for its intended use.
The first coat of enamel is a preliminary primer and must be given time to dry. When the primer is completely dry, apply the second layer of enamel in the same way. Another advantage of enamel coating is the ability to apply several layers. Only after a week will the bath be ready for its intended use.
Bathroom care
The restored enamel surface of the bath requires careful care, because the service life of the plumbing depends on it. Do not allow metal objects to get into the bathtub, clean it using powdered and chemical detergents, or soak laundry using bleaches. Damage to enamel can also occur from various products that contain alcohol or acetone. Therefore, you should not spray your hair with fixing varnish in the bathroom or remove manicure from your nails. It is better to remove dirt with a soft sponge soaked in a special gel.
How to clean an acrylic bathtub - tips and tricks
How to wash an acrylic bathtub so that it does not change its appearance, serves for a long time and pleases the eye with its unsurpassed appearance. In view of the fact that acrylic bathtubs appeared on our market quite recently, many people ask themselves the question - what products should be used to wash such bathtubs and how to handle them correctly. There are no big difficulties in the procedure of washing an acrylic bathtub. The main thing here is to follow the cleaning rules.
We are all accustomed to bulky and heavy cast-iron bathtubs, and acrylic bathtubs, which are elegant in shape and quite lightweight, at first glance seem fragile and impractical. That is why many people are wary of plumbing fixtures made of acrylic.
Features of washing and caring for an acrylic bathtub
Unfortunately, many people still do not know the basic rules for caring for acrylic. It is worth noting that the surface of an acrylic bathtub requires more careful care and therefore you should familiarize yourself with a number of rules for caring for this material. By following basic care rules, you will be able to prolong the impeccable appearance of your bathtub.
Acrylic is a wear-resistant material. Its surface has a dirt-repellent effect, so microorganisms do not develop on it. In addition, an acrylic bathtub is not afraid of impacts, but it is easily scratched.
Features of washing an acrylic bathtub
The main thing is to be careful and careful when washing an acrylic bathtub. It is not recommended to use powdered and abrasive products, as well as pastes containing chlorine, acid, alkali, and ammonia as a cleaning product.
Such substances contribute to the appearance of scratches on the surface and also lead to loss of natural color. Before you start cleaning your acrylic bathtub, always carefully read the composition of the cleaning product you are using. Do not use metal or hard brushes - such brushes will damage the integrity of the acrylic coating.
It is also not recommended to bathe your pets in an acrylic bathtub, or to place metal basins and buckets in them. Never place various objects in the bathroom - stools, metal basins and objects, as well as any other household utensils.
What means can you use to wash an acrylic bathtub?
To properly care for an acrylic bathtub, you must use a liquid with a cleansing effect as a cleaning product. Dishwashing composition, liquid soap, shower gel, etc. are perfect for this purpose.
If you find streaks of lime on the surface of the bathroom, it is not necessary to wash the entire container completely. It is enough to take a soft cloth, moisten it in lemon juice or table vinegar and wipe the surface.
If you notice that some areas of the surface of the bathroom are starting to darken, then just rinse the container with running water and wipe with a dry and soft cloth.
If minor scratches occur in the acrylic bathtub, its surface can be treated with a polishing material, in particular it can be ordinary mastic. Furniture polish or car polish is often used for this purpose.
Special products for cleaning acrylic bathtubs
The current level of development of the chemical industry has made it possible to develop special means thanks to which an acrylic bathtub can retain its original appearance for a long time. Moreover, with such products, any acrylic container is washed quickly and safely. I would especially like to highlight such products as Akrilan, Cillit, Sarma, Acryl-Net, Star-Acrylat.
These cream-gels are specially designed for washing acrylic surfaces. The product is applied to a napkin and only then on the surface of the bath. Wipe the entire surface of the container with a napkin and leave for 5 minutes. After 5 minutes, the product should be rinsed well with warm water and wiped dry with a cloth.
You can also use universal products to clean acrylic bathtubs. The most popular universal cleaner for acrylic surfaces is the product from Ravak. It is developed using special technology and is intended for washing acrylic surfaces.
To effectively get rid of rust, it is recommended to use products that are designed to combat rust specifically from acrylic surfaces.
In any case, when choosing a cleaning product for an acrylic bathtub, always give preference to special products. Such products will not only carefully clean the surface, but will also give it shine and protection in the form of a thin waterproof film. Now you already know how to wash an acrylic surface and you can provide it with proper care and increase its service life.
How to refresh your bathroom
In any bathroom, even if it is well looked after, sooner or later problems begin:
- the surface of the bath is no longer as white and fresh as before;
- the tiles are overgrown with lime and soap deposits;
- the seams between the tiles have turned gray;
- There are traces of mold here and there.
How to refresh the atmosphere without resorting to expensive means and without ruining the family budget?
Let's start with the bath. If it looks bad, the enamel has become porous and cannot be cleaned, then there are three options that will help solve this problem:
- replacing the bathtub with a new one, which will require quite significant costs;
- installing an acrylic liner in an old bathtub - less money will be required, and you won’t have to take out the old bathtub;
- Bathroom restoration with acrylic.
You decide. The last two technologies are quite well developed and guarantee excellent results if the work technology is followed.
Cleaning tiles from plaque. To solve this problem, there are now a lot of products available in household chemical stores. Although you can do without them using home remedies:
- If the tile is not too dirty, you can wash it with diluted dishwashing gel, which is applied for 10 minutes and then washed off with water.
- If the tiles are very dirty, you should use baking soda. It is applied to the surface with a damp sponge, left for a while, and then the dirt is wiped off. Do not apply too much pressure on the sponge - you may scratch the surface of the tile.
- If you need to bleach tiles, use bleach diluted in water. The solution is poured into a spray bottle and applied to the walls. Wear gloves and preferably a respirator - chlorine vapors are harmful to the body. After 5 minutes, the surface is washed with clean water.
- If the walls are very dirty, then use acetic acid diluted with water (3 tablespoons of vinegar per 1 liter of water). The surfaces are treated, left for a short time and washed with water.
- You can also use citric acid to combat plaque. The sponge is moistened, dipped in acid crystals and wiped over the tile.
- It is advisable to wipe water and electric heated towel rails with a soft cloth as often as possible, otherwise limescale will form on them. Chrome surfaces cannot be cleaned with abrasives; it is better to simply wash them with soapy water. To prevent the heated towel rail from becoming overgrown with limescale, you can periodically treat it with a special polish for stainless steel, which forms a film on the metal surface and makes it easier to remove the deposit.
It is better to wipe the tiles after washing with a bamboo towel or microfiber cloth - they do not leave streaks.
And another important thing: start washing the tiles from the bottom, but you need to wipe them starting from the top
Restoration instructions
The quality of the final result depends on the quality of all stages of work.
Tools:
- drill, power matters: the more powerful, the better;
- a nozzle for mixing the composition of small diameter - about 5 cm;
- a construction hair dryer to quickly dry the bath (you can get by with a household hair dryer);
- waterproof sandpaper No. 60-80;
- screwdriver for unscrewing the drain;
- pliers for the same purpose;
- automotive putty with fiberglass - for eliminating large potholes and holes up to 15-20 cm in diameter;
- spatulas - used for stirring putty;
- rubber spatulas for spreading the mixture;
- baking soda - for cleaning the bathtub;
- several latex gloves;
- a hammer and chisel if you need to remove a cast iron drain;
- acrylic and hardener - for a 1.5 m bath you will need 3 kg of base and 400 g of hardener.
Preparation
Everything unnecessary is taken out of the room. Check the ceiling for cobwebs and dirt. It needs to be cleaned so that dirt from the ceiling does not fall onto the damp surface.
The surface of the old bowl must be prepared before covering it with acrylic, and only then the mixture is distributed by pouring. Preparation includes thorough cleaning with baking soda.
Purpose of work: removal of dirt, corrosion, peeling. Thanks to the treatment, the surface becomes rough and grease-free. This means that the adhesion of liquid acrylic to the bathtub improves.
Processing is carried out with any abrasive tool - a grinder, sandpaper manually.
Then the surface is thoroughly washed to remove any remaining dust. It is recommended to do this operation twice, observing how the surface is wetted. If dry islands remain or water collects in drops, it means the surface is poorly treated and you need to go through the problem area with soda and sandpaper. Instead of baking soda, you can use acetone as a degreaser.
Before drying the bowl, remove the siphon and overflow. After restoration, it is advisable to replace them with new ones. The shower hose with watering can and gander are also dismantled. Cover the holes with a rag and place a bag on top of the faucet to prevent water from dripping into the bathtub.
After sanding, dry the surface with a hairdryer, heating the bowl for 30 minutes. If moisture remains, the acrylic will not stick.
Then open the can of putty and mix a small amount of the compound with the hardener using two spatulas. It is necessary to mix the putty in small portions, because it hardens in just 2-3 minutes. Cover up chips and cracks. Particular care must be taken to fill potholes on vertical surfaces. After 20-30 minutes, it is necessary to rub the putty areas with sandpaper.
Then all debris is blown off the surface with a hairdryer or wiped with a rag. Place a container under the drain hole and cover the floor with newspapers. At this point the preparation can be considered complete.
Restoration instructions
Self-leveling acrylic bathtub
Having prepared the bath, proceed to preparing the repair composition. Open the jar of acrylic, removing the remaining substance on the lid and placing it in the container. Using a rubber spatula, remove the composition from the walls into a bucket and wipe the spatula with a rag. This is done so that pieces of unmixed acrylic do not subsequently end up in the repair composition.
The hardener is poured into a jar. They take a drill and, clasping the bucket with their feet, begin to knead the acrylic at low speeds, collecting it from the walls and bottom. The kneading lasts about 10 minutes. Then leave the composition alone for 5 minutes. The lifetime of the material is 70 minutes, then it thickens and loses its fluidity.
Then the mixer is disconnected from the drill, making sure that dirt from the chuck does not get into the composition. Knead the mixture by hand for another 5 minutes.
The drain hole is plugged with a plastic cup. The jar with acrylic, having thoroughly wiped its bottom, is placed in the bathtub. The whisk is pulled out and placed there. Part of the composition is poured into a 0.5 liter disposable glass.
The finished mixture is poured along the edge of the side, starting from the far left corner (for right-handers). The front side is poured last, when the entire vertical surface near the wall has already been filled. The outer edges are poured so that the composition flows towards the floor. When all the mixture from the bucket has been used, it is turned over and left in the bath for now. Using a plastic spatula, form the sides: scoop acrylic from the bottom and coat the unfilled areas. Then fill the vertical surface of the bowl. The bucket and nozzle are removed from the bath. It is forbidden to collect the remaining material from the bucket.
The resulting drips are removed with a spatula, scooping acrylic from the bottom and stretching it into bald spots with vertical movements. The material that has accumulated around the drain and at the bottom near the sides is distributed over the entire bottom.
Leave the bath until the acrylic is completely dry.
How to cover a bathtub with acrylic yourself
You can save a little money by filling the bath yourself. Before you begin, you should soberly assess your own skills. It would be nice if you already have experience in painting work. First you need to prepare the cast iron product, then cast it in layers. You need to work carefully, otherwise you will not be able to obtain a high-quality coating.
Step-by-step guide to covering a bathtub with acrylic.
Materials and tools used
First of all, you need to make sure that acrylic and hardener have been purchased in sufficient quantities. To restore the bowl with your own hands you will need:
Solvent 647 for bath treatment.
- The device for mixing enamel is a plastic spatula with a blade width of 50 mm.
- Five sheets of sandpaper measuring 25 x 25 cm. It is recommended to buy waterproof sandpaper grade P 60.
- Solvent 647, which is used to treat the bathtub after sanding and washing.
- New spatula 10 cm wide.
- Adhesive tape 5 cm wide, two types: masking and plain.
- A medium-sized knife that will be needed for cutting tape and processing a cast iron bowl.
- Two types of screwdrivers: straight and Phillips.
- A stool on which you can mix ingredients.
Restoration is performed wearing a long-sleeved shirt, a respirator, rubber gloves and a hat. If the solution does get on the skin, it will not cause irritation, but wiping it off will be problematic. Hair should not fall on the treated surface at all stages of restoration.
Preparing the premises
To protect the floor and walls, use PVC film secured with tape. It is advisable that there is nothing in the room except a bowl. Therefore, it is recommended to remove all unnecessary and loose items, remove the shower curtain, and remove the crossbar. After this, you can begin preparing the bath.
PVC film is needed for treating walls and floors.
If the sinks or cabinet are located close to the bathtub, you need to move them away. Dust can enter from the rooms, so you need to isolate the ventilation using PVC film.
Cleaning a renovated bathtub
Before applying acrylic, you need to clean the bathtub.
After preparing the room, clean the surface of the bowl using sandpaper or a drill equipped with a special attachment. Some restorers use a grinder with a grinding disc.
To perform manual stripping, you need to wrap sandpaper around a suitable size wooden block, and then sand the surfaces. The treatment should not be too vigorous because the mixture will not hold if the surface becomes too smooth. Scratching the walls of the bowl is also not allowed.
If the bathtub was already painted before restoration, the enamel will need to be completely removed. The bathtub is cleaned with circular horizontal movements, removing an even layer, removing rust and forming a relief on the inner surface. Work especially carefully with the bottom.
After sanding, the surface should become rough, without signs of the factory coating. As a result of this treatment, liquid acrylic will be better fixed, and it will not have to be consumed in large quantities.
Washing and drying
To remove remaining dust, wash the bowl and tiles with hot water. It is recommended to use a liquid product that does not contain abrasive particles. Enamel adheres better to a cleaned surface. After washing the bowl, you need to close the taps, remove the shower hose and take them to another room.
Washing and drying the bathtub before applying acrylic.
Drops of water should not fall into the bath. Before applying acrylic, make sure that there is no water dripping from the tap. If there is still a leak, you need to turn off the water or wrap the faucet with tape, and then remove the drain and overflow. It is recommended to install a 1.5 liter container under the hole into which excess enamel will drain.
After this, wipe the bowl and nearby objects dry. It is advisable to use lint-free cotton fabric. If drops of water remain in hard-to-reach places, you can remove them with a hairdryer.
If drops of water remain in hard-to-reach places, it is recommended to dry them with a hairdryer.
Laying flooring and degreasing the bathtub
Degreasing the bath with baking soda.
It is important to clean the surface of all objects remaining in the room as much as possible from dust. If the dust is not completely removed, it will rise during a draft and settle on the enamel, negating the efforts expended.
The surfaces are covered with newsprint or film, using tape for fixation. Then the cast iron surface is vacuumed and disinfected with baking soda or solvent.
Preparing liquid acrylic for application
Before mixing the enamel, you need to keep it in a warm place for 24 hours. The product takes well if the restoration is carried out at a temperature of + 25 degrees. If you plan to apply acrylic in a cool room, you need to warm up the mixture by placing it in a large container filled with hot water.
Acrylic must be mixed with a hardener.
At the second stage, acrylic is mixed with a hardener. First, open a jar of enamel, stir for several minutes, and then add a hardener, which has the consistency of sour cream. Before adding the container with the hardener, shake it several times. Work with the hardener is carried out wearing protective gloves and observing safety precautions.
After combining the components, mix them with a wooden spatula. It is important to follow the manufacturer's recommendations, since some products need to be mixed for 10 minutes, while others need to be mixed for 15 minutes. Depending on the brand, acrylic is stirred in 1 or 2 steps.
Acrylic must be mixed with a wooden stick in a circular motion.
Stir the acrylic in a circular motion, touching the walls and bottom of the jar. There should be no air bubbles on the surface. Mixers and other similar devices are not used.
Proper preparation of a bathtub for painting with acrylic: tips for the master
The main task at this stage is to ensure good adhesion (adhesion) of the paintwork and the metal base. With proper surface preparation, painting a bathtub with liquid acrylic gives excellent results. First of all, the bathtub must be thoroughly cleaned using any abrasive powder. The usual Pemolux, trisodium phosphate or Comet are suitable for this purpose (consumption is about 400 g for a standard bath). There is no need to rinse off the cleaning agent. You can clean the surface using powder.
If there are deep chips, use automotive putty or epoxy resin to repair them. The drying time of the composition is indicated in the instructions.
Before you begin applying the coating, it is necessary to dismantle the drains, since it is under them that the largest amount of dirt accumulates. In addition, in the future, they will still have to be changed.
Effectively preparing a bathtub for acrylic painting
implies that the surface for applying enamel should be rough, with noticeable irregularities. To make it this way you will need a special tool. It is best to use a drill for this purpose with a nozzle made of waterproof sandpaper number 24. You can also use a grinder, but it produces too much dust, which is then difficult to remove. The risk of injury with this method increases markedly. In addition, there have been cases when craftsmen damaged the bathtub body in this way.
A regular household vacuum cleaner without attachments will help remove the smallest particles of enamel formed during cleaning.
Note to the master: you can determine the degree of readiness of the surface by simply running your fingernail over it. Well-prepared enamel leaves a scratchy feeling. If the nail glides well, it is better to work with sandpaper.
After the surface of the bath has been treated with an abrasive material, it must be degreased again. Here you can already use liquid detergents: “Sanita”, “Toilet duckling” or their analogues.
Rinse off the detergent with hot water. Please note that alkaline solutions containing surfactants take longer to wash off than cleaning powders.
Before applying enamel, the surface must be thoroughly dried. Use a regular or hair dryer for this; a breeze-type heater will do just fine.
The instructions for enamels recommend degreasing the surface using solvents. It is best to use acetone for this purpose. Do not use white spirit for degreasing; it has an oily texture. Apply the liquid using a piece of cotton (or any other lint-free) cloth.
Please note that careful preparation of the bathtub for painting with acrylic guarantees a long service life of the finished enamel. For more information on preparing the bathtub surface, watch the video:
Restoration with glass acrylic or self-leveling bath
Self-leveling acrylic is also a two-component mixture that will need to be prepared by mixing the components in the proportions recommended by the manufacturer. The mixture does not have a strong odor, which is a plus. After hardening and drying, acrylic has increased abrasion resistance. The glass spreads on its own, and the process of applying it is simple. True, skill is required, although this material does not dry too quickly. If you act slowly, you will avoid possible mistakes.
The step-by-step instructions are as follows:
- Mix the solution by combining the two components. The resulting substance must be homogeneous.
- Fill a small glass and start pouring glass onto the top of the side. As soon as the drip reaches half the depth of the bath, slowly move the container around the perimeter, constantly adding the mixture.
- Repeat everything described in the previous paragraph, only now pour acrylic from the middle of the bathtub depth. It's not worth saving. All excess will be collected at the drain and poured into the prepared bowl.
If bubbles appear, smooth them out with a soft rubber spatula or brush. This surface will take 4 days to dry. Better check what is written in the instructions. Even if it visually appears that the acrylic has hardened, this does not mean that the treated plumbing fixtures can be used. The drying period depends on the temperature.
So, for “Stakryl Ecolor” the standards are as follows:
| Hardening and drying time | Room temperature |
| 36 hours | +25 degrees Celsius |
| 42 hours | +20 degrees Celsius |
| 48 hours | +17 degrees Celsius |
There is no need to artificially raise the temperature using heaters and air heaters. This will likely damage the coating. It is impossible to force natural processes without losing quality. It is also impossible to work at too low temperatures. The manufacturer gives all recommendations in the manual and description of the application.
Video – Restoration of a bathtub using liquid acrylic using the “pouring” method
This is not just a master class from a professional. A video showing how to restore the appearance with poured acrylic will be a good help. Also check out this post about DIY bathtub enamel restoration. Save the link and subscribe to the newsletter. Then, when the time comes to act, you will have a personal teacher. All stages are shown in detail, and you will not make mistakes. This means that the surface will be even, smooth, and shiny.
Prices for bulk acrylic
Before you renovate your bathroom, be sure to create an estimate. It won't be too complicated, and the final amount won't scare you. However, only by comparing the costs can you decide on the choice of restoration method.
Thus, prices for the most popular two-component glass acrylic compositions are given in the table:
| Name of self-leveling acrylic | Weight of material in packaging, kg. | Bathroom volume, cubic meters. m. | Cost of packaging, rub. |
| Plastal Premium 24h. | 3,0 | 1,5 | 2100-2300 |
| Stakryl Ecolor 24h. | 3,4 | 1,5 | 1600-1800 |
| Stakryl Ekolor 16h. | 3,4 | 1,5 | 1700-1900 |
| Plastal Premium 24h. | 3,4 | 1,7 | 2300-2500 |
Technology of coating a bathtub with liquid acrylic
The technology for restoring bathtubs with liquid acrylic is quite simple. Of course, before applying a new coating, you must carefully prepare the surface. First you need to wash it with cleaning powder. Without washing it off, clean the surface of the bathtub with an abrasive stone or waterproof cloth-based sandpaper with large granules until lines appear on the old enamel. In areas of chips, cleaning must be carried out to a metallic shine. Then thoroughly rinse the entire bathtub with hot water, removing abrasive chips and remaining cleaning powder.
The surface for applying liquid acrylic must be absolutely dry and clean. Therefore, it is recommended to dry it with a hair dryer, and remove small particles of debris and dust with a vacuum cleaner without using a brush.
To prevent water from entering the acrylic coating during application or curing, place the shower sprayer in a sink or nearby bucket, and wrap the taps and faucet in a plastic bag.
The upper and lower drains need to be unscrewed. Under the hole from the bottom drain, you need to place a container into which excess liquid acrylic will drain.
Liquid acrylic is prepared as follows: pour the hardener into the container with the base and mix thoroughly for at least 10 minutes. If these two components are not mixed well enough, uncured stains may appear on the surface.
Using a mixer for this purpose is not a good idea, since it will not be able to mix the enamel on the walls of the container.
The prepared composition is poured in a medium stream onto the edge of the side. When the acrylic reaches the middle of the bathtub, they begin to move the bucket around the entire perimeter, pouring the composition evenly.
The process must be carried out continuously. You cannot stop until the entire contour has been processed.
There is no need to correct leaks and sags; they will level out on their own. Using a brush to even out the finish can ruin everything.
Hardening of the surface lasts from one to four days, depending on the temperature in the room and the material itself. It is believed that quick-drying acrylic has slightly less strength.
Video: “Restoration of bathtubs with liquid acrylic”
What color to paint a cast iron radiator
White.
Classics of the genre. A classic color that will fit into absolutely any interior, especially if the batteries are traditionally located under white metal-plastic windows and window sills.
Black.
A color that is suitable for interiors decorated in dark colors. Batteries painted black will not stand out as brightly against dark walls as white ones. There is an opinion that black batteries heat better. But experts say there is virtually no difference. Therefore, black color is more about design than about increasing heat transfer.
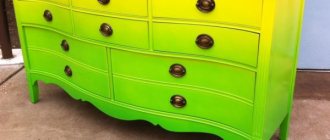
The color of the wall.
An excellent solution for disguising the battery against the background of bright walls. You can choose a paint shade to match the wall or choose a couple of tones lighter or darker.
Contrasting color.
A bold solution that is suitable for modern interiors decorated in minimalist, modern, eclectic and related styles
Such a battery will undoubtedly attract attention, so it is important to correctly place bright accents in the room. Otherwise, it may turn out that radiators will become the center of the visual composition