Applying plaster is a rather difficult process, requiring certain skills and knowledge from the performer. Finishing the walls with your own hands is an even more difficult task, as it requires scrupulousness and attention. It is necessary to comply with certain rules, as well as the use of high-quality tools. In this article, we will explain in detail how to apply finishing plaster and provide training videos so that you can understand the entire process of finishing the wall.
Why do you need finishing plaster?
Many newcomers to the construction craft refuse to finish plastering walls with their own hands, but this decision is wrong. If you decide to wallpaper or paint the walls, such finishing is simply necessary. Finishing is carried out, first of all, to create a smooth wall, as well as to seal minor irregularities. Such plaster cannot cope with large surface defects, since its application layer is quite thin. If all the work is carried out correctly, the result will be a flat and smooth wall surface, which will be ready for any further decorative cladding. In addition, the plastered wall will have a high level of adhesion, which will help in further painting or wallpapering.
Surface treatment and why it is necessary
Surface treatment is necessary for any finishing and construction work. The fact is that after using finishing plaster, surface defects may appear during subsequent work. For example, wallpapering or painting walls.
So, first the old coating is removed: tiles, wallpaper, paint, panels, and so on. The next step is to diagnose your work surface for roughness, cracks, holes, fasteners, and nails. Also look carefully at how much your wall deviates from the vertical. This is done using a construction ruler. If the wall is very uneven and you understand that you cannot correct it with plaster, you will have to resort to starting putty, heavy mortars, or even attaching plasterboard sheets. The last option is used only when absolutely necessary.
Defects are filled with putty. And after the putty has dried, you can prime the wall with a solution. It will provide additional leveling, protection from moisture, fungus and mold. In addition, primer solutions will provide better adhesion between the finishing plaster and the wall.
After the primer, which is applied in two layers, has dried, you can begin to cover the wall with finishing putty.
Selection of plaster
The quality of the entire work will depend on the solution you choose. The best option for applying the finishing layer is ready-made cement-based plaster. It will be much more difficult to prepare a solution with your own hands, because you will need to maintain the ratio of all substances.
Special polymers are added to the finished mixtures, which increase plasticity and the level of adhesion, so sometimes you can do without installing a polymer mesh. To finish brick or concrete walls in a room with a high level of moisture, we recommend using cement-sand plaster. It is of good quality and will provide the coating with a long service life. It is better to treat wooden walls with plaster based on gypsum or clay to prevent possible fire of the surface. If there is high humidity in the room, in no case should you choose plaster based on gypsum or clay, they tolerate moisture very poorly.
Final layer of plaster
Purpose
The finish takes on all unwanted environmental influences.
In any work, it is important to know what outcome should be achieved as a result of its successful completion.
In the case of plastering the walls with the final layer, the latter must fulfill the following conditions:
- Filling and eliminating all uneven surfaces of the wall. Like any plaster, the finish is intended to level the surface, and this task must be solved in full, regardless of what other tasks are assigned and how they are solved. Even the most durable and high-quality finish is considered a failure if it is uneven or uneven;
- Protection of the structure and basic finishing from mechanical damage, moisture, sunlight, corrosion and other destructive factors. It is the final finishing that takes the brunt of the environmental impact, and protection must be comprehensive;
- Creating a high-quality surface in terms of texture, relief, color and other decorative properties. The solution must have correctly selected components in terms of fractional composition and properties, which, when dried, will look like a durable monolithic material, smooth or embossed.
The main task of the finish is a smooth, durable and beautiful surface.
It is worth noting that the final plaster combines the properties of two related finishing technologies - putty and traditional plaster. The putty is intended for filling small depressions and irregularities, fine leveling, which is also typical for final finishing with plaster. However, unlike classic putty, final plastering not only levels, but protects the walls, and also serves as a decorative cladding .
An example of interior wall finishing.
Plaster is more often called façade cladding, while interior finishing is closer to putty, although the difference between these concepts is now blurred. The only clear difference may be the presence of a relief on the surface, which is more typical for plasters, although putties are sometimes treated in a similar way.
Applying the finishing layer of plaster in the classical sense.
Speaking in standard terminology, the finishing layer is the second layer in classic lighthouse plaster, when the main base has been applied and leveled, and all that remains is to fill in the depressions and irregularities and rub the surface to the smoothest possible state. We will also consider this stage.
Important! Whatever the finishing technology is called, its main task is to protect the wall and create a smooth, beautiful surface.
- How does putty differ from plaster?
Features and differences
Finishing materials differ in the properties of the components.
The main difference between the finishing mixture is the fractional composition or grain size of the filler. Regardless of whether cement, sand, lime, talc, chalk or gypsum are used in the mixture, their particles should be as small as possible, as this allows for the smoothest and most durable surfaces to be created.
Fine filler allows you to create smooth surfaces.
However, the small fraction imposes a number of limitations on the technology:
- high fluidity of the solution;
- impossibility of applying a thick layer;
- high probability of cracking.
That is why, for basic leveling, starting mixtures with large filler particles are used, which level out large differences in the plane.
The finishing layer should be thin.
Important! To prevent the coating from cracking, various plasticizers are added to its composition: glue, resins, polymer compounds, rubber and others. The layer can also be reinforced with fiberglass or a special painting mesh.
Also, the material must be moisture-resistant, frost-resistant (for facades) and strong enough, exhibit minimal shrinkage and have good adhesion to previous layers of finishing. For this purpose, various additives and additives can be used in the mixture, so the price of the finish is slightly higher compared to starting materials.
Application Tools
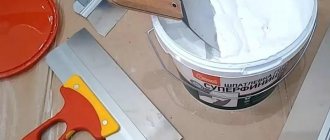
You will need to use quite a lot of tools and materials, we recommend preparing them in advance. So, you will need:
- special container;
- construction spatula for applying the mixture;
- trowel or ladle;
- construction grater;
- rule for leveling and creating texture;
- paint brush for treating hard-to-reach places.
Varieties
Based on the finishing components used in plasters, this building material is divided into several types:
- cement. As an example, consider the Rotbond mixture, used not only for interior but also for exterior decoration. It is perfect for rooms with high humidity and a complete absence of mechanical loads. Manufacturers offer different options for this finishing material. If we consider the cost, then it is at an affordable level, which is considered the main advantage of plaster. At the same time, a negative sign is also noted - the surface of the cement material cracks and does not withstand mechanical stress well. Preference is given to such finishing material in exceptional cases;
- plaster. The base is gypsum material, excellent for interior finishing work. It is prohibited to use on external surfaces, because the material is not at all able to withstand moisture. The plaster composition tolerates shrinkage well, resists mechanical stress, and does not develop cracks;
- polymer. Such plastering compositions help solve any problem related to finishing. The mixture is unique and contains various additives that regulate its properties. Manufacturers offer a large line of this product, the most popular of which is plaster based on acrylic and polymers.
It would be fair if we recall the types of decorative plaster:
- structural. Outwardly it resembles a granular mass containing wood fibers, mica, pebbles and quartz. The particles differ in different sizes, which determines the final result after applying the solution;
- embossed. The material contains particles of marble chips, fibers of synthetic origin;
- textured. It has a heterogeneous structure and contains various additives. The appearance of the surface depends on the filler component used;
- terrazite. The basis is cement material, to which glass, mica, and marble are added. Grain sizes vary between one and six millimeters;
- flocks. The basis of the mixture is acrylic flakes, differing in size and shades. Having covered the wall with them, a protective varnish composition must be applied to the decorative plaster.
Preparing the wall
The finishing plaster should be applied to a perfectly clean wall. Therefore, the surface must be cleaned of dirt and dust. You will also need to eliminate defects in the form of protruding screws and other small details.
Then the wall must be treated with a primer. Priming will not only help strengthen the base of the surface, but will also protect it from mold and mildew, and will also significantly increase the adhesion rate. Remember that finishing plaster does not cope well with unevenness, so if you find large surface defects, you will need to level the wall, including the procedure for installing beacons, and only then proceed to finishing plaster.
How to properly putty walls with finishing putty with your own hands: step-by-step instructions, video
Today we will tell you in detail how to properly putty the walls with finishing putty with your own hands.
This request is very common among those who decide to make quality repairs on their own.
It should be understood that a successful result depends on how the surface is prepared, and you cannot do without putty. It is important to follow the step-by-step instructions and use the tools correctly.
In order for the putty process to show perfect smoothness, a finishing putty is required. Concrete walls or other surfaces can be properly prepared for the application of subsequent decorative coatings.
What tool will you need?
Do-it-yourself finishing putty on walls requires a certain number of tools. So what you need:
- Apparatus for mixing the solution. You can use a drill with an attachment. The dry mixture is mixed with water. To know how to dilute finishing putty for walls, you should read the manufacturer’s recommendations. You should get a homogeneous plastic mass without lumps; Several spatulas. The required set should include both large and small tools, thanks to which the putty will be successfully applied even in hard-to-reach places; Brushes, rollers. Surface priming is also a step that should not be skipped. Extra strength and good grip never hurt anyone; Recipe. This is necessary when leveling large wall errors in order to distribute a thick layer of mass; Level A. Indispensable for leveling uneven walls. After setting the levels, control measurements should be taken; Sanding plate. A perfectly smooth surface requires careful grouting. Coarse-grained sandpaper is used for initial work, and fine-grained sandpaper is used for finishing work; Holder for attaching sandpaper. Makes work easier for both beginners and more experienced craftsmen; Container for preparing putty.
Material selection
Which putty is better for finishing walls? Based on its composition, putty can be divided into: gypsum, acrylic, cement. Let's pay attention to take into account the positive and negative sides.
Composition of plaster. It has an affordable price, good recommendations during the work process, and no shrinkage. The cement included in the composition shows excellent resistance to moisture, but significant shrinkage appears over time. Polymer products. They have many advantages: they are resistant to moisture and do not shrink. The treated walls are of high quality. An excellent option to consider for those who are busy with the question: how to level walls with finishing putty, and are looking for quality materials. The only drawback is the cost of the putty.
There is also a division based on fate.
Starting mixtures. They are distinguished by their strength, extraordinary adhesion, and coarse grain size. They are suitable for correcting uneven walls. Decorative. Recommended for use to obtain a perfectly smooth surface while correcting minor unevenness. Endurance is also quite high, the workflow does not cause problems. Universal. The product combines leveling and decorative properties. Their cost is slightly higher, despite the fact that they are inferior to the above coatings. Recommended for use to eliminate minor problems with walls.
On the modern market you can buy both dry mixtures and those already completely ready for use. The dry product is more attractive due to its cost and the possibility of longer storage.
The finished material is, of course, more convenient to use. You don't have to knead it, which makes the process faster and cleaner. However, such putty can cause significant shrinkage.
Calculation of the required material
Beginners are often interested in the question: how to calculate the finishing putty on the walls? The task, the essence of which is to determine how much material will be used per 1 m2, is not easy even for a professional. There are many factors to consider that will influence the final figure, and there are no generally accepted indicators. Therefore, in any work there is an error, only then the numbers will be more realistic.
The cost will depend on and vary according to what work has previously been done. If we are talking about finishing putty, then if there is a base layer, its amount will decrease and be approximately 1-2 mm. Thus, the material consumption will be about 2 kg per 1 m2.
Also remember that consumption will be higher regardless of the initial calculation. The material will remain on the spatula on the sides of the used container. Since the solution needs to be mixed in small portions, and it hardens very quickly, this means that the putty will last longer.
Putty is often applied in two layers. The first layer can reach 8 mm, and the second - no more than 3 mm. If even after such correction of the walls the defects are still visible, it means the work was done poorly. A thick layer of the product will lead to various types of defects.
Preparing the wall for putty
So, if you don’t know how to properly putty walls with finishing putty, you need to master the steps of the entire process. First of all, you should assess the condition of the wall. It must be clean, that is, without visible traces of grease, paint, old plaster, etc. Do not start work if the surface has been exposed to low temperatures for a long time.
Before finishing with putty, it is necessary to prime the walls. This will ensure not only good adhesion, but also resistance to moisture. Carefully distribute the composition with a roller. You can limit yourself to one layer.
Starting putty
Finishing plaster on walls for painting and any other type of coating requires perfect evenness. You should start by applying the starting composition. This is a rough material that is successfully used to smooth out wall bends, cracks and holes.
Before plastering the walls with finishing putty, use a painting mesh to improve the quality of the work. First, the composition is evenly distributed over it, and then it is completely puttied. This method has proven successful. The surface is smoother and more durable. And the greater the degree of roughness of the strips, the more reliable the material.
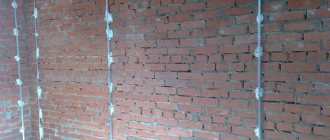
Putty using beacons
Another type of work that is performed before plastering the walls is finishing plaster. This one uses the same theme, but uses beacons.
A lighthouse is considered to be a railing made of wood or plaster. It is mounted vertically and the degree of evenness is checked with a building level. After attaching them to the plaster, you can proceed to further work.
The same principle can be used for horizontal leveling, which requires the use of a spirit level.
If all recommendations are followed, the surface will be smooth and can be checked with a spirit level.
Due to the cost, which is higher than that of the starting putty, this method is rarely used, since there is practically no visual difference between them.
Finishing putty
Having completed one of the preliminary stages of wall leveling that you have chosen, you can begin plastering the walls with finishing putty.
At the first stage, the question may arise: what do putties do for finishing walls? For this purpose, special mixtures are used that will give the surface model smoothness without cracks and pores.
For those who are interested in whether it is possible to level the walls with finishing putty, we would like to note that you need to start work with the thinnest layer. If the initial alignment was poor, it can no longer be repaired. Therefore, try to focus on leveling the walls, and only then start finishing work.
Finishing putty for wallpaper, as well as its use for other materials, is a prerequisite for a flawless wall.
We remove cracks
Remove with plaster mixture. You can use santegip. It takes longer to dry, but good plasticity during operation allows you to achieve good results.
Experienced professionals recommend first removing any loose particles and roughening up the crack by digging a little wider and deeper. Then you need to go through the primer, and only then putty.
Putty application process
Finishing walls with finishing putty or any other putty requires proper preparation of the mixture. Do it:
- Fill the container with water; Fill with putty; Mix first with a spatula, then use a drill with a mixing attachment; If necessary, add water.
The putty is considered ready when the mass has sufficient plasticity and will not flow off the spatula. This situation can be corrected by adding dry material.
Be careful not to allow any lumps to form as this will indicate the need to add water and mix more thoroughly.
After each use of the solution, wash the container and only then mix fresh material. If you ignore this advice, don't be surprised that the solution will harden faster because you are not removing the main catalyst - the old particles.
Using a wide spatula, gradually spread the starter over the surface. Each new movement must be overlapped to avoid unevenness.
It is recommended to mix in portions, as this will prevent the mass from drying out and forming lumps. Don't worry about possible streaks, they will be removed with the finishing coat.
To create even corners, use a special spatula, having previously distributed a moderate layer of putty over the entire height.
After the starting putty has completely dried, you can proceed to finishing work. For this you will need 2 spatulas. Apply the solution with a small tool and apply the putty evenly with a large putty knife. Pay attention to the layer thickness, which should not be more than 2 mm.
Do-it-yourself finishing of walls with putty for wallpapering or painting should not begin without thoroughly drying all previously applied layers. Those who don’t know how long it takes for finishing putty to dry on walls should definitely know that it takes about 12 hours to prepare for the beginning and the first finishing layer.
Now comes the time for finishing work - sanding with sandpaper.
We recommend priming each new layer of putty.
Preparing the surface for painting and wallpaper
Now think about how to putty the finishing walls with wallpaper putty, or how to putty the finishing walls with paint putty.
This process requires several levels of alignment. For thin wallpaper, a minimum of three is required. This will allow you to paste the wallpaper without the appearance of unsightly flaws.
Preparation for painting requires more careful measures, because even the smallest irregularities, roughness, etc. are visible through this decorative coating.
How to putty the walls? The procedure for applying putty comes down to several steps:
- Leveling material is applied layer by layer; Allow time to dry; To eliminate minor errors, use finishing putty; Sand with sandpaper to obtain a perfectly smooth surface.
Now you know how to putty walls with finishing putty for painting or wallpaper. The process is clear and simple, but only if the described recommendations are followed. Don't be afraid to experiment, try to work in small areas and remember that you will get better each time.
How to properly putty walls with finishing putty with your own hands: video
Application
So, after all the preparatory procedures have been carried out, you can begin the main work. First you need to dilute the mixture in a previously prepared container. Application to the walls occurs using two spatulas. Use a small tool to scoop up the mixture and then transfer it to a larger spatula. Use it to apply the solution to the wall and level it over the entire surface plane. Remember that the layer should not exceed 1.5 millimeters, otherwise the coating may crack and all work will have to be redone.
If you plan to glue vinyl or non-woven wallpaper, one layer of the finishing mixture will be enough. But, if the walls will be painted, it is recommended to use two layers. To handle corners, it is better to use a special trowel or corner spatula.
There are two ways to treat walls with finishing plaster. In the first case, the mixture is leveled with broad strokes in different directions. In this case, the spatula must be pressed against the wall at an angle of approximately 20 degrees. With this finishing, unevenness may occur from the working tool, but they can be easily eliminated by sanding the wall.
The second method is to apply the composition in small strokes. With this choice, you will spend more effort and time, but the result will be better. You will also need to apply a second layer for leveling. In this case, you can even refuse sanding, since the coating will be even and smooth.
Once completed, the work can be considered completed. The wall surface will be completely ready for further painting or wallpapering. We recommend watching a special training video to better understand the nuances of finishing plaster with your own hands:
How to make a surface even
These components are needed to give the surface a smooth and even texture. Conventional finishing compositions are aimed at creating a finish as part of the decor. In this case, the plaster has a translucent color and affects the final result of the finish. Sometimes ground glass, calcite dust or dyes are added to obtain a specific opalescent or marble pattern.
Often, finishing or superfinishing compositions for plaster with an acrylic primer are purchased for work. This solution will be more reliable than experimenting with different recipes. Typically, the consumption of dry mixture per square meter is indicated by the manufacturer on the packaging of the material. It is important to check the package release date and purpose.
Types of mixtures
There are several types of mixtures that differ in composition.
Cement
– often used in damp rooms and on walls where there is no mechanical stress.
Divided into 2 types:
- — cement-lime;
- - cement-sand.
A high-quality mixture of the brand - Rotband. They produce solutions for wet rooms that are resistant to mechanical damage. In terms of price, the material is in the average range. The disadvantages are that cement bases crack, no matter where the work is carried out - outside or inside.
Plaster
– more resistant to damage, has plasticity and does not crack. A good option for interior decoration. Not suitable for outdoor use, as it does not have high moisture resistance.
Polymer
– a universal material for leveling surfaces. There are different compositions of additives that can be used to regulate the properties of the mixture. Very large assortment. The most popular plaster is acrylic polymer.
If we consider the areas of application - for interior and exterior work, then the mixture is almost the same. The only difference is in the additives that are responsible for frost resistance and hydrophobicity.
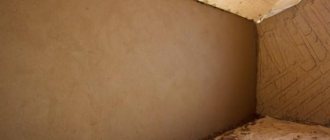
Plastering process
When the main layer of plaster has completely dried and become a little stronger, the condition of the walls is checked using a special tool - the rule.
The steps look like this:
- The working surface of the tool is applied to the old plaster and, with successive advances, dips or, conversely, bulges on the wall are examined. Once such areas are found, they are marked with a pencil.
- If there are large humps, armed with a mild tool or sandpaper, you need to clean up the problem areas and check the surface again.
- The boundaries of the deepest and crooked places of the wall are marked.
- The surface is primed with an acrylic mixture.
Important! There is no need to cut off a large area with a spatula or other tool, otherwise cracks will appear in the plaster layer. And this can only be done within 60 minutes after finishing the process of leveling the main layer of plaster.
Working with the surface
When working indoors, the temperature should exceed 10 degrees and humidity - 50%. You need to prepare spatulas - wide and narrow, a container for diluting the mixture. It is better to buy ready-made finishing plaster, which only needs to be diluted with water. It is good if you use a construction mixer when mixing.
The initial stage of work involves spraying. For this, a liquid solution is prepared, which will create the basis for the next layer. The finishing composition is diluted in parts to the consistency of sour cream and applied to the most crooked and sunken areas with intensive rubbing movements of a spatula. Work is carried out from the center to the border of the area. Then a more liquid plaster solution is diluted and applied to the wall from bottom to top. The entire surface is treated with it. The thickness should not exceed more than 3 mm.
Armed with a grater dipped in soil, the most problematic areas are leveled and leveling begins.
The disadvantage of finishing solutions is that they are weak. If the thickness does not exceed 3 mm, then the liquid layer levels out normally. But, after a quarter of an hour, the sublayer of plaster absorbs moisture and the finishing composition acquires viscosity. If you try to stretch this mixture along the wall, it will tear and the old base of the wall will begin to show through again.
In order for the work to be accurate, the actions must be slightly different. When working with the tool, you do not need to pull it along the surface of the finishing plaster, but rather slowly press it down in small steps towards the edges of the wall. In this case, the effort should be minimal. You can even alternate between pressing and pulling.
The layer that is usually collected along the side surface must be removed with a spatula and quickly rubbed with a wider tool. The resulting residue can be used elsewhere.
Grout
When grouting, you should be able to control the force applied to the tool. When the finishing solution has already hardened on the wall, you can rub or level it with rotational movements of small amplitude. The main thing is not to forget to wet the surface of the plaster or the tool itself with liquid.
The quality of the finished finishing is almost impossible to immediately assess. Basically, imperfections only appear after painting the wall.
Some recommendations
- Adhesion is very important. If the rough finishing was carried out with cement mortar, then the finishing layer must be applied with cement-based plaster. The same rule applies to gypsum and polymer.
- A small amount of the mixture is applied on a spatula in a vertical manner from the upper left corner downwards.
- Using a wide spatula will help level the plaster and keep the layer minimal.
- Working with walls made of plasterboard, concrete blocks, or a brick base requires applying the mixture from bottom to top. To achieve a smooth surface, the spatula must be held at an acute angle to the wall and not come off it.
Textured plaster
It can be divided into several types:
- Structural, consisting of various particles in the form of mica, pebbles, quartz.
- Relief, with marble particles. This texture shimmers in the sun and is very impressive.
- Textured - characterized by the heterogeneous structure of the mixture and additives. This group includes the popular bark beetle, which is most in demand recently.
- Terrazite, with a cement base with the addition of marble chips, mica, glass. Particles reach a size of up to 6 mm.
- Flocks, so-called acrylic flakes of different colors and sizes. Requires varnishing.
Often finishing plaster can be found as an independent surface finishing. To give the work a beautiful look, rollers, stencils, and spatulas with teeth are used. These tools can be used to create various decorative patterns. There are a lot of stencils on the Internet, where you can download them and add individuality to your walls. To make the drawing clear, the stencil is moistened with water and imprinted into the solution. Of course, such decor will take a lot of time, but the result is amazing.
With a simple spatula and brush you can create the texture of stone, concrete, etc. Fantasy in this matter is unlimited.
Conclusion
Finish plastering of walls is a relatively labor-intensive process that will require time and effort.
But at the same time you will get a high-quality surface and ensure a long service life of almost any coating. The main thing is to choose the right tools and materials, since the result of finishing work will depend on them. In order to properly finish the walls with your own hands and understand the details of this procedure, watch the following video:
Recommended Posts
Derufa – decorative plaster
Decorative rain plaster for walls
Pebble decorative plaster Ceresit
Decorative plaster: seamless texture
Decorative plaster for the bathroom
Consumption of decorative bark beetle plaster per 1m2
Decorating walls with regular putty.
Decorative plaster on walls using finishing putty is easy to apply with your own hands. Having studied a little application technique, making movements with small strokes, a beautiful relief is created on the walls, looking no worse than expensive painting on plaster. There is no need to resort to expensive technologies. It will be enough to follow the step-by-step instructions.
Modern compositions, such as Knauf finishing plaster, adhere well to any substrate. They fit well and can be shaped, which makes it possible to create a unique relief.
The result is an excellent coating that adheres well, repels water, and is resistant to mechanical damage.
Tools:
- different sized spatulas;
- a special grater to create a pattern;
- leveling smoother;
- plumb and level.
To obtain a decorative finishing coating, you need to go through several stages:
- prepare the walls;
- create a primary layer;
- set the texture of the plane;
- painting and varnishing.
Preparation consists of cleaning the wall from excess dirt. The work must be carried out carefully and carefully; the quality of the decorative layer and its durability will depend on this. Even if you miss a small section, this will lead to peeling and loss of the decorative wall.
All cracks and holes are sealed - the wall is leveled as much as possible. Allow time for the plaster to dry thoroughly. The last stage of preparatory work is priming the surface.
Application technology
Let's figure out how to apply the mixture correctly. The work is carried out in stages, with the first couple of layers resembling regular plastering of walls. A spray is made, the main purpose of which is to create good adhesion to the subsequent layer. The solution for this procedure is prepared liquid, its consistency reminiscent of sour cream. Thickness – no more than four millimeters.
Now let's look at how to make a second layer to level the surface. The mixture resembles dough and is spread with a spatula. As a result, you must cover the surface of the wall with a layer of mortar up to one and a half centimeters thick.
As soon as the wall dries, a covering layer is applied, the thickness of which does not exceed one to three millimeters. We work with a wide spatula, performing movements from bottom to top. The evenness of the resulting layer depends on the width of the tool blade.
All that remains is to sand the dry surface to make it even.