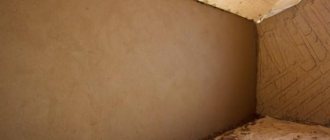
Work process
If you have already made walls from plasterboard and primed them, or prepared walls from another material, you can find out how to plaster walls with your own hands using beacons. All work is carried out in two stages. The first is rough plaster, and the second stage is finishing. Before starting work, you need to mix the mortar for plastering the wall. Let us remind you once again that the batches are made in compliance with the proportions.
Rough plaster
We begin work with rough plastering of the wall surface:
(Installation of profile beacons)
- First of all, we install the beacons; for this we use nails or self-tapping screws, which are screwed level into the wall and a thin nylon thread is pulled over them. You can also use a beacon profile. The mixture is mixed.
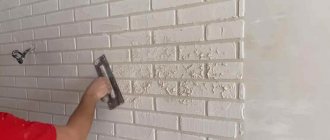
- The finished solution must be applied to the wall surface without any gaps, starting from the floor screed, which mastervdome.com suggests making yourself. It is advisable to apply a layer of material with a trowel so that it extends beyond the boundaries of the installed beacons.
- Next, take the rule and, starting from the bottom, pull the solution upward. During this, you need to make small movements of the tools to the sides and not put pressure on the rule. We send the layer that remains on the instrument into a container with a solution or use it higher on the wall.
- When the work on plastering the wall is completed with your own hands using video on beacons. We remove the fallen mixture from the floor surface. We are waiting for the wall to dry.
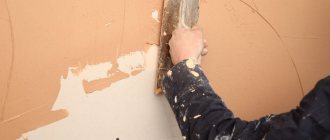
- After drying, if profile beacons were used, remove them. We fill the holes with a solution and wait for this part to dry. Next, we wet the wall with water using a roller, apply a very thin layer of plaster and stretch it in different directions. During operations, there is no need to put pressure on the tool.
Recommendations! If a gypsum composition was used for the work, then finally you need to remove all excess with a spatula. When using a solution of cement and sand, after the surface has dried, you need to moisten the walls with water and rub it with a polyurethane float. And when a lime mixture was used, there was no need to spread the base right away, but immediately throw it on the surface and level it along the beacons.
Finishing plaster
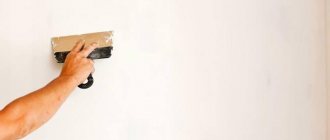
How to do rough plastering of walls with your own hands, complete instructions were given in detail, now you need to complete the work with finishing plaster. The final stage of work is grinding the surface with a special grater.
The grater can be made of different materials, but it doesn’t matter. The main thing in this work is to achieve a neat appearance of the wall, which will allow you to hang wallpaper without difficulty
Lighthouse plaster is also ideal if you decide to paint the walls.
Pros and cons of the material
The video below explains how decorative plaster is applied, video lessons and master class. If you follow the instructions, the cladding will have undeniable advantages:
- The wall has an attractive appearance without additional covering with wallpaper or paint.
- You can choose a material that imitates expensive marble or rock at a competitive price.
- The finish does not fade over time.
- Not afraid of direct sunlight.
- Less susceptible to mechanical stress than conventional gypsum mixture.
- It is applied using special tools with your own hands.
- Hides minor blemishes and uneven surfaces.
- Not afraid of moisture, fungus and mold.
The following are the disadvantages:
- High price for some types of material.
- For installation of some types, installation experience is required, so you have to hire specialists.
We will provide detailed instructions on how to apply decorative plaster in a master class below.
Attention! Since the finishing is applied as the last layer and primarily plays a decorative function, the mixture is installed in a thin layer. Therefore, before finishing the walls, you need to dry them with the usual mixture.
Photos are enlarged, click!
Preparation of plaster
After preparing the walls for applying plaster, you can proceed to preparing the solution.
In a hardware store for plastering walls with your own hands, there is a large selection of ready-made plaster mixtures for different surfaces and on different bases.
This greatly simplifies the preparation, since you do not need to calculate the proportions of the various ingredients, but simply dilute the finished mixture with water in accordance with the instructions on the package.
To prepare the plaster we will need:
- clean container (bucket or trough);
- construction mixer or drill with a special attachment for stirring;
- pure water.
Pour water into the container. While stirring with a mixer, add the dry mixture, the proportions are indicated on the package.
Mix everything well until smooth and let it brew for 3-5 minutes, then mix again.
The amount of finished plaster should be enough for 20-30 minutes of work, then it will begin to set.
Cement plaster
To prepare cement mortar for plastering walls, you need to mix 1 part cement and 3 parts sand. Then, constantly stirring, add water (approximately: 5-6 liters of water per 25 kg of dry mixture).
The consistency of the finished solution should be like thick sour cream.
Leave for 5 minutes and stir again.
Calculate the amount of prepared solution for 1 hour of work. After an hour, cement-based plaster begins to lose its plasticity and adheres poorly to the working surface.
Advantages of cement plaster:
- high strength;
- greatest durability;
- suitable for rooms with high humidity;
- Suitable for outdoor use, basements and garages.
Flaws:
It is imperative to apply finishing putty to the top of cement-based plaster.
Gypsum plaster
Gypsum-based solutions are only suitable for indoor finishing. They have high ductility and are excellent for concrete surfaces.
Preparation: gypsum is poured into a container with water with constant stirring, milk of lime is added and everything is thoroughly mixed.
Due to its increased plasticity, gypsum plaster is easily applied to any surface, even a beginner can handle it.
It has a very fine structure and does not require finishing putty.
Convenient to use in corners and on the ceiling.
Cannot be used in damp areas.
Preparation of mixtures
Depending on the main binder, plaster mixtures are distinguished: clay, lime and cement. Lime and clay mixtures are prepared independently on site; cement ones are available ready-made dry, but you can prepare them yourself. Preparation of a solution for plastering walls from a ready-made dry mixture is reduced to mixing with water according to the instructions; There is no need to check the viscosity and fat content.
It must be said right away that preparing the plaster mixture on site is becoming a thing of the past. Ready-made mixtures are born as a result of careful research by competent specialists of the highest level, undergo a full production cycle during production and have no alternative in terms of price to quality ratio. Moreover, the quality of a homemade mixture will probably be worse than a branded one, and its preparation will cost more, so we will touch on homemade mixtures in general terms, especially since many nuances require a whole series of articles.
Ready-made dry mixes
Dry ready-mixes, in addition to cement and possibly lime, contain gypsum and polymer additives, but their role here is not the same as in decorative ones. Polymers work when stored, mixed and applied until the coating is completely dry, stabilizing its properties and providing speed and ease of work. In the finished coating, they are destroyed over time, but the plaster also matures, so the durability and strength of its polymers do not reduce. There is only one “but” - manufacturers of ready-mixes do not guarantee the quality of the coating when plastering wooden walls with them.
On the market, in addition to the mentioned Rotband, there are ready-made mixtures of dozens of items intended for different types of work and base surfaces. It is not possible to describe all of them, but it is worth noting that for external plaster, domestic “Starateli” of various brands compete quite successfully with the “Germans”, and as a cheap and fairly high-quality alternative for dry rooms - Volma-layer, Gipsovit, etc. When what mixture better, as stated above.
Clay
Clay dough mixed to optimal fat content is plastered on a real Russian stove (made of plinth, flat red burnt brick, with lime mortar) and a “castle” English fireplace made of wild stone, also with lime mortar. In modern residential premises, for strength, 0.3 volume parts of lime paste are added to clay plaster, relative to the volume of clay dough, and 0.5-1 part of pure quartz sand. Instead of lime, you can add 0.15 parts by volume of M200 cement without increasing the amount of sand, but then the tone comes out a bit dirty, and a lime coating is needed, so overall the work does not become cheaper.
This solution must be sifted. It will not be possible to sift raw clay, so clay dough is pressed through a 5x5 mm sieve. Then they lay it out in a heap, make a hole at the top and add cement or lime paste with sand there and knead it. You need to develop the solution within two days, covering it with a slightly damp cloth during breaks of more than an hour.
Clay plaster takes at least 60 hours to dry, and all precautions must be taken when drying, see earlier. Professional stove makers prepare a clay-gypsum solution to speed up drying, but this is not for the DIYer, even with a mixer: mixing clay with gypsum correctly can only be done with extensive experience.
Clay dough with finely chopped straw produces adobe. Nowadays, working with adobe is a hobby, not a construction project, so we’ll just mention its existence.
Limestone
In dry rooms, lime plaster lasts for centuries, which is why it is still used today. Using the stone for spraying (see below), prepare a lime-cement mixture 1:1:7 (lime paste/cement M200/sand) by volume. Proportions for soil – 1:3.5 lime paste and sand; for covering - the same 1:2, but you need the finest sand, pure white, sifted and washed.
For wooden walls, a mortar is prepared - a lime-gypsum mortar in a 3:1 ratio (lime paste/gypsum). First, pour approximately 1:6 by volume of water into a tub or mortar box, stir and, without stopping stirring, pour gypsum in a thin stream until the gypsum solution reaches the consistency of liquid sour cream; here it is very important not to overdo it with water, and its quantity depends on the quality of the gypsum, so you need either experience or a preliminary test.
Next, add lime paste to the gypsum solution and, adding water, bring the solution to the desired fat content. Water is added from a watering can, the stream washes away the components. For the entire batch - no more than 5 minutes, and another 4-5 minutes to produce a portion.
Cement
Cement-sand plaster mortar is, in general, an ordinary masonry mortar. The proportion of sand to cement by volume ranges from 1 to 6. A smaller proportion of sand gives greater strength, durability and density, but less adhesion, and a larger proportion saves cement and makes it sticky, but reduces strength and worsens waterproofing. In general, a proportion of sand from 1 to 3 to cement is recommended for hollow brick walls; 4 and 5 - for brick and civil concrete with notches, and the large one - for dense, smooth high-grade concrete with frequent notches, adding a water-polymer emulsion to the water, and lime paste from 0.2 to 1 volume of cement to the mixed solution. Using lime paste, the solution is adjusted to the desired fat content.
"Fatness" of the solution
The plaster mortar should also have optimal fat content, but this is checked not with a cone, but with a clean trowel, immersing it vertically in the mortar and removing it. A solution that is too thin rolls up, exposing partially or completely the surface of the instrument, a normal solution sticks to it in a thin layer, and a solution that is too greasy sticks in lumps. A binder is added to the lean solution; in oily - sand.
Video: preparing plaster mortar
The classic method of applying plaster
The plaster solution is applied in several layers. The first layer is applied by spray. The second layer is a primer. The third layer is the covering. The adhesion strength of the plaster on the wall depends on the application of the first layer. The spray is applied with a liquid solution that fills the cells of the reinforcing mesh, shingles, notches in concrete, and joints in brickwork. The layer thickness on concrete and brick does not exceed 5 mm, on mesh or shingles up to 10 mm. A trowel is used for spraying. The surface is rough and does not require leveling.
The spray layer must be primed after the layer has hardened but is still wet. Determined by an open palm placed on a rough surface. The surface is quite hard, but also wet at the same time. The primer solution is somewhat thicker than the spray solution and spreads well with a spatula. A solution is applied to the middle of the falcon and, using a wide spatula, the composition is thrown onto the wall. Each portion of the solution must be smoothed with a spatula. The solution is poured overlapping and immediately smoothed out. A falcon is a square wooden plank with plaster mortar applied to the middle. The primer layer is covered with a finishing layer of plaster and is designed to eliminate the smallest defects. The thickness of the finishing layer does not exceed 2 mm. The finishing layer is applied to the wet primer layer with a wide spatula in an arc, pressing the bottom edge against the primed layer.
To obtain an ideal surface, it is recommended to grout to eliminate minor irregularities. Next, watch the video on how to properly plaster with cement mortar.
We purchase materials and tools
Finishing can be done using decorative plaster in various ways. Craftsmen use improvised tools and even unexpected objects for finishing: plastic bottles, dried maple leaves, a broom made of thin birch knots, etc. There are traditional methods:
- Giving the surface relief.
- By creating a specific pattern.
- Giving the walls a certain texture.
Depending on the chosen method, the following tools are purchased:
- Using a special shaped roller, reliefs, stripes, and designs are applied.
- You can use a brush to paint stripes and reliefs.
- Using a small spatula, create strokes and bumps.
- Use a brush or broom to create a pattern in the form of splashes or uneven strokes.
- A metal brush or a crumpled bag will give the walls an uneven texture.
When choosing a tool, be guided only by your imagination. But there are mixtures that contain special large or small particles. Various fillers create an abstract pattern when applied with a simple wide spatula. Such compositions include the well-known ones: Venetian, Bark beetle. Due to particles, for example, small pebbles or shell rock, decorative inclusions are formed on the surface.
Conventionally, all decorative mixtures for plaster can be divided into two types:
- They create a certain relief or pattern due to their composition.
- They have a standard composition, but with small fibers or coloring paste, relief and patterns can only be created using a special tool.
To work with your own hands, we recommend choosing the first group, since its application will not differ much from the standard one. Compositions that allow you to create relief and design only by hand require installation skills or artistic taste. More details in the video:
Selection of material for plastering walls
Plastering walls is needed for any uneven surface, so no matter where you live: in a private house or in an apartment, if the walls are uneven, then before applying the top decorative layer (paint or wallpaper), you first need to plaster the wall.
The choice of plaster material depends on the type of walls
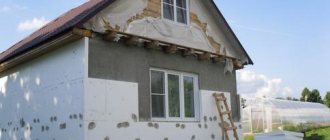
It is also important to consider the working conditions. Different materials will be required for external and internal plastering
Plaster for brick walls
The plaster of the wall, if we are talking about a brick wall, should be made from cement mortar. If there is high humidity in the room, or plastering is done outside, lime must be added to the cement. The plaster must be applied in a layer of 3 cm, but the walls must first be reinforced. This will help prevent the plaster from peeling off in the future.
Next, we will provide step-by-step instructions on how to plaster walls, and tell you what you need to prepare cement mortar. Take one part of cement and 2 to 5 parts of sand, add water to this mixture, and start mixing the cement mortar. Water must be added gradually so that the solution does not turn out liquid. If you need to add lime to the cement mortar, take one part cement, six parts sand, and pre-diluted lime. Mix all the materials and add a little water if the solution is thick.
Plaster for concrete walls
Next we will talk about how to properly plaster walls when it comes to concrete walls. In this case, cement mortar is also used, but it is necessary to add gypsum and quartz particles to it. The quartz will make the walls a little rougher, which will help the mortar adhere better to the wall surface.
If you need to make a solution with the addition of lime and gypsum, you need to prepare a container with water and pour one part of the gypsum on top in a thin layer. The mixture must be stirred quickly, after which the solution is kneaded for another ten minutes. As a result, it should not be very thick.
If the concrete wall is initially rough, you do not need to add quartz primer. To plaster this type of wall, you can use either cement or gypsum mortar.
Plaster for foam concrete walls
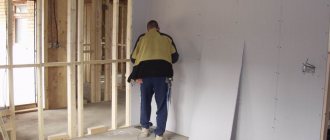
Before plastering the walls as a beginner, you need to treat them with a primer. The foam concrete wall must be plastered using gypsum mortar. However, if you have prepared cement, it’s okay, you can use that too.
You can also attach reinforcing fiberglass mesh to foam concrete walls. If the rules for plastering walls with your own hands seem very complicated to you, and it is difficult for you to mix the solution yourself, you can use ready-made mixtures that are sold in hardware stores. For beginners, this option will be very convenient, since you do not need to purchase ingredients separately or measure the proportions in which materials need to be added to the solution.
The best brands
Russian and foreign manufacturers produce a lot of perlite-based SS, as it is an inexpensive product. Both of them have proven themselves well. The leaders for 2021 are:
- Gypsum "Teplon Unis" (white) - domestic production. It is characterized by a snow-white composition, used in rooms with low humidity, applied up to 5 cm thick, setting time - less than one hour. After sanding, the surface is painted or covered with wallpaper.
- Extra Gips Izo - Turkish manufacturer. It is applied manually without the use of a reinforcing mesh up to 7 cm. It hardens within half an hour. It is leveled using the rule, and after 50 minutes with a steel trowel until it is glossy.
- Glims Velur (lightweight with cement) - Russian manufacturer. The plaster is packaged in packages from 5 kg to 30 kg. In one application you can apply a layer from 5 to 35 mm; it does not require a plaster mesh. Since it can be rubbed off to a shine, putty does not need to be used.
- Quick-mix MPL is owned by a German holding company, which is an international manufacturer of premium mixtures. It is produced in 8 countries at 23 enterprises, including in Russia. Lightweight cement-lime plaster with perlite for machine application. Suitable for external and internal work.
- Ceresit CT 24 Lite – country of origin – Russia. For outdoor and indoor work, layer thickness 3-30 mm.
- All Alci STR - Turkish manufacturer. Gypsum perlite plaster for interior work.
- Perel TeploPlast 0528, 0529 – domestically produced gypsum-perlite mixture.
The best brands of perlite-based building mixtures
All these brands are environmentally friendly, frost-resistant, weather-resistant, do not crack or shrink, and are easy to apply.
The main rule is to apply the solution according to the proportions indicated on the package. In this case, it will not be possible to stir “by eye”, because after a few minutes the mixture thickens and changes its consistency.
Finishing work
Plastering walls with your own hands can be done using two methods. In the first of them, at the beginning of work, beacons or threads are installed to mark the required level, and in the second, the solution is simply applied and leveled with a rule. There are many different additions and subtleties when working with both methods.
There are many stages in surface finishing. But only if all of them are followed, you can get a high-quality and even coating that will last the required period.
Preparatory stage
One of the activities during finishing work is surface preparation. It is carried out in several stages. The algorithm is as follows:
Initially, you need to remove old coatings: layers of paint, wallpaper, plaster. The base layer of plaster can be left alone if it is dense and holds tightly. Otherwise, it must also be dismantled. Subsequently, the entire surface of the wall is tapped to identify weak spots, which are corrected with putty or cement mortar. All old fasteners that are not needed are removed from the wall, and protruding reinforcement is trimmed with a grinder and treated with primer.
Marking
Initially, you need to check the walls with a level for deviations. Measurements must be taken over the entire surface of the wall: both horizontally and vertically. Using the rule, you should find depressions and bumps. All found defects are marked with a marker.
Work begins from the corner of the room, retreating 300 millimeters and drawing straight vertical lines from the ceiling to the floor, in increments of 160 centimeters over the entire length of the prepared surface. Next, at a distance of 150 millimeters from the edge of the wall, you need to mark the places along the line and install dowels with self-tapping screws for the beacons on them.
Then the cord is stretched from corner to corner horizontally. The result is two parallel lines. The cord must intersect all vertical lines, and at the intersection points marks are made and dowels are installed without self-tapping screws. The result is two rows of holes that run strictly along the same line.
Primer coating
When covering bricks or foam blocks, deep penetration soil is used; for the rest, any soil for construction work is used.
To cover with primer, you will need a special painting container, which has a cavity into which the primer is poured, and a platform for squeezing the excess from the roller. Work is carried out in layers with an interval of 2-3 hours and with final drying for a day.
Installation of beacons
Without beacons, plastering is difficult, and in some cases impossible. This is the key to quality work. The technology for installing beacons is carried out in the following order:
First, self-tapping screws are screwed into the prepared upper holes, after which the rule is to check how deeply the lower self-tapping screw needs to be screwed in in order to form a vertical line between them. According to this scheme, all fasteners are checked. After this, two diagonal lines are pulled between the caps using a thread, beacons are installed and checked to see if any of them will protrude. Now you need to calculate the distance between the upper and lower dowels and cut the beacon profile so that when installed it protrudes 5 centimeters in each direction. Then the solution is prepared and applied to the wall along a vertical line, after which the beacon prepared in the step above is pressed into the solution so that it does not protrude beyond the caps. After installing all beacons, a control check is carried out at the building level. It ends with the removal of the screws.
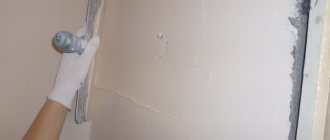
Pre-finishing work
Before plastering the surface, it is necessary to properly prepare it.
- If the work will be carried out in a room where the walls and ceiling were previously decorated, then you need to remove old paint and wallpaper from the surface and completely clean the layer of weakly adhering plaster. To do this you will need a spatula and a chisel with a hammer.
- When preparing new walls for plastering, it is enough to coat them with a primer.
- Detected cracks need to be widened, cleaned and well primed.
- Fill deep cracks with cement mixture, level it at the level of the wall surface, large protrusions must be knocked down.
- Using a level and plumb line, check the curvature of the walls.
- On smooth surfaces, places with deep depressions and potholes, places with defects in floor slabs, it is necessary to attach a plaster mesh.
- If the layer is 30 mm or higher, then it is better to use a metal mesh for the work.
- The mesh is fixed using dowels or self-tapping screws.
- To obtain a smooth surface, people who are leveling a wall with plaster for the first time should better plaster along the beacons.
The minimum thickness of the plaster layer for brick walls is 5 mm, for concrete walls – 2 mm. If plastering is done on beacons, the thickness of the layer will depend on the size of the beacons. The beacon profile most often has a thickness of 6 mm.
Step-by-step instructions for plastering walls using beacons
Before talking about the stages of work, it is important to note that working alone, although possible, requires a lot of effort. This is due to the labor costs required to mix the solution.
Therefore, the ideal condition is to have an assistant who will mix this solution.
Preparing walls for plastering
Preparing the premises begins with its complete emptying. All wires must be insulated to avoid moisture penetration. The next step will be to clean the walls down to the base from dust or other finishing materials if plastering takes place in an already inhabited house.
After cleaning from dust and beating, the walls are primed. For brick walls, a regular water-based primer is suitable, which increases the adhesion of the mortar to the wall. For smooth concrete walls, a primer with the addition of quartz sand is suitable - concrete contact, which creates a rough structure on the wall surface that is favorable for adhesion to the plaster.
After the room and the necessary tools for plastering have been prepared, you can begin work, which is divided into several stages.
Preparation for leveling - how to correctly set beacons for plastering walls
The beacons act as guides, greatly facilitating the work of leveling the plaster mixture as a rule, and also allow you to make the wall perfectly flat due to preliminary verified installation. Nowadays, the most common use is a special beacon profile, which can be metal or plastic, but several decades ago wooden blocks coped with this task perfectly.
Below is the procedure for installing beacons using a laser level. This method is the simplest and most advanced today.
A plumb line or level is used to check the verticality of the wall in order to assess the required thickness of the plaster layer. If the wall is fairly flat, you will need a standard layer about 2 centimeters thick. The laser level is adjusted in such a way that the plane it creates is at a distance of 2-3 centimeters from the wall, that is, at the distance of the required thickness of the plaster layer. Markings are made along the entire width of the wall at a distance of 1.2-1.5 meters for the installation of beacons
It is important to know that the distance between the beacons should be slightly less than the length of your rule - a tool for leveling the mixture along the wall. It is also necessary to retreat 30-50 centimeters from the corners of the walls. After this, several piles of quick-drying mixture (for example, alabaster) are placed on the marked places along the entire height of the wall
Their thickness should protrude slightly beyond the plane constructed by the level. Next, until the mixture dries, the beacon profile is sunk into it, and this is done so that the entire surface of the profile barely touches the laser plane along its entire length. This guarantees a completely level installation.
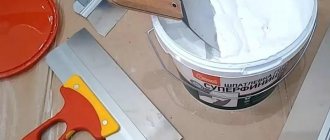
Preparation of mortar for plastering walls
For each type of plaster mixture, its own standards for dilution with water are established and written on the bags, so there is no point in dwelling on this in detail. There are two important points to talk about here.
Firstly, this is the consistency of the solution. Plaster for application to walls should have the consistency of thick sour cream. This can only be achieved through practice. The convenience and ease of performing the work will depend on how well the consistency of the solution is selected. The liquid solution will gradually drain from the wall, and an excessively thick mixture will be difficult to distribute along the wall and will tend to dry out quickly.
The second important point is the lifetime of the solution. It is also indicated on the packaging and is different for each type of plaster. This parameter should be used as a guide to understand how long it will take you to apply the mixture to the wall and distribute it. To do this, you need to start mixing with small volumes in order to prevent the plaster from hardening in the container.
Plastering works
General provisions
Firstly, upon completion of the next stage of work, the tool must be washed clean in water. The water in which the instrument was washed is unsuitable for mixing mixtures; it must be poured, but not into the toilet or sink - the sewer will clog - and not onto the lawn, but into a cesspool.
Preparing the walls
Preparing walls for plastering includes:
- Cleaning the walls.
- Repairing minor defects.
- Creating a receptive surface.
Brush
Cleaning the walls of old, tightly stuck wallpaper is done with wallpaper removers. It is applied either with a wide flute brush or with a special plaster brush - a plaster brush, see fig. Remove the wallpaper with a spatula after letting it sit according to the instructions for removing it.
Old plaster is removed after wetting with water at room temperature and allowing it to sit. It’s convenient to moisten with the same spray bottle: the hand gets very tired from long “spritzing” with a spray bottle, and you need to wait an hour and a half after the spray. Keep the wetted plaster in a tightly closed room and remove it in layers with a wide spatula.
Small hollows, potholes and cracks are sealed with a gypsum primer, rubbing it crosswise at 45 degrees with a spatula twice, back and forth. Gaping cracks (more than 2 mm wide) and cracks under the baseboard are sealed, like cracks in a floor screed - with a thixotropic compound and silicone with a damper.
Cracks under the baseboard need to be sealed especially carefully: it is through them that the fungus mostly penetrates into the walls.
Forming a surface for plaster consists of selecting masonry joints and rustications (joints between concrete slabs) and notching a concrete wall, and when working with a homemade mixture, you also need to notch a brick wall. If the finished mixture does not require notching the wall, this is indicated in the instructions for it, and in any case, notching will not harm.
Rusts and cut masonry seams are selected using an impact drill or a hammer drill with a narrow chisel for stone. Rusts are selected up to the concrete, and masonry joints are 10 mm deep. For the seams, this is where the preparation ends, and you also need to glue a PVA masking bandage into the rustic areas, and rub them with plaster, like cracks.
The walls are cut with a hammer, an ax or a hammer and chisel. There is no need to cut deeply, but the notch density should be at least 900/sq.m for walls made of high-grade concrete (notches every 3 cm horizontally and vertically), 600/sq.m for civil concrete (notch pitch 4-4.5 cm) and 250/sq.m for brick (step 5-6 cm).
After notching, concrete walls must be treated with the Betonokontakt primer, and foam concrete walls made of shell rock, tongue-and-groove blocks and other light porous materials should be treated with a deep penetration primer for concrete. Traces of leaks and mold are neutralized with “Whiteness” and disinfected with grass - a solution of copper sulfate.
Splash
photo: spray on walls and ceiling
Further, working with homemade mixtures, and in most cases ready-made ones, requires spraying, i.e. throwing lumps of plaster onto the base surface to give it a soil-holding relief. To spray the falcon with a trowel, apply a pile of solution, then use the trowel to take it little by little and with a quick but smooth movement of the brush (with just one brush!) throw it onto the wall.
The lump should stick to a slightly convex spot up to 7 mm high with spilled edges. Raised and rolled edges indicate poor adhesion; The cause may be either a thin solution or a poorly prepared surface. “Cow dung” indicates that the solution is too thin. Too greasy a solution stays in a heap, but slides.
The total area of the spray stains should be from 0.4 to 1.0 of the wall surface area; smaller values apply to brick, larger values to concrete. The composition of homemade solutions for spraying is described above, and ready-made ones are sprayed with the same ones that apply primer.
After spraying, the layer should be allowed to set, but not harden. To check, press your finger on the surface of the layer: it should be wet, but not pressed. The spray is carried out in sections so as not to move the soil over the frozen spray.
Grouting and finishing
As already mentioned, plaster as a finish is completed with a front layer - a covering. The coating is applied with a falcon in a layer of 1-2 mm, and immediately after setting, but before hardening, rubbed with the same falcon until smooth. First, they rub in a circular motion in a spiral from the center to the edge of the completed area, then, in order to remove traces of the circular grout, they rub with less pressure, apart, along and across. If there are particularly high requirements for surface smoothness, rub with a squeegee. Rubbing the lime-gypsum covering with a suede trowel gives a shiny surface if the sand in the covering is very fine.
Video: preparing walls for plastering
Plastering walls
Internal plastering work on walls is divided into:
- Plastering facing bricks.
- Plastering walls without beacons.
- Plastering walls on lighthouses, concrete and stone.
- Plastering corners and slopes.
- Plastering wooden walls.
Plastering facing bricks requires serious professional training, special surface preparation methods and work techniques, and is therefore not considered. Plaster without beacons provides the best quality coating, but requires a lot of experience, a trained eye and a steady hand, so we will describe it briefly.
Plaster without beacons is made like a falcon. A portion of the mortar is applied to it with a trowel, and then the falcon is led at an acute angle to the wall, precisely keeping its lower edge at a distance from the wall equal to the layer of plaster, and bringing the upper edge closer to it as the mortar is worked out. From this it is clear that this work is by no means for beginners, which is why in our time they mostly plaster on lighthouses.
Video: plastering with cement mortar without beacons
Plastering on beacons
Plaster beacons are special narrow oblong parts that form an imaginary flat surface above the wall, see fig. A spatula or falcon is drawn along the beacons, leaning on them, from bottom to top, rubbing the solution between them. On a brick or well-prepared wall made of ordinary concrete, some types of ready-made dry mixtures can be plastered without spraying: apply the solution to a trowel or a wide spatula and rub it in.
Plaster beacons
Installation of beacons under plaster on walls that are even within 3 mm is done using flea screws or mounting glue. If the walls are uneven, installation of beacons becomes more complicated.
First, in the upper corner of the wall, a self-tapping screw is driven into the dowel and a plumb line is lowered from it. Self-tapping screws with a slot for a flat-head screwdriver or a universal one are convenient for this; A plumb string is inserted into the vertically oriented slot of the self-tapping screw.
Next, a second self-tapping screw is driven down the cord and, by adjusting both, ensure that the MINIMUM distance from the wall to the cord is equal to the height of the beacon. After this, the cord is removed, and several piles of thick mortar are thrown up the wall; The beacon is placed on them, aligned with the heads of the screws and pressed down.
Then the cord is lowered and the beacon is pressed along it until it is level. After the mortar under the beacon has set, apply the same plaster mortar on the sides with a spatula, then install the beacon in the opposite corner in the same way, pull the cords horizontally and install the remaining beacons in increments slightly less than the width of the falcon or wide trowel. Plastering is done by turning the tool slightly obliquely, back and forth.
Once the gaps between the beacons are filled to the top and the solution has set, another 1-2 mm of primer is added to cover the tops of the beacons.
photo: installed beacons
Galvanized steel beacons can rust and rust will appear on the walls. To avoid this, use the following methods:
- Removable beacons.
- Plastic beacons.
- Homemade plasterboard beacons.
- Overhead beacons.
Removing beacons from not completely hardened plaster leaves wide rustications, which are sealed with a plaster mixture for soil. Without experience, after this, stripes of depressions or convexities may appear on the finished wall.
Plastic beacons are very expensive, as they are made of carbon fiber or comparable in strength and rigidity. They can be replaced with strips of gypsum board impregnated on both sides with a water-polymer emulsion, cut according to a pattern using a jigsaw. They are attached to the wall either with glue or by pressing them into piles of spray, but such beacons do not stick firmly to the wall, and you need to work carefully so as not to knock them down, especially when splashed.
Surface beacons for plaster are made by highly qualified professionals when plastering complex surfaces. They are small sections of plaster with flat tops that match the final surface. Do-it-yourselfers and ordinary plasterers, as a rule, do not master the techniques of aiming beacons.
Video: plastering walls using beacons
Corners and slopes
It is convenient to rough-shape the internal corners of the walls with a large square falcon or a special corner trowel, similar to a plow with a protruding angle at the top of 90 degrees. They are brought to evenness by rolling them over the beacons with a piece of plastic pipe 60-100 mm in diameter. The old methods of rolling corners - a bottle, a ball - developed at a time when there were no plastic pipes yet, and it was inconvenient to roll with a steel pipe.
Door and window slopes should have some expansion inward - the dawn of the slope. The obtuse angles required for this are formed either by applying a wooden strip of the required thickness to the frame, or by special beacons for slopes. Clean corners are also rolled with a pipe.
Video: plastering the outer corner
Video: plastering the inner corner
Video: plastering slopes
Wood plaster
Wooden walls to be plastered are first covered with felt, and the felt with roofing felt or glassine paper, otherwise the pile will prevent the plaster from sticking. Then they knock down a two-layer sheathing of shingles, or shingles - thin narrow flakes along the fibers from ridges or blocks of industrial wood.
The shingles should not be too dry, otherwise they will crack from the nails. The first layer is filled with thin shingles at an angle of 45 degrees to the floor; the second - across it from thicker shingles. They plaster over shingles with a special mixture (see above), which is not produced on an industrial scale, but in general, plaster over shingles is complex, expensive, unstable, fragile, and nails cause rust. Therefore, plastering wooden walls is a thing of the past, and fire safety of wooden buildings is now achieved in other ways.
Plastering walls with your own hands using beacons
In 14 lessons, we did a tremendous amount of work installing beacons and securing the plaster mesh. Now that we have guides for leveling, we will simply throw the finished plaster mortar with a trowel and, using a trowel and a rule, roll it along the wall to the level of the guides (beacons).
The rule will slide along the beacons and prevent the solution from going beyond the level of the beacons.
In general, what is special to tell here needs to be shown here, so watch the video that I have prepared for you:
| In this directory you can choose a normal rule for yourself. |
Well, you've watched the video! Let's summarize a little.
- Carefully mix the plaster with water in the required proportion.
- Prepare the plaster solution to the level of thick sour cream.
- We plaster in 2 stages:
- First, we create the main thickness of the plaster (roughly sketch it out, wait until it dries) so that no more than 5 mm remains to the level of the beacons.
- Then we throw a thin layer of mortar and, using a rule that slides along the beacons, level the wall exactly to the level of the beacons.
Important!
Here we are plastering an ordinary large wall. If you need to level the wall behind the radiator, then there is a separate article for this with its own nuances: Do-it-yourself wall finishing behind heating radiators.
After plastering the walls with your own hands, the next stage will begin - puttying the walls, which involves fine leveling. It will be discussed in the following articles. The main thing you must remember is that before the puttying process, the plaster on the wall must be completely dry! It usually takes a few days. You can determine that the plaster on the walls has dried visually. Every day your wall will become whiter and whiter.
Some experienced plasterers say that the main thing is to accurately install the beacons, and plastering itself does not pose any problems. What do you think?
Dry plaster and its properties
Finishing with dry plaster
Dry plaster was developed specifically for use in residential buildings, so it meets all state standards. It is environmentally friendly, clean, harmless and non-toxic material. This material is also classified as energy-saving, non-flammable materials. The plaster has excellent soundproofing properties and characteristics. It has no particular odor and is safe for human life.
This building material breathes, is often of excellent quality, and controls the level of humidity in the rooms. When air humidity increases, it will absorb it, and when it decreases, it will release it. Its acidity is the same as that of human skin, and this is harmless to health.
Aligning walls with beacons
It is in this way that significant unevenness in the wall can be removed. Beacon profiles will serve as a limiter so that the work is completed perfectly evenly with a tolerance of 1 mm/sq.m.
Cost of work
The price for plastering work starts from 600 rubles. per sq. m. Let's calculate how much you can save if you don't hire workers.
First of all, you need to buy a hammer drill and a 2 m long bubble level. All other consumables will be listed below. 6,000 rubles will be enough for all these accessories, so you will save after leveling one wall of 15 square meters. m.
If you need to level walls with an area of 90 square meters. m., then the savings will be at least 30,000 rubles! You will have the entire tool forever, and if you already have it, then it would be a sin not to use it. If we plaster the walls ourselves, we will definitely be confident in their quality.
Choosing a mixture for plaster
Now popular plaster solutions are gypsum- and cement-based mixtures. We will talk about leveling walls with gypsum mixture for the following reasons.
- Thick layers up to 5 cm can be applied without cracking.
- Unlike cement, gypsum mixtures are not subject to shrinkage.
- Gypsum has high plasticity.
- Due to its high adhesion to the base and low weight, it is also possible to level ceilings.
- Gypsum has better heat and sound insulation, and also allows the walls to “breathe”.
- Possibility to plaster smooth concrete bases without reinforcing mesh.
Of the gypsum mixtures, the most popular are the products of the German company Knauf-Rotband. There are also plaster mixtures Osnovit Gipswell, Volma Layer, Forman No. 10 and others.
Beacon profiles
Metal beacons
Metal beacons are narrow profiles made of galvanized iron with perforated holes that will act as limiters during plastering. By running the “rule” over them, we remove excess solution. The standard length of beacons is 300 cm, depth is 3, 6 and 10 mm. Metal beacons are fixed to the wall using screws and a hammer drill.
Gypsum beacons
A flat wall can be made without metal beacons. Instead, artificial beacons made of plaster are exhibited. This saves time (no need to pull out the beacons and then plaster the grooves from them) and reduce the consumption of plaster. The production of gypsum beacons occurs as follows:
- Dowel screws are installed on the wall where the plastering will be done;
- using a regular or laser level, the screws are set to the desired height;
- a metal profile or a flat wooden block is placed on the screw heads;
- holding the profile with your hand, a gypsum solution is placed under it;
- Having removed excess gypsum, the profile is removed.
The resulting plaster strip will be a beacon; such strips are made along the entire wall. More details on how to make beacons from plaster are shown in the video:
Plastic beacons
In addition to metal and plaster, there are also plastic beacons. They are in many ways similar to their metal counterparts, but are made not of galvanized steel, but of high-strength plastic. Plastic beacons are attached to the wall in the same way as metal ones using screws. The disadvantage of this type of beacons is their fragility, with strong impacts the rule.
Required tools and supplies
- plaster mixture;
- beacons 3-6-10 mm;
- perforator and adapter with a nozzle for making a solution;
- dowels of the required sizes;
- wood screws with a rare pitch;
- crosshead screwdriver;
- bubble level – 2 meters;
- metal scissors or grinder for cutting beacons;
- hammer;
- plumb line;
- aluminum rule - 2 meters and 2.5 meter rule for installing beacons;
- wide spatula – 15 cm;
- steel ironed;
- bucket;
- acrylic primer;
- primer for treating concrete and smooth walls;
- a wide brush or roller with a tray for applying primer;
- roulette;
- gloves to protect hands.
The list is impressive, but you probably already have some of it. The main costs are a hammer drill, a level and a iron; the rest is not very expensive. Also, you should not skimp on such a tool as the “rule” - this is a long aluminum strip with a sharp edge, which is used to level the mortar when screeding a floor or plastering. The rule is convenient to check the evenness of the surface.
How to learn how to apply decorative plaster easier
There are so many craftsmen - so many opinions about what is decisive for achieving a high-class application of decorative plaster. Modern technologies of decorative facing materials have required masters of plastering to master with their own hands the basics of design and artistic thought. Their class of work is already assessed not only by the quality of application of certain types of plaster, but also by the artistic design of the wall as a whole.
You can master the methods of applying multilayer decorative plaster with your own hands in several ways:
- Work as part of a repair team with a good high-class plasterer, get a couple of lessons in applying basic types of plaster yourself, and not only decorative;
- Thoroughly analyze the main master classes, including using printed and promotional materials, as well as lessons from high-class masters on videos and thematic websites;
- Proceed at your own peril and risk, receiving lessons in applying plaster decor with your own hands, learning from your own mistakes.
Advice!
The best solution would be a combination of all three methods, provided that you have the time and opportunity to master a master class or work as an apprentice to a master, raising your class with each new type of decorative plaster. In practice, this will take a huge amount of time. Fortunately, the methods for applying various types of decorative plaster are very similar in many ways. For example, having mastered the application of simple Venetian plaster in a master class on video, you can begin applying simple types of “Travertino” or the more elegant “Marmorino” without much risk.
Tools
The choice of tools for work must be approached with special care. The type and quantity of tools will depend on your professionalism and construction skills.
- Tools for taking measurements: spirit and water level, small tape measure, metal rule (aluminum recommended), ruler.
- Ladle for plaster.
- Trowel for working with mortar.
- A small shield (falcon) with a handle in the center is used for smoothing and compacting the solution.
- An ordinary hammer.
- Brush for wetting or cleaning walls.
- The trowel is used to apply the mixture, and then tamp, compact and level.
- Metal brush for cleaning walls.
Also make sure that you have household appliances in the form of stepladders, tables. The main thing is that they must be stable.
Stepladders and tables for plastering
What is plaster: learning general information
The purpose of using this technique is to create a durable layer that eliminates unevenness and other defects of the original surface.
Homogeneous solid plaster provides good protection from wind and other adverse external influences. It performs full-fledged insulating functions and improves economic performance during the operation of the property.
This is a suitable base for painting and wallpapering. During the work, they create high-quality external and internal corners, connections with window and door frames, floors and ceilings. On such surfaces it will not be difficult to secure the plinth and other parts later without the formation of cracks.
In addition to simply leveling the walls with plaster yourself, you can use more complex technologies
This photo shows an example of a spectacular decorative coating. The unique appearance was created based on techniques that are discussed in detail in this article.
Related article:
Decorative plaster for interior wall decoration. Composition and types of coating, manufacturers, examples of using decorative mixtures, how to prepare them yourself, instructions for application - in this material.
From the examples above, it is not difficult to understand the basic requirements for a suitable mixture:
- To securely adhere to a variety of surfaces, it must have good, but not excessive, adhesive characteristics. Otherwise, the composition will stick to the tools, which makes it difficult to accurately perform work operations.
- The appropriate consistency is determined in the same way. As a rule, they prefer to use a thickness similar to that of full-fat sour cream.
- After hardening, it is desirable to obtain a surface that is resistant to mechanical stress. This will prevent damage due to careless handling.
- Health safety is a must. Wall plaster is used inside residential premises, so maximum attention is paid to environmental cleanliness.
- Washable, color, antiseptic properties can be provided with appropriate additives. But in any case, the durability of the layer will come in handy. Its creation involves labor-intensive wet processes, so any owner will benefit from increasing the interval between major repairs.
A mixture of sand, water, and cement meets the listed criteria. It is supplemented with lime and gypsum to improve ductility and adhesion to a certain surface. Below are popular "recipes". Using them, high-quality wall plaster will be created. Video lessons along with written step-by-step instructions will help you independently understand the important nuances of technological processes.
What is the difference between plaster and putty: the correct use of construction technologies
Plaster and putty are similar not only in composition, but also in application features. What is the difference is described in this part of the article. In both versions, the main components are sand, cement and water. However, on large areas it is more convenient to work with relatively large fractions of fillers. The putty is used for sealing small cracks, joining elements made of plasterboard, and other “delicate” operations. In this case, small components that form a smooth surface are useful.
The plaster is applied sequentially, in layers up to 10 mm. For thicknesses greater than 30 mm, reinforcement is used. As noted above, this technology can provide good insulation from external influences.
The putty is often applied over the primer in one layer. Its thickness is less. Use fine sand and crushed gypsum. Acrylic resins are added to some compositions, which improve moisture resistance and form a glossy surface. To improve binding properties and adhesion, latex, epoxy, polyvinyl acetate and other adhesive fillers are used.
Apparatuses and devices for applying plaster by machine
There are two main principles of machine application - jet and mechanized. The jet type, in turn, is divided according to the principle of solution supply:
- Screw - the solution is supplied mechanically through a pipe to the spray nozzle. Equipment for auger plastering of walls by machine, in the video of the PFT series device:
Screw machine for automatic mixing and mechanized spraying, PFT series
- Pneumatic - uses a special gun to plaster walls in a hopper in which the facing mixture is placed. A pressure of 2-3 atm is provided by a special compressor. Such machines are simpler and easier to operate, but have much less functionality and do not mix the solution.
Automatic pneumatic installation, plastering machine using a cartouche gun
Cartouche pneumatic gun for applying plaster
Pneumatic installations are not so convenient; you have to mix the solution yourself, constantly add it to the container of the cartouche gun, and holding the filled container in your hands is quite difficult.
Important: using a cartouche installation, it is almost impossible to spray the mixture by machine on a surface near the ceiling, since the hopper gets in the way.
There are also very low-cost versions of mechanization, such as a pneumatic shovel. The principle of operation is the same as that of a cartouche gun, but this device can use conventional lining solutions. There are no restrictions on the filler fraction.
Pneumatic bucket for mechanized spraying on plinths, external walls, etc.
Devices for applying plaster using a mechanized method are mounted on telescopic spacers close to the surface to be treated. They do not mix solutions, but only “place” them on the surface of the base. It should be noted that they are much more expensive, machine and manual application. Their key advantage is the need for minimal smoothing of the base surface only at the points of contact of the treated strips.
Mechanized robot plasterer
Plastering by machine, the video shows a mechanized apparatus that applies and simultaneously smoothes the mixture: