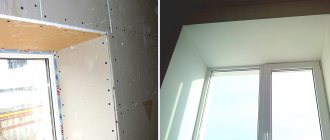
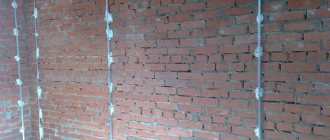
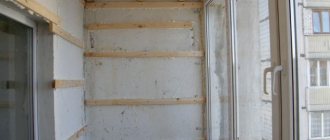
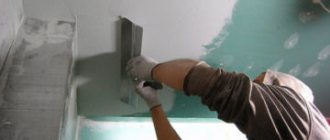
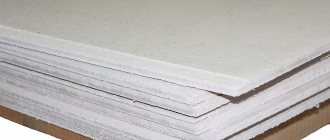
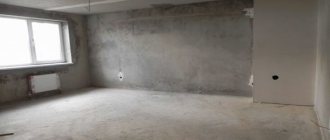
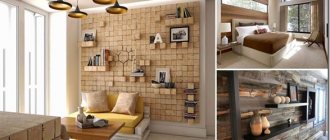
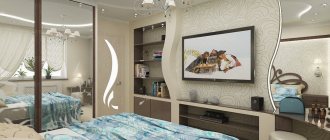
On a note ! Plasterboard panels are characterized by high fire resistance and good thermal insulation characteristics. This is a fairly durable material that can be used to cover almost any surface. It is easy to use, has a large coverage area and is easy to cut, making it possible to carry out leveling in a short time.
Which one is used?
Before you start working directly with drywall, you should understand its types. When choosing a material, the specifics and microclimate of the room are taken into account.
Depending on the type, plasterboard sheets are painted in different colors:
- grey . Used in ordinary rooms where there is normal humidity;
Regular gray drywall
- pink . Fire-resistant material, designated by the letters GKLO. Used for covering areas near fireplaces and stoves;
Fireproof plasterboard
- green . Drywall, which is designated by the letters GKLV, is suitable for kitchens and bathrooms;
- blue or dark gray . This is GKLVO, characterized by fire and moisture resistance. Suitable for finishing walls in the kitchen.
Note ! There is also an arched material, gypsum plasterboard, which is characterized by high ductility and has a thickness of only 6-7 mm. This type of drywall is intended for curved structures.
Attaching drywall sheets to the frame
Leveling the walls with plasterboard is approaching the final stage, all that remains is to screw the sheets and properly seal all the joints. The installation scheme is quite simple, but given the considerable weight of the sheets, it is better to get a partner, this will make the work much easier. A special hardened self-tapping screw 35 mm long is used as a fastening element. (see Fig. 1).
Having previously adjusted the height and armed with a screwdriver, we place the first sheet starting from the corner of the room. In order not to destroy fragile sheets of drywall, it is necessary to set a torsion force limiter on the screwdriver.
If the frame is installed correctly, the edge of the sheet opposite from the wall should be exactly in the middle of the second guide strip. The self-tapping screw is screwed into the countersunk every 15-20 cm . along the entire perimeter of the sheet.
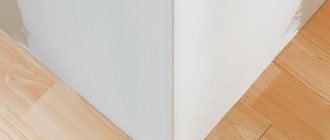
In a similar way, the sheets are attached to adjacent and opposite walls. The angle of joining the sheets should be straight without creating space between them.
Butt corner of plasterboard sheets.
Puttying joints and drywall screws
In order to prepare the sheets for finishing, the joining seams and screw caps must be masked with a layer of putty. To do this, the seams are reinforced with self-adhesive tape and covered with starting putty. Reinforcing the joints will prevent cracking of the hardened putty material due to vibration of the walls and temperature changes.
On a note! All sheets have special recesses along the edges, this allows you to apply the putty composition without disturbing the overall surface level.
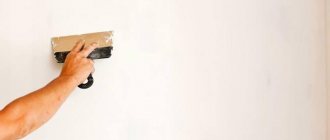
The hole from the self-tapping screw is masked by applying a small amount of putty to it, after which the excess composition is removed with a spatula.
After the starting layer has hardened, using sandpaper (P100) the seams are brought to a perfectly smooth surface. Depending on the facing coating, the walls are either covered with a finishing layer of putty or left as is. For example, walls under tiles can be left in this form, but for painting or wallpaper, a finishing touch is required.
Application options
There are several ways to cover walls with plasterboard; let’s look at each of them in more detail.
- Frame mount . A rigid frame is constructed from a metal profile or wooden blocks - it serves as the basis for plasterboard sheets. The material is attached to the frame with small self-tapping screws.
- Fastening with glue . A simpler, but less popular method. The sheets are attached directly to the wall with glue, which allows finishing with minimal loss of usable space.
Both methods are reliable; Moreover, if desired, they can be combined. The pros and cons of each of them will be discussed below.
Using drywall to level walls
Installation of a profile frame
Leveling the walls in the house using a metal profile for work is the optimal solution, allowing you to build a reliable and sufficiently strong structure that can withstand significant loads. All work is carried out in the following order:
Mounting UD (UD) profile
- First of all, with a pencil we mark the places where the profile is attached. All lines of the ceiling, floor and walls must converge into one single line.
- After this, a wall UD profile with a cross section of 28x27 mm . and is attached along the entire drawn contour. You can use a 6x40 mm “quick installation” dowel for fastening . , which are clogged every 50-60 cm .
- After installation, using a plumb line, we check the result obtained; the upper and lower profiles must coincide, so we will get a perfectly vertical plane.
Fastening UD profile around the perimeter
Important! Attaching the UD wall profile to the side walls is not a prerequisite; their presence only on the floor and ceiling will be sufficient.
Mounting CD (CD) profile
- After the frame of profiles is ready, you can install vertical racks from a galvanized guide CD profile with a section of 27x60 mm .
- The CD profile is attached using a special “bug” screw with a drill at the end (see Fig. 1). The presence of a drilling tip allows the screw to pass freely through the metal walls of the profile, securely fastening them.
Fig 1. Necessary elements for making a frame for drywall
10-20 mm from them . Between them, at the places where the suspensions are attached, nylon threads are stretched, which will serve as a guide for the correct installation of the remaining guide profiles. This way we will get a perfectly flat wall plane.
The profile fastening pitch should be 600 mm . between themselves. It is important to remember that this step is measured from the center of the profile, and not from its edge. As many have already guessed, this step is not accidental; it allows you to attach drywall without trimming. The width of a standard sheet of plasterboard is 1200 mm , so it will be fixed at the edges and in the center.
Installation of guide profiles along the threads in the places where the suspensions are attached.
The profile is fastened using special hangers made of galvanized metal. They are strips perforated along the edges, with reinforced stiffening ribs in the central part (see Fig. 1).
During installation, they are bent into the letter “P” , and after drilling holes in the wall, they are attached to the dowel through special holes. The perforated ends are bent to the walls of the profile and, aligning it along the threads, they are fixed with a screw.
Fastening the profile using a U-shaped suspension.
Video tutorial on frame installation
putty
After installing the drywall (using the first or second method), it is necessary to carry out finishing putty. This stage is mandatory, since after the sheathing the joints between the sheets are clearly visible, and minor damage, dents, and cracks may still remain. And to make the surface smooth and even, it is covered with primer putty.
Such putties are sold in the form of dry mixtures, which must be diluted strictly in accordance with the manufacturer's instructions. The mixture is prepared in small portions and used immediately, as it hardens quite quickly. When preparing the composition, special attention should be paid to ensuring that its structure is uniform.
Expert opinion
Sergey Svistunov
Specialist in the design of buildings and sewer systems. Knows everything about construction and renovation.
The putty is applied in a thin layer so that there are no cracks at the end. When applying several layers, it is important to apply a new one only after the previous one has completely dried.
Leveling walls without a frame
To attach drywall sheets without a frame, special glue is used, which can be purchased at any hardware store. The optimal application of this method would be to use it in rooms with a small area.
Important! Before starting work, the wall surface must be thoroughly prepared. They must be free of any substances that could prevent the adhesive from bonding well to the wall.
To do this, you need to wash off all the dust from the surfaces of the walls and, after allowing them to dry for a couple of hours, apply a layer of primer to them.
Primer of walls
In order to prevent the diluted glue from drying out, it is advisable to mark all sheets in advance and cut them to the required height.
It is important to remember that after installing all the sheets, there should be a gap of 10-20 mm . from each side.
After everything is ready to work, dilute the glue in small piles in increments of about 30 cm . Apply to the back of a sheet of drywall.
The sheet must be carefully lifted and installed on substrates specially prepared for the technical clearance. By lightly tapping with a rubber hammer, using a level and a 2 m , the sheets are installed in a strictly vertical position.
Fastening drywall with glue
We perform a similar procedure with each sheet, precisely fitting them to each other. This creates a continuous, perfectly flat wall without a single screw. All that remains is to give the glue time to harden and begin puttingtying the joints.
Video tutorial on attaching drywall with glue
FAQ. Questions and answers
Is it true that leveling with drywall will save money?
Yes, it is one of the cheapest materials. Moreover, drywall will save time, especially if a frameless cladding method is used.
Where is it better to start decorating a room - from the ceiling or from the walls?
It is more convenient to start covering the walls. Although there are no restrictions here, if you wish, you can start from the ceiling.
Is it necessary to putty joints?
The joints must be puttyed without fail.
What wallpaper can be glued to walls covered with plasterboard?
If you properly treat the joints and prime the surface, you can glue any wallpaper - from cheap paper to silk-screen printing.
