How to choose wood putty?
Using wood putty, you can eliminate various surface defects and imperfections. In addition, putty can improve the characteristics of lumber and extend its service life. This composition must be applied before finishing the wood. Manufacturers of building materials offer many different types of wood putty. We will consider the features of choosing wood putty in more detail in this article.
Features of application
Puttying work can be carried out with any type of wood, at any degree of wear of the material. Wood is puttied mainly to eliminate defects on the surface, but this is not the main function of wood putty.
Among the advantages of using the mixture are the following:
- Hydrophobic properties. Putty prevents moisture from penetrating into the wood structure.
- The mixture can be used to seal deep cracks, eliminate damage from poor wood processing, and restore wooden decorative elements.
- Parquet mortar has a high level of adhesion. Putty applied to the floor easily penetrates cracks and hides surface defects.
- After the mixture dries completely, it becomes transparent and does not change the natural appearance of the wood structure.
There are many different types of wood putty, which differ in some properties, color and composition.
Based on their composition, the following types of mixtures are distinguished:
- Plaster.
- Acrylic. The acrylic mixture allows you to extend the life of the wooden structure. Positive qualities also include low price, good adhesion, large assortment, short drying time. A quick-drying, heat- and moisture-resistant acrylic putty that is perfect for treating wooden floors.
- Water resistant. A variety of acrylic mixtures. In addition to acrylic, waterproof solutions include some resins and latex. It is used for both internal and external work.
- Non-shrinkable. They are characterized by the absence of material shrinkage and good adhesion performance. Suitable for finishing furniture and new flat floors.
- Nitro putty (solvent based). Such mixtures contain solvents. They are resistant to household chemicals and moisture.
- Adhesive. Such materials include mixtures made by yourself on an adhesive basis.
- Latex or polymer. Polymer and latex putty easily lay on the surface, forming an even layer. They have a high drying speed. The disadvantages include high cost. Perfect for processing parquet.
- Oily. Produced on the basis of natural oils. They have good strength and moisture resistance. The disadvantage of this solution is the long drying time.
- Oil-adhesive.
- Alkyd. The mixture contains alkyd resins. Alkyd putty is elastic and viscous. It is used mainly as a coating for painting with enamels. Also, varnish adheres well to this coating.
- Epoxy. Epoxy putty has a plastic structure and a high level of adhesion. This solution can be used as a base layer or for finishing.
Colorless and colored compositions are distinguished by shades. Colorless putty hides various damage on the surface of the wood. Using this solution you can restore an old floor. To form the base layer, the thickness of the applied putty can range from two millimeters to several centimeters. For finishing you need to apply a layer from one to five millimeters thick.
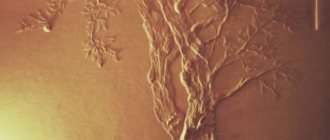
Colored furniture putty is used for restoration and is selected according to the shade of the wood. Using this mixture, damage on the surface caused by long-term use of a wooden structure is filled and leveled.
How to putty a wooden surface
How to putty a wooden surface 6.6 (94.19%) 31 votes
How to putty a wooden surface with your own hands and why. Let's take a brief look at how you can putty a wooden surface and what is needed for this. Often, before applying varnish or other finishing decorative coating, small chips and cracks are observed on the wood. Of course, no one wants to have a wooden table or other furniture with a crack or impact mark, and this is where wood putty comes to the rescue. Yes, there is one, it is not only for walls and ceilings, but also for wood.
Tools and material to putty on a wooden surface
Before you putty the wooden surface, you should prepare everything you need.
- a regular spatula with a metal tip. The width of the spatula is chosen slightly wider than the width of the crack or dent.
- putty is selected according to operating conditions; they are divided into internal and external work.
- sandpaper for surface preparation
- primer to create adhesive properties between wood and putty
Preparing the wooden surface
And how to putty a wooden surface. We have everything we need and then we need to apply it all correctly and step by step. Take, for example, a piece of board with a small crack, the depth of the crack is 3 millimeters, the width is 4 and the length is 30 millimeters.
First, let's sand the crack, take a 120-grit sandpaper, and try to bend it so that it fits into this crack. It is very important to sand this area so that there are no burrs. The wood should also be treated along the edges so that adhesion occurs wherever possible.
Next comes the primer; to putty the wooden surface, it is advisable to prime it. To do this, use any primer mixture whose description says use for wood. Typically, all primers are used for all types of surfaces, including wood, but there is also a separate primer mixture specifically for wood.
Following all the manufacturer's recommendations on the packaging, apply a layer of the mixture to the wood and let it dry, usually 2-4 hours. Depending on the type and type of wood, a second coat may be required.
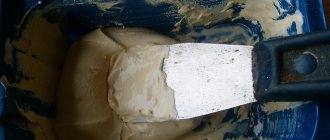
Next, we begin to putty the wooden surface. Open the jar of putty, mix the contents a little to obtain a homogeneous mass, and begin to putty the wood.
We take a spatula and scoop up a little mixture with the edge, roughly estimating how much we will need. Next, apply it to the wood, pressing the spatula to the plane. I think this process is known to everyone, and it’s clear what’s what. It is advisable to cover the required depression in one motion. Don’t worry if everything is smeared, but some of it goes beyond the limits and small stains appear.
After the putty has dried, everything should be sanded with fine-grained sandpaper 120-200. If the surface does not become even and smooth, and small differences remain, reapply a layer and repeat the process again.
I completely forgot to mention that the material must be perfectly clean after each procedure, after sanding or after priming. All particles of dust and lumps of dirt should be cleaned with a brush or improvised means.
How to choose wood putty
As I already wrote above, you should not putty a wooden surface haphazardly, and it is important to choose a good putty for wood. They are classified into many qualities, but mainly into indoor and outdoor work. Thus, you should choose a mixture specifically for your needs, if it is a wooden floor and a kitchen table, then we take putty for interior work, if it is garden furniture or windows on the street, we use a solution for exterior work.
You can also putty a wooden surface to match the color of your wood. Now many manufacturers have begun to produce products in the colors of various types of wood, pine, beech, larch and so on.
The drying time of the solution depends on many conditions, the ambient temperature, the degree of humidity and, of course, the brand. All technical data must be indicated on the packaging, and everything should be carried out as indicated in the instructions. It happens that you don’t want to wait for complete drying before moving on to work, and as a rule, this is fraught with the layer coming off and returning to the original work.
This is where I will end the article, I hope it was interesting and useful, I will be glad if you describe your method of puttingty on a wooden surface.
If your home has many items made of wood (floors, window frames, furniture), sooner or later they will need an update to their appearance - painting. But wood has such a feature that over time or due to mechanical stress, cracks, unevenness and other defects appear, which the paint can even highlight if you do not first treat the surface with putty.
It allows you to achieve evenness by filling the smallest holes in the product, and ensures long-term preservation of the paint layer. Let's look at how to choose the right material for preparing a wooden surface for painting.
Compositions of our own production
Products from well-known manufacturers are often expensive. To save money, you can make your own putty. If you choose good ingredients, then the quality of home-made material will not be inferior to store-bought mixtures.
You can make your own adhesive or oil-adhesive mixtures.
Before you start making putty, you need to study proven recipes and choose the most suitable method:
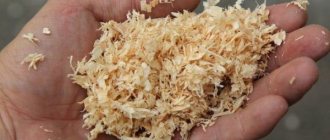
- The most popular method of making putty mortar involves the use of chalk and PVA glue as the main components. The manufacturing method boils down to mixing chalk and PVA glue until smooth. The resulting mass should have a consistency similar to sour cream. The disadvantage of this solution is the drying time (twenty-four hours). If you need putty to repair cracks in wood, then you need to add some small sawdust to the resulting mixture.
- There is another simple putty recipe using chalk as the main component. Chalk must be mixed with acrylic varnish to obtain a paste-like mass. If the paste is too thick, add a little water. The drying time for this putty is twelve hours. So that such a solution can be used to level surfaces, it is also recommended to add sawdust to it.
There are also the most complex recipes for making putty mixtures at home.
To prepare the mixture for painting you will need the following components:
- oleoresin oil (turpentine) – 70 grams;
- flax seed oil – 290 grams;
- gelatin – 30 grams;
- pumice powder or perlite powder – 40 grams;
- casein – 30 grams;
- sodium tetraborate (borax) – 22 grams;
- ammonia (18%) – 28 grams;
- water - approximately 350 grams.
Criteria for choosing putty for painting
Depending on the conditions where the wooden object will be used, the most suitable type of covering material should be selected. When carrying out repair work outdoors, an important parameter for choosing a putty composition is resistance to heating, cooling and high humidity.
Therefore, for treating the walls of wooden houses, fences and other attributes of architecture, oil putty will be the best choice. It can be used after wood components have been treated with insect and rot repellent compounds, but before final painting.
Acrylic compounds are the most versatile; they are suitable for wooden products indoors and outdoors, as they have a high level of strength and wear resistance. It should be noted that such putties are white in color, therefore they are intended specifically for applying paint on top, not varnish.
For parquet floors, furniture and other objects that people come into contact with, you need to choose safe materials, so you can use harmless aqueous compounds. Their characteristics are in many ways similar to acrylic putty mixtures, but their price is cheaper.
Types of putty mixtures
Wood putty is most often used to hide defects in wood. There are many types of these materials - they differ in composition, as well as colors. Modern manufacturers produce mixtures of different shades that exactly match different types of wood (oak, walnut, pine, cherry and others).
Solvent based putties
Wood putty, which is based on solvents, is a popular material among amateurs and professionals in carpentry and woodworking industries. This putty is considered the very first; all other types of mixtures were developed during operation and numerous experiments.
Among the main characteristics are high strength. But you need to work with such putties carefully - the composition is chemically unsafe and may have an unpleasant odor.
Water-based mixtures
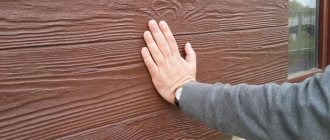
Unlike materials based on solvents, water-based wood putty has a composition that is completely safe for health. It is easy to use and the material is elastic. To remove excess there is no need to use turpentine or acetone - everything can be easily removed with a damp cloth. This is a good option for walls.
These products dry out more slowly in containers, so their shelf life is longer, even if the seal of the packaging has been broken. The mixtures have a high level of adhesion and are easy to apply even to polished surfaces.
Among the main technical characteristics are:
- High efficiency. You can cover up any unevenness and defects with these mixtures. There is also the possibility of using them at the joints of floorboards.
- Environmentally friendly. The product does not emit any harmful substances, even if heated.
- Moisture resistance and durability. The mixtures can withstand any weather conditions, so they are optimal for finishing wooden facades.
- Resistant to sudden temperature changes. Putty wood is reliably protected from fire.
- Elasticity. The product allows you to easily simulate any texture.
All these properties will fully manifest themselves only after the material has completely hardened and hardened. Application rules must also be taken into account.
Oil formulations
Oil putty for wood is intended for external finishing work. The product is oil and solvent based. These materials are excellent for finishing facade surfaces before painting.
After application and drying, the result is a durable and waterproof coating that is not afraid of adverse influences. If you use any other wood putty for exterior work, it will begin to crack and crumble after a short time. As for the palette, the industry produces these mixtures of different colors with imitation of various textures of natural wood.
Oil putty on wood for exterior use is produced and packaged in containers weighing from 0.5 kg to 15 kg. This is very convenient for different volumes of work.
Polymer putties
Polymer putty is an acrylic putty for wood. These materials are also very popular and are optimally suited for a variety of types of work. This can be easily explained by high performance characteristics - durability, elasticity characteristics, lack of shrinkage.
Due to the fact that the composition is based on polymers and plasticizers, these wood putties are used for finishing both dry and wet rooms.
Acrylic wood putty is not only moisture resistant, but also withstands temperature changes and even strong mechanical loads. Therefore, it is a good choice for wooden surfaces that are subject to stress, such as parquet or solid wood floors. This is a wood putty for interior use, but it is also suitable for exterior use.
Among the main technical characteristics are:
- High elasticity. The mixture is elastic and can fill even small cracks and pores in wood. These materials are often used to seal cracks in parquet boards.
- No shrinkage. It is enough to putty the wooden surface once and the shape of the surface will be preserved after complete drying.
- Durability. Depending on certain conditions, the service life of the putty surface will be from 3 to 10 years.
- Price. These wood materials are more expensive than oil- or water-based products, but the price will be fully recouped in the first year. When other coatings crack and begin to crumble, polymer mixtures will serve.
- Colors. The industry produces significantly more colors and shades of wood.
Putty for wallpapering
In order for the wallpaper to last as long as possible, you should stick it on the most flat surface possible.
Sometimes drywall is used to level wooden surfaces, but this method is not very convenient and is expensive. To install the slabs, you need to purchase screws, profiles, and hangers.
For adhesion, apply a primer
A simpler way of leveling is putty, especially suitable for wood surfaces. Applying the mixture under wallpaper has its own characteristics. To improve the quality of work, wooden walls are covered with plywood. Then base plaster is applied. To obtain a high-quality surface, the dried plaster layer is sanded with sandpaper.
The plywood is covered with a putty mixture to make the wall perfectly smooth and to prevent the appearance of mold, mildew and pests in the wood.
Both dry and ready-made materials are available for puttying wooden surfaces. The dry mixture is diluted in liquid according to the attached instructions, and it turns into a ready-made putty that can be applied immediately. Surface treatment must be completed within half an hour. Otherwise, after this time, the mixture will dry out and become unsuitable for application.
Acrylic putty is best suited for wooden surfaces. It is easier to apply, environmentally friendly and convenient to process with sandpaper.
A practical option would be universal mixtures that will fulfill their role and will not require significant costs. If there are minor defects on the surface, don’t worry, the wallpaper will hide them.
First of all, we putty the joints of the sheets
Homemade putty
Along with industrial compounds, which can sometimes be expensive, craftsmen also use homemade wood putty. Such finishing mixtures are no worse than products from well-known manufacturers. At home, you can prepare putty on an oil-glue or adhesive basis. How good a homemade mixture will be depends on the quality of the ingredients.
So. How to make putty? The most popular recipe for a homemade putty composition is when chalk is considered the main ingredient. This putty is prepared as follows: take equal parts of crushed chalk and PVA glue and mix thoroughly. The result will be a creamy mass. If necessary, you can dilute the mixture by adding one or another ingredient. Small wood sawdust is also added.
Among the disadvantages of this chalk mixture is the drying time. Do-it-yourself chalk wood putty will dry for at least 24 hours.
There is another mixture that is easy to make yourself: you need to dilute the chalk with water-soluble acrylic varnish. The result will be a liquid paste. If the paste is too thick, you need to dilute it to make it thinner by adding more water.
By making wood putty with your own hands in this way, you can discover the following advantages - it is elastic and reliable. It is enough to compare how long it takes for the putty to dry – within 2-8 hours.
It is recommended to prepare the mixture in small volumes, and when working, immediately remove unevenness and smudges - when the material dries, it will be difficult to remove the excess. Also, before you putty a wooden surface with this composition, you should find a rubber spatula.
Making putty at home
You can make your own putty using PVA glue and chalk.
You can make your own wood putty. However, experts do not recommend doing this, since some types of wood are sensitive to chemicals. Homemade formulations can ruin them.
Popular recipes:
- With PVA glue . Mix equal parts PVA and crushed chalk. You can use some fine sawdust to fill cracks.
- With chalk . In the recipe, chalk is used as the main component. Acrylic varnish to match the wood is carefully added to it until a thick paste is obtained. Add a little sawdust to improve application.
- Complicated recipe . The main one is 300 g of flaxseed oil. To it add 70 g of oleoresin oil, 30 g of gelatin, 40 g of perlite powder, 30 g of casein, 22 g of borax, 28 g of ammonia 18% and 350 g of water. First, mix the oils and perlite powder, then add water. When the mixture becomes homogeneous, pour in the remaining ingredients and heat to 90 degrees.
Valera
The voice of the construction guru
Ask a Question
When using homemade putties, you can get unpredictable results. Before use, all homemade recipes are tested on a cleaned and primed piece of wood that requires puttying. It needs to be allowed to dry completely.
How to putty on wood?
Let's see how to putty a wooden surface. To do this you will need a small container, a roller or brush, spatulas, a spray gun and sandpaper. The surface to which the mixture will be applied must be clean and primed.
If a sprayer is used in the work, the material is brought into a liquid state. For a spatula, the mixture should be thick. If you need to cover a large area, then the consistency should be creamy. To locally eliminate defects, it is better to use a dough-like mass.
How to putty wood using a spatula? When working, try to apply even layers. This will work if you use a clean tool. If homemade material is used, the surface will need to be sanded - you can use bars or a sander.
How to make homemade putty (2 videos)
Homemade putty: why is it needed?
Wood putty is produced by many manufacturers. And this material has a lot of advantages that are difficult to overestimate. It is very easy to use, even a non-professional can operate it. After application it dries very quickly, then an almost ideal surface is formed. But we must not forget about many disadvantages:
- if you need to work on large areas of a wooden surface, then it turns out that the cost of putty can be significant;
- it does not provide the necessary strength;
- It is not always possible to purchase truly high-quality material; often, simple putty is sold under the guise of a wood mixture.
Wood is a rather demanding material. Working with him can be very difficult. The fact is that at certain temperatures it acquires completely different properties. For example, in a cold environment it contracts, and in a warm environment it expands. This leads to warping of the surface. Because of this, low-quality putty becomes covered with numerous cracks.
Wood is a very demanding material, so a special putty must be used on it.
This is where the need arises to produce a putty that would meet many parameters. Namely:
- was strong but elastic;
- from environmental influences – did not crack;
- it could be made with your own hands - without losing the necessary qualities;
- any changes in the characteristics of the wood would not cause defects.
We make the putty ourselves
There are several ways to make your own mixture. You can make them at home. The only thing you will need is to purchase the necessary components. So, let's look at the simplest options.
1. Putty made from a mixture of PVA and chalk. This composition is considered the simplest. It's easy to do:
- chalk, in the form of a fine fraction, is diluted in PVA, the composition is brought to homogeneity;
- the mixing process continues until a mixture is obtained that resembles sour cream in consistency;
- if it is necessary to seal cracks and seams, then add sawdust;
- After application, the solution dries for about a day.
Homemade putty from a mixture of PVA, chalk and sawdust
2. A mixture of varnish (water-soluble) and chalk. This composition does not require large financial costs. After all, instead of PVA, cheap varnish is used. The operating procedure is the same as in the previous version. In addition, such putty with your own hands turns out to be much stronger and more elastic. The desired color appears by adding tint. It can even be used for work on chipboard and OSB. When preparing, it is better to adhere to the following plan:
- It is better to start mixing in the evening, then by the morning you can get a ready-made solution;
- varnish and chalk are mixed to obtain a paste-like consistency;
- it doesn’t matter if it turns out a little thick, you can add a little water;
- in the case of starting work, sawdust is added;
- Drying time up to 12 hours.
Using chalk and water-soluble varnish, you can easily and inexpensively make wood putty at home
3. A mixture of drying oil with the addition of oil. For this you will need:
- flax oil - two hundred and eighty grams, turpentine oil - sixty grams;
- perlite (pumice powder) – thirty grams;
- casein – twenty grams;
- gelatin - twenty grams;
- borax - twelve grams;
- ammonia 18% - eighteen grams.
Everything needs to be done in the following order. The oil is mixed with pumice. Three hundred grams of water is added to the resulting mixture. Then all other ingredients are mixed. The resulting solution is heated in a water bath (t – 90 °C). Everything is mixed well, you need to achieve a homogeneous structure. The mixture is ready when it looks like a paste. Then it is removed from the heat, allowed to cool and used. It retains its properties for an hour.
Do-it-yourself putty must be used within an hour
Attention! The amount of ingredients can be changed. Only then can you achieve exactly the characteristics you need.
4. Wood putty made from chalk, sawdust and nitro varnish. This composition is used for work in non-residential premises and outdoor work. The fact is that after application, due to the nitro varnish added to it, the solution acquires a rather unpleasant odor. It is almost impossible to get rid of it. The preparation procedure is the same as for previous formulations: you need to get a creamy mixture.
BrickNews.ru
The process of applying putty to a wooden surface is quite simple if you follow a number of rules and choose the right composition for a specific surface. Putty will protect wooden walls from the negative effects of microorganisms, temperature fluctuations and moisture. Consequently, the service life of wooden structures (partitions, walls, etc.) will increase.
Putty is mainly used to level surfaces. It is a building mixture, the principle of operation of which is simple. It prepares the surface before finishing, filling and smoothing out any irregularities (bulges and dents) on it. There is a huge selection of wood putty on sale from various manufacturers.
Buy products from trusted manufacturers who have been on the market for a long time and have proven themselves well. There are a number of properties that a high-quality building material of this type should have. These are the ones you need to pay attention to when choosing putty.
Consider the main properties of putty:
1. High adhesion.
The surface adhesion indicator should be as high as possible. The durability of the coating directly depends on this.
2. Good ductility.
The mass should be easily distributed over the surface with a regular metal spatula.
3. Fast drying.
This property will allow you to avoid long downtime.
4. Material structure.
When purchasing, pay attention to the particle size of the mixture. The smaller the particles, the smoother the treated surface will be.
5. Eco-friendly.
The material is absolutely safe for humans
When choosing a putty, pay attention to its characteristics indicated on the packaging. The above information will help you make the right choice. The putty will meet the requirements necessary for working with a specific type of surface.
Types of putties:
1. Gypsum putty
The most popular type. There are various modifications. The high level of adhesion and good ductility allow it to be used both as a base layer and for finishing. Well suited for wood and indoor work.
2. Latex and acrylic putties
Their application is similar to gypsum, but the cost is much higher. This is due to higher performance characteristics. The thickness of the layer when applied is no more than 2 mm, otherwise cracking may occur when drying.
3. Glue and oil putties
Mainly used for processing wooden doors and windows. Suitable for working outdoors and in rooms with high humidity. There are many different shades. You can always choose the desired color for the surface and then simply coat it with varnish.
Types of layer:
1. Basic putty
This putty contains large inclusions. It can be applied in layers up to several centimeters. The surface after applying such a coating will be rough to the touch.
2. Finishing gypsum putty
Contains smaller particles. After applying it, the surface will be smoother. It is applied over the base and finally levels the surface. As a rule, 1-2 layers are required to prepare the wall for wallpapering. For walls, painting requires 3 to 5 layers. They need to be aligned more carefully.
Calculation of the required amount of putty
Look carefully at the packaging. The mixture consumption per square meter is always indicated there with a layer thickness of 10 mm.
Here is an example of calculation: The indicated consumption is 5 kg per 1 sq.m. The surface area that needs to be puttied is 10 sq.m. The required layer thickness is 8 mm. 10*5*0.8=40
So, 40 kg must be purchased to complete this work. As you can see, the calculation is not at all complicated. It can be produced directly in the store, knowing the surface area.
How to make your own wood putty
The mixture can be made at home. The process is quite labor-intensive, but all this can actually be done. It will take a lot of work and spend a lot of time. Obviously, it will be much easier to buy this building material in a store.
Here is a list of ingredients that you will need for homemade putty: - linseed oil - 280g, - borax - 12g, - casein - 20g, - ammonia 18% - 18g, - turpentine oil - 60g, - pumice (perlite) in powder form - 30g, – gelatin – 20g.
The base for creating putty is oils. Some of the ingredients will be quite difficult to purchase. But the finished product is available in any hardware store.
First, prepare a mixture of oils and pumice. Next, add 300 g of water. This mixture is placed in a water bath (heated over steam), where it should become homogeneous. As soon as the steam temperature reaches 90 degrees Celsius, you can begin making the solution. In this case, you need to stir constantly. The process will be completed only when a homogeneous consistency is achieved. It may be difficult to do this alone. Help from another person may be required. After the material has cooled, it can be used for its intended purpose. The shelf life of homemade putty is very short, so it must be used quickly, as the working qualities of the product will be lost. For example, for different manufacturers the solution use time can be 30-60 minutes.
You will have to spend time searching for all the necessary ingredients. Next, you need to avoid mistakes during the cooking process. It is important to maintain all proportions. The likelihood of receiving a low-quality product when making it yourself is extremely high, especially if this is done for the first time. Buy putty at a specialty store. Choose trusted manufacturers. First, gather information and read product reviews, and then go shopping. The result will be great!
Putty process
The first step is to prepare the room. Next you need to protect your hands and face. Wear gloves and a special mask (respirator). Contact of the material with the skin is not desirable. It dries it out significantly. If you have to put a lot of putty, it is better to cover everything with film. This will allow you to spend less time cleaning in the future.
Stage No. 1 Surface preparation
In order to get a smooth surface, you need to prepare the wood. Any coating that was previously on the tree must be removed. This needs to be done as carefully as possible. If this is not done, the putty will peel off. Removal of coatings can be done in three ways: - using a solvent, - sandpaper or brush (mechanical method), - a hair dryer.
The solvent is distributed evenly over the entire surface. To do this I use a roller, spray gun or brush. After 20 minutes, the paint can be easily removed with a spatula. This method requires the following precautions, such as a respirator and good ventilation in the area. Solvent vapors are toxic. Removing the paint with a hair dryer will be a little more difficult. Use a hairdryer to heat the entire surface until the paint swells. Next, you need to remove it with a spatula.
The mechanical method does not require the use of special protective equipment or special tools, but it can take much longer than the others.
If protruding objects (nails, etc.) are found on the surface. They need to be coated with something like enamel. This will prevent rust from appearing on the surface after puttying. It is especially important to follow this rule if you subsequently intend to varnish the surface. At the end of the preparatory work, you need to clean the wood of all particles. First we go through it with a brush, removing particles from the cracks, and then we clean it with a damp cloth.
Stage No. 2 Applying primer.
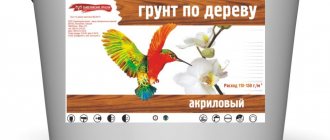
The primer will make the adhesion of the putty and wood stronger. Although this measure will also make the surface more uniform, increase the level of protection against mold and moisture and increase other performance characteristics.
You will find quite a variety of primers on sale. It is better to buy in a specialized store rather than in the market. There are consultants there to help you, and the storage conditions there are much better. The most popular, according to consumers, are Lezonal, Sikkens and Epiprime.
Depending on the base of the primer, there may be:
- alkyd,
- mineral (binding component cement),
- acrylic.
Alkyds are very good for wood. And for both new and already painted wood. Acrylics have higher adhesion compared to others. They adhere well to paint.
When choosing a primer, do not forget that it must be combined with a putty composition. If your putty is based on drying oil, then you need to use an oil-adhesive primer. Nitro putty will require the use of a nitro primer. The primer layer should be approximately 3mm. It is applied several times to obtain a better base coat. The amount of primer for work is also calculated based on the area and layer thickness.
The primer is applied by brush or spray. Aerosol formulations are very dangerous. Take off and wear a special mask and goggles. Be sure to protect your face and eyes. The composition is colorless only if you choose carpentry primer and mastic. Otherwise, the grain of the wood will not be visible. The soil dries from 12 to 16 hours. It all depends on the composition. It is necessary to wait time to get a good result.
Stage No. 3 Mixing the composition
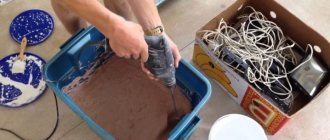
This stage is for those who use dry construction mixture and do the repairs themselves. In order to prepare the solution, you will need a container whose bottom and walls are at right angles. Water-based paint buckets or large buckets used to sell fish work well. If the mixture is small, it can be mixed by hand, but a mixer is needed to mix a large quantity. You simply won’t be able to mix everything well with your hands and it will take a lot of time. A well-mixed mixture will significantly improve the quality of the coating.
Wet the sides of the bucket with water. It is very important. Next, pour the required amount of water. It begins to interfere, creating a funnel inside, into which you need to pour the putty. You need to mix slowly, gradually adding the mixture. Periodically you need to remove the adhering mass from the walls of the bucket with a spatula. The finished solution is a slightly thick dough. Do not leave the mixer in the solution for a long time, as it will be difficult to clean later.
Stage No. 4 Puttying the surface
If any cracks are found on the surface, they must be sealed before you begin applying the putty. In cases where there are a lot of defects, serpyanka is used. It is something like a narrow ribbon. It glues difficult places. This method will prevent material from getting into the gap, which can lead to cracking in the future. When the solution dries, its excess is removed with a spatula or scraper.
You will need to use two spatulas for this work. One is large, measuring 70-80 cm, and the other is small, which will be most convenient for getting the mixture out of the bucket. The putty is applied only to 20 cm of the spatula, and not to the entire length. The spatula must be held at a certain angle while working. The most optimal angle is 20-30 degrees. Hand movements are carried out diagonally so that the composition is applied evenly. You need to start applying on your left side.
The layer thickness is up to 3 mm. The first layer can be applied in stripes. It does not matter. After drying, simply go over the entire surface with sandpaper, which will remove traces of joints and smooth the surface. After this we proceed to the second layer. It is made thin up to 1.5 mm. Now you need to wait for the surface to dry. Next, you need to go through sandpaper again. Take a sponge and remove all the dust that forms during sanding.
Stage No. 5. How long and what conditions are required for the putty to dry?
The temperature in the room in which the putty is performed should be 20-25 degrees Celsius, and the humidity should be 50-80%. Complete drying takes about a day. But it may increase due to unfavorable temperature conditions or humidity. It is worth noting that the quality of the surface also affects the drying speed. Hygroscopic surfaces, such as wood, dry faster. But metal surfaces take a long time to dry. So pay attention to what kind of surface you have and try to create favorable conditions in the room before starting work.
Puttying yourself is not a simple process, but the result will bring you moral satisfaction, and you will know that you did the job conscientiously, because conscientious employees are not always found. It will be very difficult to do the work the first time, but over time you will learn and you will do it quite quickly.
Procedure for working with homemade putties
Working with mixtures that you made yourself is not difficult. The main thing is to follow the order of actions, then you can say with confidence that everything will work out as planned.
- All necessary ingredients are prepared. It is best to use simple formulations, then you can be sure that the mixture will turn out as it should. If you have no experience in cooking, then it is better to practice a little - prepare a small amount to understand the procedure.
- As with all finishing work, the surface is prepared. Working with wood requires great care. All damaged areas are cleaned, rotten fragments and protruding nails are removed.
- The mixture is prepared with your own hands in advance. If sawdust is added, it takes time for it to swell.
- After preparation, the putty should be used within one to two hours. Then she loses all her qualities.
- The applied solution dries. The time for complete drying depends on the type of putty prepared.
- After this, you can begin sanding the surface. During the initial work, the walls are prepared for further processing.
- You can cover the tree with protective materials.
The remaining mixture is disposed of. It is not possible to store it. It is advisable to do this with a small margin.
Many people still wonder: how to make a mixture that will meet all the necessary qualities for woodworking? There's nothing complicated about it. Do-it-yourself putty will be an ideal solution for working on a wooden surface. The main thing is to prepare the solution correctly and apply it on time. Any purchased materials often do not live up to the expectations placed on them. Homemade mixtures are another matter. It all depends on the person himself; if he shows patience and does everything efficiently, then he will enjoy his work for many years.
Work order
Before you putty on wooden doors or floors, carefully examine the surface. If there are burrs, burrs, or loose pieces on it, all this must be removed. Then you should take the sandpaper and carefully sand all the defects. If there are large cracks, it is advisable to penetrate them by folding the sandpaper in half. To sand straight sections, you can use a float and attach sandpaper to it. Once you have finished this job and are sure that the wood is smooth, clean it of dust with a brush and a damp cloth, and then prime it.
Advice. Some putty manufacturers also produce primers of the same brand. Their combined use gives the highest quality results.
Let's move on to the main question: how to properly putty wooden surfaces. It's not difficult at all, you just need to follow these recommendations:
- Choose a spatula slightly wider than the defect to close it in one motion;
- Stir the putty before use;
- Proceed to work only after the primer has dried;
- If the depth of the gap or depression is too large, do not try to fill it at once - it is better to do this in several steps, each time waiting for the previous layer to dry.