Main components
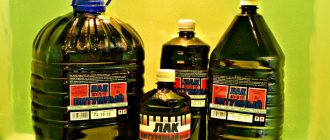
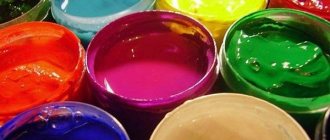
The main binder of the material is drying oil . The fillers are:
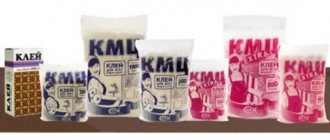
- Glue.
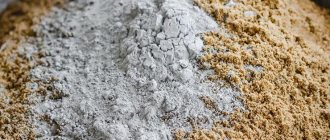
- Chalk or lime.
- Plasticizers for better adhesion and application.
- Dryers for quick drying of oils.
- Water.
Manufacturers strive to improve the characteristics of the substance, so everyone adds additives or additives at their own discretion. It also cannot do without thickeners and pigments. For these reasons, the color of oil putty may vary depending on the manufacturer.
Plasticizers and modifiers in the composition slightly change the technical characteristics depending on the quantity. Therefore, they are added to impart certain functional values to materials. Thanks to this, you can find compounds on the market that are considered fireproof or ultra-strong. There is putty that is specially white so that it does not need to be painted.
Specifications
The material is intended for interior finishing work - leveling before painting. Work can be carried out on concrete or wooden surfaces. The putty can be painted with enamel, water-dispersion and oil paints.
Oil-adhesive putty has the following technical characteristics:
- Consistency – paste-like mass with a homogeneous consistency. Foreign impurities are excluded.
- Consumption. For single-layer application with a thickness of no more than 1 mm - 0.8-1.5 kg per square meter. m.
- Dry residue. No higher than 70–80%.
- Drying time: Before applying the next layer – no more than 4 hours;
- Drying of the topcoat takes no more than a day.
Note! Each manufacturer can produce material according to technical regulations for a specific production. This leads to variability in the characteristics of products from different manufacturers.
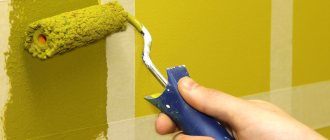
How to make imitation wood from putty
In order for the texture to resemble the surface of wood as much as possible, you need to stock up on suitable tools - a palette knife, a roller with an imprint of a wood cut, a textured roller, rubber spatulas, stencils. Step-by-step workflow algorithm:
- Putty is applied to the area with a metal trowel.
- The composition is leveled until the layer becomes uniform and reaches a thickness of about 3 to 6 mm.
- Using a brush, stiff brush or rubber roller, grooves are created that are characteristic of the natural texture of the wood.
- Based on the type of wood, the grooves can have a horizontal or vertical direction.
- The slightly dried coating is rubbed with a spatula, and then set aside 30-40 minutes to dry the surface.
- The coating is coated with a coloring compound or varnish.
At the final stage, the treated surface is rubbed with a spatula. Interior finishing is done using gypsum, acrylic, and silicone putty.
Imitation allows you to create a variety of wood textures
Puttying is a labor-intensive and demanding work process. However, it is worth the effort to get a smooth wooden surface. The main thing is to choose the right putty mixture, taking into account the composition of the material and the shade of the wood.
Did you learn something new? Share in the comments!
Advantages and disadvantages of the material
Based on their characteristics, it is possible to highlight the advantages and disadvantages of the material when used on construction sites. They should be used to determine where the use of adhesive putty will be relevant and will not cause harm.
Advantages of the composition:
- Easy to use. Most putties must be prepared before use. But the oil-adhesive leveling composition is sold ready-made, and it does not need to be mixed before applying to the surface.
- Relatively low cost. Pricing will please the customer. Moderate pricing for the composition allows it to be used over a large area of finishing work.
- High adhesion. This applies to all types of surfaces.
- Low consumption. It is about 1 kilogram per square meter.
- High plasticity. This makes the application process easier.
- Dries quickly. This allows you to speed up the pace of work, since technological breaks between finishing stages are reduced.
- Durability. The oil finish has a long service life.
- Environmentally friendly. The composition contains no harmful impurities.
The finishing material has enough advantages, but there are also disadvantages. They limit the use of oil putty when carrying out exterior finishing work, as well as for interior finishing of rooms with high levels of humidity. The material doesn’t like the mechanical impact either.
Flaws:
- Low resistance to mechanical stress.
- Does not tolerate moisture well.
- Short shelf life.
- Poor compatibility with other materials.
The material is made on the basis of drying oil, and this dictates its use only in cases where the finishing will be done with oil-based materials. Oil-based leveling base does not interact well with other materials. This is its main disadvantage.
With environmental friendliness and hygiene, not everything is simple either. Some manufacturers save money and use technical drying oil to add to putty . This drying oil has some toxicity, albeit minor. You can get rid of it by normal ventilation of the room. But this is not always possible due to weather conditions. There have been no cases of poisoning from this type of finishing coating.
Remember! In winter or in rainy weather, you should not ventilate the room with drying oil-adhesive putty, as it is afraid of moisture.
The shelf life also plays a role in the application of the coating. Over a long period of storage, the material will lose its main advantage - plasticity during application. When stored in an environment with a negative temperature, the material is unsuitable for work - this is also an important feature of adhesive putty.
Popular manufacturers
Oil-glue wood putty can be created independently, but for this you need to strictly follow the production technology. It will be much more profitable to buy ready-made universal formulations that do not need to be diluted, and their appearance and composition will be much improved. Most home craftsmen are wondering which putty is better, acrylic or glue-oil? This question is best answered by the properties of these putties:
- You can putty with acrylic compounds in rooms with high humidity. These include bathrooms, kitchens, toilets, and laundries. In addition, the solution is suitable for finishing walls
- Oil-adhesive mixtures are distinguished by their low cost and therefore have become so popular for budget repairs. Despite statements about its fragility, with proper preparation and application it will last for a long time.
Review of popular mixtures:
| Name | Description |
| Oil-adhesive putties Tex | Designed to work in a dry room, for finishing leveling under paint. Approximate consumption per m2: with a thickness of 1 mm, 1.7 kg of putty will be required. At a temperature of 20+-2 degrees, drying time is a day |
| Oil-adhesive putties-master 001 | Used for interior work, creates excellent adhesion. The material is quite elastic, the mixture is characterized by low shrinkage |
| Brozex (Brozex) Universal | Good putty made in Russia. Applicable for indoor work, 1 mm will require approximately 1.5 kg/m2. Putty walls can be covered with trellises and painted using paint and varnish. The cost of 10 kg of material is approximately 250 rubles. |
The use of oil-based adhesives is not suitable for all repair processes. For example, it is prohibited to stick tiles or tiles on a wall with such putty. It will not be possible to glue tiles using oil-adhesive putties due to one nuance of use:
- Putties can only interact with materials containing glue, drying oil or oils. In this case, gluing tiles becomes impossible due to the basic characteristics of the solid material.
- Since tiles are usually glued in places of high humidity, this becomes an additional contraindication for oil-adhesive mixtures, because they do not like moisture and are not used for external walls
New mixtures for wood already contain additives such as drying oil, which improve the performance of the mixture. As a percentage, they make up no more than 5% of the total mass of putty. If the manufacturer did not add drying oil to the solution, then it can be added independently or used as a primer.
Dilution and application of putty
Note ! Oil-adhesive putty is demanding on the indoor microclimate during application. According to the instructions, work with the material should be carried out at a temperature not lower than +10 – +15 degrees. The optimal application temperature is about +20 degrees. Humidity should be at 70%.
Preparing the surface for work
The surface for work should be prepared. This must be done before diluting the putty, otherwise there is a risk of the material drying out in the container. Surface preparation involves cleaning walls and ceilings from grease, dirt and dust . This will improve the adhesion of the material to the surface. The old coating also needs to be removed, as well as peeling parts of the wall, such as concrete chips, for example.
After cleaning the surface, a primer will be required. As additional protective measures, you can treat the surface with anti-fungal materials. The surfaces are allowed to dry after priming and only then they begin to prepare the putty for work.
Required Tools
To carry out the work you will need a tool. It's simple. In his absence, there will be a trip to the store, but you won’t have to pay a large amount for it. List of tools :
- Spatulas. It will take several. They should differ in shape and size. There are spatulas for mixing the material and for applying it. You will need one for mixing, and several for application. The latter should differ in size. To pre-apply the putty to the wall, you will need a wide spatula. But for straightening and processing hard-to-reach places, you should use a narrow tool.
- Mixer. It is needed to dilute the coating material. In its absence, you can use a hammer drill or a drill with various attachments.
- Sandpaper. Needed to level the surface after work. You can use a special grater.
- Capacity. It is necessary to dilute the material in it. There must be a suitable volume so that the putty is enough for work, but at the same time it does not have time to dry. You can use buckets or troughs.
Application of the composition
If the putty is a paste that does not need to be diluted with water, it must be poured into a container and stirred thoroughly . If the mixture is dry, then dilution with water should be done in the proportion specified by the manufacturer. Stirring is required for 10–15 minutes in both cases.
Apply the material to the surface using a spatula. The layer thickness should not exceed 2.5 mm. However, on uneven surfaces it is permissible to exceed this parameter.
It is extremely important to observe the temperature conditions during application, which were indicated above. It is advisable to apply the second layer after a day, although manufacturers allow it to be applied after 4 hours. However, it is advisable to let the first layer settle and release excess moisture.
Sanding is carried out 12 hours after the finishing layer has completely dried. Therefore, this work can be done 36 hours after application.
Some recommendations for performing the work
No matter how wonderful properties this or that putty mixture has, the result of its application will not be satisfactory if the surface is not properly prepared. As we have already said, putties are used only as a finishing layer. The starting screed should be made with a plaster mortar with a coarser dispersion of components:
The only exceptions are the walls of buildings constructed from reinforced concrete panels - they are cast in molds and have a smooth and even surface. As for brick or block masonry, you can’t do without plaster, since it often has bumps, depressions and potholes that must first be eliminated, and only then putty on the surface of the walls.
- The situation with ceilings is no better. The floors themselves, of course, are even, since they are also molded in the factory, but when they are joined, not only rustications are obtained that require sealing, but also differences in height are obtained. In brick houses this is a common thing, since due to the error in the thickness of the horizontal joints of the masonry, there is a difference in the height of the walls - and no amount of putty will help here.
- If the problems that we have described are not present on the surface, then preparation for puttying can be reduced to cleaning the surface of old paint, mold, oil and rust stains - anything that can prevent good adhesion of the applied mixture. Dust should also be removed from the surface and treated with a primer, and it is advisable that it be from the same manufacturer as the putty.
You can, of course, choose any other option, the only important thing is that the primer is based on the same substance as the putty. Composition information is usually included on the label
- When making each new portion, you must use a clean container, since frozen residues from the previous batch may end up in the working mixture and negate all your work. The solution should be mixed with a construction mixer - by hand you can get no more than 1 kg of high-quality putty.
- After the mixture is ready, it needs to be allowed to rest for ten minutes, and then stir again for three to four minutes. Keep in mind that you cannot add any components to factory-made putties, otherwise you will change the properties of the material declared by the manufacturer.
Unlike multi-layer plaster, layers of putty do not require intermediate priming. This is done when dissimilar surfaces or mixtures with different dispersion are combined, that is: between the base base and plaster, between the starting and finishing layers, between putty and paint. The last layer, after hardening, is sanded with a machine or manually: with a mesh, sandpaper, or pumice. Finally, the dust is removed, primer is applied - and the surface is ready for decorative finishing.
Scope of application of finishing material
The material in question is interesting for use in construction due to its composition. It has become widespread in the domestic market. After all, it can be applied not only to concrete or plaster, but also to a wooden surface.
Main areas of use:
- Leveling the surface before painting or wallpapering.
- Filling cracks or scratches.
- Restoration work of wooden window frames or doors.
The material lends itself well to sanding, and this allows it to be given any shape after drying. Therefore, designers often recommend material for decorative stucco.
This putty is recommended by experts for use due to its availability, environmentally friendly composition and durability. Manufacturers in most cases produce a ready-made mass that does not need to be diluted with water, but can be immediately applied to any surface after mixing. The only thing that limits the use of this material is the high humidity of the room being finished.