Technology of applying the mixture to walls
You need to prepare:
- Bucket or other deep container for preparing the solution;
- Mixer;
- Spatulas;
- Sandpaper or grater.
It is necessary to prepare special tools.
How to mix the solution
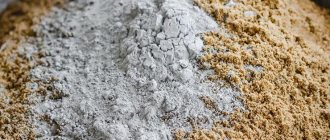
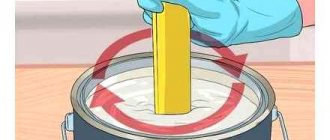
The mixture is poured into a bucket and filled with water, observing the proportions (for 1 kg of putty - 700 ml of liquid). After 2 minutes, start kneading with a spatula or other equipment yourself, and then use a mixer. The whisk should be rotated at low speed until a uniform texture is achieved.
It is recommended to prepare the solution in small portions. Compliance with this rule will ensure better mixing, and the solution will be completely used before drying.
Water and air temperatures vary from 10 to 25 degrees. The addition of foreign components is also not allowed. If the recommendations are not followed, cracking may occur.
The whisk should be rotated at low speed until a uniform texture is achieved.
Surface preparation
Surfaces must be carefully prepared before applying Knauf Rotband finishing putty. This will provide better grip.
First, the walls are cleaned of dirt, dust, and other objects. If there are metal elements, they are treated with a solution against the formation of rust. The surface must also be coated with a primer.
The surface must be coated with a primer.
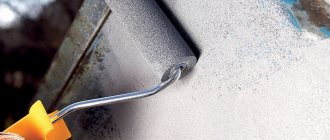
Application process
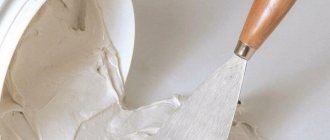
The prepared Rodman putty mixture is applied with a spatula and leveled. The recommended layer is 0.2-5 mm. All instruments must be regularly cleaned of dried particles to avoid the formation of pits and grooves.
The finished mixture must be applied to the walls within 90 minutes from the moment of preparation.
The treated surface is left to dry for a day in a dark room, protected from exposure to sunlight. Following the recommendations will avoid the formation of cracks.
The treated surface is left to dry for a day in a dark room, protected from exposure to sunlight.
How to mix and apply the solution
To mix and apply the Rotband putty mixture, you will need the following tools and materials:
- Bucket (or some kind of mixing container).
- Construction mixer.
- Spatulas (of various shapes and sizes - selected for the object of work).
- Sanding materials (sandpaper or float).
Before mixing the putty, it is necessary to carry out preparatory work. The surface should be cleaned of dirt, dust, protruding fittings or other objects. Then treat all metal parts with an anti-corrosion solution.
Next, treat the surface with a primer. Depending on the type of surface, different types of primer are used. Before starting work, the temperature of the wall (or other surface) should not be below 5°C.
After completing the preparatory work, the putty mixture is mixed. It is recommended to make batches in small portions for better mixing and to prevent the mixture from drying out. The putty is poured into a clean mixing container and filled with clean cool water at the rate of 1 kg of mixture per 0.7 liters of water (a 20 kg bag is filled with 13.5 liters of water, a 25 kg bag is filled with 16.5 liters of water), as the instructions say. A couple of minutes after pouring, the putty begins to be mixed. First, the mixture is mixed by hand, then with a mixer operating at low speed.
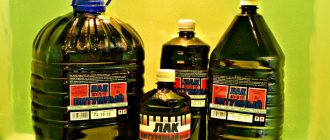
Ready putty Rotband
Stir until the mixture becomes homogeneous, similar in consistency to sour cream. The temperature of the room and water should be within 10-25 oC. At temperatures different from those specified, cracks form on the putty surface. Do not add foreign mixtures or additives to the putty. It is also prohibited to use a dried and thickened solution. The solution can only be used within 1.5 hours from the end of the batch. Apply the solution to the wall only with clean stainless steel spatulas.
The solution is applied to the surface with a spatula, then leveled to the required thickness. You can level the solution with a spatula, a Swiss falcon, or using a rule. After applying the putty, the tool should be washed. Tools should also be cleaned of dried large fractions of the solution if they are formed during the puttying process.
The putty solution should dry in the dark (or should be protected from sunlight) and in the absence of drafts.
Aligning corners
To align the corners, specialized metal corner profiles are used. If the wall curvature is less than 10 mm, then the profile is fastened with a self-tapping screw, and in other cases, alabaster or putty is used. The standard length of the corner profile is 3 meters, and metal scissors are used for cutting.
When filling a space, you need to let one side dry first, and only then proceed to the other. Otherwise, with mechanical impact on the corner, the solution will shift and the work will have to start over.
To align the corners, specialized metal corner profiles are used.
Knauf Rotband, which produces putties or plasters, is the undisputed leader in the building materials market. The manufacturer takes into account all the needs of builders and constantly improves its products and creates new mixtures. Rotband finish putty allows you to achieve excellent results during repairs at a fair price and in the shortest possible time.
Specifications
To understand why Rotband plaster is so popular, you need to look deeper into history. For a long period, lime and cement mixtures were used to level walls and eliminate defects. As for gypsum solutions, they have high plasticity and are very easy to use.
The disadvantage of the gypsum solution was that it could not stand idle for a long time. It hardened, making it unusable. Over time, special additives began to be added to gypsum mixtures, which slowed down the hardening process. As a result, the finished plaster could stand for several hours.
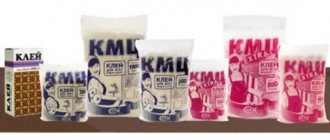
The peculiarity of the new gypsum mixture was that it was much cheaper than its cement-based counterpart. Over time, a leader in the production of gypsum plasters, the Knauf company, appeared on the market. Today the range includes many mixtures, including Rotband putty. The distinctive sign of the material is the red stripe on the packaging.
Consumption and scope of application
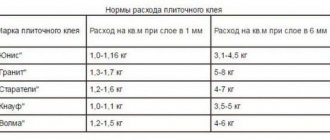
In addition to the above advantages, Rotband putty is economical to apply. Its consumption does not exceed 1 kg per m². At the same time, the bending strength of the formed layer is 1.3 MPa, and the compressive strength is 4.2 MPa; with a minimum application thickness, it is characterized by high strength and flexibility.
Rotband Paste Pro is universal, suitable for finishing any type of surface - concrete, brick, plasterboard. It is used as an intermediate layer between the surface being treated and wallpaper, paint, tiles, and wood panels.
The produced volume is from 5 to 30 kg in thick paper packaging. The color of the dry mass and when diluted with water differs from white - a pink or gray tint, due to natural additives and minerals, as the manufacturer warns. To avoid inaccuracies when mixing, the Knauf company produces a ready-made Rotband finishing paste. It comes in a 5 kg plastic bucket. Its consumption is about 8 kg per m².
The only drawback of Rotband mixtures is their short shelf life - the putty is stored for no more than 6 months, as mentioned in the instructions for use. Therefore, when purchasing material, pay attention to the integrity of the packaging and the date of manufacture of the product. When hardening, slight shrinkage is possible, which is why a 2-layer application is preferable.
Dry mix Rotband
Preliminary work with the base.
Cleaning from previous coating.
The surfaces to be processed are pre-dried, the required temperature is + 5 degrees Celsius. This contributes to less plaster consumption and better application. It is also necessary to clean off the previous coating (whitewash, plaster, paint, tiles or wallpaper). Remove uneven surfaces and protrusions from the base. Be sure to treat metal elements with anti-corrosion liquid. Otherwise, corrosion may appear.
Primer.
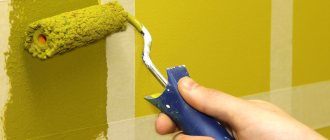
- Substrates with increased moisture absorption must be coated with a primer. This is done to ensure uniform adhesion of the plaster to the base. Primer can be applied using brushes, rollers or sprayers. According to the instructions, it is recommended to use Knauf-Grundimittel primer.
- Surfaces that, according to their technical characteristics, do not absorb moisture should be coated with Knauf-Betokontakt primer. This is done to increase adhesion.
Displaying beacons and corners.
Apply Rotband plaster to the wall with gaps of 40 cm. Press the beacons into the moldings and align them in one plane. The leveling rule should be 20 cm longer than the pitch of the beacons. Corner profiles are aligned in the same plane, with the beacons. The moldings are applied to the side inside the profile. Rotband plaster, consumption per 1 m2 with a layer of 10 mm.
- Knauf Rotband plaster – 30 kg; consumption 8.5 kg per 1m2.
- KNAUF-Betokontakt – 30 kg; consumption 0.3 kg per 1m2.
- KNAUF-Grundirmittel – 30 kg; consumption 0.1 kg per 1m2.
You can make detailed expenses using the calculator on the manufacturer KNAUF website.
Subsequence.
Kneading
Pour 18 liters of water into a metal or plastic container and add 30 kg rotband plaster to it. First, put 6 spatulas of the mixture and stir everything until completely mixed, only then pour the entire bag into the water. Mix the entire mixture with a construction mixer until all lumps disappear. The mass should be homogeneous. If the composition is too liquid, add more dry plaster. After mixing everything, you need to wait 5-6 minutes, then stir again. The technical characteristics take a little time to mature.
Application.
Apply the matured mixture to the surface to be treated for 20 minutes. On the ceiling you need to work like a “falcon”, making movements towards yourself. The surface is covered with a spatula. This does not affect consumption, since everything evens out in the future.
Note: If you bought plaster for machine coating, you should use special stations to simplify and automate the process.
After sketching, everything is leveled with a tool - usually making wave-like movements.
When it is necessary to increase the thickness of the coating, repeated layers are applied, having previously created roughness on the first layer. Which will serve to adhere the layers. The second coating can be done only after a day. This is the drying time for rotband plaster.
Leveling and grouting.
The setting period according to the technical specifications is 50 minutes, after which it is leveled with a large spatula or metal lath. Excess is removed by covering up all irregularities. In this way, lower consumption is achieved. The wall for painting or wallpaper is additionally rubbed with a tool - a grater. To do this, they are moistened generously with water and made in a circular motion, this makes the surface perfectly smooth.
Creating a structure.
If relief is needed, it can be easily achieved; to do this, simply on a soft surface (after leveling with the rule), you need to run a roller with a relief on the wheel over it. Structures can also be created using a trowel.
Recommendation: Rotband plaster dries faster if you create a ventilated room. To do this, simply open the windows and doors to allow air to pass through.
Do not forget that the dried structure is very difficult to remove, so wash the tool you are using in advance.
Features of applying Rotband
Before using Rotband Paste putty, the smooth surface to be treated, if there are no visible defects on it, is cleaned of dust and dirt, treated with a primer, and the manufacturer recommends using the Tifengrud adhesive solution. Protruding metal parts are treated with anti-corrosion solutions. The surface temperature does not exceed 5 degrees. For uneven surfaces, use a layer of plaster. The instructions for performing the work include the following points:
- Installation of beacons on the surface using plumb lines or a building level;
- Applying an even layer of leveling plaster;
- After the mass has dried, cover it with a primer mixture;
- The putty is applied using a stainless steel spatula or a Swiss falcon, leveled over the entire surface down to the base, stretched to the desired layer thickness using the “scraping” method, in which the mixture is applied from a narrow spatula to a wide one and then transferred to the surface at an angle of 45 degrees;
- If necessary, apply another layer of putty;
- After the mass has dried, the surface is sanded, sanding is done wet and dry, using a sponge or wet sandpaper;
- During application and upon completion of treatment, the instrument used is washed under running water.
If Rotband putty is used to grout joints between sheets of drywall, it is not sanded, since another layer of finishing material will be applied on top. If the repair takes place in a room with high humidity, after drying, Rotband Paste is treated with a primer to increase its resistance to aggressive environments.
Application process