Pediment is the upper part of the facade from the ridge to the cornice. On the sides it is limited by the roof slopes. Covering the gable with siding is one of the most important stages of facing a house. Firstly, he is in sight of everyone, even from afar. Secondly, due to the complex shape of the gable, siding installation becomes more complicated. But with the help of our instructions you will cope with this work without difficulty.
Material characteristics
If the question of using this type of material for finishing a building has been decided, then it is best to use its advantages, but we must not forget about the disadvantages of this kind of panels. Their positive properties of siding can be identified as follows:
House roof insulation scheme.
- It is reliable in operation and relatively durable.
- Resistant to mechanical stress.
- Tolerates various climatic changes well.
- Metal siding is available in a variety of colors, which allows you to choose the desired color for any gable.
- The price of the panels is acceptable for most consumers.
- Installation is carried out using well-thought-out technology, accessible to any beginner.
- Siding can be installed not only on the facade of the building, but also on the pediment.
Disadvantages of sandwich panels:
The siding structure is self-supporting, that is, no additional load can be placed on it. The panels require careful handling during storage and during installation work, since any careless movement can easily damage them. If installed incorrectly, the thermal insulation properties of the sandwich drop sharply.
Video installation of pediment finishing (video)
The finishing of the pediment with panels is carried out strictly according to the rules. If you do not follow them, it will be impossible to achieve a good appearance of the building. First of all, the sheathing is installed, the material for cladding is selected and tools are purchased. Only after this can you move on to the main process, which involves observing a number of nuances. An important role is played not only by how well and evenly the panels are cut and positioned, but also by how the extensions are fixed, whether there is a frame around the windows and doors, and whether soffits were used. If the technology for installing all finishing components is followed, the appearance of the pediment will be excellent, and the building will not lose its functionality over time.
Preparatory stage
Calculation of siding for finishing the pediment.
Before direct work, it is necessary to accurately calculate the parameters and number of siding panels for your home. Otherwise, you will have to re-purchase the material, which may increase the finishing time. Many companies on their websites offer an excellent option for calculating the amount of siding using an online calculator. Planned prep work is a great way to tackle your home's siding like a pro.
If you are planning to start such work for the first time, it will not hurt you to study all the basic nuances. Recommendations from specialists and educational video materials can be a useful example. As a result, you will not make predictable and common mistakes, and accordingly, you will be able to save your time and money.
Benefits of siding
If you decide to cover the roof gable with siding, you can get a number of advantages:
- Durability and reliability in operation.
- Resistance to various climatic factors and mechanical damage.
- The cladding comes in a variety of metal siding colors. You can easily choose the right color for the gable of your home.
- The price of siding is quite acceptable for the consumer.
The material is simply created for DIY installation. A fairly simple, but at the same time, well-thought-out fastening system allows even an absolute beginner to take on the installation process. Installation of vinyl panels is appropriate not only for the facade of the building, but also for the gable. This will give the exterior of your home proper completeness and harmony.
Elements for facing a house with siding
Before starting work, be sure to carry out an accurate calculation of the siding for the house on the gable. Otherwise, you will either have to purchase the missing parts and linear meters of material. Or then think about where to put the excess. For calculations, you can use a special online calculator to calculate siding. Please note that you need to prepare in advance for the upcoming work, especially if you are going to do vinyl paneling for the first time. Watch siding installation instructional videos.
As a result, you won't make the most common mistakes. In addition, such lessons are well presented in the form of concise and beautifully illustrated photo tutorials.
Some recommendations for installing sandwich panels
Covering the roof with vinyl siding.
When starting to install the siding panel on the gable, it must be secured from the center to the edges. The facing elements must be placed exactly in the centers of the perforations. The angle should be 90 degrees. A technological gap is made between the head of the fastening screw or nail and the surface of the siding, which should be at least 2-3 mm. The sandwich panels themselves can be strengthened in three different ways:
- They are mounted on an aluminum frame. This method is good, but relatively expensive.
- Sometimes the panels are laid directly on the roof gable. This can only be done when the base is made of wood and has a flat, smooth surface.
- the most common option is a lathing made of wooden beams on which sandwiches are installed. This significantly speeds up work and reduces its cost
To make a wooden frame, buy beams of the required dimensions. They are fixed in one plane. To check whether they are installed correctly or not in a vertical plane, use a building level.
The sheathing parts should be mounted as evenly as possible, since the quality of the finished surface and the appearance of the pediment itself depend on this.
The end parts of the sandwich panels are cut in accordance with the angle of the roof and its shape. To do this you will need a measuring tool.
Installation of gable sheathing.
To protect the material from temperature fluctuations, a technical gap of about 10 mm is left between the panel and the sheathing. This will avoid deformation of the siding even when the structure shrinks.
The last rows of the sandwich should be made with finishing type planks. This creates a joint between the wall of the building and the pediment. It must be hidden under a special corner element. This is the last stage of work.
You can install vertical sandwiches, which will give the structure a more individual look. They must be secured using a special casting or profile.
This is usually done using molding or using a J-shaped fastener.
What materials and tools are used in the work?
- Sandwich panels.
- Corner elements.
- Slats or beams made of wood.
- Aluminum elements for sheathing.
- Antiseptic compounds.
- J-profile or molding.
- Screws, self-tapping screws, nails.
- Electric drill.
- Grinder or hacksaw.
- Building level.
- Metal square.
- Measuring tools.
The use of siding panels for gables makes it possible to highlight the architectural advantages of the structure. At the same time, emphasis is placed on its individual parts. The main advantage of this method is the ability to install sandwich panels yourself. With proper installation and compliance with all the above recommendations, you will get a house that is warm inside and attractive on the outside.
Recommendations for selecting siding
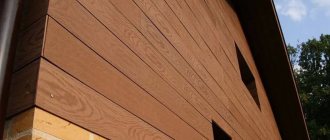
Rice. 11. The house is covered with facade panels, and the pediment is covered with siding to match the main finish.
Any type of siding is suitable for cladding the pediment: wood, metal, fiber cement or polymer (PVC siding or polypropylene facade panels). The advantages and disadvantages of each of them are shown in the table.
| Wood siding | Metal siding | Fiber cement siding | Polymer siding | |
| Moisture resistance | 2 Wood absorbs moisture, this spoils its appearance and performance characteristics. | 4 Under normal conditions, metal siding is not afraid of water. But if the protective coating is damaged, it may rust. | 5 Resistant to moisture. | 5 Resistant to moisture. |
| Corrosion, incl. biological | 1 Susceptible to infection by fungi and mold. | 3 If the protective layer is damaged, it may rust. | 5 Not susceptible. | 5 Not susceptible. |
| Frost resistance | 3 If wood has absorbed moisture when it freezes, it will deteriorate. | 5 Frost-resistant. | 5 Frost-resistant. | 5 Frost-resistant. |
| Fire safety | 1 Wood is a flammable material. | 4 Metal does not burn, but the polymer protective coating will melt. | 5 Does not burn. | 3 Does not support combustion. Extinguishes on its own if it is not exposed to a direct source of fire. |
| Weight | 4 Light enough. | 4 Light enough. | 3 Heavy. | 5 The easiest. |
| Strength | 3 Durable enough. | 4 Durable enough. | 5 Very durable. | 3 Durable enough. |
| Price | 5 Inexpensive. | 5 Inexpensive. | 2 Dearest. | 5 Inexpensive. |
| Easy to install | 4 Fairly simple installation. | 5 Easy installation. | 4 Fairly simple installation. | 5 Easy installation. |
| Ease of use | 2 Requires regular treatment with protective compounds. | 5 Does not require special care. It is enough to wash it with running water from time to time. | 5 Does not require special care. It is enough to wash it with running water from time to time. | 5 Does not require special care. It is enough to wash it with running water from time to time. |
| Total score | 25 points. | 39 points. | 39 points. | 41 points. |
Table 1. Comparative characteristics of different types of siding.
Thus, the most versatile, affordable and easy to install and use is polymer siding. It can be vinyl, acrylic, polypropylene. The characteristics of the panels themselves depend on this:
- Vinyl siding is frost-resistant down to -65 degrees, but may fade slightly in the sun.
- Acrylic siding is resistant to high temperatures, does not fade, but can withstand frosts of no more than -50 degrees.
- Polypropylene panels are the most durable, but also the most expensive.
Siding can look like a wood siding, stone or brick siding, or a tiled siding. With a huge range of colors and a variety of textures, there is sure to be an ideal option for your home.
Summary
Installing siding is not a difficult task. And when it comes to the gable of a house, finishing with siding will not be difficult for a person who knows how to hold an angle grinder in his hands.
However, it is important to follow all panel manufacturer rules and recommendations. And don't rush. Remember and follow the golden rule: measure seven times - cut once.
If you are not confident in your abilities or are not ready to spend time on installation work, entrust the house cladding to professionals.
You can find them based on reviews from neighbors, but it is advisable that the house was lined a couple of years ago and without visible defects. Another option is certified installers recommended by the manufacturer. As a rule, he is responsible for such employees. And he knows that these are professionals who will not let you down and will not cheat. Return to list
Preparatory stages of installation
Instructions for cladding the gable.
When using the attic space as an attic or living rooms, mandatory insulation of the gable is recommended. For these purposes, foam plastic is used with clogging of the seams with polyurethane foam and external plastering or glass wool with a hydrobarrier coating (construction film).
Sheathing the gable of a house with plastic panels begins with fixing the starting (initial) strip at the bottom of the working surface.
To do this, the pediment is covered with wooden or aluminum vertical sheathing, to which the cladding is subsequently mounted. The wooden frame is created from timber measuring approximately 50x50 mm.
The last mounting option is considered not as reliable as others, especially if the installation is carried out without a frame and there are remnants of old paint or plaster left on the façade of the building.
If the gable of the house is made of wood materials and there are no plans to insulate it, then vinyl panels can be mounted directly on the wood, having previously impregnated it with an antiseptic.
For ease of installation of panels on the sheathing, they are provided with special oblong holes. It is necessary to place the screw or nail exactly in the center of the hole and do not tighten it by about 1-1.5 mm until it comes into full contact with the siding. Only with this installation will the siding panel be secured correctly and will be able to move during thermal expansion (compression).
Preparatory work for decorating the gable of a house with siding is completed by installing a drain gutter or strip and securing the starting panel.
Rules and features of connections of additional elements
For ease of installation of panels, it is necessary to take into account the rules for connecting additional elements. Missing panels can sometimes be ordered in a store; many manufacturers work according to drawings, taking into account the size of the panels and their shape. When considering additional elements, the main part is a perforated strip, some call it a nail part.
It is located only on one side of the panel and is intended for fastening accessories. During installation, the gap between the self-tapping screw and the perforated strip is taken into account. To make the connection secure, locks are used that look like protrusions. Manufacturers on the market offer planks of interesting shapes; you can always try something new for finishing.
When installing elements, specialists are guided to the correct installation by a characteristic click.
If we consider window techniques, completely different additional elements are used. It is important to take into account the length of the protrusions; in this case, the bar is inserted into the recess. When working with door techniques, there is no need to achieve tight joining of panels. The element is fixed using self-tapping screws that are attached to the nail strip.
If the panel fits tightly to the sheathing, such a structure cannot be called stable. It is recommended to leave a small gap, namely one millimeter. This will allow the panel to move freely in the event of mechanical impact.
Thus, cases of rapid deformation of elements are excluded. During installation, you should always be prepared to trim the nail strip in order to control the width of the gap. Separate fasteners are used for different types of siding. When considering the vinyl metal type, galvanized fasteners are suitable.
Materials and necessary tools for siding installation
Panels of this material are installed on the gable sheathing using:
- scissors for cutting metal;
- pliers;
- hammer;
- electric drills;
- square,
- roulette;
- level;
- screwdriver;
- stationery knife;
- fastening elements;
- plumb line.
Before starting work on attaching the siding, you need to make strong scaffolding. The surface intended for mounting the material must be without protruding parts of the structure and very flat.
The sheathing is made only from completely dry wood, its humidity should not exceed 15%, otherwise, when the material dries out, the base for installing the siding may deform and bend the panels of the fixed decorative material.
For lathing, slats with a cross-section of 25 to 60 mm are used, pre-impregnated with antiseptics and fire-retarding compounds. Also suitable for lathing installation is a galvanized profile used for fastening drywall. The bars are laid every 20-40 cm.
There are several types of siding based on the raw materials used in its manufacture:
- cement-based;
- metal;
- vinyl;
- made of wood.
Vertical installation of siding panels is used for finishing non-residential premises, for example: car washes, shopping malls, all kinds of cafes and eateries, industrial premises. Horizontal installation of panels is used for finishing residential buildings.
Preparation and tools
The gable of the house must first be cleaned of dirt. Any cracks found should be repaired with plaster. The same must be done if the surface is uneven. If you decide to use wooden siding, you must first treat the gable with a special compound that prevents rotting.
Before covering the gable with siding, you need to stock up on tools and fittings. If you do at least something around the house with your own hands, then you won’t have to buy a lot of new ones.
Among the tools and consumables: nails, self-tapping screws, a screwdriver or drill, a hacksaw or angle grinder with an appropriate cutting disc (for cutting siding), a plumb line or level, a corner, a tape measure, a pencil.
Attention! For safe work it is necessary to install scaffolding. They are made from boards and beams. In some cases, the use of a stepladder is allowed, but only if the pediment is small.
The following equipment is needed:
- strips for mounting panels;
- H-profile, with its help siding components are connected to each other;
- J-profile;
- wind and finishing profile;
- if there are windows on the gable, then a window profile.
You can see what these profiles look like in the photo below.
Vinyl siding
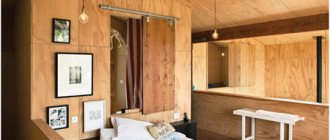
Vinyl siding can be safely called an ideal material for gable cladding, because it is free of all the disadvantages inherent in metal and wood materials.
It is characterized by a long service life, has a presentable appearance, is resistant to aggressive environmental influences, and does not change its color even with prolonged exposure to direct sunlight.
Covering the gable with siding made of polyvinyl chloride is also strikingly easy to carry out installation work, which makes it suitable for cladding an attic, which will still have to be insulated. It must be said that houses whose gable is made of vinyl siding always have an attractive and well-maintained appearance.
Also, the advantages of this material include the increased flexibility of its elements, due to which, even under relatively strong mechanical stress, they do not lose their integrity, quickly regain their previous shape and do not crack.
Another advantage of vinyl panels is their low specific weight, due to which they can be used both for arranging a new gable, as well as one that has already been in use. Thanks to the wide color palette that the modern market offers us, choosing the right shade of material will not be difficult.
Besides everything else, it is ideal for cladding an attic that will need to be insulated to prevent heat loss.
And if you decide to start arranging the gable of your house, but don’t know how to do it correctly, then let’s look at the most important points of how to cover the gable with siding.
To do this, we will need the panels themselves, self-tapping screws, sealant, nails, a utility knife, a screwdriver, a square, as well as finishing and starting strips, a wooden beam with a section of 50 by 100 mm and an edged board about 50 mm thick.
How to attach siding to a gable?
It is most rational to plan and carry out the finishing of the gable after the roof has been erected, during the final work, when other construction work will not interfere with you, and it will be easier to secure the siding. But this should only be done if you have planned the entire design of the house and, upon completion of its construction, it does not turn out that the pediment is visually simply not suitable.
How can this happen? For example, it is not uncommon for a developer to have one project and a style solution in his plans, but during the course of construction it turns out that there simply is not enough money for the entire implementation of the project. Therefore, the roofing will have to be simpler, the finishing for the house will be a little cheaper, and all the exterior design elements will look beautiful only in 3D, whereas in real life, finishing with siding can be done even after the construction of the house is completed. Moreover, it often happens that the pediment needs to be updated on an older house.
So, let's look at the order in which it is necessary to install siding on the gable.
Step 1. Surface preparation
If you do not do this, then prepare the surface in terms of cleanliness. Carefully inspect the gable and remove any protruding parts using construction tools. Be sure to seal all cracks and holes with foam. As a result, the pediment should be clean and even, only then can you move on to the next step.
Please note that those gables that were sheathed with dark siding or covered with a dark-colored roof become very hot. These places have the poorest ventilation, and stagnant high-temperature air will always form under the roof canopy. To avoid such heating when installing profiles on the gable, make an indent of two and a half centimeters from the border where the roof and the gable border touch.
Step 2. Installing the sheathing
If you figure out how to cover a pediment with siding with your own hands, know that in any case you need to install the sheathing vertically, at a distance of 40 centimeters from each other:
You can use wooden blocks or metal profiles as lathing. If you use wood as a material, then be sure to treat it with an antiseptic, and if you decide to purchase a metal profile, then give preference to the one that is designed specifically for finishing with siding:
Tip: Place starting strips and boards at a distance of 2.5 centimeters from the corner.
You can switch from horizontal to vertical siding through an edging profile. Here, all corner profiles and trims must be mounted in the same way as in horizontal siding.
The only important thing is that the metal or wooden sheathing is positioned at an angle of 90 degrees to the siding. In those places where the vertical siding extends into the corner profiles, you need to leave the following temperature gap: 16 millimeters, and 13 on top.
Main stages of installation
On the sides of the working surface (perimeter of the gable) a J-shaped profile or internal corners are attached, which are joined at the highest point.
If the side profile is not long enough, it is overlapped by approximately 12-25 mm. Then the next main panel is inserted into the lock (leaving a gap of 2-3 mm) and is also screwed to the frame in a loose state.
The gaps between the base covering and the J-shaped strips should be at least 3-6 mm.
Joining of row panels with H-shaped elements is carried out with gaps of 6 mm. If connectors are not used and the cladding is fastened overlapping, then the overlap distance should not be less than 25 mm.
The edges of the main planks are trimmed at the required angle so that they easily fit into the receiving J-shaped profile (not forgetting the expansion gaps of 3-6 mm).
The topmost main row panel is attached to the gable using a stainless steel nail.
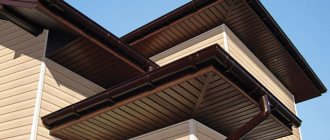
The final stage of covering the attic space of a house with siding is the installation of soffit strips on the roof ledges.
Depending on the roof covering and the location of the row panels, various J-shaped chamfers, F-shaped or finishing profiles can be used.
Some recommend first fixing all the necessary panels on the window, and then begin the main lining, joining the receiving parts, others advise finishing the pediment, and only then start decorating the window opening.
When lining an attic space with vinyl siding with your own hands, the main thing is to correctly and accurately fasten the main covering, additional and decorative panels, taking into account temperature fluctuations (expansion and contraction of the material), and then the cladding of the house will please the eye for many years.
Preparatory work and selection of tools
To install the panels efficiently, you need not only lathing, but also special tools. It's worth stocking up in advance:
- scissors;
- tape measure;
- hacksaw;
- hammer;
- plumb line;
- level.
To install panels efficiently, you need not only lathing, but also special tools
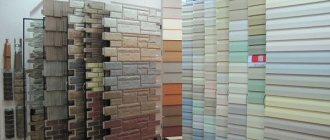
In order for the pediment to have an attractive appearance, it must be finished with a set of materials purchased in one store. It is better to check the color of the panels in advance and in sunlight.
After the sheathing has been installed, the gutters have been removed and the material for finishing the roof has been purchased, all walls to be covered are treated with a fire retardant with antibacterial components. Then a windproof membrane is mounted on the gable using a stapler.
Another important point is that the sheathing, or rather the free space between the beams, should be filled with insulation. Thus, the pediment will receive high thermal insulation characteristics.
Types of siding
Siding is a finishing material that looks like individual panels. Each module has snap hooks and a perforated edge for fasteners. The sizes of the panels are different, it depends on the capabilities of the manufacturer, usually their width is 10-30 cm, and the length reaches 6 m. This material is durable, thanks to its qualities, the finishing of the roof gable does not require paint and varnish treatment and does not suffer from moisture for up to half a century. In construction stores today you can find the following types of siding:
- Vinyl;
- Metal;
- Cement.
Covering the gable of a house with siding is good for protecting it from various environmental influences. Nowadays, many people cover their roofs with siding. How to sew up a pediment and save money at the same time is a good question. Often, cheaper PVC coverings are used as siding on the roof gable, the installation of which is easy to do with your own hands.
Description of siding gable
The pediment is a section of the roof that is formed between several roof slopes. The height of the end area of the roof varies between 70 and 250 cm. The size of the pediment is influenced by whether it is decided to make the attic a utility or residential space.
The shape of the pediment can most often be:
- semicircular;
- stepped;
- triangular;
- trapezoidal;
- broken.
Since the pediment is a structural part of pitched roofs, its shape directly depends on the type of roof
The simplest in terms of construction are considered triangular, trapezoidal and broken pediment. The last two options are chosen by those who want to increase the space under the roof. Still, the triangle-shaped roof makes the attic space uncomfortable and cramped.
The pediment is decorated with siding, trying to “put an end” to the appearance of the building’s facade. The panels fit perfectly into the overall ensemble, regardless of what material was used to construct the walls.
A siding pediment is a suitable option for brick, wood, and stone buildings.
The pediment is covered with siding, practically without paying attention to the material from which the walls of the building are made
Siding is actively used when it is necessary to sheathe a pediment, because this material brings to the fore the following advantages:
- wide range of colors;
- invulnerability to dampness;
- stability of performance;
- lack of interest on the part of rodents;
- basic installation steps;
- the ability to serve impeccably without special care.
Siding, which is panels with oval holes, is made in various colors
Siding installation
Covering the gable with siding is done in three ways. With the first method, it will be necessary to make an aluminum frame to attach the panels to it. Despite the fact that this method is the most reliable, it is also the most expensive.
In the second method, the panels are installed directly on the wooden pediment of the structure.
In turn, the third method is the best option and represents a golden mean between the first two, since in this case the panels are installed on a wooden sheathing fixed to the surface of the pediment.
It is also suitable for arranging an attic, which must first be insulated.
When implementing the third method, it is necessary to fix wooden beams on the surface of the pediment in increments of 40 to 50 cm
It is very important that all outer surfaces of the bars are in the same plane. The timber is secured using self-tapping screws or nails
The panels themselves are fixed to the sheathing using self-tapping screws. Do not tighten the screws too tightly, as in the summer, when the panels heat up, they will expand, which can lead to damage.
Siding should begin only after installing the starting strip. Using a level, the starting bar is installed in a strictly horizontal position and secured with self-tapping screws to each rack.
When installing the second strip, you should hear a characteristic click of the locking connection, which will indicate that the installation work was performed correctly. In the same way, it is necessary to carry out the cladding of the attic, which must first be insulated.
The ends of all panels are cut at an angle that follows the slope of the roof.
When covering the gable with siding, it is advisable to leave a technical gap between the surface of the sheathing and the end part of the panels, which will be necessary during thermal expansion of the elements, and it will also prevent the panels from deforming during shrinkage of the structure.
At the final stage, the finishing strip is installed. It should be noted that this method is also suitable for cladding the attic gable.
As you can see, covering a pediment with siding is not the most difficult task; the main thing is to approach its implementation with all responsibility and theoretical knowledge of the matter.
We recommend reading this too:
- How to make sheathing for siding
- Installation of wall sandwich panels
- How to insulate an attic from the inside
Installing a frame for the gable of a house
Installation of siding panels involves the installation of a frame made of either wood or metal. It is best to mount a frame made of galvanized metal. It will not rot over time and will last a very long time. But it is worth considering that fastening a frame made of metal is much more expensive than the same one, only made of wood.
The frame guides are fastened using special metal hangers. If the sheathing is made of metal, then the step between the guides should be about 50-60 cm. For wooden sheathing you need to choose an absolutely dry beam with a diameter of 25-30 cm. If you look at the instructions for installing siding, then in the photo you can see drawings on which exactly The step size between the wooden guides is indicated. Usually this step is performed with a size of 40-50 cm.
If the pediment requires the installation of windows, then sheathing should also be made around them. For lighting devices it is necessary to install a separate bar. After the installation of the sheathing is completed, you need to install waterproofing and thermal insulation layers . For insulation it is best to use mineral wool.
What is needed for gable cladding
To avoid delaying the installation process, it is advisable to prepare the necessary materials in advance. To work you will need the following:
- Siding. There are many types on sale at the moment, but the most preferred are vinyl and metal. The first option is light in weight and has excellent qualities, while the second requires a reliable base, but is characterized by decorative durability.
- Sheathing details. The frame can be created from wooden beams with a cross-section of 50*40 or metal profiles attached to hangers. An alternative could be a special suspension system for siding, but it requires financial costs and adjustment of parts.
- Thermal insulation material. Its use is not always necessary: for example, if the attic space is non-residential. Laying insulation makes it possible to increase the energy efficiency of a house in regions with harsh winters, but subject to insulation of the surface of the roof slabs.
- Additional elements. Depending on the chosen technology, you will need a starting rail, a J-profile, an internal corner, a soffit, a near-window strip (if there is a window with a slope) and a platband (an opening without a recess).
- Steam and waterproofing. Protection from water is mandatory for any work, and vapor barrier is required when lining a living space with heating.
- Fasteners: screws, nails.
Separately, material for scaffolding should be provided. Alternatively, other options may be used to allow work at heights to be carried out without risk.
Siding calculation
In order to accurately calculate the façade material for cladding the gable part of the building, you will need to take into account the geometry of the structure.
Classic gable roof
Due to the fact that such a roof has the shape of a triangle, the formula is used to determine its area: ½ * (a*h).
Calculation Guide:
- The base of the pediment (a) is measured.
- From the top of the roof, the distance to the base (h) is measured.
- The area of the window, if any, is calculated separately. To do this, the length is multiplied by the width.
- The area of one cladding panel is indicated by the manufacturer on the label.
Scheme 1. Calculation of the dimensions of the gable roof gable (conditionally)
Approximate calculation:
The base is 7 m, the height from the arch to the bottom is 3.5 m.
The selected type of metal siding is ship timber, the area of one part is 0.85 m2 (length – 366 cm, width – 23.2 cm).
½ * (7*3.5) = 12.25 m2. ½ is 0.5, so you can divide by 2 instead of multiplying.
If there is a window, its area is subtracted from the total.
12.25/0.85 = 14.4. The result is rounded to 15, which means the required number of panels.
Separately, it is necessary to count additional elements. This is done according to the drawn diagram with all available dimensions. The total footage of each section is determined, according to which the fittings are selected.
Roof with variable angle (broken)
This design has a more complex configuration, so the procedure for calculating the total area begins with measuring the entire surface and drawing up a diagram. To quickly calculate the amount of material, the pediment is divided into geometric shapes.
Scheme 2. Division of the pediment into figures (conditionally)
After breaking down, you get 4 shapes: B – rectangle, A, B1 and B2 – triangles.
The required dimensions are determined:
- The total base of the pediment is 12 m.
- The height from the roof or ridge to the base is 4.5 m.
- The base of triangles B1 and B2 is 1.5 meters; height – 2 m.
- 1.5 * 2 is subtracted from the total size (12 m), resulting in 9 m - the length (in1) of figure B. The width (in2) is identical to the height of figures B1 and B2 (2 m).
- The length (b1) of rectangle B determines the size of the base (a1) for triangle A and is 9 m, the height (a2) is 2.5 m.
The area is calculated as follows:
- Triangle A: ½ * (9*2.5) = 11.25 m2.
- B1 and B2: ½ * (1.5*2) = 1.5 m2.
- Rectangle B: 9*2 = 18 m2 (length*width).
- Total area: 18+1.5+1.5+11.25 = 32.25 m2.
If there is a window, its size is subtracted. The door can also be separately sheathed with siding or highlighted with other material.
For example, a panel has an area of 0.85 m2, then 33/0.85 = 39 (38.8) pcs. + 1–2 spare parts.
This calculation allows you to determine how many ordinary elements will be needed to cover the complex pediment of a country house or private house.
Trapezoidal shape
Calculating the area of such a roof on your own will not be difficult. To do this, a plan is drawn up (diagram 3), onto which all dimensions are transferred.
Scheme 3. Dividing a trapezoidal pediment into figures (conditionally)
Measurements are taken and transferred to the diagram. For example:
- common base – 12 m, height from it to the top of the roof – 2.8 m;
- rectangle B: length – 8 m, width – 2.8 m;
- triangles A and A1: height – 2.8 m, base – 2 m.
The area is determined:
- rectangle B: 8*2.8 = 22.4 m2;
- triangles A and A1: 2*2.8 = 5.6 m2, two figures: 5.6+5.6 = 11.2 m2;
- total: 22.4 + 11.2 = 33.6 m2, rounded to 34 m2.
If there is a window or doorway, its size is subtracted.
34/0.85 (panel area) = 40. Thus, to finish the pediment, you will need 40 parts with a small margin.
It is better to select and purchase siding after measurements to determine the most suitable one.
Finishing the pediment with siding yourself: calculating the amount of materials
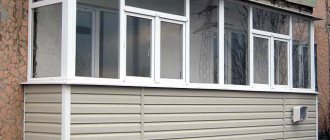
Most often, the pediment is sheathed with the same material as the main part of the facade. For example, when a house is covered with siding, the gables are lined with the same. Then the facade will turn out to be holistic and harmonious.
But in some cases they choose a different cladding. Alternatively, this could be finishing the pediment with siding of a different color or facade panels to match the main cladding, but with the texture of stone instead of wood.
When you know exactly what material you will use, you can start calculating its quantity.
As a rule, the pediment has a triangular shape, less often – pentagonal or complex (stepped, keeled, etc.). To determine how many panels are needed for cladding, you will have to calculate its area.
If the gable is a simple triangular shape, the number of panels can be determined this way.
- First we calculate the area of the pediment. To do this, the length of the cornice must be multiplied by the height of the pediment from the ridge to the cornice and divided by two.
- If there are windows on the gable, subtract their area from the total area.
- Add 10-15% to trims.
- We divide the result by the area of one panel.
Calculation example.
Let's say we have a cornice length of 4.2 m, and a pediment height of 2.4 m. There is one window 120 x 60 cm on it. Then we calculate the required number of panels as follows:
- S = 4.2 x 2.4 / 2 = 5.04 sq. m.
- S without windows = 5.04 – (1.2 x 0.6) = 4.32 sq. m
(Please note that the window area was indicated in centimeters, we converted it to meters).
- 4.32 x 1.15 = 4.968 sq. m.
- Let's say we chose green Canada Plus Premium siding from Alta-Profile for cladding. Area – 0.842 sq. m. Then the required number of panels: 4.968 / 0.842 = 5.9 pcs.
Thus, to cover our gable we will need 6 panels of siding.
Rice. 2. If the pediment is of complex shape, its area is calculated as the sum of the areas of the simple figures of which it consists.
If the pediment has a complex shape, it is most convenient to divide it into several simple shapes: rectangles and triangles, calculate and then add up their areas.
To minimize costs, you can make a model of the pediment and distribute the panels on it in such a way as to make the most efficient use of the scraps. In addition, this model will help you when cutting panels - to minimize the risk of errors.
Please note that you need to carry out calculations and cuts very carefully: if the panel is made half a centimeter shorter, it will no longer be usable. In any case, in the place where you expected it to be located.
In addition to the panels themselves, you will need auxiliary materials. Finishing roof gable siding means that you will also need:
- Starting bar
- Finish bar
- J-profile
- Corner strips for installation on external and internal corners
- H-profile, if the length of the gable is greater than the length of the panels
- Near-window profile, if there is a window opening.
For fastening, you will also need self-tapping screws with a length of at least 25 mm, with a head diameter of 8 mm, and a rod diameter of 3 mm.
When the theoretical part of the work is completed, you can proceed directly to installation.
Flaws
Like any other finishing material, siding has a number of disadvantages:
- it does not tolerate mechanical stress well - after an impact, marks remain on the panels that cannot be removed (however, the damaged part can be dismantled and replaced with new elements);
- if a fire gets on the surface, it will not go out immediately (therefore, it is not recommended to light a fire in close proximity to a structure covered with siding);
- If you ignore the rules for installing panels, they may subsequently begin to warp.
If you analyze all the possible problems that may arise, it turns out that they are all completely solvable.
Sheathing the roof gable
Installation work
To carry out all siding finishing work you will need the following tools:
Scheme of a pediment with siding trim.
- protective glasses;
- awl;
- portable circular saw;
- string with a weight (plumb) and chalk;
- roulette;
- metal folding ruler;
- pliers;
- metal hacksaw with fine teeth;
- level (min. 60 cm long);
- cross saw;
- hammer with nail puller;
- crimping pliers;
- perforator pliers;
- metal corner;
- screwdriver;
- knife-cutter;
- metal scissors.
Finishing the pediment with siding panels involves the use of vertical guide elements. They should be located sequentially every 30-40 cm. If the structure is based on a wooden beam or slats, they must be additionally treated with a special antiseptic composition
You should also take into account the temperature change in winter
To do this, it is important to take into account the process of expansion and contraction of the material when creating the siding gable
Installation of gable sheathing.
During the installation process, it is necessary to leave a technical gap between the planks and the ends of the panels. It will ensure free movement of the siding in a linear direction. Thus, the entire cladding will be protected from temperature changes, which can cause material destruction and deformation. It is best to secure siding with galvanized screws or nails. Many novice builders underestimate the choice of fasteners, because they consider it only a petty matter. However, this is not the case. The service life of the siding quite significantly depends on the quality of the hardware. The most common components include self-tapping screws, which significantly increase the speed of installation work. When choosing, you should focus on fasteners without a drill at the end. A nail is less convenient to use, but its functionality is almost as good as self-tapping screws. A sufficient size of hardware will be 30 mm to securely secure the structure. The average calculation for 100 m2 of facade is about 1600 elements. Consumables for installing siding should be purchased with a reserve.
Siding installation
Manufacturers almost always provide detailed installation instructions.
But the information in this article will also help you learn how to cover the gable of a house with siding.
- First you need to install the starting strips. They are mounted in the lower part of the pediment strictly horizontally; a building level is used for checking. The screws are not screwed tightly to the plank, but leave a gap for expansion in the hot season. This also applies to nails. Between two adjacent elements you also need to leave a distance of 5–7 mm for the same reasons.
- Next, install the inner corners along the roof slope. It is also necessary to leave a gap from the starting bar to the corner bar. The corners must be carefully processed (trimmed and sanded) so as not to spoil the appearance.
- The window is finished with a J-profile if it is flush with the trim. If there is a slope, then use a window strip, and install a finishing strip near the slope itself.
- If joints of panels of different colors or textures are planned on the pediment, then you need to install an H-bar. You can learn more about siding strips in the article: how to properly install a siding starter strip.
- Now the panels are being installed. They must first be cut to the shape of the pediment; it must be taken into account that the element should not be tightly installed in the corner strip, there also needs a gap for expansion. The first panel is installed in the starting strip and tucked into the corners. Next, the part is attached to the frame through the mounting holes using self-tapping screws or nails. Subsequent elements are installed in the same way.
- Before installing the last panel, you need to install the finishing strip. And fill it with the last element. For reliability, it can be secured through with a nail.
The entire process of installing siding on a gable is not as complicated as it might seem at first glance, the main thing is to follow the instructions.
Metal siding
This material has a long service life and is able to maintain its bright colors for more than 50 years. Its important advantage is its high resistance to ignition.
Metal siding is made from a layer of galvanized roofing steel, as well as a passivated layer, a primer layer and a polymer coating.
And these materials are of no interest to insects. The polymer coating is highly resistant to UV radiation, so it does not fade and can retain its original color for a long time, and can also be used for furnishing an attic.
However, like any material, metal siding has some disadvantages, such as low resistance to mechanical stress, the need for constant maintenance, and it costs a little more in comparison with its wooden or vinyl counterpart.
Also, a significant disadvantage of this type is its high thermal conductivity, and therefore such gables will have to be insulated after installation.
Another disadvantage of using metal elements is their relatively high weight, which makes their use absolutely unacceptable for roofs with a relatively dilapidated rafter system.