Renovating an apartment and choosing building materials often require a lot of time and effort, but the end result is a standard interior that everyone has. Painting walls is a great way to avoid the typical options that are found everywhere. Drawings on the walls in an apartment are used to decorate rooms for various purposes; there are several techniques that allow you to realize any fantasies. Inspiration for drawings can be taken from the Internet; these can be ready-made templates or invented drawings.
Stencil drawing
The pattern can be applied to the wall using a stencil. This technique provides wide scope for imagination and makes it possible to play with the contrast of colors. This type of wall decoration is suitable for small format and monochrome designs. You can buy a stencil or prepare the outline yourself on a printer, which is then transferred to thick cardboard.
Stencil design is suitable for decorating stylish children's rooms, since the simple technology allows even children to work on interior decoration. Relief designs and classic elegant patterns in modern, retro and abstraction styles look very unusual.
"How will I draw?" Features of the painting technique
There is nothing complicated about this, of course. Each person, especially those who have gone through art school, has their own unique technique that helps them bring any idea to life without any problems. But not everyone has finished painting, so our algorithm, which reflects all the stages of the technique of creating a drawing on the wall in an apartment, will come in handy.
- preparing the wall
- if you “safely” skip this stage, then even the most skilled home artist risks getting irritated instead of being satisfied with his work, which is why the old material must be carefully removed, and the wall itself should be thoroughly leveled with plaster and finally treated with a primer (in general, this process is not very differs from preparing a wall for wallpapering); - preparation of materials and tools
- you will need water-dispersion paint, preferably acrylic-based, as well as several brushes of different lengths; - applying a general background
- in essence, you simply paint the wall in the color that will later become the background for your composition; - drawing a sketch on the wall
- drawn up in parts so that appropriate edits can be made; - coloring
- first, large lines and details are drawn out with a wide brush, and then very small strokes with a small brush.
There is an option for those who honestly admit that their hands are not growing from the right place. This is stencil painting
.
- you can buy ready-made templates in the store;
- Find it online and cut it for use.
Stencil painting will not cause any difficulties:
- apply to the wall;
- carefully glue with tape for convenience;
- draw a contour;
- We remove the template, just make sure not to damage the paint or wallpaper, depending on what is the base surface of your wall.
Of course, stencil painting is inferior to conventional painting in terms of persuasiveness. As a rule, it is overly schematic, and many templates are too common in apartment interiors. If you want to make your drawing stand out, you can decorate it with additional effects. For example, you can achieve a beautiful play with light using regular varnish.
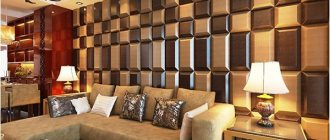
3D images
This work is performed with construction gypsum mixtures and spatulas. The solution is applied to the pre-drawn sketch where the volume is required. The process is akin to the work of a sculptor, and therefore requires patience and care. After the volumetric composition has dried, it can be painted, but this is not at all necessary.
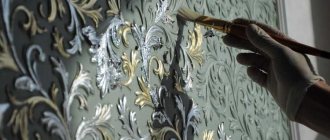
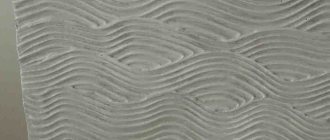
Painting on decorative plaster
Textured and textured plaster is considered the ideal basis for an artistic composition. It makes it possible to create an original visual effect. Some of the works resemble a relief painting or an ancient fresco.
If you correctly combine the design and type of surface, the paintings will be as realistic as possible. This art requires experience and proper adherence to technology.
Preparing the walls
Any drawing technique requires preliminary preparation of the wall; it must be perfectly flat. After applying the paint, all previously invisible defects appear, which spoils the overall impression of the work.
When leveling walls, two main methods are used:
- installation of drywall - the method is considered very simple and requires minimal skills;
- applying wet plaster - this method is used only if you have some experience; the procedure is often required to be repeated.
Drawings in different rooms
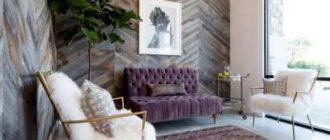
In the living room
The city, natural and sea landscapes look beautiful here. Neutral pictures are selected for this room, creating a light, pleasant atmosphere.
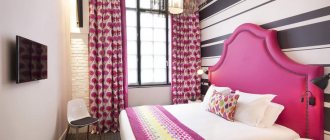
In the bedroom
The drawings in this room should be conducive to calm and comfort, and therefore delicate pastel colors are chosen for the composition. The image may resemble clouds in the sky, birds of paradise, sakura branches, graceful butterflies. The main thing is to stick to warm and soft colors.
In the kitchen
Designers do not advise painting the wall near the stove here, so that the steam does not damage the work. Branches of fruit trees, ethnic ornaments and Scandinavian patterns look great in the kitchen.
In the bathroom
Given the high humidity, painting in this room is done with acrylic waterproof paints. Landscapes of the seabed, fountains, pearls, and Roman baths are suitable for painting.
In the hall
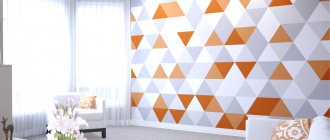
When guests cross the threshold of your home, they can see a stylish design created in the desired style. You can choose a natural picture, geometric motifs or an abstract pattern.
In the nursery
I can't think of a better room for drawing! But don’t forget that the child will have to look at it every day. Choose neutral colors.
See our photo selection and create a special interior in your home! Maybe you have other ideas on how to draw a picture on the wall for a non-professional? Write to us!
Basic drawing techniques
Today there are a large number of techniques for painting on walls in an apartment. Familiarization with the most popular methods will allow you to choose the most suitable one.
Drawing with paint
The technique is often used when drawing images without clear lines and contours. To perform such work, spatial imagination and preliminary visualization of the result are required. The base color is used when applying key details.
On the wall you can depict a landscape with a tree in the center and individual details on the periphery. When applying an image, it is recommended to use greenish or brownish shades; they are present in landscapes. This stage is considered marking and becomes the basis for work. When applying a picture, a translucent base composition is used, on top of which a thicker layer is applied. The technique is considered the most difficult and requires experience and talent. 3D drawings on the walls in the apartment are painted using paints.
Pencil
Drawing on a wall with a pencil is also not considered easy. The image is transferred from the sketch to a scale drawing, the possibility of distortion is eliminated. The difficulty of transferring lies in the need to maintain proportions, shapes, and direction of movement, which is quite difficult.
At the initial stage, an area for the painting should be designated on the wall; it is marked with crosses or dots. It is necessary to reproduce the picture in the center of the selected plane. In addition to the pencil, you should prepare an eraser and a soft cloth.
By squares
In this case, the image is transferred from an image, photo or painting to the wall using the method of dividing into separate squares. This method is considered the most accessible for those who lack artistic skills and talent. The method requires perseverance, precision, and a meticulous attitude to work. There is no need for drawing experience in this case.
Stages:
- Draw the sketch into squares 30x30, 40x40, 50x50, etc.
- Mark the area for the future drawing on the wall in the apartment, using a ratio of 1:10 or 1:5 (you should choose the ratio yourself), mark the selected area into squares.
- Transfer the image from the sketch to the wall step by step. The line of each sector must have continuations in the adjacent one, which guarantees accuracy.
The method does not require the use of a large number of tools. You should first prepare a pencil, an eraser, several rulers, and a plumb line.
Shadow
Transferring a picture to a wall using a shadow is used quite rarely, despite its relative simplicity. The main point is to create the right lighting. The shadow of the object should fall on the wall being painted.
Attention! This technique is suitable for applying geometric patterns, branches, human figure, profile, etc. The main advantage of shadow painting is that the shadow increases the size of objects.
Shadow can be used when composing individual elements of a landscape. It is possible to rearrange objects, find the best position for them until their maximum harmonious arrangement is achieved.
After clearly fixing the shadow, its contours should be outlined with a pencil; at the next stage, small details are drawn in. The technique of transferring a picture over the shadow allows you to create exclusive panels. The drawing is applied with a pencil; it is recommended to use a projector or lamp to create shadows.
Stencil drawing
The stencil painting technique is considered the simplest. The main disadvantage is the difficulty in creating blanks for large elements and the monotony of the picture. The stencil does not allow you to recreate full-fledged images with a lot of detail.
The advantages of stencil designs outweigh their disadvantages. The stencil allows you to recreate clear lines of the picture. At a minimum, you need to use 1-2 templates, which will allow you to properly design the entire site.
Paint printing
For stuffing you only need a couple of shades. The main work is carried out using a paint brush or a regular brush. Adjusting the contour requires the use of watercolor brushes. Spraying a can of paint will help speed up the process.
Attention! Following two rules will help you avoid adjustments. Masking tape will help ensure a tight fixation, the use of which will not disturb the wall coating. The use of thin putty, applied with a spatula, will help achieve relief. The drawing turns out to be voluminous, protruding beyond the wall by 1-1.5 mm.
Shade and shape
After applying the base, it is recommended to proceed to the next step. Life should be breathed into the contours, as a result the image takes on the desired appearance.
Roller
The main advantage of the technique is speed; there is no need for adjustments. The disadvantage is the monotony and limitations in the choice of pictures.
Painting a pencil drawing
When painting, water-based paints and a palette are used to combine shades. First of all, a transparent layer is applied, due to which the color distribution is ensured. The entire picture is gradually filled with color spots. It is not recommended to use bright colors at this stage. It is recommended to draw objects located in the foreground as clearly as possible. Small details should be painted after applying the main drawing; thin brushes are used when carrying out the work.