It's good when a house or apartment is tastefully furnished. You come home from work and plunge into a cozy atmosphere. But there are feelings that something is missing, there are definitely places where you need to hang something. Maybe a cabinet, but it somehow doesn’t fit into the interior or isn’t the right size. Then the best option would be a shelf. It will fit perfectly into the overall decor of the house and, importantly, will help save a lot of space.
You can keep various items and literature on the shelves.
After it has completely hardened, a shelf is put on the pins.
You can keep various items and literature on the shelves. They are attached to absolutely any room. How to properly fix a shelf on the wall so that it fits perfectly into the interior? It's not difficult as it may seem. Anyone can do this work if they want to.
Mounting methods for wall shelves
When planning wall shelves, the type of fixation is decisive. Once you familiarize yourself with the mounting method, you can easily choose the option that suits you.
Using invisible fastening . By choosing this look, you will hide the fasteners, and the wall structure will look light and elegant, no matter what room it is hung in. It is desirable that the wall be concrete or brick. Wall partitions made of plasterboard less than 10 cm are not recommended.
How to properly fix a shelf on the wall so that it fits perfectly into the interior?
You can use a variety of materials for wall shelves.
Using brackets . In this case, you cannot hide all the elements; they will always be visible. You can save money by purchasing metal or plastic corners. If you want to add beauty and originality to a piece of furniture, buy decorative fasteners, but always in pairs. It is necessary to take into account an important point - the brackets are not suitable for every interior.
They are attached to absolutely any room.
Working with it is not difficult, and its mass is small.
On holders for glass shelves . In such fasteners, rubber or silicone gaskets are used to protect the plane at the fastening site. Shelf holders can be of different sizes and shapes; there are options with suction cups. They are attached from below, and the upper surface remains open.
Anyone can do this work if they want to.
How to attach a shelf to a wall?
Using loops and corners . This is the most common method - easy, efficient, does not take much time, and will fit into any environment. The format of loops or corners allows for a decrease or increase in the load on the shelf. Attachment to guides or metal posts. Not all types can be put into practice on your own. In some cases, it is worth contacting specialists.
When planning wall shelves, the type of fixation is decisive.
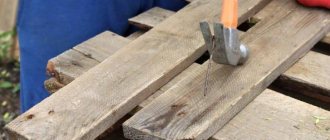
To hang a shelf on a brick or concrete wall, you need to make markings using a level.
Required tools and materials
In order to mount the shelf on the wall, you will need the following materials
- dowel-nail (or screw with dowel);
- fasteners of a suitable type;
- the shelf itself.
You will also need tools:
- drill;
- screwdriver;
- hammer;
- roulette;
- marker or pencil.
screwdriver
Attaching shelves to the wall without visible fasteners
There are a number of points that you need to familiarize yourself with in order to hang a shelf in an invisible way.
- Wall thickness. The shelf should be mounted on an invisible mount if the thickness of the brick partition is 250 mm, and the concrete partition is 105 mm. If the dimensions are smaller than the given data, then additional parts will be needed. When the wall is made of plasterboard or cinder blocks, and the thickness does not exceed 100 mm, then invisible fasteners are acceptable if the shelf will be used as decoration and light objects will be placed on it.
- Shelf thickness. It should not be massive or, conversely, thin. It is desirable that the material does not sag, is dry and has a good finish. If there will be light items on the shelf, then the thickness of the shelf should be at least 30 mm; if you store literature or heavier utensils, it should not exceed 60 mm, but should not be less than 45 mm.
- Selection of fasteners. To choose the right mount, you need to take into account the second point, and also know what function is intended for the shelf. The invisible fastening consists of hanging loops and metal rods. The loops are attached to the back side of the shelf and markings are made. Using the necessary tool, holes are made in the wall and a plug is inserted there. Then screws are screwed in to a sufficient depth and hinges are placed on them.
If you use metal rods, you need to remember that the diameter of the fastening element should be 10-12. The first thing you will find out is the length and width of the shelf. Mark this data on the wall and drill holes. The same holes will need to be made on the shelf. Depending on the load, the required number of pins will be required. They are inserted into the wall half the length of the hole and fixed with glue. After it has completely hardened, a shelf is put on the pins.
Once you familiarize yourself with the mounting method, you can easily choose the option that suits you.
Use a hammer drill to make the required holes.
Fixation on drywall
Many people now prefer to line the walls with sheets of plasterboard or make room partitions from this material. And it is clear that attaching shelves to it using pins is not the best option. Drywall is a fairly thin and fragile material, not designed for heavy loads . So the option of hanging shelves on the partition is completely eliminated.
But if the walls were leveled with plasterboard and it was already known where the shelf would hang, then you can use a trick and still use invisible fasteners. To do this, it is enough to install a reliable wooden block between the wall and the sheet of drywall in the place where the shelf will be attached. Next, you will need to fix the shelf itself so that the pins pass immediately through the drywall, through the block, and through the concrete wall. However, it is important to understand that such a piece of furniture should not be heavy in itself, and you should not place massive or significant objects on it. Also, special fasteners for drywall can be used to fix lightweight shelves.
How to hang shelves on drywall
That, in fact, is all that could be said about invisible options for attaching shelves to walls. Everything is quite simple and should not cause any difficulties even for a beginner in this matter. The main thing is to purchase everything you need in advance, and the work can be completed within 30-40 minutes. A shelf will appear on the wall that will stand “by itself.”
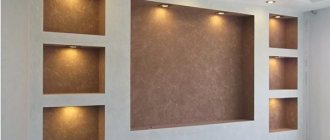
With all the variety of existing methods of interior design and modern design, it is almost impossible to imagine a modern room in which shelves would not be used.
Decorative and easy to store various small items, massive for books - shelves can not only be an additional useful surface, but they can also act as a decorative decoration for any room or office.
There are two main ways to attach shelves:
- traditional mounting of shelves to the wall
- invisible or hidden fastening of shelves to the wall
The traditional method of fastening using various types of brackets, metal or wooden racks is popular only when the fasteners, correctly selected in color, texture and material, also add their own “zest” to the artistic image of the room.
But often, the presence of additional decorative and technological elements is not always consistent with the overall design of the designer and the target orientation of the structures. In this case, it would be better to use the second fastening method.
The development of modern design craft and the construction industry makes it possible not only to quickly cope with the task of hanging shelves, but also to successfully use the fastening of shelves to the wall without visible fasteners, thereby creating the illusion of floating in space.
Invisible fastening of shelves to the wall
Let's consider the main stages of properly attaching a shelf to the wall, while hiding all fastening elements:
- First, you need to assess the strength of the wall or partition on which the shelf will be attached.
With a brick partition thickness of 250 mm or more, concrete partitions with a thickness of 100 mm or more can be safely used for hanging shelves without additional load-bearing structures.
Scheme of invisible shelf fastening.
1 – bracket for fastening the shelf; 2 – mounting holes; 3 – steel axle; 4 – suspension; 5 – shelf.
With thinner bricks, cinder block and plasterboard walls up to 100 mm, it is possible to use invisible fastening of shelves to the wall, but such shelves are suitable only for decorative purposes.
Since they simply will not withstand additional loads.
Then you need to determine the thickness of the shelf itself.
It can be determined by placing a load of expected weight on it. The absence of visual deflection and deflection to the touch indicates sufficient thickness of the board.
An exception may be cases when the choice of a thicker board is dictated by the general concept of the interior.
However, it is also necessary to take into account the fastening features, due to which the thickness of the board, as a rule, cannot be less than 30 mm. The thickness of the shelf must be selected depending on the load, for example, for books - boards with a thickness of 45 to 60 mm are suitable.
Fastening for a shelf to a plasterboard wall
There are different types of fastenings to plasterboard walls. Here are some of them:
- Embedded beams are the optimal variation. Attached directly to the gypsum board when mounting to the wall. Beams of the required thickness are fixed in the place where you will attach shelves or equipment.
- Fastening is carried out to the gypsum board. This option is not difficult, since the fixing elements - butterfly dowels, umbrellas, Molly fasteners - easily pass through the plane and are screwed into the wall.
- Using profiles. In this case, you will need a magnet, preferably a powerful one, this will ensure fastening strength. In the place where the metal profile passes, make holes all the way through. The self-tapping screw should be 5-6 mm longer than the thickness of the gypsum board sheet. Then we fix the shelf to the plasterboard wall.
- Anchor fittings. Used to attach shelves that can support significant weight. Their diameter should be from 6 mm to 1 cm.
Using the necessary tool, holes are made in the wall and a plug is inserted there.
We make sure that the drill and hardware are the same size.
Fixing the shelf on the wall using hidden fasteners
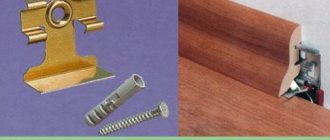
Step 1. In order to fix a shelf on the wall using a hidden fastening option, you will need to prepare a hammer drill with a drill of a certain section, 2-3 special titanium pins, a building level, a square, a drill and a bit, the shelf itself, and a pencil for marking. The pin is a metal rod that is threaded on one side and smooth on the other. The threaded part will screw into the wall, and the smooth part will need to be fitted with a shelf. Typically the pin diameter is 10-12 mm. The drill is selected with the same diameter as the purchased titanium.
Special metal pin
Step 2. First of all, you need to apply markings to the shelf itself. By the way, you can make it yourself from any part of other furniture that has served its age, rather than buying new one. Using a ruler, you need to set aside the required distance from the end edge of the shelf. In this case, a distance of 12 cm was chosen.
Step 3. Having chosen the distance, you need, using a square and a pencil, to draw a line perpendicular to the plane of the shelf at the end where the hole for fastening will be drilled.
A perpendicular line is drawn at the end
Step 4. Next you need to find the middle of the end of the board and make a corresponding mark for the drill. It is important to understand that if the shelf consists of two sheets of chipboard glued together, then in this case it is better to drill a hole for fastening not in the middle, but with a slight offset towards one or another board (better - towards the bottom, it will be more reliable).
A mark is placed for the drill
Step 5. Similar markings must be applied on the opposite side of the shelf.
On the other side the same markings are applied
Step 6. Next, to the end of the shelf where the markings are applied, you need to attach a building level and directly on it make marks parallel to those previously applied to the board, as well as marking the edges of the shelf itself. The level cannot be moved while the marking is being transferred. Pencil marks can then be easily erased from the surface of the level, but this technique of transferring markings will make it easy to make markings for drilling holes in the wall.
The level cannot be moved while the marking is being transferred.
Marks are made at the level
Step 7. Then you need to select the approximate location of the shelf on the wall. Having applied it to the surface, you need to mark the boundaries of the product directly on the wallpaper with a pencil.
The shelf is attached to the wall
The boundaries of the shelf are marked
Step 8. Now you need to take a building level with markings and, attaching it to the wall in the selected and marked place, align and transfer the markings from the level to the wall, also using a pencil. In this way, you can easily and quickly make precise markings for the locations for drilling holes for the pins without unnecessary movements.
Necessary materials
For wall shelves you can use a variety of materials:
- GKL. Designers often use plasterboard in interior design, especially if shelves made of this material are assigned one of the main places in the room.
- Tree. Most often used for balcony shelves. Working with it is not difficult, and its mass is small. When used correctly, these shelves can last a very long time.
- Chipboard or chipboard. Moisture-resistant material, withstands temperature changes, wear-resistant.
- Glass. Very common in use. Glass shelves look very fashionable.
- Plastic. The publicly available material, since it is inexpensive, is not susceptible to mold.
- Metal. When working with it, you will definitely need a welding machine.
Then screws are screwed in to a sufficient depth and hinges are placed on them.
If necessary, we make adjustments.
Features of fastening shelves depending on the type of wall
When installing fasteners for shelves to the wall, you should take into account the characteristics of the material from which the base is made. The higher its strength, the more securely the hinged structure will be fixed. Soft wood and brittle plasterboard surfaces are not capable of providing quality support. The methods for attaching shelves to them and the type of fittings used differ.
Concrete wall
To drill a hole in a solid concrete surface, you need a hammer drill. The work must be performed using a special concrete drill, the diameter of which is selected according to the size of the dowel. The depth of the hole must match the length of the fastener.
Plasterboard wall
When working with gypsum boards, 2 methods are used:
- The first is suitable for already erected structures, however, suspended structures installed in this way can only be used for decorative purposes. Heavy objects cannot be placed on them. In this case, holes are drilled in any place where you want to fix the shelf on the wall. The most reliable fixation in a fragile material is provided by a specially shaped dowel - a butterfly. It is inserted into the hole, and when a self-tapping screw is screwed into it, the wings of the dowel open. They distribute the load over the entire adjacent area of the gypsum board, so the material does not crumble.
- The second requires preparation at the stage of creating a plasterboard partition. When constructing a frame on the line where it is planned to install wall shelves or other heavy hanging pieces of furniture, additional crossbars are made. They are attached to vertical posts. This improves the rigidity of the entire structure. The fasteners are then screwed strictly into these crossbars.
Hidden shelf mounts allow you to create additional storage space with minimal disruption to your interior design. The installation can be carried out independently, however, it is important to correctly calculate the load and select hidden fittings in accordance with it.
Required Tools
The tools you will need are: a level, a drill, or better yet a hammer drill, a screwdriver, dowels, self-tapping screws, a jigsaw, wood glue, a fastening set, a set of drills, a pencil, a hammer, and a wrench for anchor bolts.
If you use metal rods, you need to remember that the diameter of the fastening element should be 10-12.
Upon completion of all stages of work, we attach the shelf.
Types of fastenings
To attach the shelf to the wall, you can use:
- exposed (visible) fasteners;
- hidden fasteners that are invisible to the average person.
Exposed Fasteners
Open fasteners include:
- brackets of various configurations and sizes. It is recommended to use such a shelf fixing element only if it fully matches the design of the room;
Shelf holders of different types
- metal corners. The devices are the simplest, most common and reliable fastening elements. Can be installed in rooms with any finish;
Corners for fixing shelves
- loops. They are also a common option. Easy to install and reliable;
Open loops for hanging shelves
- holders. Used advantageously as fastenings for glass shelves. Can be of different shapes, colors and different sizes.
Holders for shelves made of glass
Hidden fasteners
Fixation with hidden fastening is carried out using:
- hidden loops. A special structure is installed inside the shelf, which rests on a bolt screwed into the wall. From the front side, neither the hinge's retaining hole nor the bolt are visible;
Fixing the shelf with hidden hinges
- metal rods that are attached to the wall and “recessed” inside the shelf.
Using metal rods to secure the shelf
Fastening process: step-by-step instructions
How to attach a shelf to a wall? Before you start installing the shelf, you need to remember that the holes in the shelf on the back side are made 5 mm lower, and also make sure that the holes on the shelf and on the wall completely coincide.
The first thing you will find out is the length and width of the shelf.
When positioning the shelf, align it with the fasteners.
To hang a shelf on a brick or concrete wall, you need to make markings using a level. Use a hammer drill to make the required holes. We carry out the work carefully, avoiding chips on the wall. We make sure that the drill and hardware are the same size. Then we attach the fastening elements and check with a building level. If necessary, we make adjustments.
Depending on the load, the required number of pins will be required.
Using bolts and nuts, self-tapping screws or self-tapping screws, secure the shelf.
Upon completion of all stages of work, we attach the shelf. If you did not make it yourself, but purchased it in a store, then all the necessary fastening elements are included. When positioning the shelf, align it with the fasteners. We make sure that there are no gaps between the shelf and the wall. Next, mark all the holes with a pencil. Using bolts and nuts, self-tapping screws or self-tapping screws, secure the shelf.
They are inserted into the wall half the length of the hole and fixed with glue.
If you did not make it yourself, but purchased it in a store, then all the necessary fastening elements are included.
If necessary, we make adjustments.
How and with what help to attach a shelf to the wall
You can attach various shelves to the wall yourself. At the first stage of work, it is necessary to select the most suitable fastenings for shelves of a certain type, which is the main problem. Next, the tool is prepared and the work is done. What methods are used for fixation and how to install the shelf yourself, read on.
Device for storing various items on the wall