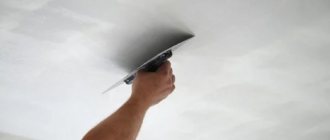
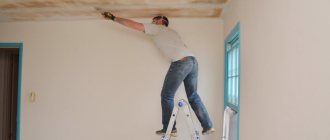
Often the decision to use soft ceiling cladding is made after the walls have been covered with plasterboard sheets. In general, this is a good solution, but you need to come up with a way to ensure reliable fastening of the stretch ceiling to the plasterboard. The frame, at a minimum, must withstand up to 100 kg per square meter of the perimeter of the canvas, otherwise the whole undertaking may end in failure.
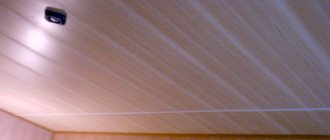
Due to the smooth walls, the geometry is almost perfect
Is it possible to make a suspended ceiling on plasterboard?
The combination of soft ceiling finishing and hard plasterboard wall cladding, at first glance, seems unnatural. But only at first glance. In fact, approximately 2/3 of all suspended ceilings are assembled using sheets of pressed gypsum. You just need to attach the material correctly.
What does the combined use of drywall and tension fabric give:
- There is no need to place a heavy plaster sheet with a steel frame on the ceiling;
- It is possible to perfectly close the joints at the intersection of the ceiling and wall trim.
And although many craftsmen claim that even on crooked walls it is possible to disguise a wildly uneven joint with the help of decorative inserts, in practice this is far from the case. Even after installing a masking tape between the stretch ceiling frame and the wall, the curvature still remains clearly visible visually. So the combination of wall plasterboard and soft ceiling cladding remains the most rational option today, especially for new buildings.
Technology for installing suspended ceilings on plasterboard walls
The possibility of installing a vinyl or fabric sheet depends on the method and pattern of laying the plasterboard sheet on the walls and ceiling. It is quite possible to install suspended ceilings on plasterboard walls if two conditions are met:
- The plasterboard on the back side of the cladding must be reinforced with an additional frame that compensates for the horizontal tensile force from the tension fabric or vinyl film;
- You can attach baguettes or a supporting profile only through plasterboard to the embedded part.
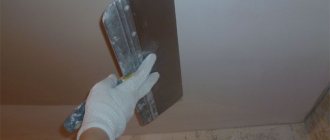
For your information! If you try to embed an aluminum molding with self-tapping screws only into the body of the plasterboard cladding, then, no matter how thick the sheet of drywall is, over time the molding will simply tear off the wall.
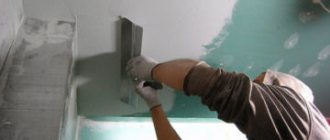
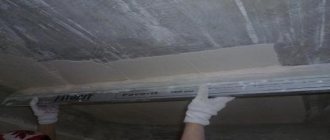
With this method of fixation there is a risk of splitting the plaster
Neither embedded plugs glued into the wall cladding, nor a wooden beam pre-sewn onto the front surface will help. If the self-tapping screw is not fixed on the back side of the sheet with a metal or wooden strip, then it is simply not physically possible to hold it in soft and crumbling drywall.
Methods of attaching a stretch ceiling to plasterboard walls
It is clear that the vast majority of wall cladding schemes with gypsum sheets involve the use of a frame made of timber or metal profiles. Sometimes the material is simply glued to the walls, but in this case the frame frame of the decorative finish can be attached directly to the plaster or brickwork. This solution is rare; partitions inside the room are usually also made of frames.
Therefore, the central problem remains the choice of a scheme that allows you to safely and reliably attach a suspended ceiling to a plasterboard partition. You can do this in two ways:
- Attach the supporting frame to plasterboard walls with additional struts on the ceiling surface;
- Use an embedded profile, board or beam sewn under the plasterboard lining. The bookmark can be attached to the frame or even just to the rough ceiling.
The first case can be considered a special option, since the baguette can be attached only at a short distance from the upper edge of the wall cladding. The second option is considered universal, since using this scheme you can easily assemble a ceiling structure of any complexity. For example, with the help of timber and a profile, it is enough to simply attach stretch ceiling baguettes to two or even multi-level ceiling finishes.
How to fix baguettes with support on the ceiling
Such a decision is usually resorted to in exceptional cases. For example, the cladding of walls with plasterboard has been completed, but they forgot to install an embedded strip or profile for the material.
Frame with struts
In this case, you have to fasten the baguette with the installation of homemade support brackets. The technology looks like this:
- Blanks from a steel ceiling profile are cut. Each workpiece is attached to a baguette in increments of 20 cm;
- The baguette profile is laid on the table, the supporting heels of the brackets are fixed and bent so that they are in the same plane;
- Attach the molding to the wall, level it, and use dowels to secure the supporting parts of the strut-brackets on the surface of the rough floor.
Important! For installation, baguettes with an h-profile are used.
General fastening scheme with h-baguette
The presence of a high back wall allows you to attach the frame frame without damage or damage to the harpoon of the decorative panel. Other types of profiles are not suitable for these purposes.
After the frame is assembled, you can lay the canvas in the usual way. It is believed that the method of mounting on struts leads to a loss of height by 12-15 cm.
Universal mounting option
To properly secure the frame, it is necessary to accurately determine the distance from the rough ceiling to the horizontal marking of the baguette line. If the tension decor is planned to be mounted as high as possible, then an additional wall profile sewn to the ceiling can be used as an embedded structure. This will significantly simplify the preparation for installing the molding and the decorative cladding itself.
Important! Sometimes builders simply try to attach the molding to the studs or top strip of the metal frame on which the plasterboard cladding is assembled. This can only be done if the design provides for reinforcement through additional vertical wall U-profiles.
The upper part of the plasterboard partition frame needs to be strengthened
An attempt to simply attach a baguette strip to a regular frame, as a rule, ends in the formation of cracks at the joints of the wall cladding sheets.
The principle of installing tension fabrics
The main advantage of stretch fabrics is that they can be used to cover a ceiling of almost any area. You will get a completely flat surface. After all installation work is completed, no gaps or joints will be visible. Also, fabric or vinyl coverings themselves have an excellent appearance, which allows you to abandon the need for decorative finishing. The cost, of course, is quite high , but demand is constantly growing, since suspended ceilings are very popular when compared with other types of finishing coating.
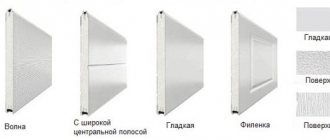
For installation, you first need to fix the profile (metal or plastic used) on all walls of the room. It must be installed as close as possible to the concrete floor. The profile for mounting the canvas is divided into four types:
- Harpoon.
- Beading.
- Klinova.
- Cam.
Often the fastening device is not of fundamental importance. In general, such ceilings are installed according to the same scheme:
- Markings should be applied to all walls in the room. The supporting structure will be fixed along it. It is attached to the main walls using dowels at a distance of 15-20 cm.
- The canvas unfolds and is fixed at the corners with temporary hooks.
- Vinyl film shrinks in area as it cools. It follows from this that it must be stretched in a heated state. You need to use a heat gun.
- There is no need to heat the fabric. It is attached to the profile immediately.
- When the vinyl heats up, fastening to the profile begins from the middle of the short wall.
- Then the canvas is tucked into the profile along the entire perimeter of the room.
- After the process is completed, folds often remain. This should not seem like a problem, since after cooling to room temperature the canvas will straighten out on its own. The stretching will occur due to the heat-shrink properties.
- At the last stage, decorative plastic overlays are inserted into the profile. They look like a plinth. With their help, technological gaps and a locking mechanism are hidden.
The fabric material does not have heat-shrink properties, so it is best to use a glazing bead profile during installation. Using this fastening mechanism, you can evenly stretch the canvas during fastening. You also need to remember that in this case much greater tension is provided.
How to fix a suspended ceiling to plasterboard with your own hands
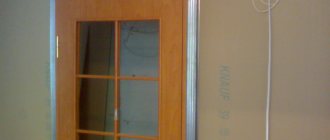
The simplest option for installing a baguette strip on a sheet is shown in the diagram below.
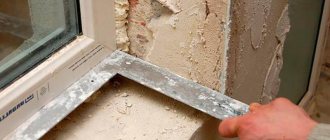
Mounting on a mounting board
In this case, there is no particular need to calculate the height of the fastening line. Instead, a 100x25 mm board is sewn onto the supporting frame. A width of 10 cm is more than enough to mount the profile efficiently and reliably.
When installing a baguette strip on a wall, fixation is performed with a pair of self-tapping screws. Initially, you need to pull and fix the sheet to a wooden bookmark. The profile itself is also sewn to the board with a second self-tapping screw. In this case, the strength of the board will be enough to ensure rigid retention of the decorative canvas.
How to make a combined two-level system
Using a standard wall profile, you can easily assemble a two-level ceiling structure. It is clear that an additional reinforcing profile must be secured along the line of installation of the baguette.
The simplest two-level ceiling diagram
The metal frame itself remains too plastic to attach the tension fabric.
Baguettes must be placed on a reinforcing profile
The laid sheets increase the rigidity of the structure several times, so you can attach the baguette strip after installing the vertical sections.
Gypsum sheets are often used in multi-level stretch ceilings as a material for the manufacture of frame structures for finishing with film or stretch fabric.
Making a plasterboard insert for the canvas
Harpoon method
Plane measurements using the French method must be as accurate as possible. The repetition of the lines is necessary so that during the installation process the harpoon can be welded around the perimeter. Measurements should be 7% less than the received data.
Before installing the stretch ceiling, a special plasterboard frame is installed. A metal (most often aluminum) or plastic strip is mounted according to its shape. One end is inserted into it, after which the film is heated by a gun. Using a spatula, the second part is inserted. In the same way, the entire canvas is mounted around the perimeter.
Don't worry if you see unevenness on the tension material during installation. Once heated, they will quickly disappear. At the end of the procedures, a decorative baguette is installed in the box. The building takes on a more aesthetic appearance.
Advice from professionals
The worst way to strengthen the supporting frame under a suspended ceiling is to use a package of two or three strips of plasterboard. This method is often used by builders seeking to save on profiles and timber. Vinyl film or fabric with such reinforcement lasts no more than 2 months. After which, under the influence of tensile forces, the aluminum strips gradually begin to move away from the plasterboard finish, and over time, the entire structure of the ceiling surface becomes unusable.
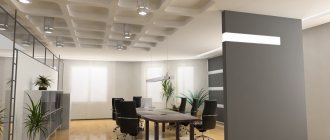
Combined options
The combination of a combination ceiling made of plasterboard and suspended ceiling, made by yourself, looks original. By combining, you can create unique, intricate figures with different backgrounds, complemented by original lighting.
Advantages of a combined plasterboard and stretch ceiling:
- all kinds of forms. You can independently design various frames, labyrinths, fancy figures;
- various lighting options. You can mount lighting fixtures of any power not in the canvas, but in a plasterboard box;
- Possibility of zoning the premises. The different colors of the materials used make it possible to divide the room into zones;
- location of communications. Wiring can be hidden in vents or pipes;
- long service life.
Another important fact in favor of combining the ceiling surface is that there is no need to first level the area to be treated.
Options for combining a plasterboard ceiling under a suspended ceiling:
| Plasterboard box around the perimeter | The designed canvas is fixed inside, where spotlights can also be mounted |
| Circle or oval in the center of the surface | A stretched sky-shaped covering is attached inside along the perimeter of the room. |
| Tablet | There is a circle of plasterboard in the center, and a chandelier is fixed. The same option, only a circle in a circle |
Which option for a suspended ceiling with plasterboard around the perimeter to choose depends on the design of the room and preferences in a particular case.