Why treat plasterboard sheets with putty?
Is it necessary to putty drywall before painting? After all, the material is made without unevenness and has a uniform texture. It is necessary to putty the surface of the drywall, because the places where the screws are screwed in and the gypsum board joints make the surface not perfectly smooth. In addition, without pre-treating the entire material, it will absorb more paint, which will lead to uneven color shades. The algorithm for working with plasterboard structures is laconic:
- ceiling assembly;
- primer and putty;
- painting the structure.
Why treat plasterboard sheets with putty
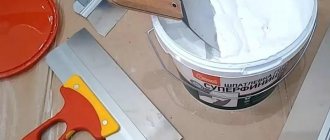
First of all, you need to choose the right mixture for putty. Several factors influence the choice:
| Factor: | Description of the mixture: | Description of the mixture: | |
| Readiness of the composition for use | Dry mixtures are cheap, last longer when sealed, and do not deteriorate due to temperature fluctuations | Ready-made mixtures are easy to use and do not deteriorate for a long time even after opening the package | |
| Purpose of the composition | Starting putty is suitable for initial processing of the material (covering seams, obvious gross defects, cracks and chips) | Finishing putty is intended for final leveling of the surface for painting. | |
| Composition of the putty mixture | Cement putties are suitable for use in bathrooms, swimming pools and kitchens. | Gypsum solutions are intended for warm, dry rooms | |
Polymer putties have universal qualities and can be used in any conditions. Tools for puttying work on drywall:
- bucket and drill with mixer;
- wide brush;
- spatulas of different sizes;
- roller;
- serpyanka mesh (for masking and fixing seams);
- abrasive mesh and grater;
- flashlight or lamps to illuminate the surface;
- primer and putty mixture.
How to putty a plasterboard ceiling? (video)
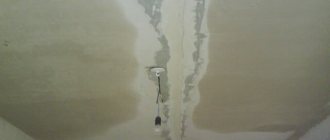
Sealing seams
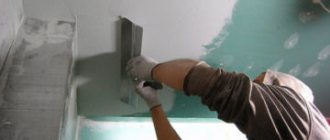
In fact, before plastering the entire ceiling, you need to seal three parts of it, or rather, putty its three vulnerable places - seams, holes from self-tapping screws and cracks. Where do holes come from on drywall? If you have correctly attached the plasterboard sheets to the frame, the heads of the screws should go deeper into the material, leaving a small hole. You can check whether the screws are screwed in well using a spatula. Place it at a slight angle and slide it along the sheet at the attachment point. If it does not touch the head, the self-tapping screw is screwed in well enough. Otherwise, screw it tighter before you begin to putty the ceiling.
After this, you need to take putty and seal the hole formed by the head of the screw. There should be no difficulties with this, as with cracks, since you just need to cover up the damaged areas of the plasterboard sheet, so as not to leave any free space in the material. The situation is a little more complicated with sealing seams on knocked plasterboard sheets.
You will need special reinforcing tape. It is also called serpyanka. The serpyanka must be placed in place of the bayonet and puttyed with fugenfüller. This is a special building material designed for filling seams before finishing putty.
Then you will have to wait again. The seams must dry for at least a day, and only after that can you begin the final finishing of the ceiling. Check to see if parts of the reinforcing tape are sticking out at the seam. If necessary, get rid of excesses, otherwise they may interfere with the final putty.
Preparatory work before plastering the ceiling with your own hands
When answering the question of how to properly putty drywall for painting, you need to remember that the surface must be prepared before treatment. After assembling the plasterboard structure, you must wait from a week to 14 days for it to shrink. If you start puttying too early, the layer may crack, which will lead to repeated work and wasted money.
Before work, you need to level the surface, remove protruding parts, and make sure that the screws do not protrude from the surface. Drywall must be cleaned of dust using a brush so that the mixture lies evenly and directly on the surface.
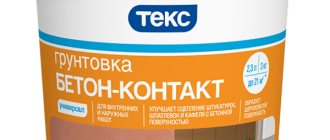
The stage of priming the ceiling should also not be skipped. The primer is designed to increase adhesion (adhesion) between the material and the putty solution. Craftsmen recommend using acrylic solutions for priming. They have a low cost and are used quite sparingly.
Step-by-step puttying
Puttying occurs in several main stages:
You will need the following materials:
There are also universal putty mixtures, but we advise beginners to start with specialized ones, this will make leveling easier. We also recommend purchasing solutions from one manufacturer.
When purchasing a mixture, pay attention to its operational and installation characteristics. Starter putties can usually be applied in a layer of up to 1.5 cm (if necessary, pay attention to the instructions on the packaging) and in the case of drywall this is also true, because it does not always lie flat, and may also have pits on the surface due to temperature -humidity differences or breakdowns. The finishing mixture may also have special instructions for application thickness - from 0.5 to 3 mm.
Also, if you need to choose putty for a room with high humidity, buy a mixture with the appropriate designation, most often it is LR+, with normal - KR.
And tools:
Preparing the ceiling for puttying
First, remove all furniture from the room or cover it with film. You also need to cover the walls and floor if they have already been finished or are not planned in the very near future.
Before you putty the ceiling, you need to carefully prepare it for this process so that the mixture goes down well.
Clean the “base” from dust and dirt. Inspect the surface for cracks and, if any, immediately determine the nature of their origin and, if possible, eliminate them. Cracks in gypsum boards can appear for various reasons - they can be the result of installation errors, improper storage of gypsum boards before use, temperature and humidity changes, or they can warn of more serious consequences, for example, significant shrinkage of the house, ceiling deformation, rotting of load-bearing beams, and so on. Such problems may appear too late after high-quality puttying, and often many of them even threaten the lives of people living in the room if they are not noticed and prevented in time. If the cracks are not of a dangerous nature, they need to be “cut” in a manner similar to cutting a chamfer.
If everything is in order, start cleaning the chamfer of the sheets. Some gypsum board panels have an edge that does not require careful sealing with reinforcing tape; otherwise, or if there are cut joints, the chamfer should be removed. If you do not do this, you end up with a narrow seam between the sheets, into which it is very difficult to hammer putty. To do this, at an angle of approximately 45 degrees, using a sharp construction knife, the edge must be smoothly cut to no more than 2/3 of the thickness of the sheet. Then sand it lightly with sandpaper or a special abrasive mesh.
Prepare a rolling tray, which needs to be filled with a deep penetration primer, and carefully prime the ceiling surface with a “coat” roller.
Sealing seams
Sealing of seams is necessary so that they do not stand out as grooves against the general background, as well as to prevent the formation of joint cracks.
Carry out puttying work in the following order:
Puttying seams
How to putty a plasterboard ceiling
After the initial treatment of plasterboard, the stage of covering the seams with putty begins. The work will be easy if you follow clear step-by-step instructions:
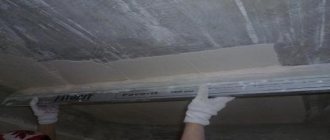
- Direct factory seams, which form at the natural joints of plasterboard sheets, are sealed with putty with a small notch for subsequent reinforcement with a special mounting tape - serpyanka.
- Serpyanka is glued to the seam and slightly embedded in the putty.
- Next, the surface is leveled with a solution and brought to the same level.
- The seams that appeared after cutting the drywall are not reinforced. They need to be expanded and puttied.
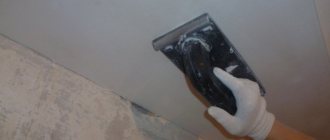
After the putty has dried, the surface must be thoroughly sanded without removing a thick layer of mortar. This is a rather dusty stage of work, so you need to take care of the respiratory tract in advance using a respirator. The floor in the room can be covered with a special construction coating to make cleaning easier.
Putty stages
The surface of the gypsum plasterboard does not have large irregularities, but to obtain an ideal ceiling it is recommended not to limit yourself to one layer of putty.
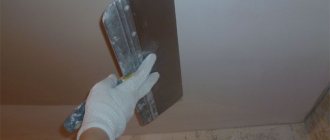
To putty a plasterboard ceiling, you need:
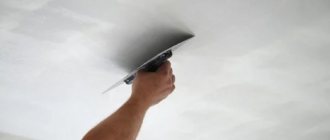
- Using a wide spatula, apply putty to the ceiling and level it with a layer no thicker than 2 mm;
- then clean the spatula from any remaining putty and, applying another portion next to the treated area, repeat the operation;
- If you can’t immediately create a smooth layer, you need to add more putty to it and level it to the desired condition, and remove the excess with a cleaned spatula.
The thickness of the layer is formed depending on the inclination of the spatula. With a smaller slope, the thickness of the layer increases. The mixture is applied at an inclination of 60°. For final leveling, the angle is reduced to 15°, and the process is carried out by capturing part of the adjacent area.
A total of 2-4 layers of putty may be required. For the first ones you can use the starting mixture, for the last one or two - the finishing mixture.
A few nuances:
- The putty work cycle should be carried out at positive room temperatures, from +5 to +30°C.
- During leveling, avoid direct sunlight on the surface, as it will distort the perspective.
- You should not take any measures to speed up the drying of the putty, as this may cause it to crack.
- To obtain a perfectly flat ceiling surface, you can use the building rule.
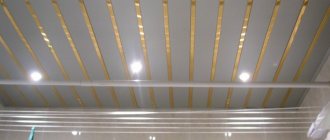
Finishing the corners of a plasterboard structure: step-by-step instructions
A plasterboard ceiling can be presented in the form of a multi-tiered structure. For high-quality puttying of corners in this case, you will need special perforated corners. They will serve as the basis for gluing the serpyanka. The tape is attached along the center line of the inner corner, puttyed and leveled using a special tool. To strengthen the outer corners, special plastic or metal corners are used. They need to be pressed into freshly applied putty and the excess solution removed. The corners are sealed until the surface is completely leveled.
Primer selection
Before you putty the ceiling, you need to prime it. The primed surface has increased adhesive properties and increased moisture resistance.
Priming drywall requires significantly less primer than surfaces made of other materials. The average consumption is 1 l/10–15 sq. m with two-layer application. It should be taken into account that the primer consumption before painting is 2 times more than before puttying.
The most suitable option for a plasterboard ceiling is an acrylic primer. At a low cost, it is used very economically.
Finishing putty for plasterboard structures
How to putty a plasterboard ceiling with your own hands
How to putty plasterboard before painting walls at the final stage? After the starting solution has completely dried, you can begin the last stage of putty work.
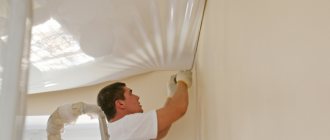
Before removing plasterboard walls and ceilings for painting, the surface must be primed again. It is better to apply the primer with a brush to prevent smudges, but, if convenient, you can use a roller. When working with ceiling structures, for safety it is better to use a tool with a long handle and prime while standing on the floor. The aesthetic appearance of the ceiling depends on the quality of putty work at the final stage. If minor irregularities and flaws in the walls can be hidden with wallpaper, then the ceiling, which is most often painted, should be perfectly smooth.
Since the drywall itself is smooth, the finishing putty can be applied in one or two layers. The putty is applied with a wide spatula. Before applying the next layer, the previous one must dry and be treated with a primer. The last stage of work on puttying a plasterboard ceiling is sanding it. Here it is important to take care of good lighting, which will help identify and eliminate possible flaws and uneven surfaces. Sanding is done using a special grater and fine-grained sandpaper.
Features of ceiling putty for painting
To prevent flaking pieces of putty from sticking to the roller or brush during the painting stage, use the following recommendations:
- use moisture-resistant putty as a finishing layer;
- add a small amount of water-repellent primer to the usual mixture;
- Before you start painting, coat the ceiling with a moisture-resistant primer;
- When painting the surface, work quickly with the roller, without staying in one place for more than 2 seconds.
How long does it take for different types of putties to dry?
All construction putty mixtures must be diluted with water. After the liquid evaporates, the material will acquire its characteristic strength and hardness. The drying time of the composition depends on environmental conditions and the type of surface being finished. If the surface is porous and absorbs moisture well, the putty will harden much faster. The average time is approximately 24 hours. But experts advise waiting at least a week before starting to sand the surface.
If we talk about different types of putties, the hardening time for them will be different:
- gypsum-based putty hardens in 3-6 hours if the material is applied in a thin layer;
- the cement putty will dry within a day, and the layer thickness should not exceed 4 mm;
- the surface finished with the polymer mixture will be ready for further work in 3-4 hours.
The technology for puttingtying a plasterboard ceiling is simple, so you will be able to do the job yourself. For a more visual understanding of the process, we recommend watching the video accompanying the article.
Recommendations for puttying plasterboard ceilings
For work you need to choose only high-quality compounds. A good solution is easier to work with and has a greater chance of successfully filling the surface yourself. Do not neglect the starting putty. The final result will depend on the quality of work at the initial stage.
You need to check the work carefully, because any minor or small flaw can ruin the entire appearance of the structure after painting. It is better to entrust ceiling putty to professionals. Self-plastering of the ceiling can be done after competent study of the technology and process of working with plasterboard structures.
Repair materials
In order for the choice of putty to be correct, it is necessary to pay attention to its performance indicators. Main characteristics of building mixtures: starting mixture – applied in a layer up to 15 mm thick. It is used when working with gypsum plasterboard at the stages of leveling joints and installing self-tapping screws; finishing is a fine-grained solution that covers the sheets with an approximately three-millimeter layer. Apply to the entire surface of drywall. When selecting building mixtures, we must not forget about the operating conditions. In rooms with high levels of humidity, materials marked LR+ are used, and for ordinary rooms, compositions marked LR are quite suitable.
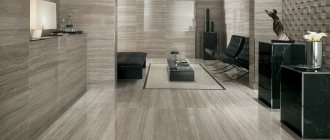
Photo gallery of finished works
Corner processing
Finishing the ceiling with plasterboard may involve the production of multi-tiered structures that have internal and external corners. To strengthen them, metal or plastic corners with perforations specially designed for this purpose and sickle tape or paper tape are used.
Internal corners are processed in the following order:
- Serpyanka is placed in the center of the corner or paper tape is glued to the layer of putty;
- the entire area of the serpyanka or tape is covered with putty;
- To level the corner, use a corner spatula.
To process external corners you need:
- Prime the entire surface of the corner and apply putty after drying. While it is still wet, apply the corner and press it to the desired depth.
- Remove excess putty squeezed out through the holes in the corner with a spatula.
- After drying, apply a layer of putty over the entire surface of the corner using top-down movements.
- To completely level the angle, apply the required number of layers, each time waiting for the previous one to dry completely.
USEFUL INFORMATION: Sound insulation for the ceiling of an apartment: how to make sound insulation with your own hands?