Creating a floor surface is an important and responsible process that requires a careful approach to the nuances. Most often, a specially poured compound with a thin coating thickness is used to level and correct minor imperfections.
The price of such material is quite high, so the correct calculation of the consumption of self-leveling floor per 1 sq. m makes it possible to determine the required quantity.
Features of self-leveling floor
The floor finishing material has an excellent property that makes working with it much easier. It easily self-distributes over the surface and hardens quickly. And in the process, a perfectly flat and smooth plane is formed.
The coating consists of two parts. The first layer contains polymer elements and is often called rough. The final layer is called mineral. Its structure is made of cement with special modifiers. Additional components are mineral fillers.
Polymer mixtures for applying a rough self-leveling layer are:
- Polyurethane. The coating is elastic and copes well with normal and even shock loads. Excellent for unheated rooms.
- Methyl methacrylate. The surface is resistant to mechanical loads, but requires strict compliance with all conditions of the installation technology. Due to the pungent odor, it can only be used in rooms with good ventilation.
- Epoxy-urethane. The coating is not afraid of any chemicals and is resistant to friction. The elastic surface is well suited for garages.
Epoxy floor Source archidea.com.ua
- Epoxy. After hardening, the floors can easily withstand impacts, withstand heavy weight, and are not afraid of temperature fluctuations. In addition, the surface is easy to clean. Excellent for residential premises.
Thanks to their excellent characteristics, self-leveling floors have become in demand and are used in most public buildings. The halls of train stations and airports, the lobbies of institutions are a small part of the places where such coating is used. The material has gained no less popularity in private buildings.
Dependence of material consumption on its density
Table 1. Characteristics of self-leveling floor
This is a corrective parameter that is necessarily included in the calculations. The self-leveling mixture contains many components, additives, and fillers that manufacturers keep secret, so it is impossible to independently find out the density value; the indicator is indicated on the bags.
Average statistical data for calculating self-leveling floor:
- epoxy 1.4-1.65 kg per l;
- polyurethane 1.2-1.35 kg per liter.
The addition of heavy impurities increases the density of the composition and reduces the cost, because modifiers are cheaper than the main components. If there is a transparent finishing mixture on top, then the calculation is carried out separately, because the density is different.
Reducing mixture costs
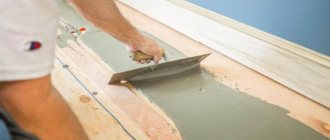
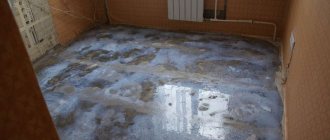
The consumption of self-leveling floor per square meter is directly dependent on the thickness of the layer. And this is directly related to the condition of the surface. It is necessary to examine it for porosity, as well as the number of irregularities. And if there are a lot of defects, then it is better to make an additional cement screed. Minor surface imperfections are removed manually in preparation for applying the self-leveling mixture.
Surface preparation Source monolitvtomske.ru
See also: Catalog of companies that specialize in paints and varnishes and related work
Elimination of irregularities
Floors must be thoroughly swept and vacuumed. This way even the smallest cracks and small bumps become noticeable. The first ones need to be covered with putty. But first they need to be processed. A crack no more than 2 mm wide is simply expanded. That is, all problematic concrete around the edges is removed. And for a wider and longer gap in the floor, additional perpendicular cuts are made with a grinder.
Large tubercles on the surface are removed using a perforator. After this, all small irregularities are smoothed out with a grinding wheel. And if during the preparation process the old coating peels off in some areas, then you still cannot do without a preliminary cement screed. After treating the surface, it must be thoroughly vacuumed again.
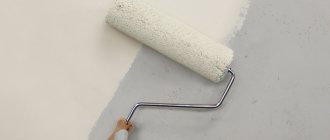
Surface priming
In order not to waste an unreasonably large amount of materials when the self-leveling floor is distributed, the consumption of the mixture must be reduced. In addition to bringing the surface to a general level, it is necessary to deal with the porosity of the old coating. And the easiest way to reduce absorbency is by priming.
Surface priming Source prorab.help
This operation is mandatory and not only neutralizes all pores on the surface, but also prepares the latter for adhesion to the self-leveling mixture. But before priming, it is necessary to check the compositions of the primer and self-leveling floor. They must completely match each other. Otherwise, rejection is possible. This can happen if an acrylic primer is used for the epoxy leveler.
Consumption
In order to begin leveling the surface, you need to decide on the amount of mixture to purchase . Therefore, the question arises: “How to find out how much is needed for a particular room?” To do this, we need to know what affects consumption.
The first important indicator is the thickness of the self-leveling floor , there are three groups:
- If there is a large difference in heights in the room or the surface has to withstand heavy loads, then universal mixtures are used, which are called base mixtures .
On each package, the manufacturer indicates the thickness of the resulting layer, usually from 6 to 100 mm. Please note that the higher this indicator, the greater the expense you will have to pay. Please note that we do not recommend making a layer that is too thick, as this will increase the drying time. Make two thin layers instead of one. - If it is necessary to eliminate small irregularities, then medium compositions , the thickness of which is from 7 to 30 mm.
- Finishing mixtures from 3 to 10 mm, a decorative coating is laid on them.
After you decide on the thickness, you should carefully study such a parameter as material consumption .
It is indicated on the packaging, each manufacturer has its own, measured in liters per 1 square meter. meter. For convenience, some indicate the amount of mixture in kilograms.
For example, the consumption of a mixture such as Vetonit 5000 is 1.8 kg/sq.m ; and the area of the room where the floor needs to be poured is 22 square meters. m. Multiply 1.8 by 22, we get 39.6 kg of dry mixture. Material consumption is indicated for a thickness of 1 mm. Therefore, if the layer thickness is 5 mm, then accordingly the consumption will be 5 times greater: 39.6 x 5 = 198 kg.
The next parameter indicated on the packaging is density . It is less common on packaging. Needed to find out how much dry mixture is needed to prepare 1 liter of solution.
For example, we will need only 35 liters of the finished mixture with a density of 1.5 kg/l. Therefore, it will not be difficult to calculate how much dry material we need : 1.5 x 35 = 52.5 kg. This is approximately 2 bags of 25 kg and another small package weighing 3 kg. For a full cycle of work on installing a self-leveling coating using the Vetonit mixture, watch the video below:
Example of calculating the amount of material
Now let's see how much money will be required to fill the surface of a room of 25 square meters. m. and a layer thickness of 6 mm.
Let’s take “Vetonit 5000” as an example, its consumption per 1 sq. m. - 1.8 kg. This means that to fill a surface of 6 mm we will need: 1.8 kg x 6 mm = 10.8 kg per 1 sq. m.
Now let’s calculate how much is needed for the entire area: 10.8 kg x 25 sq. m. = 270 kg.
The packages are mostly 25 kg, we will need 11 packages. With an average price of 550 rubles, we calculate the total cost of the material - 550 rubles. x 11 = 6050 rubles.
These are the material costs for a self-leveling floor, but you need to take into account that the price of the mixture from different manufacturers varies greatly.
This depends on the basis on which they are produced; prices also differ in different regions and retail outlets where self-leveling floors are sold.
How to save money
There are several ways to reduce material consumption, for this you should:
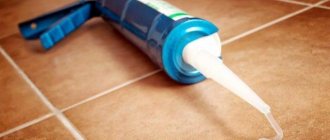
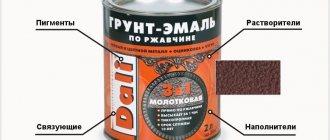
- Prepare the surface more thoroughly, eliminating all cracks with special putty or primer, the cost of which is much lower.
- If you sprinkle the floor with clean sand before you start pouring, the thickness of the layer will decrease, which means the consumption of the mixture will be reduced.
- If the base for the self-leveling coating is an insulating film or polyurethane.
Calculation of consumption of self-leveling mixture
The prepared solution for self-leveling floor cannot wait long for its fate, since it contains a quickly setting hardener. Therefore, it is necessary to work with it very quickly. But this is easy to do, because the mixture itself spreads well over the surface and you just need to help it with this.
And the main problem for beginners is preparing the right amount. Since the floor leveler is not cheap, out of a desire not to spend extra money, everyone tries to prepare the material back to back. But if there is a shortage of it, the solidity of the coating will be impaired. After all, by covering the gaps a second time, even the most experienced master will no longer be able to bring the two mixtures to the same level. And their junction will inevitably be noticeable.
Therefore, all experts recommend not going to extremes of saving and buying materials with a reserve. It’s another matter to keep the overspend to a minimum. And to do this, they make accurate measurements of the area and calculate the required number of bags for purchase.
Laser marking Source otlichnyjremont.ru
A little about the material used
For leveling the base, building compounds with high plasticity and a fast hardening period are ideal. They are obtained by diluting dry mixtures with ordinary water in a certain proportion. However, the prices for such products are relatively high, so making correct calculations at the preliminary stage is very important.
Completely different binders can be used as a base. Mixtures based on polymers and cement are moisture resistant. The first of them are also characterized by elasticity. Gypsum-based products should only be used in dry areas.
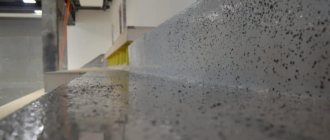
The process of pouring the liquid solution is shown
Regardless of the type of binder component, all compositions have the following advantages:
- fairly rapid hardening;
- high level of wear resistance;
- small layer thickness;
- simple filling technology;
- high speed of work.
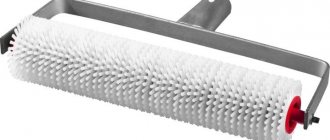
Using a needle roller to remove air from the solution
Video description
In the video, the master will tell you how to properly prepare a room for a self-leveling floor, how much mortar is needed per square meter and how to calculate the required number of bags of self-leveling mixture:
And at the end, some tips from professionals on how to prepare the mortar:
- The mixture must be kneaded in such quantity that it can be distributed within 20 minutes.
- If you dilute the dry composition with much more water than indicated on the packaging, this will naturally lead to a reduction in material consumption. But the quality of the coating will be seriously affected.
- All work is carried out at a room temperature not lower than +10 degrees Celsius.
- Mixing the solution is carried out in two stages, with a break between them of 5 minutes. Let the mixture settle.
Mixing the solution Source remstd.ru
What is the consumption of self-leveling floor for compositions from different manufacturers?
The calculations below are based on the selection of the most popular compositions of self-leveling mixtures. Basis for calculations:
- the area of the room S is 20 square meters;
- fill layer thickness H – 3 mm (average);
- composition density P (kg/sq.m. with a layer thickness of 10 mm).
The consumption formula is used taking into account the conversion of the mixture density for a layer thickness of 1 mm
G = S×H×(P/10) (kg).
For convenience, the calculation results are presented in table form.
| Name of composition, consumption in kg | Packaging, kg | Cost of the specified quantity, taking into account packaging (bags), rub. | S, sq.m. | Recommended layer thickness, mm, current 3 mm | Mixture density, kg/sq.m. with a layer thickness of 10 mm |
| Self-leveling floor “Starateli”, quick-hardening, consumption 96 | 25 | (4)1025…1200 | 20 | At least 5 | 13,5…14,5 |
| Self-leveling floor Eunice "Horizon" universal, quick-hardening, consumption 96 | 20 | (5) 1270…1500 | At least 10 | 15…17 | |
| Self-leveling floor "Volma" Level express, consumption 75 | 20 | (4) 1008…1200 | At least 5 are recommended | 12,5 | |
| Self-leveling floor "Vetonit" 3000, consumption 90 | 20 | 3107…3500 | 0…5 | 15 | |
| Self-leveling floor "Bergauf", consumption 90 | 20 | 1365…1500 | 3…50 | 14…16 |
Briefly about the main thing
To accurately calculate the consumption of the mixture for self-leveling floors, it is necessary to take proper measurements in the room. In this case, slopes and surface differences up to one millimeter are taken into account. Data from the manufacturer, which is indicated on the packaging, is also used.
When making calculations, do not forget that the thicknesses of the rough and finishing layers differ. And the size of the distributed layers is influenced by both the quality of the surface and the prepared solution. As well as strict compliance with all conditions of installation technology.
Ratings 0
Parameter "Tie dimensions"
- Screed thickness H;
- Height of corner A;
- Height of corner B;
- Height of corner C;
- Height of corner D.
In the “Screed thickness H” parameter, you must specify a number indicating the thickness of the self-leveling floor. The thickness of the self-leveling floor is calculated as follows: the angle height parameter is selected, whose deviation from the “zero point” is minimal or equal to zero, and the previously entered parameter “Screed thickness N” is added to it. The height of this corner will be the point from which the height difference at other corners will be calculated. It is thanks to this approach that the maximum accuracy of all calculations is achieved.
Polymer compositions
Polymer self-leveling floors make it possible to obtain a durable and abrasion-resistant coating that is resistant to aggressive environments. These compounds are used as a finishing layer.
Epoxy
They are durable, highly resistant to moisture and chemicals, and are used where chemical resistance is important. Such a floor is not capable of accumulating static electricity, so dust does not accumulate on it, and the surface is easy to clean. The disadvantages of the material include the fragility of the resulting coating. Epoxy self-leveling floors have a density of 1.4-1.5 kg/l.
Epoxy urethane
The elasticity of this composition corresponds to polyurethane-based materials, and the strength corresponds to epoxy resins. High abrasion resistance makes it suitable for use in high traffic areas. It has a density of 1.3–1.4 kg/l.
Polyurethane
Self-leveling floors made from this material have an attractive appearance, are elastic and resistant to temperature changes, and are also wear-resistant and durable. In addition, they are not susceptible to aggressive environments and are not prone to the accumulation of static electricity. Modern polyurethane self-leveling floors contain dyes that give the floor an aesthetic appearance. The density value is at the level of 1.25–1.35 kg/l.
Methyl methacrylate
This quick-hardening composition is not very popular, and is used in cases where speed of work is important. The finished mixture should be used within 20 minutes of preparation and takes only a few hours to cure. When using it, it is necessary to take safety measures, since the material has a specific odor that disappears after the polymerization process is completed. The compositions have a density of 1.2–1.3 kg/l.
Step-by-step instructions for applying the mixture using the example of a floor with ceramic tiles
For a better understanding of how to work with such material, let's look at an example.
Condition: ceramic tiles on the floor. It is very durable and difficult to remove. The difference in floor height between the bathroom and the corridor is up to 10 mm. The apartment layout is Khrushchev style.
Solution: the surface of the bathroom floor will be leveled with a self-leveling mixture on top of the old coating. The finishing composition will best help with this due to its high adhesion and strength. As a rule, its recommended thickness is from 1 to 15 mm, which suits the conditions.
So, what materials will be needed to complete the work?
- dry material (in the example – finishing composition);
- drill with an attachment (for stirring the self-leveling mixture);
- roller (a needle roller is better);
- tassels;
- spatula (wide);
- deep penetration primer (its performance characteristics are higher than those of the regular version);
- grinder with diamond blade;
- large capacity for solution (for one batch for the entire area required for pouring).
Separately, it is worth noting the need to purchase special shoes that will not spoil the damp floor covering. With it, you won't have to smooth the surface again. True, this is only necessary if the floor is poured in a large room (more than 20 sq. m.).
Since the difference between the floor in the bathroom and in the corridor is very significant, careful alignment is required. It is difficult and time-consuming to do this on beacons, so you need to resort to a self-leveling mixture.
Below are step-by-step instructions for leveling the floor surface with a self-leveling mixture.
- Calculate the required amount of material.
- When the characteristics of strength and adhesion are unknown, but there is a flat surface of ceramic tiles, you can use a grinder (remember, a diamond disc is used) to cut lines. You should get a lattice, the pitch of which is from 5 to 10 cm.
Please note! This stage is associated with the appearance of a large amount of dust and loud noise from the cutting process.
- Preparing the base. To do this, use a metal spatula to remove any remaining building materials. Afterwards, thoroughly vacuum the floor. Don't forget about covering the cracks in the walls.
- Floor primer. Before doing this, you need to carefully study the instructions, since the primer material is not universal. You can use a roller, but in hard-to-reach places it is better to use brushes. When the primer absorbs quickly, another layer is applied. This way you can ensure that the future flooring remains of high quality.
Practical advice. To prevent the primer from flowing outside the room, a side is made. For example, it can be constructed from polyurethane foam. An alternative is a thin strip of drywall.
- Prepare the solution in such a quantity that is enough for subsequent pouring of the solution into the room. When cooking, it usually bubbles a lot, so you need to set the drill to 400–600 rpm. In this case there will be no bubbles. It’s better to stir a little longer than to fix problems later. How to cook: first pour water into a container, then add the dry mixture. The material is not added at once, but gradually. The amount of water will directly affect many parameters. If there is more of it than required, the solution will be less viscous, which means it will adhere better, but it will take longer to dry, and the floor will become less durable. If there is not enough water, the leveling will deteriorate due to the appearance of bumps.
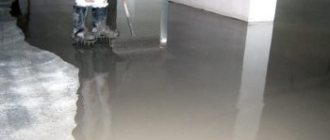
- After preparing the solution, you can start pouring the mixture. It would be more correct to do this from the far corner of the bathroom and move towards the corridor. Do not pour too quickly to avoid bubbles.
Important! Carefully monitor the thickness of the coating formed.
To make the process go faster, you need to smooth the solution evenly poured onto the floor with a spatula. The last stage of work is rolling the mortar poured onto the floor with a needle roller.
Everything needs to be done quickly - there is only half an hour before the mixture begins to harden.
There is an interesting life hack from experienced craftsmen. To level the mixture, they use hammer drills in the following way: place the tip of the chisel on the floor and turn on the equipment. Alignment is improved by vibration. The downside is that you cannot hold the tool like this for a long time, otherwise the composition will delaminate and the floor covering will become worse.
Installation work must be continued only when the poured solution has completely hardened. To find out how soon this will happen, look at the manufacturer's instructions.
Manufacturers
In the building materials market there is fierce competition between manufacturers of dry mixtures for self-leveling floors. Large companies are developing the entire line of types of mixtures for various conditions of use, provide certificates for their products, give detailed instructions and recommendations from in-house specialists, collect feedback from craftsmen and study consumer demand in order to increase their ratings to improve the quality of materials. The following brands are the most popular and well-known to consumers:
- is famous for its high quality and wide range of produced levelers. A specially developed composition of the Boden line based on purified gypsum, quartz sand and polymer additives increases the strength of the floor by 50% compared to concrete floors. Can be used for warm floors, dries quickly. Users note the high quality of the products and the possibility of using them for heated floors.
- Vetonit products contain special additives that accelerate the spreading of the solution and drying without deformation. An excellent choice for experienced builders. The composition dries within 24 hours. This material is not painted or sanded, and is not used as a finishing coating for floors. Consumer reviews indicate that the products of this brand are worthy of attention: the mixture dries really quickly, but when applied to a damp surface it may begin to smell unpleasant.
- Bolars mixtures are distinguished by consistently high quality of products and an affordable price for the general consumer. Thin finishing levelers, which instantly harden and create a perfectly even coating, receive excellent customer reviews. An excellent solution for installing underfloor heating systems. Imported polymer additives allow you to level floors in basements, garages, and damp rooms.
- Ceresit levelers are very popular in Russia and are used for any floors: concrete, wood, cement. They produce coarse-grained dry mixtures, as well as special self-leveling compounds for rooms with increased loads during operation. Users highlight these products as high-quality and inexpensive goods that have many advantages over analogues.
The use of high-quality factory-certified self-leveling mixtures and adherence to technology will allow you to quickly obtain a durable, strong and level floor.
Example on certain brands
The building materials market is full of manufacturers and various brands of cement mortars and self-leveling floors. Today the brands “Horizon” and “Osnovit” have become popular. Using simple examples you can figure out how many mixtures will be needed to complete the installation.
Calculation of self-leveling floor "Horizon"
The Horizont brand self-leveling floor is used for manual or machine leveling on concrete bases and cement screeds. In this case, the surfaces may have significant unevenness, up to 10 cm inclusive.
The Horizon self-leveling floor can be used to level the base for the finishing floor covering. In particular, mixtures of this brand are used to create thin layers of self-leveling floors, starting from 2 mm. This option is suitable in cases where the surface is without visible defects. This will also save on the primer layer.
Any plastic container of 70 liters or more is suitable for preparing the solution. The volume of the container is selected depending on the scale of the work. The capacity can reach 100 or 125 liters. One 25 kg bag uses 4.25 liters of water. At the same time, stir the composition, gradually adding a third of the total liquid. Having added the entire mass and brought the composition to a homogeneous consistency, it is used in any room.
After the solution is mixed, it is left for 2 minutes, after which it is stirred again. To do this, it is recommended to use a construction mixer or an electric drill with a special attachment. If you stir by hand, there is a high probability of air bubbles appearing.
Attention! Manual stirring is allowed only in cases where it is necessary to prepare a solution of less than 1 kg. If after stirring the solution turns out to be too dry, you can add a little water
In this case, you need to be careful, because too liquid a solution will turn out to be fragile.
If after stirring the solution turns out to be too dry, you can add a little water. In this case, you need to be careful, because too liquid a solution will turn out to be fragile.
The prepared solution must be used within 30 minutes, after which it will begin to lose its working properties and harden. The frozen solution cannot be diluted with water.
As already noted, if you need to apply a layer of 3 mm, you will have to multiply the consumption of self-leveling self-leveling floors per mm (1.3 kg) by 3. It turns out that you will need to use 3.9 kg per 3 mm layer per 1 square meter.
Calculation of the volume of Osnovit self-leveling floor
Self-leveling floors "Osnovit" are used for arranging floors. The solution is applied mechanically or manually. The solution can be used in all types of premises (from residential to warehouse) and at different humidity levels.
It is worth noting the possibility of using the solution outdoors without the risk of loss of quality. So, they are allowed to fill areas and platforms. Some varieties of mixtures are combined with a heated floor system.
Osnovit mixtures are made on a polymer basis; they are used to pour self-leveling floors with a thickness of 1-100 mm. Typically, these compositions are used to solve complex problems of installing final finishing coatings.
To prepare a 3 mm layer on 2 m. you will need 4.5 kilograms of the mixture. Unlike Horizon, Osnovit brand mixtures are used to create thicker layers of self-leveling flooring. At the same time, the technology for stirring the solution is the same as that of “Horizon”.
Self-leveling self-leveling floors are convenient and excellent for creating a flat surface for laying finished floor coverings made of various materials.
How to calculate a self-leveling floor to make a 5 mm layer or even the entire 18 mm - watch the video:
Application Features
The following tools and materials are required for work:
Clean water to add to dry powder.- An electric hammer or construction mixer with an attachment for mixing the solution.
- Construction level (regular or laser).
- A spatula for filling holes and cracks.
- Primer emulsion based on acrylic.
- Needle-type roller for correcting spreading and removing air bubbles.
- Notched trowel and rule for leveling rough composition.
The technology of leveling the floor with a self-leveling mixture in a house, apartment or other premises by pouring is carried out in several stages and begins with the preparation of the rough coating. The room should not be very cold, as otherwise the self-flowing of the leveler will be disrupted. The temperature should be approximately +10 degrees, and it takes two or three people to fill it in order to finish it before it hardens.
First you need to clean all surfaces from dirt, debris and dust. It is easier to remove dust with a vacuum cleaner, and then do wet cleaning and dry the floor. For removing oil stains and various detergents and chemicals. Carefully cover all cracks, potholes, cracks and large differences in height, more than 8 cm. The result should be a clean, dry, and relatively even rough screed without large and noticeable defects. For adhesion, you need to prime the base with an acrylic compound, which will seal microcracks in the screed, improve spreading and adhesion, and reduce material consumption.
Primer should be applied in 2 layers, and to apply the second, thoroughly dry the first. For porous surfaces, special emulsions are made to strengthen them. When the layer hardens and changes in humidity/temperature, the volume will expand, and the load on the walls will also increase. In this case, the floor may crack and even become deformed. To prevent floor destruction and compensate for the load, a damper tape is usually used.