Primer for self-leveling floor
Forming a perfectly flat floor is the main task performed during the renovation process. Self-leveling flooring is ideal for this purpose. In addition to the smooth surface, the self-leveling floor has a number of additional advantages (strength, resistance to moisture and temperature changes). In order for all these qualities to be preserved for a long time, the rough surface must be primed with a special compound.
The need to use a primer
Builders understand self-leveling flooring as a special coating with high strength and decorative characteristics. It is created by applying (pouring) a special polymer composition after preparing the surface. The basis of the solution is cement powder, among the components are:
- modifiers;
- fixatives;
- plasticizers;
- polymer additives.
The latter allow the material, after drying, to become elastic, well leveled, and durable. Self-leveling coatings make it possible to create a perfectly flat floor, which can be decorated with any pattern or given a uniform color.
The manufacturer of any self-leveling floor indicates in the instructions that the rough screed must be carefully prepared before work:
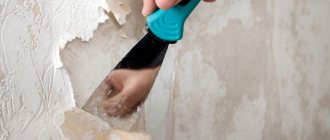
- Remove all old floor materials, including settling varnish and paint.
- Clean the base from oil, grease, soot, dirt, dust and soot.
- Wash the floor.
- Apply primer.
Whatever the thickness of the screed (from 1 to 100 mm), you cannot do without a primer. This material will allow you to make a truly high-quality coating with a long service life. The soil seriously improves the adhesion of the new layer and the rough base.
The main advantages of using a primer:
- Reduced moisture absorption. Any subfloor, even concrete, has a significant disadvantage - it has a high ability to absorb water, pulling it out of the mixtures for pouring and leveling. Once saturated with water, the base wears out faster, and mold and mildew can grow in it. Metal rusts. If you prime a subfloor, the density of its top layer increases, because soils have saturating and moisture-insulating properties.
- Reliable adhesion of materials. The right primer helps reduce the production of bubbles, cracks, scratches, and voids. Even quick drying of the filling solution will not lead to such problems, because the quality of adhesion will be at a high level.
- Uniform distribution. The liquid solution poured onto the subfloor should ideally immediately spread over the surface in an even layer. Pre-priming helps to increase spreadability and make the floor smooth.
The soil creates optimal strength of the floor, increases its elasticity, closes the smallest pores, prevents the appearance of fungus and improves the performance of the material. All manufacturers of self-leveling floors produce primers suitable for them. It is best to use products of the same brand, which are ideally combined.
Why you need to prime
The better the base is prepared, the longer it will last.
When thinking about whether it is necessary to prime a self-leveling floor, it is worth remembering that only a carefully and correctly prepared surface can withstand fairly heavy loads over a long period of operation. The primer for self-leveling floors has many positive qualities corresponding to each type of composition.
In most rooms, the base for the flooring is a concrete surface, the distinctive feature and feature of which can be considered the ability to actively absorb moisture.
It is moisture that has a negative effect on concrete and causes its destruction. A properly selected primer can protect such a base from the harmful effects of water.
Why do you need to prime?
The primer mixture is necessary to prepare the rough coating for further finishing; it serves not only to impart better properties, but also increases the degree of adhesion between materials. Floor bases are distinguished by their ability to absorb liquids, which increases the consumption of finishing materials. It also has a negative impact on the foundation itself, resulting in a shorter shelf life of the floors.
Among the types of materials that differ in the absorption of moisture are wood, concrete, and if we talk about metal, then water contributes to the formation of rust on the surface. Excessive accumulation of moisture leads to biological formations that are hazardous to human health.
The primer for self-leveling floors serves as a bonding layer between the rough base and the finishing coating, preventing further penetration of moisture. It is able to penetrate deeply between the pores of the base, thus blocking the path to liquids, resulting in a film coating on which the finishing material fits well.
If moisture penetrates into the rough finish, the self-leveling floor will rise due to this effect, which leads to the need to completely renew the coating.
The following functions of priming the base before pouring the self-leveling floor can be distinguished:
- Creation of a protective layer against biological formations;
- Increasing the degree of adhesion;
- Barrier layer against moisture;
- Increasing the shelf life of the surface.
The primer mixture is necessary to prepare the rough coating for further finishing.
Working with primer
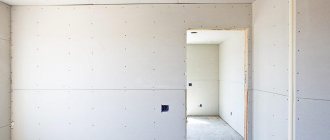
Preparing the coating for priming
The final result depends on the preparation of the coating.
Before applying the primer, the surface must go through several priming steps:
- The surface is cleaned of looseness, etc., right down to the base.
- We remove any remaining construction debris, dust and dirt.
- Next, we screed the floor.
- When the surface is completely dry, clean it of smears and smooth out the seams.
ADVICE. To check whether the mixture has dried, you need to put a small piece of plastic film on it; if after a day no moisture has formed, then the screed has completely hardened.
- The entire surface is sanded with a special construction vacuum cleaner; the quality of the self-leveling floor depends on the quality of the rough sanding.
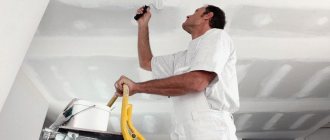
Instructions for applying primer
- The first step consists of the preparation described above and wet cleaning. Next, dilute the composition according to the manufacturer's instructions.
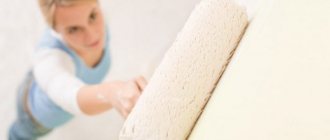
- The primer can be applied with a roller or spatula, depending on the coating and its purpose. We start from the farthest corner of the room.
- Apply consistently and evenly.
- After application, allow time for the primer to dry for a certain period of time. After complete drying, you can begin pouring the floor.
Advice. In order not to spoil the coating on the walls (if any), you should cover them with masking film.
Primer selection
The purchase of a primer must be done carefully so that the material is suitable according to the main parameters - the type of base and the type of room in which the floor is intended to be poured.
Base type
Usually the primer indicates for which substrates the composition is suitable: wood, iron, concrete, etc. There are universal primers that can be used on almost any type of subfloor. Any primer can be applied to the most common concrete bases, but acrylic and latex mixtures are less preferable (adhesion will be worse).
If the cement screed contains alkali and fire-fighting additives, you must definitely buy anti-alkaline primers.
When the subfloor no longer needs to be leveled, but can be filled right away, select soils marked “finish”.
Only deep penetration primers are applied to painted floors; others are not suitable. The same products are recommended for repairing old screeds, as they significantly strengthen them and prevent dust from escaping.
Tile bases are primed with polyurethane or epoxy primers.
Room type
It is very important to use special products in rooms with high humidity, especially where water is constantly present. Deep penetration soils will ensure the creation of a reliable waterproofing layer.
In the most humid rooms it is recommended to use “liquid glass” priming. In ordinary rooms, it is worth using concrete contact primers or products with anti-mold additives (biocide primers).
Price
Too cheap products may be of poor quality, so you should not focus on a low price. The total cost of the work will depend on the primer consumption for the self-leveling floor. Consumption is determined by the chemical composition of the material and surface porosity.
Typically, 250–500 g/sq.m. is used for the first layer. m of epoxy and polyurethane primers, 250 - 300 - acrylic, latex. Repeated layers require 100 – 200 g/sq.m. m of materials. Based on these figures, you can calculate the total cost of the primer.
Ease of use
Masters are able to work with any types of primers. This criterion is important only for those who are trying to do all the work with their own hands. Latex and acrylic primers are easiest to apply; epoxy primers are quite difficult to apply.
Types of primers
The following types of primers are distinguished:
- universal;
- strengthening;
- adhesive, etc.
Each type has its own characteristics.
Universal primers
Universal mixtures have the following properties:
- strengthening;
- compaction;
- adhesion - efficiency is significantly lower than when using specialized ones.
The application and filling technology allow us to talk about indoor use.
Distinctive features are:
- weak supply of chemicals;
- ease of mixing;
- ease of use.
The positive aspects are considered to be use in warm and cold rooms (without heating).
The drying period does not exceed 4 hours.
- concentrate;
- ready solution.
The first option is practical and can be used to solve any problem, for example, for processing wooden surfaces.
Strengthening soils
A simple example is a deep penetration primer. With its help, you can not only increase the density of the floor, but also significantly reduce the level of absorption of the base.
Penetration depth up to 5 cm.
Primer for heated floors is the optimal area of application. It is used extremely rarely for external work.
Adhesive primers
The most famous products include Betokontakt soil. All domestic enterprises, without exception, are engaged in its production.
Composition includes:
- polymer dispersion based on acrylic or urethane resin;
- pigments;
- modifying additives;
- mineral fillers.
The last component is considered the most significant and at the same time distinctive feature.
Multi-grounds
The most interesting type from the point of view of manufacturing technology.
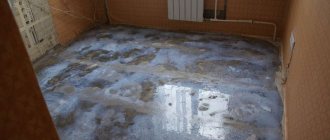
Preparing the floor surface
The preparatory stage must be treated with due attention; the quality of the final result largely depends on this stage. Here it is important to create a level base so that pouring the self-leveling floor can be done without difficulty, and the coating will be beautiful and even. This especially applies to the process when they are going to fill the base with a transparent self-leveling floor to get unusual floors.
If the surface is not new, then it may be necessary to remove poorly adhering areas of the old material, for example, old paint. In any case, it is necessary to remove all dirt so that no dust remains. For this purpose, it is necessary to rinse the surface. If required, pour a cement screed or use a self-leveling mixture.
It is necessary to repair all defects and seam parts to obtain a smooth surface. Then the base is sanded and the resulting dust is removed. The preparation stage can be considered complete, but the surface can only be primed after the floor has completely dried.
To avoid mistakes, check the quality of drying by stretching the film onto the surface, look at it after 24 hours, if no condensation is detected on the films, then proceed to applying a primer. If moisture appears, then wait a couple more days to obtain a dry base.
The joint elements, as well as the corner parts, can be leveled by treating them with sealant.
The preparatory stage must be treated with due attention; the quality of the final result largely depends on this stage.
Features of soil selection for self-leveling floor mass
The task of the primer is to form a transition layer between two dissimilar materials, the concrete base and the cement-polymer self-leveling layer. Therefore, the composition of the primer must correspond to the specific type of leveling mixture, otherwise it will be of very little use.
And, of course, you should not confuse the material for applying self-leveling mixtures with primers for painting the surface, primers, stabilizers and waterproofing. All of these are completely different products in composition, the formulation of which was developed to solve specific problems not related to pouring self-leveling floors.
Primers for epoxy self-leveling compounds
They are manufactured mainly in a two-component form; together with the modified resin there is a liquid hardener. One example of such a primer mixture is the composition EP0301.
Epoxy materials
The containers show the designation A and B for the resin and hardener
The primer mixture is used for epoxy and polyurethane self-leveling floors. Unlike self-leveling fillers, it has a low viscosity, which allows it to penetrate even into air-filled pores. Used for concrete, cement-sand, and any other floors on a mineral or wood base. Can only be used with bulk mixtures of the same brand as the primer.
Polyurethane primers
They are made in the form of quick-drying liquid mixtures with a very unpleasant odor. Can be used both under epoxy self-leveling floors and acrylic ones. Of the entire range of primers, they have the highest strength and ductility. Recommended for use on fresh concrete floors and surfaces with a lot of cracks.
Can be used as a second coat on a surface pre-treated with epoxy. Double priming is often used for complex floors with a highly porous structure.
Acrylic primer materials
Used for bulk mixtures prepared on the basis of aqueous emulsions. Typically these are materials based on acrylic or latex resins. Of the highest quality and at the same time affordable, we can name “Betonkontakt” and “Tikkurila Euro Primer”.
One of the best soil options for self-leveling flooring
Acrylic primer does not require preliminary preparation
Quartz dust in the form of microplates and needles is used as a filler. Thanks to this, after applying an acrylic primer to concrete, a needle-like forest remains on the surface, so any water-based self-leveling floor adheres to the primer very firmly.
Primer for water-based self-leveling mixtures
Methacrylate and methyl methacrylate primers
This is a product of deep processing of vinyl polymers, very expensive, but inferior in strength and depth of setting to epoxy primer.
Among the positive qualities, the following points can be noted:
- High drying speed of the applied primer, this allows you to fill the floor in a matter of hours;
- Good workability of the primer. It is used to prepare the surface before pouring the second layer.
The material is used for local repair of self-leveling base; heating, grinding and tinting in a specific color are allowed. Methyl methacrylate primer is just a solution of the polymer in an alcohol-acetone mixture with the addition of delamination stabilizers. One of the few types of soil that can be adjusted by dilution. Can be used in conjunction with epoxy and polyurethane materials. Strongly absorbs water, resulting in loss of performance.
What does using a primer provide?
In the construction industry, several types of self-leveling floors are used on an epoxy, acrylic, polyurethane, and water-based base. The composition necessarily includes cement and finely ground quartz, but the main substance is still a polymer binder. And since the self-leveling floor is mostly poured on a cement-sand base, it is almost impossible to “force” the poured mixture to adhere to the concrete without using a primer. Or the polymer-cement filling will fail in a couple of months.
Experts say that using a primer:
- Provides displacement of air bubbles from the surface of concrete;
- Improves the wettability of the concrete floor surface with a self-leveling mixture;
- Blocks the absorption of water or solvent included in the mixture by the base.
In practice, craftsmen say it more simply - if you do not use a primer, the hardened mirror made of self-leveling material will peel off from the old floor, no matter how durable and high-quality the composition being poured is.
Important! The first and main reason for using a primer was and remains to ensure the maximum level of adhesion. The filling composition always has a certain viscosity so that a mirror can form on the floor surface. Therefore, the mixture has to be “glued” to the concrete.
Preparing the base
If the surface is uneven, then before laying the finishing coating, you will need to make floor screeds. They are:
- concrete;
- dry;
- self-leveling.
Concrete screeds are traditional. They are necessary if the unevenness is large. Dry screeds are also suitable for strong changes. They are made from special sheets on gypsum fiber or along logs. But self-leveling screeds are simply poured onto the floor up to three centimeters, thus ultimately forming an ideal surface.
First, carefully examine the surface for curvature, and estimate how much mixture is required to screed the floor. Then the beacons are fixed, preferably with an asbestos solution and do not forget to apply primer. After this, the surface is prepared and coated using compounds that include concrete. The premises where work is carried out should not be exposed to sunlight. You should be prepared for the fact that complete drying will occur only after 25-28 days.
If self-leveling compounds are used for the screed, you will need:
- remove dirt completely;
- apply primer to concrete;
- prepare the solution and pour it onto the surface, helping to level it with a level.
Typical drying time is 10-12 hours. However, in rooms where the percentage of moisture is high, this will take longer.
The use of dry screed is a new method. In this case, the first layer is made of expanded clay sand. The second layer consists of plasterboard sheets, which are screwed using self-tapping screws.
Once the job is complete, the next step is to prime the floor before applying the topcoat. When using, you must strictly follow the instructions. Then the primer forms a reliable layer, which will guarantee that the self-leveling floor will form perfectly evenly.
Technology of applying primer for self-leveling mixtures
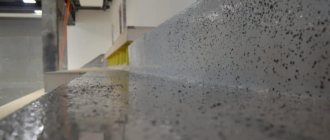
First of all, you need to get rid of dirt on the subfloor. The concrete floor is cleaned dry, using a spatula to remove and scrape off all layers and dust remaining after pouring the screed. If the surface seems clean, then blow out all joints and crevices with compressed air. You should not wash or use water before applying a primer, even an acrylic one. Any remaining moisture can “raise” the self-leveling floor a couple of weeks after the layer has polymerized.
Apply the mixture to concrete
The soil is mixed with a mixer immediately before applying the material. There is no point in waiting for the bubbles to go away; they add additional plasticity to the mixture. Unlike a self-leveling floor, the soil is always liquid, so bubbles are easily squeezed out with the bristles of a brush or roller. The primer application scheme is similar to painting; it is necessary to accelerate the mixture, successively changing the direction of movement of the tool. Consumption will be 350-400 g/m2.
Important! If, after the primer has dried, cavities remain on the surface, then before the self-leveling floor you will need to apply a second layer, this time more viscous.
The second pass can be done as soon as the first layer has dried to the touch. The consumption for the second layer is 200-250 g/m2.
The priming process is similar to painting
Drying time
The stronger the soil, the longer it takes to dry. Epoxy and polyurethane, depending on the temperature, can dry up to two days, and if the room is below 12°C, it may not dry for a week.
At room temperature, the primer can dry faster than required by technology
Acrylic sets on average in 6 hours, so it is quite possible to make at least one layer of self-leveling floor in one working day. If the room is too dry or humid, the quality of adhesion of the primer coating decreases, so the time for forming the self-leveling floor must be chosen based on the manufacturer’s recommendations.
Priming technology
In order to effectively prime the surface and obtain the declared properties from the layer, the solution should be applied correctly. So the following procedure is performed:
- If the preparatory stage has been completely completed and the base has dried, then you can proceed to preparing the solution; it is prepared according to the manufacturer’s recommendations, the rules are always written on the label;
- Afterwards, you can begin to apply the mixture to the surface; you can choose a roller or spatula as your tool. The choice is made taking into account the thickness and type of solution. Start by selecting the far corner from the entrance door to the room;
- Moving one by one, cover the entire base with a primer solution, making sure that it is distributed in an even layer;
- When the process is completed, they wait a certain time until the next stage of applying the self-leveling floor so that the primer coating is completely dry. The timing is indicated by the manufacturer; on average, the process takes four hours.
If finishing work was previously carried out on the walls in the room, then in order not to spoil their surface, masking tape is glued in the transition zone.
The floor covering should be poured only when the base is completely dry. In this case, a damper tape is first glued along the walls; it serves to preserve space if, after drying, expansion of the layer occurs due to temperature effects.
The article answered the question: is it necessary to prime a self-leveling floor? If owners want to get a high-quality coating that will last a long time, then applying a primer to the floor is indispensable. It is important to choose a remedy that suits the conditions. Also, do not neglect the stage of preparing the base; the evenness of the floor in the end depends on it.
Pouring a floor without a primer: consequences
The master will immediately give a clear answer to the question of whether a primer is needed before pouring the floor. Application of soil is a mandatory stage of work. The material guarantees comfortable and long-term use of the base and helps strengthen it.
Without applying the product, a new floor may begin to deteriorate within 1–2 years: cracks and unevenness will appear on the surface. It is especially important to use a primer when there is high humidity in the room, otherwise the mineral bases will be saturated with moisture, which will inevitably destroy the floor.
When to use a deep penetration primer
This type of primer is used during the process of pouring the floor, in rooms with high levels of humidity and frequent changes in temperature conditions. Such premises include baths, saunas, and swimming pools. Since the floor here is in constant contact with water, standard soil for a domestic space is not enough; it is the deep penetration effect that is important. Application of the composition makes it possible to clog the wide pores of concrete, thereby creating an additional protective layer responsible for the safety of the coating.
Primer technology
Regardless of the type of primer mixture chosen, the technology for its application is carried out in accordance with the following steps:
- Consideration of the characteristics of the base . Carrying out an inspection allows you to choose the optimal soil composition, taking into account the base material, as well as the type of self-leveling floor. In some situations, it is possible to use two types of soil on one base.
- Preparing the base . Before applying the mixture, the floor surface must first be cleaned, leveled, sanded, and all visible defects must be eliminated.
- Application of primer . The application process occurs using a roller, brush, or a special spray apparatus.
- Applying the second layer . During the drying process, you should pay attention to the uniformity of this process. If there are areas where drying occurs faster, then a recoat may be necessary.
Primer before screed
The corresponding topic also needs detailed study. During the execution of work, one cannot do without professionalism and strict adherence to technology. The easiest way is to figure out whether the floor needs to be primed before screeding, because it is much more difficult to resolve other nuances. First of all, in this case, you should start from what kind of coating will be applied subsequently. For wooden floors, an acrylic primer is best. Thanks to the use of the appropriate mixture, the top layer of wood will be properly loosened, which will allow you to apply a layer of paint on it without any problems.
For the purpose of impregnating a concrete base, it is better to give preference to an epoxy primer mixture. Subsequently, the surface will be reliably protected from the penetration of excess moisture. The primer can be applied even on still wet substrates. However, experts recommend waiting a while and giving them a chance to dry.
If you find an error, please select a piece of text and press Ctrl+Enter.
Self-leveling floors are increasingly becoming part of our lives - they can be found in premises for various purposes, including apartments. However, the filling technology is complex and requires attention and accuracy, since it is quite easy to make a mistake and ruin the whole work. A primer for a self-leveling floor is very important; you cannot do without it if you want to make a high-quality and durable coating that can last for many years.
Primer for self-leveling floor
Which primer should I choose?
The choice of primer depends on the type of coating; for wood, one type of primer mixture is needed, and for concrete or metal, another. A deeply penetrating mixture is suitable for a rough base; its use is especially appropriate in places of high humidity. This primer will create a durable waterproofing seal. In places where there is increased humidity, it is recommended to apply liquid glass.
In residential apartments you can use ordinary concrete contact . But its disadvantage is that it does not resist fungus and mold, so in apartments on the first floors it is worth using a biocidal primer . If the coating is tiled, then it is worth covering it with polyurethane varnish.
Any type of primer can be applied to concrete, except acrylic, since such a floor is more likely to “float.”
If the surface is prone to excessive moisture absorption, then the primer layer can be applied in several layers.
General information
Types of floors
There are four types of self-leveling floor covering:
Epoxy (apartments, cafes, restaurants, food production and places where increased chemical resistance is needed)- Polyurethane (large cold rooms, areas with high exposure to ultraviolet radiation, elastic wooden bases)
- Polyester (closed parking lots, warehouses)
- Methyl methacrylate.
In general, any type of self-leveling floor has many advantages compared to other types of floors:
- They represent a perfectly smooth coating; if desired, you can make any design or pattern on them,
- High strength,
- Excellent waterproofing,
- Suitable for almost any room.
Before coating with a polymer mixture, it is necessary to prime the subfloor, this process is not the easiest, we will tell you about all the stages.
Why do you need a primer?
Primer for self-leveling floors, a mixture that allows you to bond the subfloor and the top coating to each other. Most types of subfloors have one significant drawback - excessive absorption of moisture from polymer soil mixtures for poured floors or for finishing them, which can result in the appearance of fungus, etc.
ATTENTION!!! Floors made of wood or concrete are particularly prone to absorbing water. This destroys its quality and will reduce the durability of such a floor. Iron coatings will become rusty or corroded when exposed to moisture.
If liquid gets in large quantities on the surface of such a floor, fungus or mold may spread. They have a negative impact on human immunity and health. They also spoil the material and emit an unpleasant odor.
If water gets between the coatings, the self-leveling floor can rise several centimeters. This means that you will have to remove it and install it again. If you want to avoid this, then carefully follow the preparation and filling technology. Primer coating is needed to protect against water, mold, increase service life, and for better adhesion to the top coating.
Types of primers for self-leveling floors
There are two categories of primers : liquid - those that can be used immediately and dry, which need to be diluted before use.
They are divided into types:
- Mineral - the basis is cement, used for the first leveling of coatings, such as gypsum, concrete, expanded clay and others.
- Alkyd - used on wood, tile, plastic and metal surfaces. Not suitable for plaster or plastered surfaces. Excellent for painting, can be stored in almost any conditions. Drying time is approximately a day.
- Acrylic - great for use as a finishing layer. Good for use on wood or plaster surfaces. It has antibacterial effects, is odorless, and thanks to its water-based composition dries quickly. Do not use on metal surfaces as it may cause rust.
There are also primers:
- Standard.
- Strengthening agents are used on loose gypsum surfaces, they tend to penetrate deeply and have an effective effect.
- Deeply penetrating - used for concrete or plastered surfaces, excellently increases the level of adhesion.
IMPORTANT!!! On a smooth surface, adhesion properties will not appear. There are some other types of primers. This is a biocidal, polyurethane, silicone primer, concrete contact and material with high adhesive properties.
- Biocidal - it has the ability to penetrate into the very depths of the texture of the material and effectively protects and fights the appearance of microorganisms and mold.
- Polyurethane - protects the surface from chemical attacks and will protect against oil and greasy stains from gasoline. It is far from cheap, but the consumption is very economical.
- Silicone - penetrates into the very depths of the screed and pushes out all moisture from it, preventing the new appearance of moisture and dampness. Can be applied directly to fresh screed and has an antibacterial effect.
- Betonokontant is the best primer for self-leveling floors, a primer with a high level of adhesiveness. Permeable to moisture, not recommended for baths and saunas.
Popular primer manufacturers
The following brands of soil are most in demand among repairmen and floor pourers:
- Bergauf;
- Ceresit;
- Knauf.
The quality of these products is at a high level; it is only important to choose the right primer in each specific case and strictly follow the application technology.
Recent Entries
A primer is a specific liquid material that is designed to significantly improve the adhesion of various coatings. It is easy to understand whether the floor needs to be primed, because after the appropriate procedure, you can lay various coatings with confidence in the durability. In addition to its main function, the primer can slow down the process of water absorption. As a result, the screed will maintain its uniformity for as long as possible, and will also reduce the likelihood of its subsequent cracking.
The primer is suitable for:
- monolithic concrete;
- epoxy screeds;
- cement-sand bases;
- wooden coverings, etc.
Specialists clearly know whether the self-leveling floor needs to be primed, but at the same time they also select the correct mixture. It is imperative to take into account the surface material, because it can be concrete, brick, wood, metal, drywall, plaster, and so on.
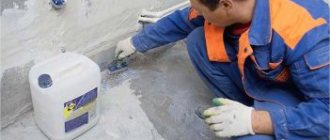
Preparation of concrete surface and materials
Our floor looked like this
Let's start turning it into something suitable for laying laminate flooring. (or other covering at your discretion).
We clean the floor from dust and dirt in advance. We fill large chips and cracks with putty. We treat the entire surface of the concrete floor with a deep penetration primer. 24 hours after priming, you can begin leveling the concrete floor. It is recommended to glue the bottom of the walls with a special tape, but this is not necessary.
To level the existing concrete base, we will use the self-leveling, quick-hardening Osnovit T-45 Skorline mixture.
Available in 20 kg packages. The cost of one package is approximately 250 rubles. In order to level the concrete floor, we needed to level and raise the floor by about 1 cm. The area of the room is 12 square meters. The consumption of this mixture is small compared to other manufacturers - 13 kilograms of mixture per 1 square meter, with a layer of 1 cm. To level the concrete base in our case, you will need 156 kg of the mixture, which means 8 bags. Just in case, we bought another bag of mixture, but it was not useful. At a cost of 250 rubles per bag, we will spend 2000 rubles on a room. Agree, this is not much.
In addition, we will need a needle roller with a long handle. Its cost is about 250 rubles.
Drill with an attachment (attachment 250 rubles) for mixing the solution.
And containers for preparing the solution. We bought 2 containers of 20 liters each costing 130 rubles. We will also need so-called paint shoes. But, since the nearest stores did not have them, I made them with my own hands. To do this, you will need two planks the length and width of your foot, and 12 screws each. for each and regular tape. We screw the screws into the board; when needed, we tape it to the legs. The main thing is not to do this ahead of time, so as not to spoil the flooring in the remaining rooms.
How is the floor primed before laying linoleum?
Step 1. The primer is used according to the instructions. If it was purchased in the form of a dry mixture, then it is diluted in accordance with the instructions given on the packaging. Also, the soil can be liquid, that is, ready-made, and some builders create it themselves from PVA construction glue. It is easy to prepare - 1 part glue is mixed with 2 parts water in a container.
Preparation of the primer mixture
Step 2. Mix the homemade composition using a construction mixer. The finished soil is also thoroughly mixed.
Mixing the composition
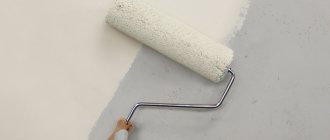
Step 3. The roller is dipped into the prepared primer. Then the composition is applied to the rough base. The composition is applied starting from the wall farthest relative to the exit from the room, so that you do not have to move along the fresh layer of soil.
Applying primer to the base
Step 4. The corners and joints between the floor and the wall are well processed. The primer must be applied evenly - there should be no untreated areas or puddles left on the floor surface.
Using a Roller to Apply Primer
Step 5. The entire surface of the subfloor is processed in the same way. The primer can be applied in 2-3 layers, each of which is dried before applying the next. Then the primer layer dries well, after which you can continue working.
The process of priming a floor under linoleum
After priming, you can proceed directly to laying linoleum.