Do I need to prime the walls before puttying?
Applying primer is an important technological process for preparing walls for the next stage of finishing. The primer will provide:
- strengthening the surface layer of the enclosing structure;
- improving adhesion and reliable fastening of finishing materials;
- reduced absorbent properties of the surface, higher quality of finish.
In addition, most brands of soil contain antifungal additives that prevent the risk of mold. We have already discussed in more detail why you need to prime the walls here.
Almost all wall materials have a porous structure with small microcracks and small chips, which actively absorb any moisture and reduce adhesion. A wall primer for putty can fill these small voids, creating a kind of film layer on the surface associated with the internal structure of the wall.
Therefore, after applying and drying the primer, the putty will not lose moisture and the subsequent process of setting the material will ensure the best strength of the layer and its reliable fastening to the wall.
Do I need to re-prime before the second coat and finishing?
The answer is clear - yes, you need to prime the walls before putting putty in any case. During the first priming, you coated and impregnated the wall material with the compound. After this, a layer of putty was laid, which in a dry state also has micropores and weak adhesion. Consequently, the first leveling layer must also be strengthened with primer and only after that the next one must be applied. You will also have to do this before wallpapering or painting.
You can refuse a primer before puttingtying the walls only if, before applying the finishing coat, it has not had time to dry completely, but has already set to a solid state. In this case, the puttying process becomes continuous and more labor-intensive.
At what stages of finishing work is primer required?
Usually, only one layer of putty does not completely remove potholes and defects on the surface being treated. To get the proper result, you have to putty the walls several times, allowing time for the applied layer to dry. As a result, the question arises: is it necessary to prime the surface of the putty wall before applying the next layer. This depends on the solutions used during the work. If the putty compositions are homogeneous and do not differ in structure, then a primer is not required at all. When using mixtures of different fractions, a primer is required.
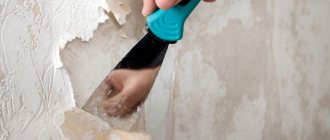
The plastered surface is treated, then wait until the applied solution is completely dry. Sometimes you have to wait several weeks. According to technological requirements, this work can begin only after the applied mixture has been absorbed and completely dried on the area to be finished. But it is undesirable to create long breaks between stages - dust will appear on the surface of the walls, and oily and greasy stains may even appear through the gypsum layer. If you have to putty the surface after removing wallpaper or other finishing materials, the walls and ceiling must be primed. The solution will increase its strength and hide stains of any kind of contamination under the protective film. Otherwise, from these stains, dirt may appear through the wallpaper or paint.
Maximum strength of the putty is achieved by applying a primer. Exceptions are allowed only when working with products of the same brand - plaster, primer, starting and finishing putty. In this case, only the surface of the base is primed, before applying plaster and final finishing.
Is it necessary to prime between layers of putty?
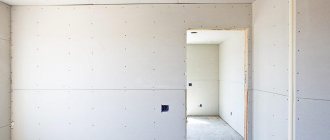
Putty is used to cover a surface previously leveled with plaster. This material has a fine-grained structure and cannot remove volumetric defects. The base layer is applied up to 1 cm thick, it is made thicker, which allows you to remove small irregularities and depressions. The finish is perfectly leveled, after which only decorative finishing is needed. A logical question arises: is it necessary to prime the surface between layers of putty?
Attention! Do not mix layers of plaster and putty, in which case the leveled wall will begin to crumble. The primer is used to prevent the possibility of shedding; it combines compositions of different structures.
Types of primers
Primer compositions are sold in the form of concentrated liquids, dry mixtures or ready-to-use solutions. Any soil contains a binder base, which may contain special fillers and additives. For concentrated and dry mixtures, you will need a solvent, which is indicated on the package. Most often this is ordinary water.
Based on the base material, the following types of primers are distinguished:
- acrylic - suitable for processing most types of surfaces and considered universal;
- phenolic – for coating metal and wood, including chipboard, OSB and fiberboard indoors;
- alkyd - for impregnation of stone walls, plaster, putty surfaces and drywall with subsequent application of alkyd-based paint;
- perchlorovinyl and polystyrene - for plaster and brick when performing external work;
- glypthal - for wooden and metal surfaces, while the composition has toxic properties and can only be used outdoors.
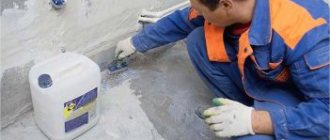
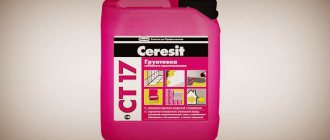
Separately, mention should be made of the special solution “Betonokontakt”. This is an adhesive polymer primer, which contains ground mineral filler. Applicable only to concrete walls. As a result of its application, a thin rough layer with excellent adhesion is formed on the surface, which perfectly holds putty and other finishing materials.
Wallpaper glue diluted with water to a liquid state can be used as a primer. However, such mixtures are recommended to be used before appropriate finishing.
Which primer and in what case is it better to choose?
When finishing brick, concrete, plasterboard (we wrote about priming gypsum boards here) or block walls, it is better to refuse to use special compounds and choose a universal acrylic primer, ready for use. However, please note that it is only used for interior work.
For concrete walls, excellent results can be obtained using Concrete Contact. However, this is more expensive and therefore only makes sense when acrylic primer cannot be used. For example, in a room with high humidity or for outdoor use.
For solid wood, plywood, fiberboard, chipboard and OSB, use phenolic primer, since it contains special additives that can protect the wood from damage by pests. Phenol is more expensive than acrylic, but the quality of processing will be much higher.
Priming walls before applying plaster
When craftsmen compile a price list for installation work, they always include the stage of wall priming in the list. In this case, the condition of the leveled surface and the quality of the plaster mixture do not matter. Let's get acquainted with the importance of such an event, the technical justification for whether it is necessary to prime the walls before plastering.
Why do you need to do this, what are the benefits?
The effect of any primer composition is to improve the adhesion of the finishing material to the base. Additionally, depending on the components included in the tool, a number of other tasks are performed:
- partial or complete filling of micropores and microcracks, which reduces surface absorption and reduces the consumption of plaster mortar;
- binding/gluing individual parts of the material, which is important for a loose or brittle (weak) base with low strength;
- protection of materials from moisture, corrosion, biological activity, chemical reagents.
Note ! Manufacturers often indicate on the packaging the process of removing dust from the base. However, in reality, it is not the removal of excess microparticles that impairs the adhesive properties of materials. The primer binds them together and secures them to the working platform.
Taking into account the many problems that can be solved with the help of primers, it becomes clear whether the base needs to be primed before plastering. This event is necessary during wall repairs. At the same time, it is important to treat the walls or ceiling not only before plastering, but also before each stage of installation work: puttying, painting, wallpapering, lining with other materials using an adhesive solution.
Necessary tool
To apply primer to walls you need to have:
- a stable stepladder or a durable lightweight table;
- a paint brush for finishing corners and a wide brush;
- spatula for removing dirt;
- container for preparing consumables.
The paint roller can be replaced with a long-handled paint roller. It may even be more convenient to work this way.
Soil consumption
The amount of primer used to treat the surface depends on the structural porosity of the wall material. But the average recommended consumption is usually determined by the manufacturer and indicated on the packaging.
Here you can notice that high-quality soil may be required during repairs not only for impregnation of walls, but also for covering the ceiling, cement screed and floor, when installing slopes and other work.
Therefore, read the amount indicated on the packaging of the material, multiply it by the surface area to be treated and add 10-15%. If the soil remains after, you can always use it in another place.
Primers for walls in Moscow
Wall primers and other products can be purchased at Leroy Merlin in Moscow at low prices. Select the product you are interested in on the website and buy it in our online store. The range of products presented in the catalog is extremely wide. Among them there will certainly be a position suitable in all respects.
All products presented in the “Primers for Walls” section are produced by well-known companies that have proven themselves to be of high quality for their products.
You can always place an order and pay for it online on the official website of Leroy Merlin in Russia. For residents of the Moscow region, we not only have low prices for products in the “Wall Primers” category, but also fast delivery to cities such as Moscow, Balashikha, Podolsk, Khimki, Korolev, Mytishchi, Lyubertsy, Krasnogorsk, Elektrostal, Kolomna, Odintsovo, Domodedovo, Serpukhov, Shchelkovo, Orekhovo-Zuevo, Ramenskoye, Dolgoprudny, Pushkino, Reutov, Sergiev Posad, Voskresensk, Lobnya, Ivanteevka, Dubna, Yegoryevsk, Chekhov, Dmitrov, Vidnoye, Stupino, Pavlovsky Posad, Naro-Fominsk, Fryazino, Lytkarino, Dzerzhinsky, Solnechnogorsk, Istra and Zhukovsky.
Technology of priming walls for putty
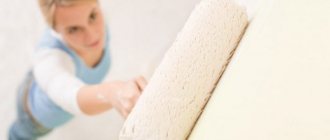
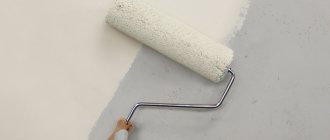
You can prime the surface using a roller or a brush - here you choose what is more convenient to work with, but keep in mind that although working with a brush is more difficult, it not only applies primer to the surface, but also washes away the dust deposits at the same time. This result is more difficult to achieve with a paint roller.
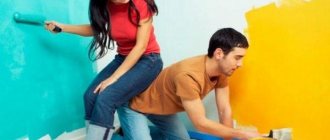
The composition is applied in several layers, and at the same time it is necessary to cover the entire surface of the finish. The second layer is applied only after the first has dried. Uniform coverage is very important. Carefully ensure that there are no material leaks and, if necessary, immediately remove or wipe them down.
How long does it take for primer to dry on walls before applying putty? The drying time is usually indicated on the packaging, but if this is not the case, just touch the surface with your hand and make sure it is dry. Only after this can the subsequent stages of work begin. We will not give the average value so as not to deceive the reader.
Technology
How to prime a wall with your own hands?
The base should be:
- Cleaned from glossy and generally low-adhesive coatings (tiles, enamels, etc.);
- Cleared of grease and oil stains. They are removed with a rag containing any organic solvent (gasoline, acetone, solvent, etc.);
Any organic solvent is suitable for degreasing.
- Dust-free. To remove dust, use a vacuum cleaner or a regular broom.
The adhesive primer is applied in one layer using a wide brush or medium-nap roller. Before use, the soil must be thoroughly mixed, ensuring an even distribution of quartz sand in it.
Penetrating primer on gypsum board and putty of any type is applied in the same way, but on highly absorbent mineral substrates (cellular concrete masonry, weak cement plaster) the instructions are slightly different. Here, priming is performed in two steps without a break for drying: in this case, the penetration depth of the dispersion will be maximum.
For a penetrating primer, you can use an improvised spray bottle from a garden sprayer and a large plastic bottle.
General recommendations for performing work
- to reduce the absorbency of drywall, it is better to treat it with a deeply penetrating acrylic compound;
- drywall fasteners should be pre-treated with an anti-corrosion compound;
- wooden surfaces require the use of mixtures with waterproofing properties;
- primer over the first layer of putty allows you to obtain a more durable and durable wall covering;
- when applying putty, remember - several thin layers are always better than one thick one;
- It is not recommended to mix soils from different manufacturers, as they can differ greatly in composition.
To save material, you can use a spray bottle, but in this case, preliminary cleaning of the walls from dust and dirt must be done more thoroughly.
Priming the finishing layer of putty before painting will ensure a uniform color tone and high quality work.
Priming as the basis for all putty work
The plastered wall should be smooth and not crumble. This requirement is basic for any surface. You cannot apply simple gypsum putty to the previous dry layer. Otherwise, instead of adhesion, this coating will absorb liquid from the subsequent one.
At the same time, the quality of surface treatment will deteriorate. Then later the ceiling or wall will peel off greatly and crumble. Therefore, before each new coating, the treated area must be primed.
To do the job correctly, you should use step-by-step instructions:
- Apply a primer between the loose lower layers of plaster, penetrating deeply into the applied materials for better adhesion within the 2 coatings. The product prevents the putty from crumbling in the future. Deeply penetrating mixtures hold other plaster layers.
- If the surface moderately absorbs moisture, it is recommended to use an acrylic composition. If it is not available, use a deep penetration mixture.
- For waterproof putty, it is recommended to use a special primer. To understand which material is suitable, you need to read the composition of the product on the can.
- If necessary, apply an additional coat of primer. Sometimes it helps create better grip.
Temperature
Compliance with temperature indicators during the process of external and internal finishing work is one of the fundamental points. Work on puttying walls can be carried out at any time of the year, provided that the temperature conditions are observed.
Regardless of the wall material, the temperature should not be lower than +5 degrees, and the humidity should not be 10% during interior work. The putty should not freeze, otherwise after drying the mixture may crumble or burst.
For external finishing work, the temperature must be no lower than -5 degrees and the humidity no more than 60%, and you will also need to use specialized solutions with anti-freeze additives.
The point that requires attention is that you will need to worry about drying the layer and proper ventilation.