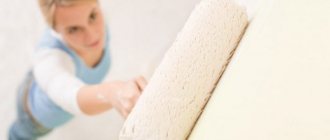
Primer for drywall is a special composition that is used to treat the wall before applying the finishing layer. The primed base has better adhesion to the finish and receives additional protection from adverse influences. For the final surface coating, decorative putty, facing tiles and paint are used.
What are primers used for and is it necessary to apply them?
In addition to increasing the adhesion of materials, primer mixtures are intended to protect the coating.
When processing metal structures, they become invulnerable to corrosion. Priming wood allows you to emphasize its natural texture and provide it with fire-resistant characteristics. Distributing the solution over a base made of stone or plasterboard prevents the formation of excess dampness, which provokes mold and mildew.
Drywall primer allows you to reveal the properties of the finish so that it corresponds to the declared quality and special characteristics. When wondering whether it is necessary to prime drywall before puttying, it is enough to evaluate the main functions of such a mixture.
Why prime drywall:
- Drywall primer eliminates minor defects, dents and damage to the base, making it smooth and even.
- The composition gives the coating anti-mold and anti-fungal properties. It also protects the finishing layer from rodents and other pests.
- Priming structures provides additional reinforcement and protection.
Only moisture-resistant material, which is designated in the labeling as GKLV, is not subject to processing. There is no need to prime the surface yet if you plan to apply finishing putty. This layer is elastic and sticky, so it is simply impossible to additionally cover it with a moisture-repellent mixture.
It is important to consider that the primer mixture does not form a film on the wall, limiting air circulation. Its structure resembles a braided mesh.
Before installing the facing tiles, you will need to prime the coating. In addition, it is better to do this in 2 stages. In this case, it is not necessary to level the putty layer much, because decorative material has such properties.
Another argument for priming drywall before caulking is the ease of later disassembly if you want to change the finish.
Work order
Before you start decorating the walls, you need to prepare them. In general, painting drywall with your own hands is done in stages. Types of work are:
- Inspection of the surface and its preparation for painting.
- Priming the base.
- Processing joints and strengthening corners.
- Applying putty and additional primer.
- Applying paint.
Since you can paint drywall yourself, it is important to understand the technology of the work.
How to prepare the base
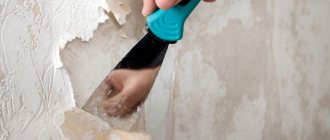
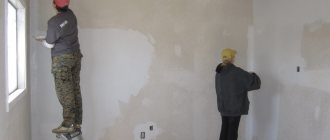
Processing drywall for painting begins with inspecting the base and identifying defects: cracks, depressions, holes. The joints must be taped with masking tape, after which it is puttied. This procedure will prevent the paint from cracking in the future. The places where the self-tapping screws are screwed in are also covered with putty. It is applied in one motion using a spatula at an angle of 30 degrees. All smeared areas are rubbed smooth.
If the drywall is new and has not yet been finished, then it is better to putty the entire area. To do this, apply a layer 1-2 mm thick. If it is necessary to restore damage to the old cladding, then use a gypsum finishing mixture. After the layers have dried, they are sanded with fine sandpaper.
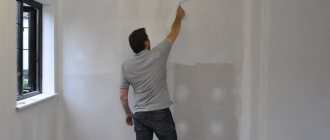
Drywall is also primed before painting. The means for carrying out the process must be of increased permeability. It’s good if it contains antiseptic components. The primer mixture is applied to the plastered and dry surface using a brush or roller. The treatment is carried out in 2-3 layers, and each previous one must dry before applying the next one.
Preparing the paint for application
Before painting plasterboard walls, you need to prepare a working mixture. It is stirred with a plastic or wooden stick. If the composition needs to be diluted with water, then it is important to take into account that the liquid does not exceed 10% of the total volume. If you have to add color, it is better to first prepare a small amount of material of the desired shade. Apply the resulting mixture to an inconspicuous area and wait for it to dry completely. Once the correct tone is selected, you can use the entire volume of paint.
Drywall painting
The work must be done step by step. The paint is applied in 2-3 layers. The first of them is applied from top to bottom, and the second - from left to right. The walls are finished after the ceiling is painted. The composition is poured into the bath in small portions. Next, the work is carried out like this:
- First, the decorative coating is applied to hard-to-reach places (the area behind the radiators), internal corners, joints with the floor and ceiling. The width of the strip is 5-8 cm.
- Painting the main plane. The roller needs to be dipped into the paint, rolled over the tray area and the excess material removed from its side. The tool must be moved smoothly across the surface, without jerking. During work, you should periodically monitor the quality of paint application. Since painting a plasterboard wall needs to be done technologically correctly, it is better to regulate the intensity of the finish shade and promptly remove smudges if they form.
- When decorating, you need to periodically mix the material.
If several shades of paint are used to paint drywall, then the borders need to be taped with masking tape.
Reasons for the ambivalent attitude towards gypsum board primer
There are constant discussions among experts about whether it is necessary to prime drywall before puttying. After completing the repair work, many craftsmen do not treat the gypsum board with a primer. However, this leads to gradual destruction of the facing layer and causes a number of problems.
Arguments for
Experts who recommend priming drywall before puttying give the following arguments:
- This mixture efficiently fills cracks and damage, which reduces the consumption of material for subsequent layers.
- During the hardening process, the primer forms a reliable frame on the plasterboard sheet. Such protection copes with almost any vertical loads, which is important when installing porcelain tiles on walls.
- The putty solution cannot provide identical absorbent qualities for the entire substrate, so unevenness will form after the paint is distributed.
- The soil does not interfere with the vapor permeability of the structure, since it does not form a dense film, but a kind of network of threads that does not allow moisture to pass through.
- The primer improves the adhesion of plasterboard with the putty solution.
- Antifungal substances are added to the primer mixture, which allows it to be used for treating rooms with high humidity. It is indispensable for walls in the kitchen or bathroom.
- Acrylic-based products are safe for the environment and the human body.
Arguments against
Opponents of soil point to the following features:
- Before the advent of primer mixtures on sale, plasterboard sheets were treated with paint or covered with wallpaper, and decorative plaster was used. The finishing layer remained on the surface for decades. Conclusion: the soil was developed to earn money, and construction services indicate the importance of this stage in increasing the final cost of the work.
- Drywall sheets have good adhesion to any type of putty. Therefore, priming them is not entirely justified.
- Primers may contain toxic components. They are capable of releasing harmful substances into the environment.
- Putty can act as a primer solution.
- After priming, the coating no longer allows air to pass through, because microholes become clogged.
It is quite difficult to immediately refute the above opinions. In addition, there are a number of situations in which gypsum boards are not primed.
Do I need to prime drywall before wallpapering?
To prevent this from happening, use a special drywall attachment with a lampshade that adjusts the depth of immersion. In houses that are located near highways, where heavy equipment passes or near a railroad, cracks often appear, and some craftsmen use paper cement bags for drywall joints in such cases. Tips. If you find poorly tightened screws in sheets of drywall, then they must be recessed under the plane.
But, in order not to delay time, eliminating defects with a screwdriver, you can use a drill or screwdriver with a PH-2 attachment. The rotational force of the power tool can drive the screw too far and break through the cardboard, going into sludge - in this case, the fixing function will be lost. Well, the last obstacle is the seams between the sheets. Walls with untreated seams may come apart a little, in which case the wallpaper will tear and crack. A very large percentage of the population performs certain work at home to improve their homes with their own hands and is constantly improving in this regard.
And for those who are interested, we will now look at how to treat drywall before wallpapering and how to do it correctly. The tape, completely covered with mortar, firmly binds the joints and prevents the formation of cracks. All fasteners protruding above the surface are screwed in flush.
Then they are puttied.
How to choose a primer for drywall
Before priming drywall, you need to choose the right composition for this procedure.
Taking into account the type of surface and components of the mixture, the following groups are distinguished:
- Water repellent.
- High penetration compounds.
- Adhesive.
- Heat resistant.
- Antiseptic.
The selection of a suitable option is carried out taking into account the functional purpose of the building and operating conditions.
When preparing and processing gypsum boards, you should take into account the type of finish that will be applied in the following layer:
- If you plan to paint the surface, it is better to use a primer with medium adhesion.
- For thick wallpaper or tiles, a deep penetration mixture will be required.
- In rooms with excessive humidity, a specialized water-repellent solution is used.
If you have not decided on the choice of product, it is recommended to buy a universal primer for gypsum boards.
Priming drywall - what is it for, what does it give
A primer is a special composition that is applied to the prepared surface before painting or other finishing. Priming allows you to more reliably adhere the surface to the coating, level the surface and perform other functions. For example, a primer can protect metal from rust.
Additionally! Unlike the coloring composition, the primer has a small amount of pigment.
The primer can be applied in different ways: with a brush, spatula, spray gun, etc. It all depends on its composition and consistency.
Advantages and disadvantages of processing
Some people believe that priming drywall before puttingtying, applying paint or wallpapering is useless. This is not true: the primer improves adhesion between the surface and the finish, and also protects the walls.
The positive aspects of the procedure include:
- The primer penetrates into the pores of the wall and fills them, which helps save paint and glue.
- The adhesion between the surface and the wallpaper is enhanced, allowing the paint to be distributed more evenly.
- After the primer hardens, the surface becomes more durable. This allows you to hang heavy wallpaper and ceramics on them.
- The composition prevents the formation of mold.
Opponents of priming usually point out that in the past, drywall was painted, plastered and wallpapered on without any problems. Therefore, priming is an easy way for growers to generate additional income.
This is not entirely true, since the functions of the primer are not limited to increasing adhesion. And yet, in some cases it is not recommended to use it:
- In rooms with high humidity, for example, in the bathroom. They use moisture-resistant gypsum board, and the primer will not be able to adhere.
- If you need to achieve perfect evenness of the walls. To do this, use a final putty (finely ground), which can only be applied to a highly absorbent surface. The primer is weakly absorbent, so the surfaces will have to be puttied in several layers - without priming, one layer is enough.
- If within several years it is planned to replace “dry” plaster with “wet” one.
Additionally! Seams and places where screws are attached are always primed.
Types of primer material by composition
The classification of priming products is carried out taking into account the components that are used for their production. The most common are acrylic options.
Acrylic primer
The mixture is made on the basis of acrylic copolymers. The size of the components present in the composition is much smaller than the pore diameter of the surface being treated. This feature ensures soil penetration deep into the wall up to 10 cm.
The substance quickly adheres to materials that allow moisture to pass through, including drywall. Acrylic primer is a universal product that does not have a characteristic odor or toxic substances. This allows it to be used both for external and internal work. Penetration ability increases the wall's protection.
The main properties of acrylic primer include:
- Vapor permeability. This property prevents the surface from clogging, allowing it to “breathe” freely.
- Universal purpose. The primer is suitable for subsequent painting or laying tiles. In addition, the primed base can be covered with any wallpaper.
- Effective filling of pores. The coloring composition is distributed evenly over the coating without changing the tone.
- Saving paint and glue consumption during finishing work.
- Good adhesion to different materials.
Do I need to prime ceilings before painting with water-based paint?
Coating ceilings and walls with water-based emulsion is environmentally friendly, does not cause allergic reactions and has no negative impact on humans. And the addition of pigment gives the surface the desired color. For painting with water-based emulsion, a universal acrylic-based primer is used.
It is suitable for preparing most ceiling surfaces. Mineral compositions are acceptable. Special primers are used only to perform work in specific cases indicated on the packaging.
- The mixture itself.
- A spray bottle that will ensure optimal application of the foundation. If the sprayer is missing, it can be replaced by a regular paint roller, preferably one with a long handle.
- Paint brushes for applying product in corners. In small areas you can get by with just them.
- The primer tray will make the job much easier when using a roller.
- Is it necessary to prime the ceiling before painting if the frame is made of gypsum plasterboard? Of course, after installation, a plasterboard structure must be puttied and leveled.
- Is it possible to do without a primer when using wallpaper for painting or applying a new layer to an old water-based paint? Yes, you can. But the primer will reduce paint consumption. If the previous layer is significantly different in color, then application is necessary.
- Removing old coating (paint, wallpaper, damaged plaster).
- Leveling the surface by applying a layer of putty (ideally using the starting putty first and then the finishing putty). Before filling, the ceiling must also be treated with a primer.
- Sanding the putty surface for final leveling.
- Remove accumulated dust with a vacuum cleaner or brush.
Types of primers for surface treatment
When wondering how to prime drywall, you need to take into account that, depending on the purpose, primer mixtures are divided into the following types:
- Deep penetration.
- Under the wallpaper.
- Before laying tiles.
- For treatment with water-based paint.
Deep penetration primer for drywall
Finishing with heavy wallpaper or tiles is impossible without first applying a deep penetration mixture. The surface treated with this composition is characterized by improved adhesion. This primer provides an antiseptic quality to the base.
In addition, the solution is resistant to high humidity, does not contain toxic substances and is completely safe for health. The mixture can be used for premises for various purposes, including children's rooms.
Under the wallpaper
To treat the base for subsequent wallpapering, different types of primer are used. If you plan to glue “heavy” rolls, including glass wallpaper and series made of bamboo, textiles or non-woven fabric, you need to use a primer with high adhesive characteristics.
The wallpaper is pasted onto the wall, which is previously puttied. Therefore, it is allowed to use a primer for both clean drywall and putty.
Under tiles
Compositions for laying tiles are necessary for:
- Reducing the level of moisture absorption by drywall.
- Strengthening the fibers of the material.
- Eliminates the problem of mold and mildew.
Once dry, the primer will form a thin film that will prevent moisture from moving from the tile adhesive. An acrylic mixture of deep penetration is recommended for treating the base.
For painting with water-based paint
Before finishing with water-based paint, you need to apply a water-based polymer primer.
Like coloring compounds, such primers:
- Dries quickly.
- They do not have a pungent odor.
Deep penetration solutions are not suitable for painting.
For these purposes, a universal primer is used, which has the following properties:
- Penetrates into the pores of the base material.
- Increases adhesion of paint and substrate.
- Forms a film that reduces the consumption of the color mixture.
- Protects the surface from fungus and mold.
Which is the best primer for gypsum plasterboard under putty?
Under the putty solution, primers for indoor work are used. It is important to choose a deep penetration primer based on acrylic polymers. When interacting with surface voids, the material forms an additional frame, holding a layer of putty on the plasterboard.
What is drywall covered with before wallpapering?
To carry out this work, you need to prepare tools, devices and purchase the necessary materials. All of them are presented in the table.
- Treatment of gypsum board helps to reduce pores on the surface and reduce the consumption of wallpaper glue.
- Protects drywall from getting wet if it does not have water-repellent properties.
- When gluing light-colored wallpaper without pre-treatment, the base of the drywall may show through, resulting in a change in the color of the wall covering.
- Cracks may form in corner joints, especially if it is an apartment in a new building.
- antibacterial composition,
- sanding mesh and sandpaper,
- paint brushes, rollers and brushes for applying antiseptic and primer,
- spatulas with narrow and wide blades,
- primer,
- gypsum or polymer putty,
- sealant or plaster for sealing joints,
- fiberglass or lavsan mesh tape (serpyanka).
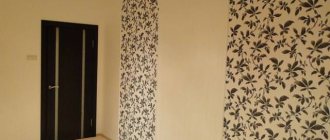
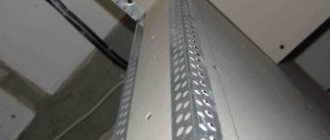
Pay attention to the fragment of the plasterboard wall in the photo above, and you will see the heads of the screws, which will appear as rusty spots through the wallpaper material and the depressions of the joints, changing the relief, but this should not happen! Do not limit yourself to one layer of primer, since in poorly primed areas it is not provided high-quality, uniform adhesion to the decorative layer, and the pasted wallpaper will be visually different from the general background.
How to properly use drywall primer
Before treating the base with soil, you need to select the appropriate type of finish, taking into account the purpose of the room. If the soil is produced as a concentrate, it will need to be diluted. By default, water-dispersed mixtures are used, which need to be diluted with liquid.
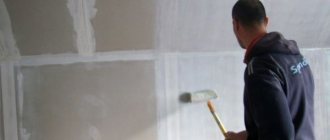
Acrylic and latex based compositions are suitable for application without dilution. Before applying the primer, you need to remove dust and dirt from the base. Before distribution, the mixture is poured into a container and then applied to the structure using a roller or brush.
Conclusion
Now you know for sure that gypsum boards need to be primed according to technology, this is not my personal opinion or the result of experience, although it confirms the rule. I talked about the types, properties, and techniques for applying primers; all you have to do is choose the composition and feel free to get to work. And for clarity - the video in this article, watch and learn. I'm waiting for your questions in the comments.
Did you like the article? Subscribe to our Yandex.Zen channel
November 22, 2021
Plasterboard systems, Finishing materials, Construction Chemicals
If you want to express gratitude, add a clarification or objection, or ask the author something, add a comment or say thank you!
How to best apply primers
The soil is distributed onto the surface to be treated using a roller. It is better to use a brush in joints, corners and hard-to-reach places.
How to prime drywall before starting and finishing putty
Before applying putty, it is necessary to prime the entire coating. Before this, the surface is cleaned of dirt and dust. To improve the final result, it is better to re-process after the first layer has dried. Priming is carried out using traditional painting equipment, such as a roller and brush.
Features of the priming process before puttying
Before applying the putty solution, you need to fill the joints with a primer. All seams are treated with reinforcing tape. It is better to cover the fasteners, which use self-tapping screws, with a special putty for seams.
Preparation before wallpapering
Before you hang wallpaper, you need to properly prepare the coating. Therefore, it is worth cleaning the wall from dirt and dust, and then applying a composition with antifungal properties.
When the layer has dried, the seams and screws should be sealed. You also need to clean the putty from sagging and level it.
The next step is to allow the primer to dry. Before wallpapering, the structure should be covered with a thin layer of putty. When applying the putty solution, you need to strengthen the outer corners with metal or plastic corners.
Preparing the surface before gluing tiles
Before laying the facing material, it is necessary to apply a deep penetration primer with antiseptic properties.
Such processing will allow:
- Strengthen the base.
- Improve the adhesion characteristics of materials.
- Reduce water absorption of gypsum boards.
- Apply a protective layer to prevent mold and mildew.
All voids are covered with sickle tape. It is fixed using joint putty. After preparation, the material must be primed again, distributing the mixture evenly over the entire area. There is no need to sand the putty, since the tiles themselves level the surface to be treated.
How to prime plasterboard walls
GKL primer is performed according to the following scheme:
- First, the entire coating is processed.
- Next comes the reinforcement of joints and seams, as well as the installation of corners.
- Then the putty is primed.
The next stage comes down to priming the walls using a brush and roller.
How to apply on the ceiling
The use of gypsum boards for ceilings has been practiced for a long time. After installing the sheets on the ceiling surface, you need to properly process it. It is important to eliminate all defects in the plasterboard, hiding all damage and problem areas. The procedure is carried out by puttying.
To distribute the putty solution over the ceiling, you will need to additionally prime it. This treatment will protect the material from temperature changes and humidity. It improves adhesion and simplifies the distribution of putty.
The base coating can be processed using a roller. It is better to prime corners and awkward areas with a brush. After completing the work and the primer has dried, apply an initial layer of putty, carefully treating the joints and screw heads. Serpyanka is used at the joints.
If the first layer of plaster has dried, you can eliminate obvious defects and apply an additional layer. It is important that it is as even as possible. After all layers have dried, you need to sand the ceiling with sandpaper and proceed to the following procedures.
How to glue
Before you start gluing onto a gypsum plasterboard surface without putty work, you need to carry out preparations.
If there is old wallpaper on the walls and ceiling, remove it using liquid products, a sponge, or a spatula. After removing the remaining finish, cracks in the old putty may be discovered. It is removed with a scraper.
Where does gluing begin?
If the plasterboard surface is new, carry out the following work:
- It is necessary to inspect the entire surface for flaws - protruding screws, no chamfer at the joint. All defects are eliminated.
- The next step is priming the gypsum board. The mixture coats joints, corners, and fasteners especially well.
- The joints are reinforced with sickle tape or KNAUF paper tape using a mixture of FUGEN, UNIFLOT. The surface is completely dry.
- Afterwards, the applied KNAUF mixture is cleaned with sandpaper to remove small lumps and stripes.
- The fastening points are also covered with Uniflot putty. After drying, clean it.
- All putty joints, corners, and fasteners are covered with a second layer of primer mixture for good adhesion.
- All pencil and marker marks are also covered with a thin layer of putty to avoid the appearance of black spots on the finish coat.
When the surface is prepared, using a laser level or rule, draw an even vertical line on the wall. The length of the strip is transferred to the wallpaper. A section with a margin of 5 cm, that is, if the length of a strip of wallpaper is 2.5 m, then cut off 2.55 m.
12 hours before work, dilute the glue and leave it to dissolve. This is done strictly according to the instructions on the packaging.
Glue is applied to the surface and to the canvas. There are options (non-woven) that do not require you to apply an adhesive composition to the strip, just to the surface.
They begin gluing the strip from top to bottom, gradually smoothing it with a rag from the middle to the side and releasing air, adhering to the mark.
The next strip is glued end-to-end with the first, also smoothing and releasing air.
How to glue in corners
Next, measure the distance from the corner to the last glued strip. The width of the canvas should be equal to this distance plus the approach to the adjacent wall: internal corner 5-15 cm, external corner 2-3 cm.
Often the canvas on the adjacent wall has an uneven border.
Having glued the canvas in the corner, measure the width of the canvas on the adjacent wall and also draw a vertical line along this mark as a guide. Aligning with it, glue the strip with an overlap onto the previous canvas. If the wallpaper has a pattern, select the borders by cutting off the unnecessary strip.
How to stick under the baseboard
There is a wide variety of ceiling skirting boards. All of them are divided into 2 types: soft and hard. Each type has its own principles of pasting.
Flexible and soft skirting boards are glued to the trellises after the surface has dried. To do this, use transparent glue - liquid nails.
The hard ones are fixed to the wall, and then there is pasting, or the finishing coating is already on the surface, but you need to fix the plaster molding to the wall. Then the wallpaper is cut so that 1-2 cm remains under the baseboard. After this, the strip is removed, leaving only drywall. A solid baseboard is fixed to it with gypsum plaster or glue.
If the baseboard is already on the wall, the wallpaper is glued slightly over it. After that, use a spatula to move the plinth a little and insert the canvas. This creates an even angle on the strip, along which the excess is trimmed.
The floor plinth is placed on the cut trellises from the floor. There remains 1-2 cm under the baseboard.
How long does it take for primer to dry on drywall?
The drying time of the primer is determined by several factors.
Among them:
- Environmental parameters such as humidity and temperature. The greatest drying efficiency is observed at +15...+20°C and humidity 60-80%.
- Thickness of the primer layer.
- Type of primer mixture. Formulations with a high content of volatile substances and the presence of solid components dry out faster than water-based products.
Under favorable conditions and room temperature, one layer dries in no more than 2-4 hours. In non-residential buildings, the process time increases to 5-6 hours.
Sealing seams and joints
Once the primer has dried, you can begin to seal the seams. A special tape is used for this. It is used to ensure that the putty on surfaces, in particular on seams, does not subsequently crack. If the internal corners of the room were finished, then they are also closed using reinforced tape.
As for the external corners, in this situation it is necessary to additionally hide them from mechanical damage with massive objects.
Otherwise, there will be dents and even chips on the corners, which will ruin the aesthetic picture. So, the outer corners need to be treated with metal or plastic corners. They are secured using glue or self-tapping screws. If the outer corners have a curly shape, then you need to find corners that bend easily. Once the corners are securely protected, you need to move on to the next stage.
Questions and answers
At different stages of priming drywall, inexperienced craftsmen may encounter difficulties. To avoid them, you should familiarize yourself with the basic questions and answers.
Do I need to prime plasterboard walls before puttying or wallpapering?
The procedure is performed to strengthen the sheets and eliminate the problem of putty peeling. If you do not prime the wallpaper before gluing it, the adhesive mixture will be so absorbed into the drywall that if you want to change the wallpaper, it will be impossible to remove it.
Features and Recommendations
The process of gluing wallpaper will not be difficult if you follow the recommendations:
- The plasterboard surface does not have small stones or wave transitions.
- All containers and tools must be clean.
- When working with wallpaper, you need to remove all the shortcomings, otherwise it will be impossible or difficult to do this later.
Tips for working with wallpaper on a plasterboard surface:
- The work of wallpapering a room begins with a doorway or window.
- Wallpaper should be measured and cut on a horizontal, clean surface - a clean floor, a large table.
- During gluing, the canvas is completely free of air bubbles. Do this carefully with a soft rag or rubber spatula.
- Excess glue that comes to the surface of the canvas is removed immediately with a damp sponge.
- If the wallpaper has a large pattern, then the consumption of the pattern at the joint is allowed to be no more than 2 mm.
- Trimming of excess trellises is done strictly along a ruler with a sharp knife.
- During work, windows and doors must be closed.
Having familiarized yourself with the recommendations and tips, the work of gluing a plasterboard surface will not be difficult or time-consuming. To avoid unpleasant consequences, such as dark stains from moisture-resistant drywall on trellises, the surface still needs to be covered with putty and primer. This guarantees the appearance of the room and the durability of the trellis covering.
Painting the walls
Only after painting can you get a perfectly smooth coating without flaws. Remember that plastering walls for painting is a painstaking job that must be done responsibly and carefully. An important role is played by the choice of material that will be used in the work.
Thus, plasterboard panels and walls are usually painted with water-based paint. Before painting, drywall must be prepared in accordance with all of the above requirements. Only in this case can you get an excellent result of the work performed. Let us note once again that the technology for carrying out repair work is highly not recommended.
Thus, finishing walls using drywall is not as difficult as it might seem at first glance. However, you should not think that everything is extremely simple. The work must be approached as responsibly as possible, since repairs are usually carried out not for 1 or 2 years. You will need special tools, and, of course, a minimum of knowledge. Specialists in hypermarkets will help you select suitable building materials. Everything else depends on your financial capabilities, as well as your imagination.