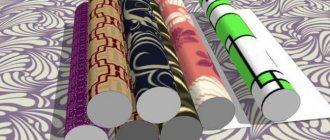
Wallpaper among finishing materials has reached a height inaccessible to competitors. And there are many reasons for this:
- variety of types and types (paper trellises, non-woven wallpaper, glass wallpaper, vinyl, liquid, etc.);
- all kinds of design solutions;
- a range of prices available to different categories of buyers, literally from pennies to very expensive ones, when one tube costs several thousand rubles;
- simple gluing technology, which allows you to do the finishing yourself.
And it’s very disappointing when work done with your own hands requires redoing after a couple of years - the sheets began to fall off, dark spots appeared in some places, etc. The reason is not bad glue or lack of experience of home decorators. Simply, no primer was applied to the surface of the walls before wallpapering.
Do I need to prime the wall before wallpapering?
Thousands of skeptics will object: “fathers and grandfathers did not know what a primer was, and the wallpaper hung on the walls for decades.” They are partly right. Indeed, several decades ago, if walls were primed, they did it either with very liquid homemade glue, or using diluted PVA glue.
However, this statement ignores the fact that wallpaper at that time was paper, and therefore lightweight. Therefore, glue based on starch or flour easily held them on the wall for a long time. In addition, the types of walls did not have variety: brick, wooden, which were necessarily plastered with cement-sand mortar, and concrete. Their adhesion to the adhesive was good.
With the advent of new types of wallpaper (heavy, with different bases) and types of wall materials (aerated concrete, gas silicate, etc.), as well as the beginning of the use of gypsum board (plasterboard), GVL (gypsum fiber sheets), OSB (oriented strand board) for dry plaster and plywood, it has become very difficult to achieve good adhesion of walls with wallpaper using glue. A primer for walls under wallpaper was able to solve the problem.
A primer (another name is “primer”) is a special liquid composition that is applied to the surface to be pasted to create reliable adhesion between the wall and the wallpaper glue. Is it always necessary to prime walls before wallpapering? Almost always. There are three exceptions when this type of work is impractical:
- repairs are temporary, for four to five years;
- purchased light paper wallpaper;
- Pasting is done in the utility room.
In other situations, applying a primer allows you to:
- improve adhesion between the wall and the adhesive mass;
- bind dust microparticles that could not be removed during preparation of the wall for wallpapering;
- increase the resistance of the wall surface to mechanical damage and protect it from the occurrence of microcracks during operation;
- protect walls from damage during subsequent removal of old wallpaper (especially important for drywall);
- prevent the appearance of fungus and mold on the glue thanks to the drugs added to the solution;
- hide darker spots on the wall surface (a special pigment primer is used, which levels out the high contrast in the color scheme), which are visible through light or thin trellises;
- reduce wallpaper glue consumption by:
- filling microcracks, pores and small irregularities with a primer composition (having a high dispersion of particles, primer solutions penetrate deep into the wall material and stop the pores and cracks into which glue would get);
- creating a water-repellent layer on the wall, as a result of which concrete, plaster, putty, drywall do not draw moisture from the adhesive mass: as a result, premature drying of the adhesive is prevented and, therefore, it is not re-applied.
Make a decision: “for” or “against” priming walls?
Many people think that before they start gluing wallpaper, it is not at all necessary to apply an emulsion layer, spending money, time and effort on this. For good adhesion, adhesive bases have been invented, which are considered a popular method of preparatory work. It turns out that you can do without a primer?
A primer is not so necessary if you do not want to make permanent and long-term repairs. In the case of sticking simple paper wallpaper, a primer is also optional.
The purpose of the primer mixture is to increase the adhesion of surfaces to the finishing material. When using it, the consumption of the adhesive composition on which the wallpaper is applied is significantly reduced. No matter how strange it may sound, the composition of the primer can prevent the appearance of mold and putrefactive deposits on the walls under wallpaper and other types of coverings.
It is considered preferable to use priming before gluing non-woven or vinyl wallpaper, which has a heavy and dense structure.
So, primer can and should be used for:
- confidence in your long-term and practical repairs;
- cost-effectiveness of wallpaper glue and adhesive mixtures;
- desire to protect wall surfaces from cracks and gradual destruction;
- the need to prevent the appearance of pests and moldy spots on the walls under the wallpaper.
Types of primers and their characteristics
The choice of primer for wallpaper is completely determined by the type of material on the surface of which it is planned to apply the primer. Unfortunately, in various articles on this topic, the authors of popular educational works mislead buyers by claiming that there is a special primer for non-woven, vinyl, and paper wallpaper.
Why is there no primer for a specific type of wallpaper? Let's figure it out. For each type of wall material, the wallpaper adhesive must contain a special component responsible for adhesion of the adhesive mass to that particular surface. There are about 12 types of such surfaces. For convenience, let's round to 10.
Then the manufacturer of glue, for example, for paper wallpaper, is obliged to produce 10 varieties of it (for each surface). There are also about 10 wallpapers with different bases. As a result, it turns out that there should be at least 100 types of adhesive mass on the building materials market. This is irrational neither for producers, nor for sellers, nor for buyers.
With the advent of the primer, which acts as an intermediary between the wall and the glue, it is necessary to produce 10 types of primer for each type of surface and 10 types of adhesive mass for the corresponding base of the wallpaper.
The whole variety of primers on the construction market can be sorted by release form, type of solvent, purpose, type of soil. This knowledge will make it easier to find the product you need.
According to the release form. On sale you can find:
- liquid solution, ready for use;
- concentrate that needs to be diluted;
- dry mixtures that require preparation.
By type of solvent. In production, the following are used as solvents:
- water (water-based primer);
- organic solvents (acetone, butyl alcohol, isopropanol, white spirit, etc.).
By appointment. Depending on the functions performed, the primer is divided into:
- penetrating (for concrete, brick, stone);
- strengthening (plasterboard, gypsum fiber board, all types of cellular concrete, gas silicate, etc.);
- adhesive (for cases when you plan to stick wallpaper on glass, tiles, plastic).
By type of soil. The primer can be acrylic, alkyd or mineral.
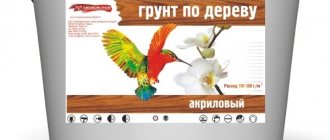
Acrylic primer (water-based). This is the most versatile type of primer. Acrylic can be used on almost all types of wall materials: concrete, brick, wood, plywood, cement-based plaster, etc. According to its intended purpose, it is available in deep penetration, impregnating (strengthening) and adhesive. Easily soluble in water, odorless, dries quickly.
Available in the form of: dry mixture, concentrate, ready-made solution and primer mixture in a can. When special substances are added, the primer acquires antiseptic properties (used in the kitchen) or becomes pigmented (hides bright color spots). The most popular brands are: “Alpina”, “Ceresit”, “Composite”, “Knauf”, “Perfecta”, “Starateli”.
Alkyd primer. This type of primer is based on alkyd resins diluted with organic solvents, mainly white spirit. The application is almost universal - all types of wall materials with the exception of plasterboard, gypsum plasterboard, putties and plaster based on cement and gypsum (alkyds destroy them).
It has an unpleasant pungent odor that occurs due to volatile substances released within 15-18 hours. After prolonged ventilation, the air is completely cleaned. Can dry up to 16 hours. Due to the presence of polymers in the composition, it forms a film on the wall surface that can withstand large temperature differences (from -40 to +60 ° C) and mechanical stress.
The presence of a water-repellent film allows the primer to be used in the bathroom and kitchen. Available only in ready-to-use form. If it is necessary to dilute for a more liquid consistency, use white spirit, regardless of the solvent used in the primer. The disadvantages include the toxicity of the composition, which disappears after polymerization of the film.
It has varieties: glyphthalic, perchlorovinyl, polystyrene and polyvinyl acetate primer. Produced by the widely known “Aura”, “Tikkurila”.
Mineral primer. The composition of the mineral-based primer includes cement, gypsum and lime, which bind the base of the wall made of concrete, expanded clay concrete, brick (gas silicate brick and blocks), as well as plaster and putty with wallpaper glue. It has no odor and dries quickly.
They are produced by Ceresit, Caparol, etc. It is very difficult to find mineral and alkyd primers on sale. The reason lies in the fact that acrylic primers cover all the problems that arise before wallpapering, but at the same time they are much cheaper.
Removing wallpaper
This activity is associated with disorder. Therefore, it is best to move all the furniture to another room, and protect the floor and other elements, such as contacts, sockets or window sills, with film and masking tape. Thanks to this, you can avoid getting glue and debris on them, and also get free space in which you can work freely
It is equally important to equip yourself with the appropriate tools: a joint knife, a spatula, sandpaper, a bucket, a sponge, a paint roller, a brush or a paintbrush.
Wallpaper can be removed dry - by hooking it from the corner with a spatula, tearing it off the wall. But this is a very labor-intensive task and you need to be careful not to damage the plaster. Therefore, it is better to remove wet, moistened with water or a special preparation.
To do this, you need to completely saturate them with a damp sponge and wait until they soften, and then remove them. You can also use a spray bottle filled with water, wait until the wallpaper absorbs the moisture, and then peel it off the wall. If some fragments do not move away from the base, you need to repeat the action, and sometimes even several times.
To quickly and efficiently remove wallpaper from any wall, it is recommended to use a special preparation - wallpaper remover. The product is intended for all types of wallpaper (paper, vinyl, glass). It comes in the form of a concentrate, which must be diluted with water in the proportions specified by the manufacturer. Apply the prepared solution to the wallpaper with a brush or roller. The agent is absorbed into the wallpaper, dissolving the glue, making it easy to remove the wallpaper from the wall without damaging the plaster. For convenience, you can cut the wallpaper with a knife in several places so that the solution penetrates better inside. The best way to remove wallpaper is to pull the top corner down at a slight angle.
Selecting a primer based on the type of wall surface
In terms of popularity, depending on the type of walls, the following primers are leading among buyers: “Ceresit” and “Knauf”. Their comparative characteristics are given in the table (prices taken for St. Petersburg as of mid-summer 2021).
| Primer name | Packing | Primer type | Surface type | Consumption per 1m2 | Price from, rub. |
| Ceresit CT 17 | 10 l | acrylic | concrete, brick, plasterboard, wood, plaster and putty, gas silicate blocks | 0.05-0.25 l | 510 |
| Ceresit CT 19 | 15 kg | acrylic adhesive | concrete walls, glass, tiles, plastic | 0.3-0.75 kg | 1165 |
| Knauf "Tiefengrund" | 10 kg | alkyd | GKL, GVL, gypsum putties and plasters | 100 gr | 690 |
| Knauf "Grundirmittel" | 15 kg | alkyd | gas and foam concrete, sand-lime brick | 0.2-0.3 l | 3000 |
| "Optimist" | 10 l | acrylic | tree | 0.1 l | 547 |
To summarize: primer for wallpaper, which one to choose? This is an acrylic primer: universal, easy to apply, odorless and non-toxic.
If you are not satisfied with the choice or want to save money, then you can prepare your own soil.
Required:
- boiling water - 7 l;
- drying oil - 0.1 kg;
- laundry soap - 0.15 kg;
- lime (slaked) - 2 kg;
- bucket - 2 pcs.;
- fine sieve - 1 pc.;
- grater - 1 pc.
Soap is grated on a fine grater and diluted in 3 liters of boiling water. When it completely disperses, drying oil is poured in and the composition is stirred. 4 liters of boiled water is poured into another bucket and lime is added.
The solution is also mixed. Water with soap and drying oil is poured into the milk of lime and mixed. The slightly cooled homemade primer is filtered through a fine sieve. The cooled mixture can be used for its intended purpose.
How to clean the surface?
An important procedure before applying new wallpaper is to get rid of old coatings. This will require a number of cleaning tools that are easy to find in hardware stores.
Cleaning the base for new wallpaper is not that difficult if you follow some basic rules:
It should be remembered that near heating appliances and near windows, wallpaper comes off quickly, and this process does not require much energy.
If this cannot be done the first time, wet the wall with water and then remove the remaining wallpaper with a spatula. If you have to remove old vinyl wallpaper, in this case it is important to first remove the vinyl layer, and only then the paper itself. Hot steam will help you remove non-woven wallpaper
This way the old canvas will be removed very quickly.
- If the task is to get rid of old washable wallpaper, then this can only be done in layers. First, a thin layer is removed, then the paper layer. Using a steam iron or steam cleaner will also help greatly here.
- Another challenge in the cleaning phase is paint removal. In this case, you can resort to several methods of removing the coating. You can try to clean the base with your hands and using tools. A regular hammer or wire brush will work well.
An alternative option would be to use chemicals, the list of which is extensive and available for sale. After this method of cleaning, it is necessary to wash the wall, preferably two or three times:
- If there is whitewash left on the wall, it should be of high quality, also without cracks or chips. On this basis, the new wallpaper will stick well. However, whitewash is not always of good quality and may crumble. In this case, it should be cleaned to avoid future problems.
- Next, you need to clean the wall to get rid of debris and dirt using a vacuum cleaner or broom with water.
- At the end of the stripping of the base, it is proposed to evaluate how ready the surface is for gluing.
Flow calculation
To determine the amount of primer required, it is necessary to calculate the area of the walls minus the openings of doors and windows. Multiply the resulting amount by 2 (the number of passes) and multiply again by a factor of 1.1 (unforeseen losses of 10% are included).
Then, using the table below, calculate (approximately) the number of canisters or bags of primer. A more accurate figure can be obtained directly when purchasing a primer - the packaging indicates the consumption in g/m2 or ml/m2.
| Type of primer | Wall type | Consumption in g/m2 |
| Thinned acrylic | wood, iron | 40 |
| Unthinned acrylic | plywood, chipboard, OSB, sawn wood | 140 |
| Alkyd | brick, concrete | 135-150 |
| Acrylic | for all types of material except wood | 100 |
| Universal | for all types of walls | 65-100 |
Benefits of primer
Primed surfaces acquire a number of advantages:
- fungal protection;
- uniform and economical distribution of wallpaper glue;
- removing construction dust and filling microcracks and pores, creating a protective film;
- saving wallpaper glue and uniform application.
Even if priming surfaces can become an additional expense item in the renovation estimate, and also take time, it still pays dividends in the form of additional protection for the walls of the apartment, and also simplifies the process of wallpapering.
Instructions for applying primer to the wall
How to prime walls before wallpapering? The whole process consists of 3 technological operations:
- preparing the wall for taping;
- preparing the primer mixture;
- directly to the primer itself.
Preparatory work
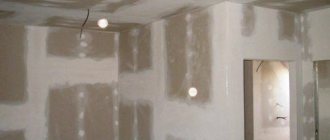
The surface of the walls can be treated with primer only after they have been prepared for wallpapering. At the same time, preparatory work in a new building and a lived-in apartment can differ significantly.
In a new house, the walls are cleaned of construction dust and, if necessary, leveled with plaster or gypsum plasterboard (GVL). If an already occupied living space is being renovated, it will take much more time to bring the walls into working condition. Necessary:
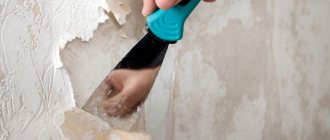
- remove old finishes (paint or wallpaper);
- check the plaster, if it was previously applied, for any loose spots from the wall and, if necessary, remove it completely;
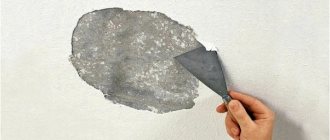
- inspect the walls for microcracks and repair them;
- plaster the surface of the walls.
Detailed instructions for this item are given in the material: “How to prepare walls for wallpapering.”
Preparing the priming mixture
Depending on the form in which the primer is purchased, the technology for preparing the mixture depends.
- The finished primer does not require additional manipulations to bring it into working condition (just shake). However, when working with concrete or reinforced concrete walls, experienced craftsmen dilute the primer for the first layer - acrylic compounds with water, alkyd compounds with white spirit.
- Concentrates are diluted according to the recommendations printed on the packaging.
- To prepare a primer solution from dry mixtures, you will need a mixer, a bucket and a solvent (water or white spirit). The dry mixture is poured into the poured water in the proportion specified in the instructions and stirred with any object (trowel, stick, etc.) until lumps of the dry mixture disappear from the surface of the water. After this, the solution is kneaded with a mixer until a homogeneous mass is formed.
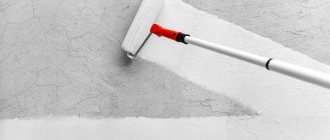
Primer of walls
The priming stage consists of a cycle of sequential work.
- A plastic film should be spread along the wall to protect the floor from splashes that are generated when working with a roller or brush.
- The primer is poured into the cuvette up to the level of the ribbed area.
- A roller is lowered into the primer solution and wetted around the entire circumference.
- The roller is wrung out on the ribbed surface of the bath - otherwise a lot of the mixture will end up on the floor.
- Priming starts from the bottom and works upward - in this case, drops of primer flow down the wall rather than flying onto the floor.
- The soil must be rolled out into a thin film, avoiding traces of drips. It is necessary to go over the leaked solution with a roller again.
- In corners and hard-to-reach places, the wall is primed with a paint brush.
- The second layer is applied after the first has dried.
Finishing work begins after the primer has dried.
How to prime with your own hands
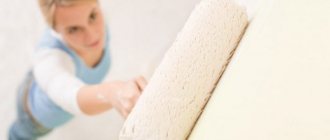
Do-it-yourself repairs are a cost-effective endeavor. Priming walls is similar in the set of steps to the process of painting walls with a roller. To prime the walls you need: a primer, a high-pile roller, a tray with a wringer, a brush.
When applying primer to walls, one must not forget about personal safety measures. First of all, you need to take care of protecting your eyes and hands, for which you need to use special glasses and gloves.
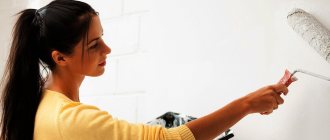
How to apply correctly
Initially, the primer is prepared according to the manufacturer's recommendations. After dilution, the first portion is poured into a tray with a squeeze. Then wet the roller in the primer, squeezing it thoroughly, since the primer itself is very liquid and pliable, and therefore splashes easily when applied.
Apply to the wall with smooth movements from bottom to top, preferably in a strip from the floor to the ceiling. In many cases, the problem arises that during the process it is difficult to determine the places where the primer has already been applied.
Many masters recommend two methods of control:
- The light method is to apply the primer to the light in relation to the window, that is, you need to start priming from the window to the door. Then, at any difficult moment, looking along the wall in the direction of the window, it is easy to see wet places;
- color, initially, when diluting the primer, add a color to match the wallpaper.
How many times should I apply
In the process of priming a wall, the number of layers of coating depends on the type of primer chosen, the wallpaper material, as well as the quality and material of the walls.
To achieve a good result, it is recommended to coat with a primer:
- acrylic - at least twice;
- alkyd - twice;
- latex - two layers are enough;
- glyphthalic - one layer is applied;
- Prime with wallpaper glue once.
How long does it take to dry?
Depending on the selected primer, the number of layers and material, the drying time of the primer differs.
- Acrylic - 2-3 hours.
- Alkyd dries in 4-5 hours.
- Latex - 3-4 hours.
- Glyphthalic - 6-8 hours.
- Wallpaper glue - 10-12 hours.
When can I glue after several layers?
Masters recommend starting the wallpapering process after the primer layer has dried. However, if the walls were primed with wallpaper glue, it is recommended to start gluing the wallpaper without waiting for it to dry completely.
How to dilute white primer
White primer is a water-based acrylic primer. This material is sold as a white concentrate, which must be diluted in a ratio of one to ten before use. The manufacturer indicates on the label the appropriate primer dilution recipe for the type of wall.
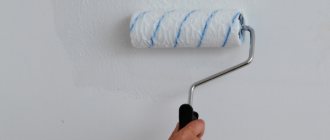
The better to smear
To make it easier to apply acrylic or latex primer to the wall, it is recommended to use a wide roller with thick bristles.
Alkyd or glypthal primers must be applied to a vertical surface with a short-nap roller.
All soil mixtures are applied from the bottom up to prevent runoff. To apply various types of primer in hard-to-reach places, for example, the corner of two walls, or in delicate places that require caution - the edge of a wall near baguettes, it is recommended to use paint brushes.
Is it necessary to prime before applying new wallpaper after removing the old ones?
Painters recommend priming walls before gluing new wallpaper. In particular, if the walls have not been primed before, this procedure will prepare them. Secondly, priming the old primer layer will restore its maximum adhesion properties, and therefore gluing will take place without negative consequences.
How long can it take to glue?
Depending on the type of soil chosen, wallpapering can begin almost immediately after the walls have dried. If the primer and wallpaper glue are water-based, it is allowed to stick paper and non-woven wallpaper without waiting for the working surface to dry completely. If they are treated with alkyd or glyphthalic material, then gluing should begin only after the soil has completely dried.
Can I replace it with wallpaper glue?
Professional finishers, as one of the options for preparing walls, offer priming with wallpaper glue, which will allow you to:
- remove and clean the surface from remaining construction dust,
- fill microcracks and pores in the wall covering;
- increase surface adhesion.
When priming with wallpaper glue, it is recommended to use the same brand of glue that will be used to glue the entire array of wallpaper. Preparation of the adhesive mixture for priming is simple: you need to dilute the glue in warm water, taken in double the volume as prescribed.
When can you start wallpapering?
After applying several layers of primer, many inexperienced finishers immediately begin gluing the wallpaper and, thereby, make a big mistake. Then a logical question arises: how long after priming can you glue wallpaper? Only after the primer has completely dried.
For aqueous solutions this time can be from 2 to 15 hours, for alkyd primers - up to 35 hours. The estimated drying time of the solution is always indicated on the packaging. However, under the influence of various factors it can fluctuate significantly.
In practice, experts check the readiness of a wall to be covered with drops of water. If it spreads like a stain, you need to wait further. On a dry surface it will slide down.
Why is this necessary?
Usually, beginners begin to have questions after the process is completed, and the freshly glued wallpaper does not want to stay on the wall and tends to fall off. Let's consider a common cause of failure in this matter - the lack of primer on the wall.
Priming the walls
The answer to the question whether the walls need to be primed before wallpapering should be answered positively. Of course, without this they may not fall off; moreover, this also will not provide a 100% guarantee against trouble.
Mixture for preparing walls before wallpapering
Preparatory process
The walls, of course, differ in structure, and this must be taken into account when preparing. But most often the same procedures are performed:
- Level the surface.
- Get rid of imperfections using putty.
- Clean and prime the surface.
Alignment
To prepare walls for painting after wallpaper or other material by leveling, the surface can be:
- Grind. You can grind a fairly strong base, the level of which changes by no more than 2-3 mm. In addition, it should not have significant defects. This removes the old coating and a small layer of plaster underneath. To do this, use a simple tool: a block with sandpaper wrapped around it.
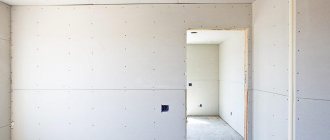
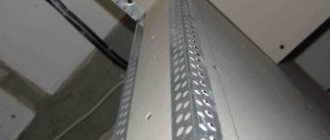
- Level with plaster. If there is significant curvature of the surface, plastering along the beacons or finishing with drywall is performed.
Important! After the leveling procedure, the walls must be primed and dried for six to seven hours. Use drywall sheets
The simplest and at the same time effective way to straighten even very crooked walls
Use drywall sheets. The simplest and at the same time effective way by which you can even out even very crooked walls.
Important! The only caveat when using plasterboard sheet material is a large “cut” of the usable area of the room
Puttying
The first layer is applied with starting putty, which is sold as a ready-made solution or dry mixture. To apply the starting putty, a fiberglass painting mesh is used:
- Apply 2-3 mm putty to the surface using a wide spatula.
- A narrow spatula is used to smooth out small ridges and spread the solution.
- We put a painting mesh on the wall and rub it into the putty using a spatula.
- Apply starting putty to the mesh with a layer of 2 mm.
- Dry the surface for 5-7 hours.
- We rub down the wall.
Important! Finishing putty is used to get rid of the marks left by coarse grout. Its consistency is uniform and finely dispersed, so the surface ends up being perfectly smooth.
In addition, paint does not absorb much into it.
The finishing putty is applied in the same way as the starting putty, but its layer will have a different thickness. The optimal layer thickness is considered to be 1.5-2 mm. When the surface is dry, it needs to be sanded using fine-grained sandpaper.
No. 6. How to remove wallpaper glued to PVA
PVA glue is a water-insoluble composition, so traditional methods do not work well with it. You can try adding laundry soap or vinegar to the water, or both together, or you can do it a little differently.
Use a spatula and a sander. Using a spatula, try to carefully remove those parts of the wallpaper that give in. Residues and large pieces can be removed with a sander, but in this case it is worth remembering that you run the risk of damaging the main surface. Most likely, after completion of the work you will have to level the walls.
Also, do not forget about the most effective method - steaming.
Removing from a plasterboard wall
Removing wallpaper from drywall sheets is a task with an asterisk. The thing is that the top layer of drywall is made of paper. It is not difficult to understand that the surfaces of wallpaper and walls made of paper are glued with a stranglehold. How to remove wallpaper from a plasterboard wall? In this case, it is necessary to use only the removal agent, since there should be no impact on the wall. After application, work carefully to avoid damaging the drywall sheet. Well, if the coatings are glued rigidly (possibly with PVA or similar glue), then based on the appearance of the sheet of drywall after removing the coating from it, it is better to conclude that further stripping is advisable. You may have to replace the sheets with new ones.