Primer for drywall under wallpaper: selection and application of impregnation
Before you begin finishing drywall for final application, you need to decide on the issue of priming the material.
Naturally, the question often arises whether this makes sense and whether it is necessary to apply an impregnating layer for gypsum board. This is exactly what we’ll talk about, citing all the advantages of priming gypsum board before wallpapering.
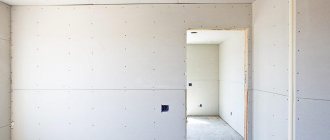
Photo of plasterboard walls for wallpapering that need to be primed
Drywall and impregnation
There is no doubt that the surface of the gypsum board itself (as plasterboard is called after the largest manufacturer in Russia - Gyproc) requires virtually no preparation or additional processing, but the material itself requires additional processing, especially if we are talking about applying wallpaper as a finishing touch. finishing.
However, even so, there is no consensus among builders as to whether it is necessary to prime drywall before wallpapering. This is due to the fact that the physical properties of gypsum board are somewhat different from those of a conventional plastered surface or concrete base.
Gyprok differs from a regular concrete wall in its surface structure
There are basically three opinions on the issue of priming:
- Drywall does not need treatment . The coating of the sheets is capable of providing excellent adhesion to wallpaper, especially paper, even without additional material, due to the fact that the gypsum board is covered with cardboard.
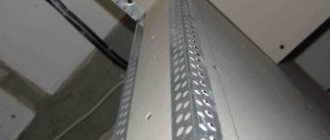
- The second opinion involves impregnation only of the drywall seams that have been puttied , and therefore do not have the same qualities as the main surface material. Plus, this offers a wonderful opportunity to save on impregnation, and the price of the entire work will hypothetically decrease.
- The third party to the debate suggests applying impregnation completely to the entire surface of the gypsum board , waiting for the material to dry and only then proceed with gluing.
An option in which it is proposed to process only the seams and places of screws
Important! However, in practice, it immediately becomes clear that a primer for wallpaper for drywall is still the preferable option, and there is certainly no point in saving on it.
Reasons for priming
Despite the divergence of opinions about impregnation, it is necessary to apply it before wallpapering, and there are a number of undeniable reasons for this:
- Impregnation improves the adhesion of putty to cardboard, strengthening the gypsum board itself, giving it additional strength, which increases its service life.
- Primed drywall will require less adhesive. In the absence of impregnation, wallpaper glue can act as a primer, and therefore its consumption increases several times.
- When re-pasting, the old wallpaper can be easily removed; dismantling will not require any effort or time.
- If the wallpaper is to be painted, then it is the primer that provides additional strength, at which you can safely apply several layers of painting and the material will still not move away from the wall.
Important! Speaking about dismantling wallpaper, it is worth saying that without a primer they will be dismantled along with the cardboard covering on the drywall.
- Even if, after pasting the wallpaper, a layer of paint is applied to it, then due to the fact that the plasterboard primer is applied under the wallpaper, the consumption of paints and varnish will decrease significantly.
Impregnation will allow you to properly dismantle the wallpaper later
Regarding the financial side of the issue, we can immediately say that the cost of the primer is never high, and therefore even complete impregnation of absolutely the entire surface of the drywall before gluing will not have a strong impact on the overall estimate.
However, applying the material will definitely reduce the costs of other work, because with a primed wall there is no need for a massive layer of glue or paint on the wallpaper. Thus, without leading to financial costs, primer paint also allows you to save on other materials.
How to choose a primer
There are several options for impregnation for surfaces, but not all impregnations that are on the market today are suitable for future wallpapering on gypsum board. Fortunately, each material comes with instructions that fully explain its purpose.
When choosing, you should simply abandon the impregnation that is used for outdoor work. Not everything in it is always environmentally friendly and safe - toxic substances and compounds are not dangerous outside, but indoors they can cause trouble.
As a rule, the most common material remains an acrylic universal primer, which can be used under wallpaper on any surface, including gypsum boards.
When choosing, it is best to buy a primer from a well-known brand, rather than a cheap analogue; any rework after repair is always more expensive than the repair itself. Here the option is not only that the composition of such a primer is unknown and it is not clear how it will ensure adhesion, but you can also run into a frankly toxic impregnation.
If the primer is presented in color, then this is a very convenient moment; when applying it, you can immediately mark the places that remain unpainted.
Application
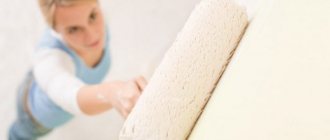
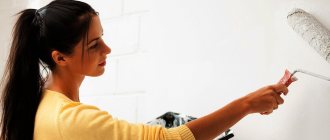
To apply the primer, you can use the simplest tool available for painting work, which is a roller and a paint brush. Moreover, you can work with your own hands, there is nothing clever or complicated in application, so anyone can handle the process.
It is easiest to work on drywall with a roller, and preference is given to a tool with a long handle so that you can easily reach over the entire surface.
In addition to a roller and a brush (needed for normal painting of corners), you will need a painting tray. Everyone chooses personal protective equipment such as glasses and gloves. If the floor is already laid when painting begins, then it must be covered with newspapers or polyethylene.
As for the application itself, you can work in any order; no one will see the primer layer. The only requirement is not to skip sections of the wall. You can prime in one or two layers; for this you will need to wait until the first layer has completely dried. It occurs differently for different materials, from 5 to 24 hours, so you just need to find out the exact time from their instructions for use.
Instead of a roller, sometimes you can just use a wide brush
Advice! If the primer is supposed to be applied to previously puttied drywall, then the putty must first be sanded with emery cloth or a grater, and only then painted over.
Stages of preparing plasterboard walls for wallpapering
The process is carried out exclusively in strict sequence.
Primer
This procedure is often considered optional, but it significantly increases adhesion and eliminates peeling.
For work you will need the following materials and devices:
- Primer mixture. Polymer deep-penetrating compounds are preferred. If the treatment is carried out in a room with high humidity, the solution should help increase the water resistance of the surface. The presence of an antiseptic additive will prevent the formation of fungus and mold that appear on unprotected substrates under the influence of moisture.
- Container for the mixture.
- Roller for large areas, brush for hard-to-reach places.
At this stage, general strengthening and adhesion-increasing compounds are used.
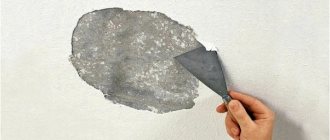
- Preliminary jointing of the joints between adjacent gypsum board parts is carried out if the edges do not have a chamfer. The areas are cleaned of dirt and dust.
- The surface is primed evenly without excess. Particular attention is paid to the seams: they are treated with a brush.
When performing processes in a room with stable humidity, one layer is applied, in the bathroom, hallway, kitchen and loggia - at least two.
Sealing joints
The presence of gaps between adjacent elements is a prerequisite that helps prevent damage to the surface during shrinkage of the structure. This is especially true in a wooden house or a recently built high-rise building.
To cover the joint areas of plasterboard parts, you need to prepare:
- Putty. It is recommended to use elastic acrylic compounds, but the treatment can also be done with a regular gypsum mixture.
- Reinforcing tape or mesh.
- Medium and small spatula.
- Tools and container for preparing the solution.
Proper sealing of joints allows you to paste the surface without causing problems in the future.
To reinforce joints, you can use either fiberglass or special paper tape.
- The composition is mixed according to the instructions, the finished product is mixed. It is important that the solution has a viscous consistency.
- The mixture is scooped onto a wide spatula and distributed over the joints with a small tool. All areas must be filled. It is also necessary to cover the adjacent space with material.
- Exactly in the middle, you need to stick a reinforcing tape or mesh onto the solution.
- A layer of putty is applied on top, after which the areas are leveled.
Separately, it is recommended to treat the places where screws are screwed in. The hats are coated with waterproof paint, which completely eliminates the appearance of rust.
Advice! If branded mixtures are used, then it is advisable to choose serpyanka from the same manufacturer.
External corner protection
External protruding areas are subject to the greatest impact and therefore require a special approach.
To work you will need:
- Solution (similar to the previous option).
- Set of spatulas and level.
- Perforated metal corner. It is better to purchase options with reinforcing mesh. There are also plastic varieties that can be quickly glued if you wet the inside with water.
Corners for reinforcement can be metal or carbon fiber; the second option is considered to be of higher quality, as it is stronger, lighter and not afraid of corrosion.
- The gap between the plasterboard fragments is covered with a small amount of the compound. If the perforated part has a mesh, then the adjacent areas are processed.
- A little mixture is applied to the inside of the corner, after which the element is pressed into place and leveled.
- The solution is distributed evenly over the entire part from above.
- For greater convenience, one part of the wall is processed first. When the composition has set a little, another one is finished.
Reinforcement of external corners
You can simplify the work with the corner segment by using two spatulas: the blade of a wide tool is applied exactly along the edge of the base, and the second device is used to level the applied mixture.
Wall putty
To properly prepare drywall for wallpapering, the entire surface is treated. This process is not always necessary, but if it is necessary to dismantle the decorative layer, the intermediate coating will protect the drywall from destruction.
For puttying you will need:
- Finishing mixture. To calculate the required amount of composition, the area of the walls is measured. The layer to be laid should not exceed 2–3 mm.
- Wide and medium spatula or rule.
- Container and accessories for mixing the solution.
- A mixture of viscous consistency is prepared. The composition is prepared without excess, since it cannot be restored after setting.
- They start putting putty from the corner, this will simplify the formation of the inner segment. The solution is spread over the blade of a wide spatula or rule, the tool is pressed against the wall from below at a slight angle and rises, moving slightly to the side.
- Consecutive actions form a homogeneous layer.
The process of puttying drywall with your own hands is not difficult, but working with a wide spatula requires a certain skill.
It is necessary to cover the surface evenly and without stopping, treating the maximum space.
On a note! Creating an inside corner is much easier if you use a corner spatula, but it does take a little practice.
Grouting the surface
Complete leveling allows you to achieve an ideal base, which is especially important if you need to paste with paper roll materials. The technology involves two methods of work:
- Using a grater with mesh or sandpaper. To finally finish the base, it is important to wait until the putty has completely dried. The tool is made in a circular motion with constant checking. To do this, use a lamp that illuminates the surface at a slight angle. Particular attention is paid to the corners. Work is carried out in a respirator and goggles, as a lot of dust is generated.
- Glossing of the plaster composition. The coating is left for 2 hours, after which treatment is performed. To do this, you can use a spatula or grater: the tool is constantly moistened in water and smooth out all the irregularities. This method requires certain skills.
To prepare the surface for wallpapering, glossing is not a necessary step; high-quality sanding is sufficient, but with its help it is easier to bring the wall to an ideal state.
Grouting external and internal corners is a responsible procedure, since it is in these places that the main defects form. If the defects are not eliminated, then adjusting the adhesive strip can be very problematic.
Wallpaper on drywall
Drywall is a building material used for leveling walls and ceilings, creating partitions, and producing many elements of furniture, fireplaces, and podiums.
How can you make a wall finished with this material beautiful, durable, and multifunctional? Do I need to putty and prime drywall? Is it possible to glue wallpaper onto gypsum boards without putty?
Wallpaper has always been a popular finishing material. The most common and frequently arising questions are discussed in the article.
Can it be glued or not?
The coating is glued to the plasterboard surface only after all work with the mixtures has been completed. Otherwise problems arise:
- Wallpaper glue is absorbed into the surface created from KG sheets, so it will be impossible to change the trellises. They are removed along with the cardboard covering. This will damage the surface.
- Change in wallpaper color. GCR has its own colors - gray, green, red (pink). When gluing light, thin wallpaper, the color will change, which will damage the appearance.
- When pasting light-colored trellises, the joints and fasteners on the surface can be seen. After drying, the coating has a striped and spotted appearance.
In order to save money, the trellises are glued to the gypsum board surface without putty, however, a number of measures are carried out.
Is it necessary to putty
To save time and materials, home craftsmen do not always putty gypsum board sheets before gluing, but some rules should be followed:
- The surface of the walls is thoroughly cleaned of construction dust; you can use a damp cloth.
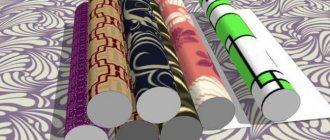
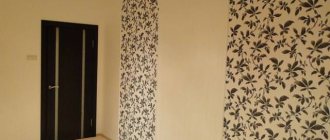
- Choose wallpaper that is dense, bright, and textured—the seams between the sheets will be invisible under it.
- If you use light, thin wallpaper, the joints and places where the self-tapping screws are installed still need to be glued with sickle tape and covered with putty.
Before gluing, control markings are made on the sheets. Wallpaper quickly sticks to the cardboard covering, so you should work carefully. It will not be possible to align the stripes later; there may be gaps between the canvases that cannot be hidden.
Advice! It is possible to glue wallpaper onto drywall without first treating the surface with putty, but it is not recommended.
Is it possible to apply liquid wallpaper to drywall without putty?
Liquid coating is a finishing material for a flat surface, suitable for drywall. It is plastic, durable, and provides additional protection for the HA surface. Since wallpaper is sold in the form of a dry mixture, it is diluted to a certain consistency. The mixture has the following qualities:
- The mixture applied to the surface does not have seams.
- Does not contain any harmful impurities.
- Increased sound and thermal insulation.
- Liquid formulations do not tolerate moisture.
- Absorbs odor and dust.
To apply the wallpaper mixture to a plasterboard surface, the following preparatory work is carried out:
| No. | Material used | Application on HA surfaces |
| 1. | Primer | Cover drywall, especially fastening points, as well as after puttying |
| 2. | Reinforcing tape | Close all gypsum board joints using KNAUF putty. |
| 3. | putty | Apply the finishing mixture to cover the plasterboard surface. |
After filling, the surface must dry. It is cleaned of remaining pieces of solution with sandpaper. Afterwards they prime.
The liquid coating is prepared according to the instructions on the package.
There is no need to pour water into the wallpaper mixture “by eye”. There is strict adherence to the technology for preparing wallpaper for application.
Working with a mixture of wallpaper on a GC surface:
- Before direct application, the mixture is thoroughly mixed to achieve uniformity.
- Place a piece of wallpaper on a plastic tool and distribute it evenly over the surface, starting from the corner.
- If unevenness appears during the distribution of wallpaper over the surface, it is possible to correct them within an hour.
- It will take 24 hours to dry.
Having studied the process of applying wallpaper to the prepared gypsum board surface, many home craftsmen avoid mistakes.
Primer consumption
One of the economical options for primer solutions is the acrylic type. Acrylic primer is consumed in approximately 100 ml. per square meter.
To find out how much the selected composition will be consumed, you just need to look at the instructions from the manufacturer. The average consumption is always indicated on the product packaging. It is influenced by the number of layers, surface material, and the experience of the craftsman.
One of the economical options for primer solutions is the acrylic type.
Pasting without putty on primer
This question arises among people who want to apply a finishing finish to drywall. Opinions vary:
- The first group of people believes that there is no need to prime the surface of HA sheets. You just need to cover the joints and fastening points.
- The second group is sure that before gluing the trellises it is necessary to apply a primer to the entire plasterboard surface.
The statement of the second group of people is confirmed by facts:
- Since gypsum board absorbs water, part of the applied glue will go into the drywall. The primer will prevent this. After drying, a thin film will appear, providing protection for the HA surface from moisture, as well as good adhesion to the wallpaper.
- When removing old wallpaper, the process will be easier. But this does not give a 100% guarantee that the top layer of the HA sheet will not be removed along with the wallpaper.
- If a primer is applied to the surface, there is a possibility that the topcoat will not change its color and will not show dark spots.
After such statements, we can say with confidence that wallpaper can be glued to gypsum boards without putty using a primer. However, it is possible that defects may be identified.
How to glue
Before you start gluing onto a gypsum plasterboard surface without putty work, you need to carry out preparations.
If there is old wallpaper on the walls and ceiling, remove it using liquid products, a sponge, or a spatula. After removing the remaining finish, cracks in the old putty may be discovered. It is removed with a scraper.
Where does gluing begin?
If the plasterboard surface is new, carry out the following work:
- It is necessary to inspect the entire surface for flaws - protruding screws, no chamfer at the joint. All defects are eliminated.
- The next step is priming the gypsum board. The mixture coats joints, corners, and fasteners especially well.
- The joints are reinforced with sickle tape or KNAUF paper tape using a mixture of FUGEN, UNIFLOT. The surface is completely dry.
- Afterwards, the applied KNAUF mixture is cleaned with sandpaper to remove small lumps and stripes.
- The fastening points are also covered with Uniflot putty. After drying, clean it.
- All putty joints, corners, and fasteners are covered with a second layer of primer mixture for good adhesion.
- All pencil and marker marks are also covered with a thin layer of putty to avoid the appearance of black spots on the finish coat.
When the surface is prepared, using a laser level or rule, draw an even vertical line on the wall. The length of the strip is transferred to the wallpaper. A section with a margin of 5 cm, that is, if the length of a strip of wallpaper is 2.5 m, then cut off 2.55 m.
12 hours before work, dilute the glue and leave it to dissolve. This is done strictly according to the instructions on the packaging.
Glue is applied to the surface and to the canvas. There are options (non-woven) that do not require you to apply an adhesive composition to the strip, just to the surface.
They begin gluing the strip from top to bottom, gradually smoothing it with a rag from the middle to the side and releasing air, adhering to the mark.
The next strip is glued end-to-end with the first, also smoothing and releasing air.
How to glue in corners
Next, measure the distance from the corner to the last glued strip. The width of the canvas should be equal to this distance plus the approach to the adjacent wall: internal corner 5-15 cm, external corner 2-3 cm.
Often the canvas on the adjacent wall has an uneven border.
Having glued the canvas in the corner, measure the width of the canvas on the adjacent wall and also draw a vertical line along this mark as a guide. Aligning with it, glue the strip with an overlap onto the previous canvas. If the wallpaper has a pattern, select the borders by cutting off the unnecessary strip.
How to stick under the baseboard
There is a wide variety of ceiling skirting boards. All of them are divided into 2 types: soft and hard. Each type has its own principles of pasting.
Flexible and soft skirting boards are glued to the trellises after the surface has dried. To do this, use transparent glue - liquid nails.
The hard ones are fixed to the wall, and then there is pasting, or the finishing coating is already on the surface, but you need to fix the plaster molding to the wall. Then the wallpaper is cut so that 1-2 cm remains under the baseboard. After this, the strip is removed, leaving only drywall. A solid baseboard is fixed to it with gypsum plaster or glue.
If the baseboard is already on the wall, the wallpaper is glued slightly over it. After that, use a spatula to move the plinth a little and insert the canvas. This creates an even angle on the strip, along which the excess is trimmed.
The floor plinth is placed on the cut trellises from the floor. There remains 1-2 cm under the baseboard.
Types of soil for drywall
Primer solutions should be selected taking into account the finishing materials that are decided to be mounted on the wall. They also influence how many layers of the product will be applied, drying time, and the specifics of the work. They buy a product that indicates the possibility of using the material for gypsum plasterboards.
The following types of compositions are distinguished:
- Acrylic, characterized by versatility, can be applied before and after puttying work. Dry in 2 to 4 hours; They are distinguished by their versatility and can be applied before and after puttying work.
- Phenolic, used as a 1st layer of primer, application over putty is not allowed. It is necessary to check the packaging for permissibility of use inside the building; Used as a 1st layer of primer; application over putty is not allowed.
- Alkyd, used on wood. Cannot be applied to a putty layer; Cannot be applied to a putty layer.
- Polyvinyl acetate, it must be taken into account that only similar paints can be painted on top; It must be taken into account that only similar paints can be painted on top.
- Glypthal are distinguished by their high adhesion index. Can be applied outside the building, or in rooms where good ventilation is provided; They are distinguished by a high level of adhesion.
- Perchlorovinyl, limited to use outside the building, can be used on brick, putty, cement materials; Restricted to outside use.
- Polystyrene, also for external use, suitable for plaster and wood. Suitable for plaster and wood.
To make the right choice, we also recommend focusing on the type of finishing material:
- For painting work or wallpapering, it is enough to purchase a regular solution, not a deep penetration primer for drywall;
- If you are going to glue heavy wallpaper, you need a product with deep penetration properties, it helps create reliable adhesion to the surface.
The acrylic type is most in demand due to its universal properties.
The acrylic type is most in demand due to its universal properties.
Acrylic primer
Composition made on the basis of acrylic copolymers. The sizes of the particles included in the primer are several times smaller than the pore diameter of the material being processed. This property of the soil allows it to penetrate deeply into the substrate (up to 10 cm).
The soil goes well with surfaces that absorb moisture. These include drywall. The composition is universal in relation to finishing materials, odorless, non-toxic and can be used both inside and outside buildings. Due to deep penetration, it has surface strengthening properties.
The main characteristics of acrylic primer are:
- vapor permeability - due to this, the surface does not become clogged and can “breathe”;
- versatility - can be used both for painting and for tiling and pasting with any type of wallpaper;
- pore filling – if the pores are well filled, the paint lies smoothly on the surface without changing the tone;
- deep penetration into the surface;
- economical consumption of glue and paint during finishing work;
- high adhesion to materials.
Water-dispersed soil
The definition itself suggests that the composition is prepared on the basis of water. This is a dispersion of polymers in water. After application to the surface, the water evaporates, leaving particles of material that polymerize and create a thin film.
This composition, unlike other types of primers, can be applied not only to the base, but also to the plastered surface. Available in the form of a ready-made solution and concentrate. The concentrate can be diluted with water to the state required by the finishing material. Aquatic soils are characterized as follows:
- safety and harmlessness – the liquid is practically odorless, which allows you to treat surfaces inside buildings and in enclosed spaces;
- high drying speed – 3 – 5 hours;
- non-flammable composition - made on the basis of water, does not burn;
- high efficiency - due to the ability to fill surface pores, penetrates deeply and prepares the surface for any type of finishing work.
Water-dispersed soil, depending on the surface being treated and the desired result, can be divided into several types:
For drywall, universal primer compounds are suitable that will provide good adhesion to the surface, can strengthen the base, have antiseptic properties, and will also save finishing materials.
Features and Recommendations
The process of gluing wallpaper will not be difficult if you follow the recommendations:
- The plasterboard surface does not have small stones or wave transitions.
- All containers and tools must be clean.
- When working with wallpaper, you need to remove all the shortcomings, otherwise it will be impossible or difficult to do this later.
Tips for working with wallpaper on a plasterboard surface:
- The work of wallpapering a room begins with a doorway or window.
- Wallpaper should be measured and cut on a horizontal, clean surface - a clean floor, a large table.
- During gluing, the canvas is completely free of air bubbles. Do this carefully with a soft rag or rubber spatula.
- Excess glue that comes to the surface of the canvas is removed immediately with a damp sponge.
- If the wallpaper has a large pattern, then the consumption of the pattern at the joint is allowed to be no more than 2 mm.
- Trimming of excess trellises is done strictly along a ruler with a sharp knife.
- During work, windows and doors must be closed.
Having familiarized yourself with the recommendations and tips, the work of gluing a plasterboard surface will not be difficult or time-consuming. To avoid unpleasant consequences, such as dark stains from moisture-resistant drywall on trellises, the surface still needs to be covered with putty and primer. This guarantees the appearance of the room and the durability of the trellis covering.
Introduction to the topic
Finishing work on drywall must be carried out after preliminary preparation, which includes sealing the seams, treating the surface with putty and primer.
Ignoring this stage complicates repairs in the future:
- It will be difficult to remove the wallpaper from the gypsum board sheets; the cardboard lining of the gypsum material is removed along with the canvas and glue. As a result, the sheet will need to be completely replaced.
- Another important nuance regarding whether it is possible to hang wallpaper on drywall is changing the color of the finish. GKL sheets are covered with paper of different shades, dark cardboard changes the tone of light canvases.
- Seams, joints and screw heads that are not pre-treated with putty stand out under the wallpaper, especially under thin paper sheets.
In order not to spoil the final result of the repair, it is better to glue the wallpaper onto the drywall after applying putty and primer. In addition to the joints, you need to seal the screw heads. Rust forms on metal products that are not protected from corrosion. It comes through the wallpaper and leaves yellow spots, which looks sloppy.
Important! Before preparing sheets for gluing, you need to make sure that the screws are screwed in correctly. The head of each fastener should be recessed by 0.5 mm.
Do I need to prime drywall before wallpapering?
To prevent this from happening, use a special drywall attachment with a lampshade that adjusts the depth of immersion. In houses that are located near highways, where heavy equipment passes or near a railroad, cracks often appear, and some craftsmen use paper cement bags for drywall joints in such cases. Tips. If you find poorly tightened screws in sheets of drywall, then they must be recessed under the plane.
But, in order not to delay time, eliminating defects with a screwdriver, you can use a drill or screwdriver with a PH-2 attachment. The rotational force of the power tool can drive the screw too far and break through the cardboard, going into sludge - in this case, the fixing function will be lost. Well, the last obstacle is the seams between the sheets. Walls with untreated seams may come apart a little, in which case the wallpaper will tear and crack. A very large percentage of the population performs certain work at home to improve their homes with their own hands and is constantly improving in this regard.
And for those who are interested, we will now look at how to treat drywall before wallpapering and how to do it correctly. The tape, completely covered with mortar, firmly binds the joints and prevents the formation of cracks. All fasteners protruding above the surface are screwed in flush.
Then they are puttied.
Additional work with corners
Wallpaper is pasted not only on a flat surface, but also in corners, both external and internal. The outer corners are already reinforced, so you need to align them. To ensure that the reinforcing corner is not noticeable under the wallpaper, it is necessary to properly level the putty.
It is necessary to ensure a smooth transition from the edge of the corner along the wall. A level or ruler, which is applied to the wall parallel to the floor, will help here. If there are gaps, then you need to align the corners further.
Also pay special attention to internal corners. To make everything as simple as possible, they are glued with cobwebs (reinforcing tape). Moreover, the web is glued along the inner corner on both sides of the wall. This should be two separate pieces of tape. Then everything is puttied.
It is convenient to make an even angle with a special spatula
To make work easier, you can use a special angled spatula. With its help you can easily make an internal corner. You can go with the classic option, leveling one wall and then the second. As a result, the inner corner will turn out by itself.
Primer for drywall under wallpaper: everything you need to know and be able to do
- Unstitching. The joints of sheets that do not have a factory chamfer must be embroidered using a construction knife. To do this, the corners of the adjacent edges are cut at 30 - 45° by 2/3 of the sheet thickness.
The fact is that wallpaper is not glued directly onto drywall . The finishing technology requires a certain sequence of work, which I want to immediately consider. Working with a primer is very simple.
Having absolutely no construction skills, you can easily apply it yourself. For work you will need: When people ask me whether a primer is needed for drywall under wallpaper, I get the feeling that the person is not entirely familiar with the technology of preparing gypsum plasterboard walls before finishing.
- Porous surfaces such as brick, foam concrete, plaster and drywall absorb applied material, including putty, paint, and wallpaper glue. The primer fills the pores and significantly reduces the absorbency of the base, thereby saving expensive materials.
In addition, you will need various containers for priming, mixing solutions, and water for washing tools. When all the preparations are completed, it’s time to start preparing the drywall for the wallpaper - step-by-step instructions for this event will be available in the next section of the article. Pour primer into a bucket or paint bath, take a roller in your working hand, a brush in the other, and begin to saturate the plasterboard with the strengthening solution. The areas are primed with a roller, and with a brush – where the roller does not reach.
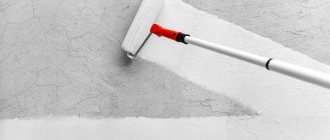
Drywall is primed in one pass, but carefully, without gaps.
Procedure for priming
After the installation of gypsum boards is completed, proper preparation of drywall for finishing work is necessary, i.e. the surface should be primed. When all the slabs are screwed to the frame (or glued to the wall, depending on the choice of installation method), we proceed to putty. To ensure that the mixture lies smoothly and efficiently on the sheet, and the consumption of it and finishing materials is minimal, you need to use a primer.
To apply the primer mixture, you must prepare the following:
- the selected primer mixture (the quantity depends on the area of the gypsum board surface to be coated; consumption for mixtures from different manufacturers may differ);
- brush or roller for applying primer to the wall;
- container for the primer mixture (plastic containers specially designed for paint with a corrugated surface and a recess for the mixture are suitable).
Drywall ceiling primer scheme.
You need to prime the wall following the following sequence:
- First you need to answer the question of which primer to choose for the wall. Here it is necessary to take into account several points: is it possible to prime drywall with this mixture, is it suitable for interior work. It is best to take acrylic primers, which are ideal for drywall; they do not contain harmful substances. Such compositions are diluted in water before applying to the wall.
- The question of which primer to choose is decided based on what type of finishing material will be used. The simplest option is wallpapering or painting with water-based paint. To do this, primer should be with a mixture that does not penetrate deeply. But if heavy wallpaper is used, then a deep penetration primer should be used. This will make the bonding of the glue and the base coating more reliable, that is, the wallpaper will hold stronger and longer.
- Once the solution has been selected, you can begin priming the drywall. Such work must be started before puttying. The mixture is diluted with water and poured into the prepared container. The roller is dipped into the solution, after which the surface must be primed very carefully, the layer must be even. The entire surface of the drywall is coated, then the first layer is left to dry completely (time depends on the type of primer). The second one is applied only after the first one has dried. For hard-to-reach places, use a paint brush. When determining the time required for drying, it is necessary to take into account what type of primer is used. If heavy wallpaper is pasted and a compound with deep penetration is used, then the question of how long it should dry is decided a little differently: you need to wait several hours longer.
- After the primer mixture has dried, putty is applied to the drywall; before doing this, the joints of the plates must be glued with serpyanka to ensure a strong connection and no cracks. The putty must dry completely, after which the surface is treated with sandpaper and all dust is removed.
Now you need to prime the surface with a strengthening layer, after which the finishing material dries.
When repairing and finishing walls, many people believe that a layer of putty is enough to ensure that the finishing coating lasts well, reliably and for a long time. But this is far from true. A primer, a layer of which must be applied before puttying, not only improves adhesion, but also allows you to extend the life of the finish. Most often it is recommended to do this if you plan to glue wallpaper, but other finishing materials, for example, paint, will lie on the drywall much smoother and of better quality, and the consumption of glue and putty will be much less
It is important and correct to determine how long the primer will dry, it depends on its type, the thickness of the applied layer
Is it necessary to prime drywall before wallpapering: what to use?
- antibacterial composition;
- sanding mesh and sandpaper;
- paint brushes, rollers and brushes for applying antiseptic and primer;
- spatulas with narrow and wide blades;
- primer;
- gypsum or polymer putty;
- sealant or plaster for sealing joints;
- fiberglass or lavsan mesh tape (serpyanka).
- Treatment of gypsum board helps to reduce pores on the surface and reduce the consumption of wallpaper glue.
- Protects drywall from getting wet if it does not have water-repellent properties.
- When gluing light-colored wallpaper without pre-treatment, the base of the drywall may show through, resulting in a change in the color of the wall covering.
- Cracks may form in corner joints, especially if it is an apartment in a new building.
On construction markets and in online stores you can find any primer compositions, building materials and tools, which will help you quickly and easily decide how to treat drywall before wallpapering. Do not neglect the antiseptic properties of primer compositions, since mold and microorganisms not only appear on surfaces with ugly spots, but can also cause significant damage to the health of all inhabitants of the apartment, which manifests itself in allergic reactions, nausea, migraines, mycotoxicosis, cardiac dysfunction, bronchial asthma. Preparing plasterboard walls for wallpapering takes a lot of time, but the results obtained are superior to all expectations and guarantee an excellent appearance of the apartment for at least five years.
Preparation technology
The entire process of preparing drywall for wallpapering is presented in the diagram:
Stages of finishing gypsum boards for wallpaper
Next, we will consider all the main nuances of work at each of these stages.
Preparation of materials and tools
First of all, let's figure out how to treat drywall before gluing wallpaper in order to improve the adhesion of the putty and also protect the surface from fungi. The following types of water-dispersed soils are suitable for these purposes:
- special primers for gypsum boards;
- deep penetration compositions;
- universal soils.
Primer for drywall
All these types of primers strengthen the surface of the gypsum board, preventing the cardboard from delaminating. In addition, they cope well with other tasks assigned to them, which I mentioned above . Therefore, you can choose any of them.
In addition to the primer, you also need to purchase putty. Since there are several options for covering drywall, it is necessary to choose a material taking into account its operating conditions.
For dry rooms, the best option is a gypsum-based composition. If the work is carried out, for example, in the kitchen, then it is better to use polymer putty - latex or acrylic. These compositions tolerate moisture well, although they are more expensive.
To calculate the amount of materials needed to prepare gypsum plasterboard for wallpaper, calculate the square footage of the walls, then multiply it by the consumption of the composition. As a rule, manufacturers indicate the consumption of primers and putties on the packaging.
Add about 10 percent of the margin to the resulting value. If you buy materials “back to back”, they probably won’t be enough.
The required amount of primer must be multiplied by two, since the liquid is applied in two layers.
In addition to coatings for rough finishing of drywall, you will also need:
- plaster corners to protect external corners;
- special tape for reinforcing joints.
Tape for reinforcing sheet joints
Also, preparing walls for wallpaper requires some tools:
- set of spatulas;
- paint roller;
- roller cuvettes;
Roller with cuvette
- paint brush – it is used to process drywall in hard-to-reach places;
- assembly knife.
You will also probably need a stepladder or a stable table to work on the top of the walls or ceiling.
Preparing drywall for puttying
So, we figured out the materials we need and the tools. Now let's look at another very important point - how to prepare drywall for puttying.
Cutting chamfers from drywall sheets
This procedure includes the following operations:
- Before treating the surface of the gypsum board with a primer, it is necessary to prepare the seams, namely, cut off the chamfers from the ends. To do this, use a sharp mounting knife. The width of the chamfers should be about 5 mm;
- Now you can start priming. To do this, first shake the soil and, if necessary, dilute it with water. The proportions of water and soil are contained in the instructions on the packaging.
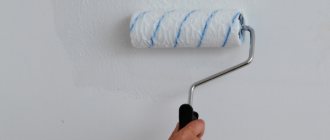
Wet the roller in primer
Pour the prepared liquid into the roller cuvette. Then wet the roller itself, squeeze it lightly on the rolling platform, and apply it to the drywall.
Apply the primer carefully so that there are no drips or excess liquid on the surface. After the first layer of soil has dried, be sure to repeat the procedure. ;
- Next, you need to putty the joints of the sheets with your own hands, using a narrow spatula. Apply the putty to the joint across the seam, then level it by moving the spatula along the seam from bottom to top;
Puttying the joint of sheets
- until the putty has dried, glue tape to it to reinforce the seams;
- Apply a second thin layer of putty over the tape;
- While the putty is drying, check all the screws - their heads should be recessed. If any screw sticks out, it must be tightened . Sometimes it happens that you cannot tighten the screw deeper. In this case, you need to unscrew it and screw in a new one next to it;
Puttying screw heads
- then you need to putty the screw caps using the same narrow spatula;
- after the putty has hardened, it should be cleaned with a spatula or even “walked” over it with a P120 mesh to remove all significant irregularities;
- At the end of the work, remove dust from the surface and treat the filled areas with a primer using a brush.
Puttying
After performing all the above operations, the surface of the gypsum board becomes smooth. Therefore, many novice craftsmen doubt whether further finishing of plasterboard walls under wallpaper is necessary?
In principle, you can glue wallpaper without finishing. But, keep in mind that without putty you will not be able to dismantle the wallpaper without damaging the surface of the gypsum board. In addition, when sealing seams, bumps inevitably appear, which can only be eliminated by filling the surface.
Lumps form at putty joints of sheets
Another point is the dark color of the drywall surface, which can be visible under the wallpaper. True, this deficiency can be corrected with primer paint. But, in any case, I believe that finishing drywall under wallpaper with putty is necessary.
Step-by-step instructions for performing this operation look like this:
- if the putty is a dry mixture, pour it into a bucket, add water and mix thoroughly. As a result, it should acquire a pasty consistency;
We put putty on a wide spatula
- take the spatula so that your little finger, ring finger and thumb clasp the handle of the spatula, and your middle and index fingers lie under the blade;
- then scoop the putty onto a wide trowel using a narrow trowel. Place it in the center of the canvas in a small lump, as shown in the photo above;
- Now place the spatula blade on the drywall and tilt it in the direction of movement to form an acute angle. Holding the tool in this position, run it along the surface of the drywall.
Correct grip of the spatula
To make the wall decoration for wallpaper even and smooth, try to ensure uniform pressure of the spatula from the beginning of the movement to the end. At the same time, control the thickness of the putty layer by the angle of inclination of the spatula.
You will feel all these nuances when you get a little practice. Therefore, it is better to start working with inconspicuous sections of the walls;
In the photo - gluing a plaster corner
- While applying putty, glue plaster corners to all external corners. In this case, use a level so that they are positioned strictly horizontally or vertically;
- Internal corners can be leveled using a corner spatula. To do this, simply move the tool along the corner;
Is it necessary to prime drywall before puttying: under wallpaper, tiles or before painting?
Another important property is the increase in strength of sheets that are treated with a primer. This, in turn, helps maintain the integrity of the coating in the event of impacts and other damage. When creating walls or ceilings from plasterboard in a room, it is often assumed that it will be further processed by one of the options, this could be painting the walls, wallpapering and laying tiles. Based on each material, you need to treat the surface of the sheets accordingly for further work . The first step in this will be working with the primer.
There is a difference of opinion whether it is necessary to prime drywall before puttingty, wallpapering or plastering, but there are quite objective reasons that indicate the advisability of such a procedure. The advantage of this treatment is the disinfection of the surface, which will subsequently prevent the appearance of fungus or mold on the coating . In addition, such gypsum boards are protected from all kinds of pests and are not afraid of mold or mildew. Due to additional initial processing, this material is more durable than simple sheets and can withstand high loads.
If walls are built using such material, then you can then glue wallpaper on them, lay tiles, and even paint them, but all these tasks must be correctly implemented. According to manufacturers, wallpaper can be glued to plasterboard sheets. But, before this, the surface should be carefully prepared.
Without following all the instructions, you cannot avoid the following consequences: Applying plaster will not only help make the walls perfectly smooth, but will also increase repairability after wallpapering, and will also allow you to use rolled materials of any shade and color. Plasterboard construction can be found in any room. Ceilings, walls, shelves and niches - everything can be leveled and made from plasterboard and a metal frame. Drywall has a perfectly flat surface, which, when prepared, allows for different decor.
Before you start wallpapering, you should prepare it well. Modern adhesive compositions are made from mixtures that perfectly create an adhesive effect, but without a primer these components will be absorbed into the base and will not give the expected result. Soil mixtures prevent the composition from penetrating inside and create the basis for wallpapering.
External and internal corners
External and internal corners on plasterboard walls and partitions are made using:
- reinforcing paper;
- serpyanka;
- perforated aluminum corners;
- special metal corners Shitrok with paper.
Paper and serpyanka are most often used to decorate internal corners - the junction of walls, as well as walls and ceilings. The technology is similar to seam sealing. A certain amount of putty is applied to the corner, paper or sickle is glued onto it, the reinforcing strip is pressed into the composition with a narrow spatula, and excess putty is removed. After this, they go through the corner again, applying a thin layer of putty on top.
Perforated corners are used to design external corners - slopes, protrusions, etc. First, a piece of the required length is cut. The metal is very thin, it can be cut even with ordinary large scissors, but if you have metal scissors, the work is easier. Edges are cut at an angle of 45° or less, rather than at 90°. So, when puttingtying drywall, the edge will not curl up.
Decorating the outer corners of plasterboard walls using a perforated corner
Putty is applied to the outer corner on both sides in small islands approximately every 10 cm (can be done in a checkerboard pattern). A perforated corner is pressed into the solution, its installation is checked whether it is vertical or horizontal, and adjusted. Use a spatula to pick up excess mortar, aligning the edges in one plane with the surface of the sheet. The installed corner is left for some time until the putty dries, after which it is sanded and puttyed again if necessary.
What is different about the metal corner Sheetrock? Thin strips of metal are applied to a paper base. They are more rigid than simple reinforcing paper, but it is more convenient to work with them than with conventional perforated ones, since due to the presence of paper the transition to plane is smoother.
What is drywall covered with before wallpapering?
To carry out this work, you need to prepare tools, devices and purchase the necessary materials. All of them are presented in the table.
- Treatment of gypsum board helps to reduce pores on the surface and reduce the consumption of wallpaper glue.
- Protects drywall from getting wet if it does not have water-repellent properties.
- When gluing light-colored wallpaper without pre-treatment, the base of the drywall may show through, resulting in a change in the color of the wall covering.
- Cracks may form in corner joints, especially if it is an apartment in a new building.
- antibacterial composition,
- sanding mesh and sandpaper,
- paint brushes, rollers and brushes for applying antiseptic and primer,
- spatulas with narrow and wide blades,
- primer,
- gypsum or polymer putty,
- sealant or plaster for sealing joints,
- fiberglass or lavsan mesh tape (serpyanka).
Pay attention to the fragment of the plasterboard wall in the photo above, and you will see the heads of the screws, which will appear as rusty spots through the wallpaper material and the depressions of the joints, changing the relief, but this should not happen! Do not limit yourself to one layer of primer, since in poorly primed areas it is not provided high-quality, uniform adhesion to the decorative layer, and the pasted wallpaper will be visually different from the general background.
Surface preparation
Before gluing gypsum board sheets with wallpaper, starting and finishing putty and protective primer are applied to the gypsum material. The purpose of the preparatory process is to form a perfectly even coating.
The work is carried out in several stages:
1. Apply a primer layer to the sheets for better adhesion of the putty to the drywall. The protective coating prevents the formation of fungus and mold. You can use acrylic primer as the most popular one or other compositions in powder and ready-made form. The primer is applied from bottom to top with a wide paint brush or brush and allowed to dry (time specified in the instructions).
2. The seams between the sheets of drywall are glued with serpyanka - a special tape made of lavsan or fiberglass treated with an adhesive substance. The thickness of the serpyanka is sufficient for sealing the joints. Some craftsmen use paper tape. If the auxiliary material does not adhere well, you can coat the joints with PVA glue. Tape must be applied to all installation seams.
3. Apply starting putty to the joints and screw heads, the layer thickness is 1-2 mm, the spatula is held at an angle of 45 degrees. After the primary coating has dried (24 hours), the finishing is performed. The putty is applied in 3-4 layers over the entire base to obtain an even base, each layer is allowed to dry. Before gluing wallpaper onto gypsum board sheets, the surfaces are smoothed with sandpaper.
4. Primer provides additional protection to drywall sheets. It ensures reliable adhesion of wallpaper glue to the putty surface. You can use acrylic primer containing bactericidal additives with good antiseptic properties. The composition is applied with a roller or brush, less often with a spray. The primer is sold in large, economical containers of 5 or 10 liters.
Before processing, the sheets are wiped with a slightly damp cloth to collect dust remaining after using sandpaper. The partitions and plasterboard walls must dry well within 24 hours - the base is ready for wallpapering.
On a note! To align the outer corners, use plastic reinforcing corners, which, after installation, are covered with putty and brought to the level with the gypsum plasterboard sheets. If galvanized items are used, they may rust over time and the rust will show through the finish.
How and with what is drywall primed for different finishes?
During renovations, you want to save as much as possible and not spend money on unnecessary materials. Is it possible to refuse to use primer without fear for the finished coating? This question must be answered depending on what kind of finishing coating will be used.
To understand in what cases a primer is not necessary to use, you need to understand why it is needed at all. What positive qualities does this material have? If you putty the screw heads without first treating them with a primer, then nothing bad will happen. Such actions are not critical. Is it necessary to prime drywall before wallpapering?
If you plan to change this wallpaper in the future, then the answer is a clear yes. If this is not done, then removing the wallpaper will turn into flour, because it will come off along with putty or pieces of cardboard (depending on what you glued it to). Not everyone knows whether it is necessary to prime drywall before applying putty.
Although most already guess that such a procedure is necessary. The benefits of soil were described above, so such questions should not arise. Also, a primer for drywall is an excellent tool with which you can hide putty joints of gypsum boards.
If this is not done, then the uneven color of the base layer will be noticeable under the light wallpaper. Even under dark wallpaper, light joints will appear against the background of darker sheets of drywall. If you putty the entire surface and cover it with two layers of primer, then you don’t have to worry about distorting the color of the wallpaper.