Icer
21595 0 15
Icer November 2, 2016Specialization: master in the construction of plasterboard structures, finishing work and laying floor coverings. Installation of door and window units, finishing of facades, installation of electrical, plumbing and heating - I can give detailed advice on all types of work.
Surface priming is ideal preparation before wallpapering
Everyone knows that walls need to be prepared for finishing, but the subtleties of existing technologies are not fully understood. For example, whether it is possible to prime walls with wallpaper glue causes a lot of controversy among experts; there are supporters and opponents of this option, but no one will deny that such treatment improves the quality of wallpaper gluing. In this review, I will tell you how to prepare the composition correctly, we will also figure out how to properly organize the workflow and what is required for this.
Wallpaper glue helps strengthen the surface and reduce its absorption
Workflow Description
We will look at three main aspects:
- Selection of adhesive composition;
- Preparation of glue primer;
- Applying the solution to the wall.
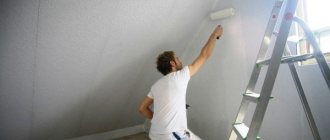
If the wallpaper is glued to the ceiling, then it is primed in the same way as the walls
Each aspect is important in its own way, so please read the information below carefully. Everything is quite simple, but you need to know a few nuances that affect the quality of work. Any violations lead to unpredictable consequences, and if you do not want to get the result as in the photo below, then take the preparation of the walls responsibly.
This is what mistakes when preparing walls lead to
Glue selection
Since the same composition is used for both primer and gluing, the process is simplified. As for recommendations for choosing, there are several of them:
- Choose glue only after choosing wallpaper, then you will know what kind of coating you have and will choose the best option for it . There are different types of compounds, and, as practice shows, specialized options provide greater reliability than universal ones, especially if you use heavy coatings;
If there is a recommended brand of glue on the wallpaper packaging, then it is better to choose it, since the manufacturer guarantees that the quality of the work will be at the highest level.
There is always an indication on the packaging for which coatings the composition is intended.
- If there are changes in humidity in the room, then the presence of antiseptic additives will not be superfluous . Of course, they will not provide complete protection against mold, but they will significantly reduce the likelihood of its occurrence;
The presence of antiseptic additives is important when used in rooms with high humidity
- Consumption of the composition is the most important aspect, because the concentration can be different and the same packaging can be enough for both 20 and 60 square meters. Always read this information so that you can compare the actual amount of glue and its cost, because often the more expensive option is the most economical due to its high concentration ;
Sometimes manufacturers distort information and indicate a larger coverage area than it actually is. For example, if the package says “8-10” rolls, but the instructions indicate that the contents need to be diluted with five liters of water, then with a standard consumption of one liter per 10 square meters it is easy to calculate that the composition will be enough for only 5, maximum 6 rolls . This little trick allows manufacturers to mislead buyers; no one knows which rolls they mean.
- Some compositions add a color indicator; the finished composition may have a pink or other tint, which makes it easy to control whether the entire surface has been treated. This is very convenient, especially since after drying the glue becomes completely transparent;
The presence of an indicator allows you to better control the application of the composition
- I advise you to buy glue that was produced no more than a few months ago, especially if it is packaged not in a sealed bag, but in a regular cardboard box. And packaged options gradually lose their properties over time, so it’s better to take a fresher composition to be sure of its quality;
- Modern manufacturers always indicate on the packaging whether the adhesive is suitable for priming walls. If there is no such mark, then it is better to choose another option where it is, this will save you from any problems .
Now I will tell you about the most popular and sought-after brands today. This is not a complete list; the table contains only the compositions with which I am well acquainted and which I can recommend to you.
| Manufacturer | Peculiarities |
| "Methylane" | Without a doubt, the market leader today. The products are manufactured in Germany and are distinguished by consistently high quality and a wide range of compositions; you can find the optimal solution for any type of wallpaper. The price is quite high - from 270 rubles, but they are worth it; there are practically no complaints about products from Methylan. |
| "Kelid" | A French brand that also produces many formulation options, although the line is noticeably smaller than that of the option described above. The glue is of good quality, although from time to time I hear complaints, especially from inexperienced craftsmen. As for the cost, it is lower than the first option, but not significantly. |
| "Cleo" | Another French company specializing in the production of wallpaper adhesives. The products of this brand are distinguished by affordable prices (up to 200 rubles), fairly high quality and environmentally friendly compositions. The product line is quite wide to find the optimal solution for almost all types of coatings |
The Cleo line even has a special composition for children's rooms
Priming walls with wallpaper glue requires the presence of certain devices:
- It is best to apply the composition with a roller with a fur roller with a pile length of up to 20 mm; I tried many devices - from a brush-like brush to ordinary brushes and foam rollers, but the first option is best. The width should be 18 or 25 cm, such a tool is convenient to work with and the application speed is very high;
It is most convenient to apply the primer composition to the walls using a roller.
- To evenly distribute the solution over the working part of the roller, it is best to additionally purchase a paint bath . Its width must be no less than the width of the roller. Spend a hundred rubles and buy this element, it will simplify the work and reduce the consumption of the composition;
Bath - a convenient device for work
- To prepare the priming solution, we need a container and a stick or other device for stirring. You can use any suitable size bucket.
Preparation of the primer composition
If you have everything you need at hand, you can begin preparing the solution. The instructions for carrying out the work are quite simple and consist of just a few steps:
- Modern formulations do not need to be boiled, they are ready for use, and this is good news. As for the amount of water, you should take about one and a half times more, that is, if the package indicates that the contents should be dissolved in 4 liters of water, we will take 6 liters. Everything here is simple and clear;
- You need to pour water into the container; if the package has a recommended temperature, then it is advisable to adhere to it, since under optimal conditions the dry mixture will dissolve much better . But you don’t need to heat the water too much, as this may cause lumps to form in the mixture that you won’t be able to stir.
- The adhesive composition is gradually added to the water, and the liquid must be constantly stirred to ensure the best dissolution of the granules. You need to add the mixture with one hand and stir with the other; if you have an assistant, you can stir more energetically;
Do not pour everything into the water at once, add glue gradually
- After adding all the glue, you should leave the composition for a certain time for it to swell, after which you need to stir the mass again and check its consistency, if it is too thick, you will have to carry out another step;
We don't need thick glue, so if it turns out like in the photo, the composition will have to be diluted
- You need to add warm water to the thick composition; if you immediately poured one and a half quantities, then add another half of the quantity (in our case it is 2 liters) and mix the solution thoroughly again. You should have a kefir-like consistency that is easy to apply and absorbs well into the walls and strengthens them.
When the composition is similar in consistency to kefir, you can use it for work
Applying primer to walls
Do-it-yourself priming of walls with glue is a simple process, so even a person with minimal experience in the construction industry can handle it:
The scheme of work is very simple
- You cannot begin work without first properly preparing the surface. If there are remnants of old wallpaper on the walls, then they must be removed, with the exception of options where, after removal, a paper base remains. If the surfaces are plastered or puttied, then they must be cleaned of dust before starting work;
Old wallpaper must be removed
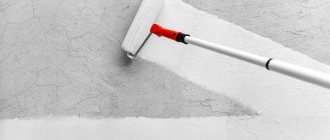
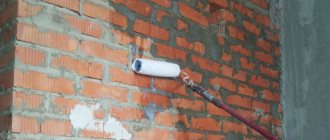
- The composition is poured into a paint bath, after which you need to carefully moisten the roller in it from different sides. To evenly distribute the solution over the roller and remove its excess, you need to move it back and forth along the squeezing grid several times . Thus, our glue is distributed throughout the roller and does not drip from it, as always happens when using a regular bucket;
Using a bath, the composition is distributed throughout the entire roller
- After this, you can begin applying the composition to the wall; the easiest way to work is from top to bottom to immediately remove smudges; you should press the tool with moderate force. The main thing is to follow the order of application so as not to miss a single area on the wall. While the composition is fresh, it is clearly visible where it already exists, for this reason it is better to finish the entire wall at once, so as not to have to look for where to continue working from;
For convenience, you can purchase a roller handle extension or adapt a suitable object for it.
- After treating the walls, you should wait until the surface is completely dry, this is necessary so that the composition polymerizes and completely fills all the voids, ensuring the strength and low absorbency of the surface. Drying can take from several hours to a day, it all depends on the type of composition used and the temperature in the room.
The finished surface must be dry and smooth
After such preparation, it will not be difficult to perfectly paste wallpaper even without experience.
In order for the wallpaper to stick securely, the wall must be prepared
Sometimes I come across situations where a person does not understand the topic and, after the usual primer, also primes it with wallpaper glue. There is, of course, nothing wrong with this, but there is no point in applying two layers of primer; if you used a ready-made composition, then treatment with wallpaper glue is not necessary.
In the photo: if the walls are properly treated, then even after 10 years the wallpaper will hold up perfectly
Anti-moisture primer
Vinyl wallpaper on non-woven fabric serves well in the kitchen, bathroom and even on closed, unheated loggias. Non-woven vinyl can easily cope with high humidity, but it needs help by priming the wall surface with moisture-resistant compounds. This is an aqueous composition of acrylates, which, when dried, forms a film much denser than that of conventional primers. A wall treated with this composition retains the ability to “breathe”, allowing air to pass through, but a fairly reliable barrier is created for dripping condensate moisture.
The non-woven fabric behaves stably in such an environment, without deforming or peeling off the walls.
Most manufacturers produce moisture-resistant primers in concentrated form. They must be diluted in strict accordance with the recommendations. Types of primers for walls before plastering? Sometimes it can be tempting to use the formula undiluted, so to speak, “for strength.” But such experiments end with the opposite result: this type of primer, even when diluted, creates a fairly dense film, and the concentrate generally becomes glossy when it dries.
It is already difficult to glue anything to such a surface.
Priming walls with glue before gluing non-woven wallpaper
Probably everyone dreams of having a beautiful, well-kept and pleasant-looking apartment. In such an environment, everything must be perfect. But the undoubted highlight of any decor is wallpaper. Depending on what material they are made of, what colors they contain and what is depicted on them, the appearance of the room also depends. Today's construction market offers a huge assortment of roll coatings, from which you can choose whatever you like.
In the 21st century it is difficult to surprise. However, the place of one of the most popular and original types of wallpaper went to non-woven fabric. This material has been used by people for a long time, however, in the field of clothing repair. Walls with non-woven wallpaper will not only make your room elegant, but will also add sophistication.
Priming walls before gluing non-woven wallpaper
Having skillful hands and a desire to work, you can refuse the services of professional craftsmen. Wallpapering is a labor-intensive task. It is a mistake to believe that rolls of material can be glued to a previously untreated surface. It doesn’t matter what quality the product is, you first need to prime the walls.
The first step is to carefully examine the surface of the wall. If cracks or chips are found on the surface, they must be repaired. The result should be an absolutely smooth and even surface.
Gluing non-woven wallpaper
After this, you need to carefully putty the surface, which will allow you to achieve an even and smooth coating.
Putty application process:
- Using a large spatula, apply the first layer of the substance. When working, maintain an angle of 45 degrees, since this value is the most optimal for the solution to lay down correctly. The first layer should not exceed 0.2 cm. This is easy to do; it is enough to apply the putty at once without adding more solution. After the wall is plastered, you need to let it dry. This usually takes about a day.
- The second step towards gluing non-woven wallpaper will be to apply another layer of primer. The process is repeated. However, the drying process will not take so much time. 5 hours is enough, it all depends on the internal temperature of the room.
- The final touch is the third coat of primer. This is the finishing line. Here, when working, you can use a medium-sized spatula.
- After all three layers of mortar have dried, you can begin sanding. It is worth noting that this is a long process. However, the end result will undoubtedly please you. You can use sandpaper to wrap the grater.
How to prime walls with glue, preparing them for wallpapering
Primer is a unique solution that is actively used before wallpapering. If this is not done, then all the glued canvases will come off over time, as a result of which you will have to do all the work again.
A good primer will allow you to quickly and efficiently hang wallpaper.
It doesn’t matter at all what kind of glue you used when gluing the wallpaper. Sometimes even the best quality products fail to achieve effective coupling. But when choosing a primer adhesive, you need to take into account such criteria as the composition of the product, its adhesive properties
WE GUARANTEE HIGH QUALITY WORK
DESIGN PRESTIGE LLC was founded in 1999. The company's employees are all experienced, have Moscow registration and Slavic origin, payment is made in any convenient way, if necessary, equipment and work are provided on credit. Autonomous heating and full winter water supply.
The company's office is located near the districts: Mitino, Tushino, Strogino, Shchukino.
Nearest metro stations: Tushinskaya, Skhodnenskaya, Planernaya, Volokolamskaya, Mitino.
Nearby are the following highways: Volokolamskoe Highway, Pyatnitskoe Highway, Leningradskoe Highway.
But the walls are different
Imagine that you bought non-woven wallpaper to be painted in delicate pastel colors. Here you will need not only ideal smoothness of the walls, but also uniform color of the base, since dark spots will be noticeable under the translucent non-woven layer. The wall should be uniformly light over its entire area, and this can be achieved by using a coloring primer. In order not to waste time searching for the right composition, you can add a little white water-based paint to the universal primer, and the problem of leveling the tone of the base will be solved.
Glue selection
Wallpapering unprepared walls rarely leads to a positive result. The surface needs pre-treatment for the following reasons:
- high absorbency of materials - the glue quickly penetrates into the base, adhesion deteriorates;
- the presence of dust or sand from the solution on the surface on which it is difficult to stick wallpaper;
- roughness caused by the presence of small particles in the composition of the plaster (putty), which leads to loose wallpaper and poor adhesion.
Coating the walls with glue will help eliminate these problems.
The selected adhesive must meet several criteria:
- match the type of wallpaper;
- the manufacturer must indicate in the instructions the possibility of using a primer composition;
- specialized compounds are better than universal ones, especially when gluing heavy types of wallpaper;
- the shelf life must not expire at the time of use;
- for rooms with high humidity levels, compositions with antiseptic additives are used;
- when purchasing, pay attention to the consumption indicated by the manufacturer, taking into account the upper figure, for example, if 50 - 100 g/m2 is indicated, choose a consumption closer to 100;
- have a color indicator (coloring in a liquid state) - this makes it more convenient to apply the composition without gaps, which is important for inexperienced “finishers”.
An important condition is that the adhesive-primer matches the type of wallpaper chosen.
Among the specialized types are mixtures:
- for glass wallpaper and non-woven products;
- for vinyl wallpaper with non-woven or paper base;
- universal, incl. and for paper wallpaper.
How and what is the best way to prime the walls before wallpapering?
Candidate of Sciences, site expert.
Wallpaper among finishing materials has reached a height inaccessible to competitors. And there are many reasons for this:
- variety of types and types (paper trellises, non-woven wallpaper, glass wallpaper, vinyl, liquid, etc.);
- all kinds of design solutions;
- a range of prices available to different categories of buyers, literally from pennies to very expensive ones, when one tube costs several thousand rubles;
- simple gluing technology, which allows you to do the finishing yourself.
And it’s very disappointing when work done with your own hands requires redoing after a couple of years - the sheets began to fall off, dark spots appeared in some places, etc. The reason is not bad glue or lack of experience of home decorators. Simply, no primer was applied to the surface of the walls before wallpapering.
Types of adhesive primers
Industrially produced adhesive mixtures for surface preparation are the easiest to use. The compositions are ready for use or sometimes only require dilution to the desired consistency.
Adhesive primers do not contain organic solvents and oils, which can leave stains on the wallpaper during or after gluing.
In the segment of adhesive mixtures, Vetonit, Knauf, Starateli, and Glims stand out.
You can divide the compositions based on the basis:
- Acrylic - suitable for wooden, brick, plastered surfaces. The composition holds surfaces together, dries quickly, is almost odorless, and environmentally friendly.
- Alkyd is suitable for wooden walls, chipboard, fiberboard, oriented strand boards. Not suitable for processing concrete and drywall.
- Latex can be used on any surface, quick-drying.
- Mineral compositions based on gypsum, cement or lime are suitable for priming brick, concrete, cement plaster.
- Containing PVA glue are the most common and inexpensive options for universal primers.
The choice depends on the condition of the surface, material and type of wallpaper used.
Types of primers and their characteristics
The choice of primer for wallpaper is completely determined by the type of material on the surface of which it is planned to apply the primer. Unfortunately, in various articles on this topic, the authors of popular educational works mislead buyers by claiming that there is a special primer for non-woven, vinyl, and paper wallpaper.
Why is there no primer for a specific type of wallpaper? Let's figure it out. For each type of wall material, the wallpaper adhesive must contain a special component responsible for adhesion of the adhesive mass to that particular surface. There are about 12 types of such surfaces. For convenience, let's round to 10.
Then the manufacturer of glue, for example, for paper wallpaper, is obliged to produce 10 varieties of it (for each surface). There are also about 10 wallpapers with different bases. As a result, it turns out that there should be at least 100 types of adhesive mass on the building materials market. This is irrational neither for producers, nor for sellers, nor for buyers.
With the advent of the primer, which acts as an intermediary between the wall and the glue, it is necessary to produce 10 types of primer for each type of surface and 10 types of adhesive mass for the corresponding base of the wallpaper.
The whole variety of primers on the construction market can be sorted by release form, type of solvent, purpose, type of soil. This knowledge will make it easier to find the product you need.
According to the release form. On sale you can find:
- liquid solution, ready for use;
- concentrate that needs to be diluted;
- dry mixtures that require preparation.
By type of solvent. In production, the following are used as solvents:
- water (water-based primer);
- organic solvents (acetone, butyl alcohol, isopropanol, white spirit, etc.).
By appointment. Depending on the functions performed, the primer is divided into:
- penetrating (for concrete, brick, stone);
- strengthening (plasterboard, gypsum fiber board, all types of cellular concrete, gas silicate, etc.);
- adhesive (for cases when you plan to stick wallpaper on glass, tiles, plastic).
By type of soil. The primer can be acrylic, alkyd or mineral.
Acrylic primer (water-based). This is the most versatile type of primer. Acrylic can be used on almost all types of wall materials: concrete, brick, wood, plywood, cement-based plaster, etc. According to its intended purpose, it is available in deep penetration, impregnating (strengthening) and adhesive. Easily soluble in water, odorless, dries quickly.
Available in the form of: dry mixture, concentrate, ready-made solution and primer mixture in a can. When special substances are added, the primer acquires antiseptic properties (used in the kitchen) or becomes pigmented (hides bright color spots). The most popular brands are: “Alpina”, “Ceresit”, “Composite”, “Knauf”, “Perfecta”, “Starateli”.
Alkyd primer. This type of primer is based on alkyd resins diluted with organic solvents, mainly white spirit. The application is almost universal - all types of wall materials with the exception of plasterboard, gypsum plasterboard, putties and plaster based on cement and gypsum (alkyds destroy them).
It has an unpleasant pungent odor that occurs due to volatile substances released within 15-18 hours. After prolonged ventilation, the air is completely cleaned. Can dry up to 16 hours. Due to the presence of polymers in the composition, it forms a film on the wall surface that can withstand large temperature differences (from -40 to +60 ° C) and mechanical stress.
The presence of a water-repellent film allows the primer to be used in the bathroom and kitchen. Available only in ready-to-use form. If it is necessary to dilute for a more liquid consistency, use white spirit, regardless of the solvent used in the primer. The disadvantages include the toxicity of the composition, which disappears after polymerization of the film.
It has varieties: glyphthalic, perchlorovinyl, polystyrene and polyvinyl acetate primer. Produced by the widely known “Aura”, “Tikkurila”.
Mineral primer. The composition of the mineral-based primer includes cement, gypsum and lime, which bind the base of the wall made of concrete, expanded clay concrete, brick (gas silicate brick and blocks), as well as plaster and putty with wallpaper glue. It has no odor and dries quickly.
They are produced by Ceresit, Caparol, etc. It is very difficult to find mineral and alkyd primers on sale. The reason lies in the fact that acrylic primers cover all the problems that arise before wallpapering, but at the same time they are much cheaper.
Application technology
Priming the walls with glue before wallpapering consists of preparatory activities starting with the actual application.
H3 - Preparatory activities
At this stage, the base is prepared.
- removal of nails, dowels, brackets (if any);
- removing peeling putty, removing paint residues, dirt, dust, oil and other stains;
- puttying;
- wetting the walls with warm water to remove construction dust.
After drying, you can proceed to the next stage.
Preparation of the primer composition
How to prepare glue for use as a primer is usually indicated on the packaging; if such information is not available, then you should proceed in the sequence indicated below.
How to dilute glue and prime walls
For priming, the glue/water ratio should be reduced by one and a half times. For example, if the manufacturer indicated that a pack of glue should be diluted in 4 liters of water, then 6 liters should be taken to treat the surface.
The water should be heated to 35 - 40 o C, this is better for the glue to dissolve. In cold water the process will take longer.
The consistency of the primer composition should be liquid - a thick composition cannot be evenly distributed over the surface, the consumption will increase, the drying time will increase, which means you will have to wait a long time before directly gluing it.
Workflow Description
Before dilution, measure out the required amount of water and pour it into a container of suitable volume.
The glue is poured in gradually, continuously mixing the contents. After one portion is completely dissolved, add the next one.
After infusing for 10 - 15 minutes, add water if necessary. The thoroughly mixed composition is ready for use.
Applying primer to walls
The tool used is a paint roller with a pile of up to 20 mm or a wide brush, which is called a fly brush. (for example, this https://uspehidelo.ru/upload/iblock/d4f/d4fb6c257ee3daf9e1fbcf9d59c56289.jpg)
Technology
I have good news here. Priming walls for painting, unlike other stages of repair, does not require special skills and is the least labor-intensive process. Primers are sold in cans of various sizes in liquid form. Usually these are 1L, 3L, 5 and 10L. Their consumption is small, and the remains can always be applied with an additional layer. Nothing bad will come of this. The tools you will need are a convenient container (usually a paint tray or bucket), a roller (preferably with long pile), a brush and a brush.
For high walls, prepare a comfortable handle. This could be a long branch, a mop, a fishing rod or any other handy item.
A small amount of primer for walls for painting is poured into the selected container. Then, dip a brush or roller into the liquid and carefully apply it to the wall. Don't forget about safety rules. The primer splashes a lot, so take care of your face and wear work clothes and a hat. Washing primer from your hair is not the most pleasant thing. It is much easier to wash it off from areas of the skin with a small amount of water or by wiping it with a wet cloth. When applying primer to a wall, you will most likely experience drips. This is not very scary, but still try to avoid them so that the work looks neater. A brush can be used to treat corners and other narrow areas. For priming high walls, place the roller or brush on the holder and continue working.
It is important that the roller sits firmly on the holder, otherwise you risk getting injured from it falling. After the primer for walls for painting has completely dried, you can apply a second coat. Before carrying out further work, make sure that the wall is completely dry. If painting begins with a wet primer, it will begin to fall off along with pieces of plaster and mix with the paint right on the roller. Then it will stretch along the entire wall. Then you will have to start all over again, completely cleaning the wall. Enjoy your renovation, easy preparation and excellent results!
Questions and answers
On forums and in specialized chats, the same type of questions are often asked about the use of primers when gluing wallpaper.
How long does it take for wallpaper glue primer to dry?
If the glue manufacturer has not specified conditions for immediate gluing after priming, then you can start working immediately after complete drying.
The approximate time is indicated on the packaging in the instructions for use.
Porous substrates will absorb moisture from the primer faster and dry faster. Dry air and high temperature accelerate the process.
In damp and cold rooms, drying can take up to a day.
The average readiness time at a temperature of 18 - 25 o C and a humidity of 40% is from 6 to 12 hours.
Is it possible to prime walls with wallpaper glue before painting?
It is recommended to prime the wallpaper before painting based on the following considerations:
- improving paint adhesion;
- wallpaper protection;
- increasing the durability of the finishing coating;
- reducing paint consumption;
- giving the surface uniformity - the paint will lie smoothly, without streaks or stains.
When starting to prime with glue, you should take into account that work can only begin after the wallpaper is completely dry. This will happen no earlier than the next day after gluing. It is better to test tinted glue on an inconspicuous area, for example, in a place that will be hidden by furniture. If an unplanned tint is noticeable on the wallpaper, you should discard the glue as a primer.
When diluting the composition, add one and a half to two times more water than for glue.
The best results are achieved by two or three thin layers of soil rather than one thick one.
Is it possible to putty a wall using wallpaper glue?
Most often, this question arises after removing old wallpaper. You can putty if the glue is completely dry. It is unlikely to be possible to apply putty on wet, slippery glue.
The problem can be eliminated by covering the wall with concrete contact primer.
Is it possible to use adhesive primer for glass wallpaper?
Fiberglass wallpaper is subject to mandatory preparation before painting. Prime two or three times with a break for the previous layer to dry.
When starting to prime with glue, check its compatibility with the purchased paint.
Is it possible to add a primer to wallpaper glue?
You can add a primer to wallpaper glue, but this only makes sense to give the coating antibacterial properties. Formulations specially designed for this purpose are used.
It is important to check the compatibility of the adhesive and primer before mixing and conduct a test application. In some cases, the compositions collapse and lose their properties.
Experts believe that wallpaper glue is best combined with primers that contain PVA.
Priming the walls before gluing wallpaper or before painting the pasted finishing material is an important stage of repair. It is necessary to choose the right glue, follow the application steps, and maintain the drying time. If everything is done correctly, wallpaper is easy to paste, and it will last longer than usual.
PVA glue as a primer - overview of important rules
In order for the result of the repair to meet expectations, special attention should be paid to preparing walls and floors for the application of finishing coatings, be it tiles, wallpaper or paint.
Priming the entire surface is one of the most critical moments at the stage of preparing walls and floors.
Treating walls with a primer strengthens the surface, increases the adhesion of the coating and the wall, and helps to avoid peeling of glued materials at joints and in corners.
Ready-made primer is sold in specialized stores, but in order not to spend extra money and not carry 10-liter canisters halfway across the city, you can prepare a composition that is in no way inferior in characteristics at home.
As a base for the primer you can use:
- PVA-MB “Universal” adhesive is a polyvinyl acetate emulsion intended for gluing paper, cardboard, wood, leather and other materials. Universal PVA is included in many putties and primers;
- PVA construction and household adhesive (wallpaper) is an adhesive composition intended for laying linoleum and working with various types of wallpaper. This glue, in accordance with the instructions for use, can be used as a material for priming walls before wallpapering.
Using household PVA glue instead of primer is not only convenient, but also profitable, since it costs less than modern wallpaper glue - about 50-70 rubles per kilogram.
How to dilute PVA glue for priming walls - recipe description
To prepare a primer from PVA glue, you will need the following materials and equipment:
- Container for preparation (basin or bucket);
- PVA glue;
- Drill mixer or wooden spatula.
The recipe for preparing the primer is simple:
- One liter of PVA glue needs to be poured into a container,
- Add 8-9 liters of lukewarm water and mix thoroughly with a mixer.
To treat quickly absorbing surfaces, the glue concentration can be increased to a ratio of 1:3.
It is necessary to prepare the primer mixture immediately before use and strictly in the amount required for priming.
VIDEO INSTRUCTION
Important nuances - priming walls with wallpaper glue
- Do wallpaper manufacturers allow walls to be primed with wallpaper glue?
Yes, many manufacturers allow the use of the glue itself for pre-treatment of the surface to be glued.
The relevant information is always indicated on the packaging, where you can also find the proportions in which the glue must be diluted with water to obtain a primer.
- How to prime walls correctly?
The priming process itself does not present any difficulties. The most important thing is to apply primer to the entire surface to be pasted. This can be done either with a wide paint brush or with a foam paint roller.
priming with wallpaper glue, special attention should be paid to the corners and various protrusions (if any), since it is in such places that the wallpaper most often comes off.
You should work slowly, and apply more of the compound to areas that absorb very quickly.
- How many times to prime?
In most cases, one layer is sufficient, but if the surface continues to become dusty and dirty after priming, the walls should be re-treated after complete drying.
- When can materials be glued?
Immediately after the primer has completely dried. This may take from several hours to a day. Some craftsmen recommend applying primer the day before gluing.
Why do you need primer for walls: characteristics
In order to make wallpapering more practical, it is necessary to prepare the surface of the walls, for this they must be:
- cleared of old wallpaper;
- puttied;
- primed.
If everyone is sure of the need for the first two stages, then some people may neglect such an important process as priming.
- to create a dust-free surface that has maximum
- ability to bond;
- prevents the spread of mold or mildew;
- filling microcracks and micropores on the surface of walls, forming a monolithic film;
- improves the adhesion of wallpaper to the wall surface.
Which composition is best?
Upon arrival at the hardware store, you will see a wide range of these products. What to choose in such a situation, and which solution is best? Here you need to take into account the type of wallpaper used and operating conditions. Primer compositions used before wallpapering can come in different variations. They are classified taking into account the surface on which it will be used, as well as the type of binding component.
Primers are available in hardware stores from various manufacturers. The choice of the appropriate one should be determined only by you, taking into account the quality characteristics of a certain composition. If you decide to pay attention to well-known brands, then their cost will be much higher.
Primer composition from a famous German manufacturer
Very often they sell such a cheap option as PVA glue under the guise of a primer solution. But this option does not always allow you to obtain high-quality adhesion, although many people choose this glue and are very satisfied with this composition. If you decide to treat the surface of the walls with this product before gluing the wallpaper, then you need to dilute it with water.
But the primer compositions don’t end there. Many manufacturers produce effective products that, according to many criteria, can occupy a leading position compared to PVA.
The primer can be of the following types:
Alkyd composition is perfectly applied to wood surfaces. Thanks to the unique composition, it is possible to qualitatively prepare the wood for further wallpapering. But such a primer cannot always be used. It cannot be applied to the surface of plaster walls. When the surface is treated, it dries completely within 15 hours.
The next type of primer is glyphthalic. They are in great demand before gluing wallpaper on metal and wooden surfaces. You can also carry out the treatment on a wall coated with a primer, the only condition is that there is low humidity in the room. The disadvantage of the primer is that it takes a long time to dry; for this you need to wait a day.
Universal acrylic primer
Acrylic primer today is one of the most popular means when it is necessary to treat walls before gluing canvases. It is odorless and can be used for walls made of various materials, except metal. It dries very quickly, so you can glue the wallpaper after 5 hours. This primer can have a regular or deep action. The second option should be used in cases where wallpapering will occur on an unprepared surface.
If you do not want to use a special primer, you can prime the walls using any wallpaper glue. To do this, dilute the glue in a liquid consistency and apply it to the wall. The consistency of wallpaper glue that must be maintained for priming the walls is indicated on the pack.
Inexpensive wallpaper glue is best for priming.
Priming the walls before wallpapering: is it necessary?
Priming the walls before gluing wallpaper is necessary to increase the level of adhesion of the surface to the adhesive mixture and reduce glue consumption.
Is it necessary to prime
Today, there are a wide variety of options for finishing walls, but wallpaper is still popular among designers. In order for the wallpaper to fit perfectly when finishing, it is necessary to prime the surface.
Why is it needed for wallpaper?
Priming allows you to prepare the walls before gluing wallpaper, creating a dense layer (film), which leads to uniform application of wallpaper glue and subsequently saves the cost of wallpaper glue. The adhesive applied to the primer layer allows you to adjust the wallpaper pasting without much effort.
How to choose
Construction stores offer a wide range of primers, so you should approach this issue carefully. The choice of primer depends on:
- type of wall surface material (wood, putty, concrete, metal, etc.);
- wallpaper material;
- conditions in which this premises will be operated, etc.
Water-based acrylic and latex primers are not suitable for priming wooden walls, as moisture will cause unnecessary swelling of the wood. Therefore, it is recommended to use an alkyd primer for treating wood walls. However, if it is necessary to prime a concrete wall, then an alkyd primer will not be suitable, since increased adsorption of concrete will lead to excessive consumption of this type of primer. A water-based acrylic primer is suitable for treating such a surface.
Why do you need a primer before wallpapering?
The main purpose of priming before gluing is to create a link between the finishing material and the surface itself.
Applying a primer will not only increase the adhesion (adhesion) of materials, but will also create a protective film and prevent excessive absorption of liquid from the adhesive into the wall. Thus, there will be a pause before complete gluing, and during this time the wallpaper strips can be easily adjusted. In addition, gluing wallpaper onto a primed surface significantly reduces glue consumption.
In our age of a wide range of different building compositions, the problem is not the availability of the primer itself, but its choice. I want to get a high-quality result without throwing money away. For priming walls before professional wallpapering, which our private team at Repairs 7 offers, there are three main options:
Using acrylic primer
The most ideal option is to use an acrylic primer before gluing.
It is designed for priming concrete walls, plastered and puttied, and will cope with this task in the best possible way. You can use both regular and deep penetration or with additives against mold. It is best to purchase a primer from well-known and well-established manufacturers, such as Knauf, IVSIL, Starateli, etc.
Types of primers: which one to choose for wallpaper
Before choosing a primer, you must remember that the correct choice depends on the material of the wall surface (wood, concrete, putty, metal, etc.), the type of wallpaper (non-woven, vinyl, paper or washable) and other factors related to the operating conditions of the room (temperature, humidity, light).
Is it necessary to treat walls for non-woven wallpaper?
Decorating the walls with non-woven wallpaper gives the room a special elegance.
Priming the walls will make the process of gluing easier, neutralize and prevent the appearance of mold and mildew, and also prevent yellowing from appearing on the wallpaper. For priming walls before gluing non-woven wallpaper, the following types of materials are used:
- Acrylic primer. The most common and inexpensive material. Method of preparation: dilute the soil with water. Once applied, it dries quickly, approximately 2-3 hours at medium room temperature. If the color of the wall is uneven, there are types of primers with color that will even out the tone.
- Alkyd primer on non-woven base. A specific solvent is required for dilution. This type is intended for priming walls made of wood material: chipboard, fiberboard, SIP panels, plywood, wood boards, etc. This material covers the work surface with a moisture-proof coating. Latex primer is used for all types of coatings and materials from which walls are made. In addition, this primer is easy to apply and subsequent use.
Experts recommend using wallpaper glue for priming. Method of preparation: dilute the dry glue mixture twice as much with warm water. This material is applied exclusively with a thick-pile roller. It is enough to cover the surface with two layers of material.
When choosing a primer for non-woven wallpaper, it is recommended not to use a PVA-based primer, as this type of material will lead to premature yellowing of the wallpaper.
For primer under wallpaper - from wallpaper glue
Although there are a huge number of different types of primers available on the market, some users may use adhesive to treat surfaces. A completely suitable option would be the simplest glue, which must first be diluted with water. At the same time, there are several recommendations that must be taken into account when choosing glue for preparing a homemade primer.
- The material should be selected taking into account what type of wallpaper will be applied in the future.
- It is best to buy those mixtures that contain special antiseptic additives. Due to this, the risk of mold or mildew in the future will be significantly reduced.
- It is advisable to pay attention to the color indicator. Preference should be given to those products that, after preparation, become light pink. This will allow you to better control the process of applying the mixture to the walls and not skip certain areas of the surface.
- Before purchasing, be sure to study information about the glue manufacturer.
You should only buy high quality glue. This will allow you to achieve the desired result and not risk the wallpaper starting to fall off after a few days.
Can I prime with glue?
For heavy vinyl wallpaper, this priming method is not very suitable, but for non-woven wallpaper with a thin layer or without one at all, it is quite acceptable. True, you will need one and a half times more glue than usual. For the primer composition, dilute the glue in warm water according to the usual procedure, but pour twice as much water. Pour the dry mixture in a thin stream with continuous stirring.
Leave the resulting composition alone for 10 minutes, then mix thoroughly again. We apply liquid glue to the walls with a roller, spreading it over the surface in a thin layer without forming smudges. It is important to be patient and start gluing wallpaper only after the primer layer has completely dried. This usually takes 8 to 12 hours at normal room temperature. Despite the simplicity of this method, you need to remember that it is only suitable for smooth and strong walls.
Having completed the priming work, you need to once again check the quality of its implementation. To do this, just run your palm over the surface. The absence of grains of sand or traces of putty will be an accurate sign that the work has been completed successfully, and you can confidently begin gluing non-woven wallpaper.
