It is important to glue the tiles onto a concrete wall correctly and efficiently, in this case they will last for many years.
Even in Soviet times, tile was considered one of the most expensive and sought-after materials. Its impressive properties were popular even with a limited choice between white and bluish 15x15 cm tiles. Strong, durable, easy to clean material has reliably taken its place in the kitchen area, in the bathroom and toilet, as a floor covering. Today, store shelves offer a wide selection of tiles, from budget options to designer designs.
Which tile to choose and how to glue it to the wall
If you plan to tile a room, you need to understand the types and variety that manufacturers offer. First of all, it should be noted that tiles are considered an environmentally friendly material and are made from natural clay.
When choosing tiles, special attention should be paid to its quality, characteristics and manufacturer
There are 3 main types of tiles:
- Tile for outdoor use. It is easily distinguished by its snowflake markings. This means that the material is resistant to temperature changes.
- Wall tiles are identified by the image of a palm on the back of the tile or box.
- The floor tiles are marked with a foot pattern. This means that this material is especially durable and resistant to mechanical damage.
Depending on the porosity and resistance to wear, the class of tile coating differs. A, B, C - from highest to lowest. This is an indicator of the material’s resistance to acids and chemicals. So, for example, the highest class A is chosen for swimming pools; class C may be sufficient for kitchens and bathrooms.
Preparation for gluing tiles to the wall
The quality of the coating depends not only on the correctly selected material. But also from the correct performance of the work preceding the laying of the tiles. Prepare the surface for work.
Before you start gluing tiles, you must first clean the wall of old cladding, dirt and dust.
Dismantle the previous covering:
- Limes;
- Paints;
- Wallpaper;
- Old tiles.
Each of the listed materials will not support the weight of the tiles. Tap the wall to identify voids or peeling. Remove any swollen old plaster; it will collapse under the weight of the tiles. Remove any protruding bumps. If necessary, grout with coarse sandpaper or remove protrusions mechanically. If necessary, carry out work to restore and level the wall.
It is important that the surface does not have differences of more than 1 cm.
Check the wall surface with a level. Fix potholes and grout joints. Make notches, this will help the adhesive mass to fix on the vertical wall. Be sure to clean the wall of dust. For this, PVA glue or a special primer is used.
How to prepare walls for finishing with ceramic tiles in a toilet with your own hands
Preparation for independent repairs in the toilet includes several stages:
- dismantling the old coating (if any);
- alignment;
- primer.
In apartments, the walls are, as is correct, concrete or brick. Each material has its own preparation characteristics.
Concrete walls
The concrete must be leveled before laying the tiles.
- A visual assessment is first carried out and measurements are taken using a level.
- When irregularities are identified, their nature and parameters are determined.
- Before carrying out work, the walls are cleaned of dust and dirt.
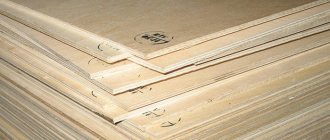
- Plaster is used directly for leveling in case of pronounced differences. If the concrete is smooth, but there are cracks or potholes, putty is used. If the difference is more than 5 cm, drywall is used for leveling.
- Next, the walls are primed to impart or enhance adhesive and waterproofing properties.
- After completing each stage of work, the coating must be given time to dry completely. The operational life of the masonry directly depends on the degree of readiness of each layer.
In the case of installation on a brick wall, installation without preliminary preparation using an adhesive composition with increased adhesion is possible, provided that the wall initially does not have large differences in unevenness.
However, rough seams still need to be puttied. At the same time, the consumption of such a mixture is always high, so this method cannot be called profitable. It is not recommended to use large, heavy tiles with this method, as they can slide down under the weight of their weight.
If there are unevenness and pronounced differences in the brickwork, then it is necessary to plaster the walls along the beacons and prime them.
When working in rooms with high humidity, it is better to use cement-sand mixtures for leveling.
Acceptable irregularities
Even with the most careful leveling of the surface of the base, it is difficult to achieve ideal results. Simple errors in calculations and measurements are possible, which can arise due to low-quality materials or banal vision problems of the master. The measuring instruments themselves initially contain a certain percentage of error.
Since a limited period of time is allotted for repairs, which does not always include additional rework, you should strive to reduce possible errors to zero from the very beginning. But there are also certain permissible errors when carrying out internal work, consistent with SNiP:
- The vertical deviation of the surface with laid tiles by 1 meter is 1.5 mm.
- Vertical and horizontal deviation of seams: per 1 meter - no more than 1.5 mm.
- The curvature of the plane with masonry is up to 3 mm.
- The seam width is no more than 0.5 mm.
- Profile mismatch at the joints of finishing elements and seams is up to 3 mm.
Is it possible to lay tiles without leveling?
The option of laying tiles on uneven walls is possible, but highly undesirable. In exceptional cases, when there is a lack of time and funds for high-quality leveling, installation can be carried out on an unprepared surface. It is important to understand that the quality and service life of such masonry can be significantly reduced.
Laying tiles on unleveled walls is a complex process that requires certain skills and experience, so novice craftsmen are not recommended to undertake this type of work on their own.
How to properly lay tiles on a concrete wall
It is extremely rare to find perfectly smooth corners and walls in a room. If the surface has deep depressions, do not try to level it in one go. Apply a coat of plaster and let it dry completely. Repeat if necessary. Applying too thick a layer of coating at one time will cause the tiles to peel off. It is necessary to ensure that the wall is absolutely flat; permissible differences in the surface should not exceed 3-4 mm.
Many experts additionally recommend leveling the wall so that the tiles lie flat.
Adviсe:
- Apply the composition 5 points at a time on the back surface of the tile, 4 of which are located in the corners and 1 in the middle.
- When connecting to the surface, the solution should be evenly distributed between the tile and the wall.
- Avoid voids.
- Remove excess adhesive extending beyond the edges with a spatula.
- Place the tiles level.
- To create even seams between the boards, be sure to use plastic crosses, which are sold in every hardware store.
- After installing the tiles on the wall surface, use a clean rag to remove traces of glue or mortar from the decorative surface of the tile.
- Do not attempt to install more than 2 or 4 rows at a time, as tiles are very heavy material and excess load will cause the tiles to move and distort the seams.
- After the coating has completely dried, use the mixture to grout the joints.
If you have to glue tiles onto a clean concrete surface, then this will have different features. On the one hand, a concrete slab, as a rule, does not need additional leveling, but this quality is also a disadvantage, since a clean concrete wall gives poor adhesion to glue or mortar.
For good adhesion, it is better to fill the concrete with a metal plaster mesh. This will give a strong grip and prevent the tiles from sliding on the surface.
Take the preparatory stage responsibly. It is on this absolutely non-creative part of the work that the quality of adhesion of the selected coating to the surface and its service life depend.
Stages of work
For professional installation, a tile cutter is used to cut products, but for one-time use, a manual disk cutter (“grinder”) is perfect.
To perform the job efficiently, you must follow the recommended instructions.
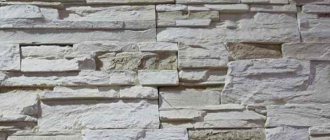
Ceramic or concrete facing tiles are laid in the following order:
- Preparatory work. Includes cleaning, leveling and waterproofing of concrete. The surface must be clean and dry.
- Choice of installation technology. The method depends on the planned design, so the process is influenced by the aesthetic taste of the home owners.
- Marking. The base is divided into several segments, which facilitates even laying of ceramic products.
- Applying glue. To do this, it is best to use a notched trowel. The device allows you to evenly distribute the adhesive composition on the floor or wall.
- Laying tiles. The facing material is carefully applied directly to the adhesive layer and leveled using a rubber hammer. The thickness of the seams is regulated by special plastic corners or crosses.
- Grouting joints. This is done after the glue has completely dried using a special product and a rubber spatula.
In general, laying ceramic tiles on a concrete wall is not a difficult process. Therefore, it is not difficult to learn this. When choosing a facing material, you should pay attention to the fact that concrete tiles or porcelain tiles on the floor in a room with a sofa and TV will look dull and dull, so these products are best used on a terrace or in rooms decorated in a minimalist style.
Nuances: how to stick tiles on a wall
If you have decided on the design and size of the tiles, calculate the required quantity. If you have decorative inserts, do not be lazy to measure the walls and draw an exact design for the future tiled covering. Consider where the joints and seams will be. When creating a drawing, keep in mind that it is better to start work from the most visible corner, this will help move the cuts to places that are not obvious. If you use small tiles, purchase them 15% more than the planned area; part of the material will be used for trimming. You are unlikely to be able to use the remaining parts of the tile after trimming.
It is imperative not only to calculate the number of tiles, but also to prepare the tools for the job
The tiles are glued with nuances:
- Using a plumb line, determine the main vertical line from which you will begin laying the tiles.
- Given the unevenness of the floor, the first row may need to be trimmed. Cut joints near the floor will be less noticeable, so start gluing the tiles from the second row.
- Use a level and draw a horizontal line along which you will align the bottom edge of the second row.
- To support the row, attach a flat block to the wall. The upper edge of the bar must be placed strictly along a horizontal line. This simple trick will help keep the tiles from moving down. You can remove the block a few days after the solution has completely dried, and only after that, close the first row of tiles.
- Clear the room of small debris so that it does not fall into the solution or stick to the material or tools.
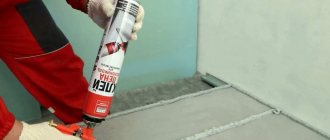
- To create a solution, you can use a mixture of cement and sand with the addition of glue. Or purchase a ready-made composition in the store.
Tools
Tools and materials that will be needed for work:
- Tile.
- Cement, sand, special glue, special colored grout.
- Plastic crosses and squares.
- Sieve, trowel or spatula.
- Metal square, building level, plumb line.
- Glass cutter, pencil with a pobedit tip, pliers.
- Typically a tool for cutting tiles.
- Metal construction mesh. For more information about simple tile laying, watch this video:
Knowing all these details, you can independently lay tiles on the concrete base of the walls.