Laying tiles
Ceramic tiles can easily be called one of the best finishing materials for walls. After all, this material has excellent properties, such as environmental friendliness, long service life, low maintenance requirements, etc. But in order to properly decorate the walls with ceramic tiles, you must first prepare them thoroughly. Then you need to adhere to a certain work algorithm. So where to start and how to lay tiles on the wall?
Laying tiles on walls: preparatory stage
If the tiles will not be laid in a new house, then the first step is to tear off the old tiles, if any. After dismantling the old covering, you should check the curvature of the walls. This is a very important point in preparing the surface for finishing, because if the walls are crooked, then problems (both during and after laying the tiles) cannot be avoided. To accurately measure the curvature of the walls, you should use a level.
In most cases, the walls are curved, so they need to be leveled. But before you start leveling the walls, you will have to set up beacons, to the level of which the plaster is leveled. Without beacons it is difficult to level the surface, so their use is extremely important.
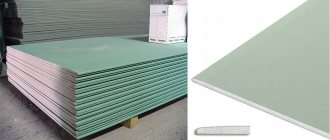
After leveling the walls, they need to be primed. Thanks to the primer, the base is strengthened and better adhesion of the walls and glue is ensured. In principle, the primer is enough to begin laying tiles on the walls, even if the walls are plasterboard.
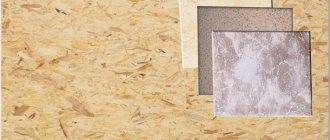
By the way, plasterboard can be used to level old walls, using it instead of plaster (it’s not for nothing that plasterboard is often called dry plaster). Read in detail about what is better to choose for preparing walls – plaster or plasterboard in our article “Rough finishing of walls: plasterboard or plaster”.
Only after these steps can you begin to decorate the wall. In this case, the correct choice of adhesive compositions is very important.
Surface preparation
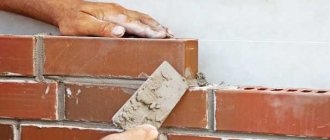
To perform work with high quality, the facing material must be glued to a flat wall. If the surface is not pre-prepared, the rows will lie unevenly and the seams will be of different widths. If you apply more than the recommended layer of glue, the tile may slip, and the glue will take a long time to dry. Therefore, preliminary preparation of the wall surface must be carried out. The walls must be plumb or level. The angles between them should be 90°. The easiest way to level the walls can be done by installing construction beacons. They are usually installed with tile adhesive, as it dries faster. The step between the beacons is 70-80 cm. If it is necessary to apply a thick layer of plaster, then use a sand-cement mortar and apply it in several stages. The next one is applied after the previous one has dried.
After finishing the plastering, there is no need to remove the beacons and putty the walls. They will be swept to remove any remaining sand. If the walls are almost smooth, but there are small defects, they are repaired with glue. After the prepared surface has completely dried, it is primed. To do this, use store-bought or homemade solutions. The simplest deep penetration primer is made using PVA glue, water and cement. To give it antiseptic properties, you can add copper sulfate. The volume ratio of the ingredients should be 1:8:1. After mixing all the components, the solution is ready for use. The prepared primer must be used throughout the day. This solution cannot be stored.
To check that the primer has been prepared correctly, it must be applied to a small area of the wall and allowed to dry. If a film does not form on the surface, then everything is done correctly, and when it appears, you need to add 1 more part of water. For weak plaster, the solution is applied in several layers. Each subsequent one is applied after the previous one has dried.
If the wall being prepared was painted with oil paint, then it must be completely removed and the defects eliminated with an adhesive mixture. After the primer has completely dried, the surface is ready for the next stage of work and you can begin gluing ceramic tiles to the wall. When laying it in the bathroom on the wall, it is necessary to apply a layer of waterproofing mastic.
Laying tiles on walls: glue
Adhesive compositions must be fully consistent with the type of room where the repair work is being carried out and the materials. For example, porcelain stoneware is characterized by poor moisture absorption, so the adhesive must have higher adhesion.
All modern adhesive mixtures in their original form are similar to powder. This powder is diluted with water, resulting in a solution with high fixing ability. A very important point when choosing an adhesive is its specification, that is, it should be intended for finishing walls, not floors. Also, we must not forget about the instructions for using the mixture. It should indicate the proportions for mixing and, of course, the time during which the mixture will harden.
How to calculate the amount of glue that will be needed?
The amount of adhesive required for laying tiles depends on the type of adhesive and its characteristics.
The amount of glue that will be needed to cover the required area must be calculated individually for each job. It will depend on the existing properties of the adhesive mixture, as well as on the choice of base and tile, and the efforts that are used to distribute the glue. The current weather conditions are also important. For example, a relatively porous surface made of cement mortar will absorb much more glue than a slab of concrete. Porous unglazed tiles absorb more glue than glazed ones. Heat will promote significant evaporation of liquid from the cement and mastic solution, so you will need to apply a little more glue to the base than would be needed if the temperature in the room was suitable. Due to this dependence on different conditions, it is impossible to make a correct table in order to calculate the appropriate amount of adhesive mixture.
It is for this reason that it is recommended that you read the instructions for using the glue that was chosen. If it does not contain a table for calculating the appropriate amount of adhesive solution, then it makes sense to seek help from a specialist or manufacturer.
Laying tiles on walls: methods
Before you start laying tiles, you need to calculate the number of tiles that will fit on the wall.
If you don't have to cut the tiles, this would be an ideal option. In this case, you need to start like this: in any of the corners of the room you need to lay out a vertical row, and after that, on the same wall, a lower horizontal row, and only then can you fill the space that remains.
More often than not, the width of the wall does not correspond to the multiple width of the tile. What to do in this case? There are several options for solving the problem here. The first is to start laying from the “red” corner, and end with the one in which the cut tiles will be inconspicuous.
The second option is to start installation from the center of the wall. If all the calculations are done correctly, then the cut tiles should be on both sides, and even the same width. In this case, if the tiles are laid out symmetrically, the result should be a beautiful look.
How can I apply adhesive to the back of the tile?
Tiles that are made by hand most often have an uneven back. This also includes mosaic tiles, which are fixed to sheets. Such material requires additional application of glue on its back side, using a rectangular trowel, so that it is possible to obtain full contact between the tile and the base. You will need to additionally spread the glue on the back side of the tiles, because this process does not replace applying the adhesive mixture to the surface. If the adhesive mixture is applied unevenly or in insufficient quantities, the adhesion may be weakened, causing the tile or grout to begin to crack.
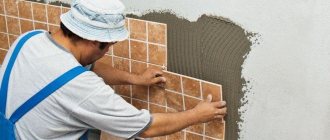
Ceramic tile laying technology.
You should know how to work with marking lines. A grid of marking lines can help you lay out evenly at the same speed. You should try not to go beyond the lines, so this stage of the work can be tedious. It is quite important to distribute and “comb” the glue mixture directly along the lines, because only in this case will all the edges of the tile be on the layer of the mixture. If the line is accidentally blocked by the mixture, you should not waste time scraping it off. Instead, you will need to align the rule with the part of the line that you can see, and then apply the edge of the rule instead of the line. This is the only way to say with confidence that all the tiles are placed correctly.
It is quite convenient to use a laser level for marking lines. In this case, there is no need to think that the adhesive solution did not get on the marking lines.
How to lay tiles on a wall?
When laying tiles from the floor, you should start from the second bottom row. A guide/support rail (metal or wood) is placed under it from corner to corner. The tiles are laid from the batten. The rail must be secured strictly horizontally, perfectly level. The first row of tiles is laid along the lath. When the entire surface of the wall is tiled and the glue has dried, the slats are removed and the remaining tiles are placed in their place.
Why is a support rail necessary? Because the floors may not be perfectly level. If you start from the floor, it will be impossible to achieve perfectly even rows. Often a vertical batten is also nailed in if the corners are also not very even.
If the apron is tiled in the kitchen , a lath is also installed at the level where the lower border of the apron will be located. The lath is removed only after the glue on which the tiles are laid has dried.
Periodically check with a level the horizontal and vertical evenness of the installation.
Recommendations for laying tiles
It must be remembered that the wall in which the door is located is tiled last. First, the part of the wall that is located above the door is tiled, and then the rest of the area.
In order for the seams to be even, spacer crosses should be used, which in this case act as wedges that do not allow the already glued tiles to move.
When laying tiles, it should be taken into account that the adhesive solution hardens within 30 minutes. As a rule, this time should be indicated on the glue packaging. The hardening time of the glue depends on the type and quality of the base, as well as on the air temperature in the room. You should prepare the amount of glue that will be used in the allotted time, no more and no less.
The glue is placed either on the tile or on the wall. If on a tile, then it must be applied evenly over the entire area of the back side of the tile. If, when gluing and pressing the tile to the wall, a little glue does not appear beyond its borders, then there is too little of it. If too much shows through, then you need to put less glue.
If you choose the “glue on the wall” option , then the mixture is placed on the area where the tiles will be. The glue should be evenly distributed over the area, “combed” with the edge of a spatula and the moistened tile should be glued to the wall.
Which option is better when laying tiles - applying glue to the tiles or to the wall? It is impossible to say for sure: each tiler chooses his own method. It is recommended to try both ways and determine which option is more convenient for you.
Before applying adhesive to a tile or gluing it to a wall treated with adhesive, it must first be moistened, for example, using a damp brush. This washes away dust from the tiles, which can impair adhesion, and the moisture makes the tiles more “adhesive” to the adhesive. However, it is very important to read the instructions for the glue! Perhaps the glue manufacturer's technologists determined that wetting will only worsen adhesion. If there is no special instruction about this on the packaging, lightly moistening the tiles will not harm.
But under no circumstances should you dilute ready-made glue with water! Mix the tile adhesive exactly in the proportions indicated on the package, and under no circumstances dilute it with water or thicken it by adding powder to the finished adhesive! Do not add cement or anything else to the glue!
Ceramic tiles must be glued so that there are no voids between the tiles and the wall! Having placed the tile against the wall, you need to knock on it. You can use a rubber hammer.
Traces of glue on the front side of the tile must be removed immediately using a damp cloth or sponge. You can completely wash the tiled wall only 3-4 days after finishing the work.
The final touch when tiling the walls is to grout the joints. For this, there are special mixtures that also have a powder base.
The grout can be contrasting with the color of the tile or completely merge with it - there is no universal rule here. The result can only be truly appreciated when the seams are worn. You can change the color of the seams by using a different color of grout on top.
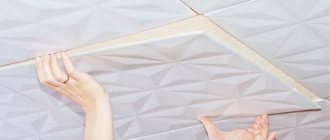
The whole process of laying tiles in pictures:
Author of the article: Sergey Pepchenko Photo sources: Lori photobank (lori.ru), depositphotos photobank, open sources
What do you need to know before applying the adhesive mixture to the tile base?
When laying tiles, keep a bucket of water and a sponge handy to wipe down the tiles and floor as needed.
Applying adhesive and laying out tiles should not be done until all materials needed to complete the job have been purchased. You should also acquire all the necessary tools, and then place them next to you. You will need to keep water and a sponge on hand so that you can easily clean the tools and collect any liquid that has been spilled. Areas that need to be protected will need to be covered with tarpaulin, film or plastic. Such elements include, for example, kitchen cabinets. It is possible to use adhesive tape, but do not leave it in place for a long time, because the tape may come off wallpaper, paint or base trim on wood structures.
Next, you need to decide in what sequence you plan to glue the tiles and cover the base.
Before laying tiles, level the surface and clean it.
Before applying the glue, you will need to clean the substrate on which you plan to apply it. You will need to remove dust and other debris so as not to reduce the adhesive strength of the tiles and adhesive. If you plan to work with an adhesive solution that is based on cement, or mastic that is based on water, then the first thing you will need to do is wipe the surface with a dampened sponge. If you plan to use a mastic that is based on a solvent, you should take a sponge moistened with a thinner intended for paint. You can also use any solvents that are suitable for the adhesive solution used.
Preparatory work
Before applying adhesive to tiles and walls, all surfaces must be protected from contamination. You need to remove everything unnecessary from the room, and cover the kitchen cabinets with plastic wrap. It is also necessary to prepare all the materials and tools necessary for the work:
- building level;
- roulette;
- marker;
- tile cutting tools;
- toothed combs (see photo);
- containers for glue and water;
- sponge
It is necessary to immediately decide at what angle the laying of the ceramic material will begin. This is necessary so that the work is not chaotic. All surfaces on which glue will be applied must be cleaned of dust and dirt. If cement mortar will be used in the work, it is advisable to moisten the surfaces with water before work, and if solvent-based mastic is used, with a solvent suitable for the existing brand of adhesive.
Application Features
To properly apply the adhesive to the tiles, toothed combs are usually used. A certain amount of adhesive is drawn onto the comb, after which it is distributed over the surface of the tile with the serrated side. The tool must be held at an angle of 30-45 degrees. For laying small tiles, it is recommended to use a comb with V-shaped teeth no more than half a centimeter long, but for large tiles, combs with square teeth more than 6 mm long are preferred. When applying glue to the walls, it is necessary to press well on the surface so that the composition penetrates into all holes, which will make the connection more durable.
It is necessary to apply glue to tiles and walls when you need to create particularly strong connections, for example, when laying mosaics, decorative stone, etc. Insufficient or uneven application of the adhesive will cause the ceramic materials to simply fall off or crack. After preparing the glue, you must immediately apply it to the surface. This will allow you to get maximum grip force. A finishing specialist will tell you more detailed information about the correct application of the adhesive in the video provided.