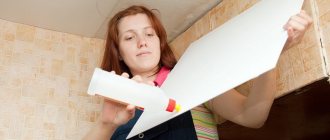
Expanded polystyrene (or polystyrene) tiles are an original and inexpensive option for ceiling cladding. One of the attractive points is the opportunity to do the repairs yourself. Difficulty arises if the ceiling is whitewashed, painted or covered with wallpaper. Washing off whitewash or cleaning off enamel is a labor-intensive task, but in some cases it is not necessary. The article discusses the possibility of gluing tiles to the ceiling without removing the old coating.
Is it possible to glue ceiling tiles to whitewash without washing them off?
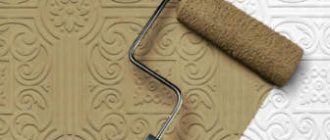
Polystyrene tiles are produced in three different ways:
- Injection – manufactured in molds under the influence of steam and high temperature. They produce a variety of designs and textures. The joints between the squares are almost invisible - the finish looks like a continuous coating. If desired, it can be painted. The density of the products is low, thickness 8-20 mm. This is the most expensive option – 150-200 rubles. per sq.m.
- Pressed (stamped) - produced by pressing in molds at high temperatures. It can be painted with acrylic or water-based paint. Due to its loose structure (low density), it is not recommended for rooms with high humidity. The thickness is small: from six to eight millimeters. The most affordable option: 70 rubles/sq.m.
- Extruded (extruded) – produced under high temperature and pressure; usually laminated. Thickness 2.5-3 mm, weight of one piece 50x50 cm - 200-300 g. Easily tinted in the color you like. High density gives the products water-repellent properties. 1 sq.m costs 80 rubles.
Experts believe that gluing ceiling tiles to whitewash is possible in the following cases:
- One layer of lime was applied to the ceiling. You can check this with a hard spatula. It is enough to clean a small area in the corner of the room and the number of layers will become visible.
- If the coating does not crumble or peel off. This means that the adhesion force to the ceiling surface is sufficient and it is possible to glue polystyrene tiles onto lime whitewash. But first you need to make sure the color is durable.
- For cladding, tiles made of extruded material were chosen - light and dense. The pressed one has a too loose structure, while the injection one is heavier.
- Recommendations for pre-processing the ceiling and gluing the material will be followed.
Important! Chalk whitewash must be washed off - the foam glued to it will quickly fall off. Thawed lime is also removed: it is fragile and crumbles like a chalk coating.
Applying primer
As a rule, fixing the base with deep penetration impregnation helps to properly glue tiles to the ceiling using whitewash. Thanks to this, the strength of the whitewash and the degree of its adhesion to the adhesive significantly increases. It is strongly recommended not to neglect this important procedure.
When applying the primer, observe the following procedure:
- Preparation of deep penetration liquid. The canister of impregnation must be shaken well, for convenience, pour the substance into a plastic paint tray.
- It is most convenient to apply the primer with a roller or a wide soft brush. For pressing the tool on the pallet there is a special platform on the pallet.
- When spreading the liquid on the ceiling, it is necessary to maintain uniformity, avoiding large deposits. Hard-to-reach areas are treated with a thin paint brush.
- After applying the first layer, you need to pause so that the impregnation dries completely. After this, another layer of soil is laid using the same technology.
- All significant irregularities and defects found on the base of the ceiling must be eliminated using gypsum putty.
What additional steps are needed when gluing?
Before gluing the ceiling tiles, you must complete the following work:
- Remove loose whitewash using a spatula. Then go along the ceiling with a roller slightly moistened with water. This will remove all loose areas and lower layers. Unstable areas are cleaned within a radius of 5-7 centimeters. At the end of the stage, only firmly adhering lime should remain.
- Apply primer to improve adhesion. To do this, you can use: - Tex Universal 2-in-1. The solution penetrates to a depth of 6 mm, improves the adhesion of contacting surfaces, and evens out the absorbency of lime whitewash. The product is applied with a roller in two layers, the second after the first has dried. Hard-to-reach places are treated with a brush. Consumption: 1 l per 5-4 sq.m; for a room of 20 m2 you will need an average of 5 liters (price from 400 rubles) - homemade primer: grate 1 piece of laundry soap, pour in 4 liters of boiling water, strain and use chilled.
- Level the surface - then the pattern will be located in the same plane and will not move. First, find out the magnitude of the height difference: - find the lowest point; - determine the corresponding positions on each wall using a hydraulic level; - connect the marks and measure the distance from them to the floor slab.
Basic alignment techniques:
- minor irregularities and cavities (up to 5 mm) will not cause any trouble: polystyrene will hide them;
- differences from 5 mm to 1 cm are eliminated with putty;
- about 1 cm - additionally use construction mesh;
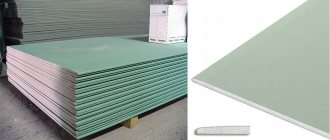
- differences in height of more than 1 cm are eliminated with plasterboard;
- After completing the work, use a wide spatula to pass over the entire surface for final leveling.
What glue is suitable for a whitewashed ceiling?
The following adhesives are not suitable for whitewashed ceilings:
- water-based - the lime layer will become limp;
- containing solvents that are aggressive to foam plastic - the material will be damaged.
To choose what can be used to reliably glue foam ceiling tiles onto lime whitewash, you need to familiarize yourself with the properties of the glue.
It must meet the following requirements:
- suitable for whitewashing and polystyrene foam;
- be sufficiently viscous to hold the glued material;
- have a short setting time: it is difficult to stand for a long time pressing the tile to the ceiling;
- have high adhesive properties: penetrate at the molecular level into both polystyrene and the whitened surface.
Important! A white adhesive is preferable: it will not show through the material and will mask the joints well.
Suitable glue brands:
- Titanium - waterproof, environmentally friendly, universal; applied with a dotted line, mastic with the same name - dotted. The product is kept in air for 2-5 minutes. before gluing.
- Liquid Nails. It is applied in the form of a broken line using a construction syringe or gun and immediately pressed to the surface. Then manufacturers advise peeling off the product and determining where to add the composition. After 10 minutes, fix it completely.
- Moment-montage. It has a very fast setting. Due to its high cost and significant consumption, it is used less frequently. A respirator is required when working.
- Eltitans is elastic, moisture resistant, does not change its properties at both high and low temperatures. Has good adhesion. Apply in a dotted line and leave for several minutes. Consumption: 0.5 l per 10 m2.
- Eco-nasset reliably connects surfaces, is completely harmless and affordable. Minus: the long setting time makes the composition not very convenient when working with the ceiling.
Is it possible to glue
I’ll say right away that there is no clear answer to the question posed. It all depends on the situation, namely, on two points :
- features of whitewashing;
- type of tile itself.
If the whitewashing is done with chalk, then such an idea will have to be abandoned . Even if you prime the surface and are able to glue tiles to it, very quickly it will begin to crumble, like leaves from an autumn tree.
Therefore, further we will talk exclusively about lime whitewash. However, even this cannot always be used. Namely, whitewash will have to be removed in the following cases:
- the coating easily lags behind the ceiling - in this case, the tiles will fall off along with the whitewash;
- over time, several layers of lime have accumulated on the ceiling - the old coating will probably delaminate;
- Frozen lime was used for whitewashing - in this case, the coating resembles chalk whitewash, and accordingly, there cannot be normal adhesion of the glue to the ceiling surface.
Foam tiles
In fact, it is possible to glue tiles to whitewash only in one case, if the latter is applied in a thin layer and holds firmly to the base.
As for the tiles, everything is simple here - it should be light. Therefore, the material must be made of polystyrene foam or extruded polystyrene foam.
How to glue tiles to whitewash
Important! Hands must be clean so as not to stain the front surface of the material.
Before gluing ceiling tiles, be sure to follow the recommendations for strengthening the surface. The whitewash is cleaned off with a spatula, cracks are sealed, and the base is primed twice. Next, make the markings.
Fragments can be placed diagonally, starting from the center. Two mutually perpendicular lines are drawn on the ceiling, connecting the middles of the sides of the room. The diagonals are marked with a marking cord - their intersection will give the center.
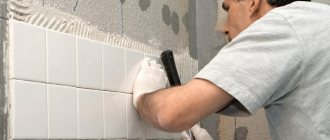
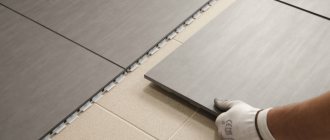
The sticker process goes like this:
- Glue is applied to the tile from the inside along the perimeter with a dotted line or a solid line of small thickness, a small amount is applied in the center of the square.
- Apply to the ceiling and press without applying significant force.
- The first tile is placed in the center. If a lamp is going to hang here, the elements are arranged so that it is in the middle of an area of four squares.
- Next, work continues from the already glued elements in different directions.
- Near the wall, if necessary, the tiles are trimmed. Polystyrene foam is brittle and should be done without force.
- Excess glue at the joints is immediately wiped off with a clean cloth.
- The seams are masked with polymer putty.
Read more: How to glue ceiling tiles diagonally
Or sticking from the corner opposite the door is possible. This area of the ceiling is most noticeable when entering a room. The method is especially effective and simple for small elongated rooms, such as corridors.
If you want the surface to have a continuous look, you can paint it with two layers of acrylic. The second is applied perpendicular to the first.
Note! If a stamped (pressed) coating will be used, then it is advisable to apply one layer of primer to it before painting. This will reduce the porosity of the material and make it denser.
Marking
Before gluing tiles to the whitewashed ceiling, it is necessary to mark the base. This will not increase the fixation strength, but will allow the installation of square elements to be carried out much faster and smoother.
The procedure for applying markings to a whitewashed ceiling:
- Determine the center of the base. To find it, diagonals are struck from corner to corner: the point of intersection of these lines will point to the center of the ceiling. The most convenient way to beat off lines is with a painting cord: it is fixed at two points at the beginning and at the end of the diagonal, after which it is pulled down and released.
- Apply guidelines for gluing tiles. There are several layouts for the arrangement of decorative elements on the ceiling. The most common are the row and diagonal scheme. Each option has its own specifics for marking control lines.
- Continuous marking can be avoided to save time, because high-quality tiles have fixed dimensions. All that is needed in this case is to make two lines in the center, which will allow the tiles to be aligned with each other.
Is it possible to glue tiles to water-based paint?
You can glue tiles to water-based emulsion because:
- it has a high degree of adhesion to the ceiling;
- polystyrene foam elements are lightweight and their weight will not tear the paint off the base floor.
The process consists of the following steps:
- Remove blistered paint with a spatula.
- Clean the coating in areas of cracks.
- To remove contaminants from dust, dirt and grease, wipe the ceiling with liquid detergent or soap solution, and then with a clean sponge.
- Cover the cleaned areas with a deep penetration primer.
- After drying, glue the foam squares in any way. It is advisable to use Moment glue.
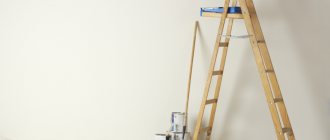
Tools needed
To work on gluing slabs, you need to prepare a number of tools. To cut the slabs, you will need a stationery or sharp construction knife; markings are made with a painter's cord. To glue the slabs, you will need high-quality tile adhesive (“Moment”, “Liquid Nails”, “Titanium” and others). Other tools needed:
- a hard spatula or a set of spatulas of different calibers;
- scissors;
- a simple pencil;
- roulette;
- roller;
- sponge, rag;
- construction level.
To dilute the glue, if it is not sold in finished form, you will need containers and water.
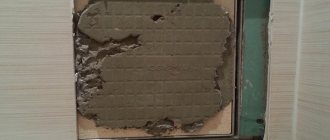
Is it possible to glue ceiling tiles onto old tiles?
In some cases, lightweight polystyrene foam elements can be glued without removing the old ceiling tiles.
This is recommended if:
- the previous ceiling covering has no relief;
- there is a strong fit to the floor slab
- The height of the room is quite large.
If there are more positive aspects, you can start gluing in the traditional way. Glue is applied around the perimeter of the element and in the center.
An important point: the seams of the new coating should not coincide with the old one. That is, the center of the tile is in the place where the four squares meet. This will make the surface stronger.
Gluing tiles onto an old base using the stencil method
It is quite possible that the plaster will crumble badly. For example, this is clay applied to shingles. The original stencil gluing method will allow you to finish the ceiling even in these difficult conditions.
Solving the problem comes down to implementing the following steps:
- make a stencil: cut 9 evenly spaced holes 3x3 cm - 5x5 cm in a sheet of tile;
- attach the stencil to the ceiling and use a pencil to transfer the markings from the square to the surface along the entire row;
- in the marked places, scrape off the plaster to a durable layer and cover these areas with glue;
- On each tile, also under the made stencil, mark the places where glue should be applied;
- press the part along the markings on the ceiling and hold until the adhesive sets;
- After gluing the first row is completed, mark the second.
Cladding the ceiling with polystyrene foam squares can be done with minimal expenditure of money, time and labor. Fast and high-quality repairs are possible if you follow the recommendations of specialists. If there is a high probability of tiles falling, it is better not to risk it, but to accept it and clean the ceiling thoroughly.