Tiles are the most popular material used to decorate bathrooms. She is unpretentious and versatile. In addition, now on the shelves of construction stores there are all colors and sizes of this material. If you follow the instructions and rules for laying tiles, every new homeowner will be able to lay it without the help of craftsmen. You can find out how to lay tiles on a wall in a bathroom here.
Where to start laying tiles in the bathroom - from the floor or walls
Just when starting to decorate the bathroom, you need to know what is laid out first: tiles on the floor or on the walls. After all, if it is assumed that both the floor and walls will be finished with this material, then you need to decide what to work with first.
Finishers are known to always perform their work from top to bottom. However, this rule is inappropriate in the bathroom.
The thing is that priority depends on the surface of the floor and walls. If they are smooth, without bulges or holes, you can start laying tiles from both the floor and the walls. However, if the floor has unevenness and differences, then start with it. This can be easily checked using a level, level or rope with a weight.
If the owner of an apartment or house starts tiling the walls first, there is a high probability that in the future he will not be able to connect the walls with the floor. You will have to remove the excess tiles, or, on the contrary, buy the missing ones. And these are time and financial costs.
If the floor has unevenness and differences, then start with it.
How to lay tiles on a wall
The technology for laying tiles on the wall is simple. It consists of several simple steps:
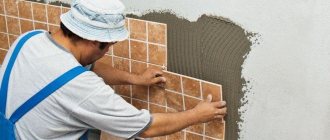
- Apply tile adhesive to the wall with a wide spatula and remove any excess.
- A layer approximately 3 mm thick is applied to the tile, leveled more or less evenly, making sure that the edges are coated. How to apply mortar to tiles
- Remove excess with a notched trowel. Remove excess with a notched spatula
- The tiles with glue applied are installed on the wall and pressed a little.
- Aligned with level or beacon tiles. Installing tiles on the wall
- Excess glue is removed, the surface is wiped with a damp sponge (the dried compound is difficult to wash off).
- Crosses are installed between two tiles. As you can see in the photo, there are two methods, and sometimes they are also combined: five pieces are placed at one intersection: in the middle and in each seam. One moment. Crosses should not stay in the seam for too long: they will stick and it will be difficult to pick them out. Half an hour after installation they are removed. By this time, the glue will already begin to set and the tiles will not “float”.
How to put crosses
This is all. Then all actions are repeated. There are, of course, various points that still need to be understood - how to cut tiles, how to shape corners, but the main steps are described.
A few nuances about the complete process. First, the outer whole tiles (those that do not need to be trimmed) are glued to the marked places on the installed plank. When laying out, you noted their position. It is very important to set them correctly. To do this, each is checked with a level in the vertical and horizontal planes. If the geometry of the tile is ideal, you can also check the verticality/horizontalness along the edges. Then they take a long level or an even bar with a shorter level and check how evenly one beacon bar is set relative to the other. They must be in the same plane. Then, using this bar, they check whether each subsequent tile is positioned correctly.
Description is one thing, but seeing everything with your own eyes is another. The video demonstrates the technology; after watching, you will understand exactly how to lay tiles on the wall.
Wall adhesive thickness
For those who are laying tiles on a wall for the first time, they may have questions about how thick the adhesive layer is needed. This value depends on how smooth the walls are. If they are ideal, you can apply the minimum layer allowed in the instructions for the composition. If the walls are only relatively flat, the “starting” layer can be 3-4 mm. Then, as necessary, it can slightly decrease or increase, correcting the unevenness of the wall.
There are several techniques for laying ceramic tiles. It is not always the case that glue is applied to both the tile and the wall. Some craftsmen apply the composition only to the wall, others - only to the tiles, some recommend dipping it in water before applying the glue, others do not do this. Choose the option that seems more correct to you. But it is more convenient for novice tilers when the mortar is on both the wall and the tile: it is easier to move and level it.
Manufacturers of tile adhesive advise applying it to the wall, removing excess with a notched trowel, but this means a perfectly flat base. Based on these recommendations, the cost of laying one square is calculated.
Glue consumption depending on tile size
With other techniques, consumption increases by 50% or even 100%, since the wall has to be adjusted. But you should definitely listen to the prescribed sizes of the spatula teeth.
How to cut tiles
There are several ways. For small volumes and not very thick tiles, a manual tile cutter is suitable. This is a device consisting of a platform on which tiles are placed. Fusing pads are attached to the platform along which the cutter moves. The cutter moves with the help of a handle, ripping through the durable coating. A stop is usually installed on the same handle, with which the tiles are broken along the line drawn by the cutter.
Another way is with a grinder, but it is very noisy and dusty. Besides, you won’t be able to make a perfectly even cut, but it will work in case of an emergency.
If necessary, round holes are cut using a crown of a suitable diameter, which is put on a drill. During drilling, to ensure that there is as little dust as possible, the work area is constantly watered with water. The result is a perfect hole and everything looks decent.
Finished round holes in ceramic tiles
If you need to cut a strip that is too thin, you won’t be able to do it with a tile cutter: it simply won’t break off. Then, after drawing a line with a cutting disk or rod (for some companies, the cutting element is made in the form of a rod), the thin edge is broken off. In general, there are special tongs for this, but it works well with pliers.
Tile tongs
If the edge turns out to be very uneven, it can be smoothed out a little with a file or sandpaper attached to a block.
Decoration of corners
If the tiles are laid evenly, the internal corners do not raise any questions. Difficulties may arise only with the installation of crosses. Just turn them so that they are not in the way or break off the protruding parts. In general, they join neatly in the corners, and the final seam is formed using grout.
There are also profiles for internal corners. They are matched to the tone of the grout, installed in the corner, leveled, and then attached to self-tapping screws or dowels. When laying tiles in a corner, the tiles rest on them. This results in a finished fillet seam.
Profile design of an internal corner
External corners are more difficult. If you simply join the tiles, overlapping the edges, it turns out ugly. To properly shape the outer corner, you have to cut the edge at 45°.
How to make an outer corner when laying tiles
This can be done using a professional tile cutter. But not everyone has such equipment. Then you will have to work with a grinder. The first cut, at approximately the desired angle, is made with a smooth diamond disc. There should be no slits or holes in it, and the spraying should also be even.
These are discs for an angle grinder: for cutting and grinding
It turns out not very smooth, and the outer edge is quite thick. But this is only preliminary processing. We bring the cut to the required parameters using a grinding attachment with the same disc. See the video for more details.
If you don’t want to bother with such trimming, there is another option - to decorate the corner with a special plastic corner.
Another way to design an outer corner
Another video about how you can design junctions and seams when laying tiles.
To make laying wall tiles with your own hands completely clear, watch another video tutorial.
Carrying out design, calculations and measurements in the bathroom for laying tiles
Of course, any professional finisher knows that before starting to lay the tiles, you need to carry out design work and calculations, and measure the surface. This is required so that in the future the work itself will be simple and as fast as possible.
The design stage includes a plan for the placement of tiles on the wall. It is chosen how they will be laid, in what direction, and whether they will alternate with decorative elements. It is best to draw the approximate location of the tiles on a piece of paper so that you can visually assess the layout.
Next you need to make calculations. They are needed to purchase material. When making calculations, you should take into account the installation location, the presence of a doorway (rarely a window), the size of the material itself, as well as the presence or absence of additional places for installation.
Having measured the entire facing surface, you need to calculate the number of rows of tiles, as well as the number of tiles for each row. Based on this, the total number of tiles for the entire surface is calculated.
Having measured the entire facing surface, you need to calculate the number of rows of tiles, as well as the number of tiles for each row.
Also, before taking measurements, you need to choose the method by which the installation work will be carried out:
- Regular straight;
- Diagonal;
- In the form of a chessboard;
- With offset (shift of each row);
- A combination of different methods.
The total amount of material will depend on the method chosen.
When ordering tiles, you should remember that you need to add another 7-10% of the total amount of material to the data received. This is necessary in order to have a reserve. If tiles with defects, chips, or cracks are found, they can be easily replaced with spare ones. It is recommended to buy tiles from the same batch so that their shade is the same.
When ordering tiles, you should remember that you need to add another 7-10% of the total amount of material to the data received.
Preliminary leveling of walls and floors
Leveling the walls is almost always necessary. To do this, you need a level - a special ruler with air bubbles. Based on the location of the bubbles, a conclusion is drawn about the unevenness of the floor (wall). Small irregularities (up to 5 mm) can be smoothed out with cement. Large ones are leveled using a metal mesh, which is installed on the wall and cemented.
This mesh is also necessary for tiled walls in an adobe house. To level the floor, instead of a mesh, metal profiles are used.
In addition, you can quickly and beautifully level the wall using drywall. How to lay bathroom tiles on drywall? It's very simple. For the bathroom, moisture-resistant sheets are taken - gypsum boards, which are mounted on the walls using metal profiles. However, this leveling method is better suited for living rooms.
Required materials and tools
Any professional finisher knows that before starting tiling a bathroom, you need to prepare in advance all the necessary tools and materials for the job.
Materials for laying tiles you will need:
- The tiles themselves are in the right quantity.
- Primer for walls.
- Separators for seams (crosses).
- Tile adhesive.
- Waterproofing material.
- Grout.
- Special liquid for removing excess grout.
- Water for kneading.
- Waterproof tape.
Before you start tiling the bathroom, you need to prepare in advance all the necessary tools and materials for the work.
Among the main tools for tiling a bathroom are:
- Level or level;
- Pencil;
- Tile cutter or grinder;
- Putty knife;
- Rule;
- Mixer for kneading;
- Roller for priming walls;
- Chisel and hammer;
- Hammer for preparing walls and leveling them.
In addition, you need to prepare consumables: gloves, a bucket for mixing, a light bulb with a wire for good lighting, a spatula for pouring the mixture, rags.
You need to prepare supplies.
How to choose the right tile adhesive
The second important step in tiling bathroom walls is choosing the necessary adhesive composition for reliability in operation. It must be said that 20–30 years ago, professionals did not even think about ordering special compounds for tiling work, since cement-sand mixtures were widely used. But time does not stand still, and more and more special adhesive mixtures designed for ceramics and having the following advantages are appearing on the market:
- Increased adhesion to the back side of the tile - the granulometric composition of the adhesive completely eliminates the presence of large fractions that are not enveloped by the binder. Thus, every square millimeter of the product will be securely fixed to the vertical surface.
- Plasticity of the mixture compared to cement-sand mortar. As you know, when drying, any binder shrinks - it decreases in volume due to released water molecules. Thanks to elastic plasticizers and chemical additives, tile adhesive shrinks less, which affects the quality of installation.
- Reduced porosity of the adhesive composition due to the presence of the same additives.
- High strength tile adhesive. An extremely important parameter, since cement-sand mortar has high strength characteristics when forming a thick layer, as, for example, when laying brickwork. In tile work, on the contrary, minimum thickness of the layer between the wall and the tile is encouraged.
- Due to the increased density and minimal porosity of the hardened composition, a high level of water resistance of the entire cladding structure is achieved, which is important for “wet” rooms.
Rice. 4. Assortment of tile adhesives
Tile adhesives are available in 2 types - ready-to-apply mastics, or dry mixtures that need to be diluted with water and mixed. The cost of mastic is much higher than dry matter, which is why it is not in high demand among professionals.
Preparatory work before laying tiles in the bathroom
Preparing walls for tiles is another important stage of installation. In turn, the preparatory work includes several intermediate stages:
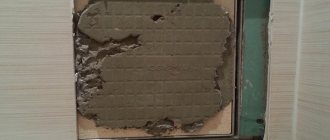
- Dismantling the old coating. If there were tiles on the walls before, they need to be removed along with any remaining adhesive. To do this, first the grout is cleaned off, and then all the walls are wetted with water. After 2 hours, you can begin removing the old tiles using a drill, or a chisel and hammer. If there was plastic on the walls, you just need to dismantle it. But when there was paint on the surface, it will need to be sanded using a grinder.
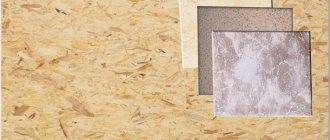
If there were tiles on the walls before, they need to be removed along with any remaining adhesive. - After this, you can begin leveling the walls. If their differences do not exceed 6 centimeters, the surface can be leveled with plaster. Otherwise, only drywall or OSB boards will help.
If the differences in the walls do not exceed 6 centimeters, the surface can be leveled with plaster. - When the walls are leveled, they begin to re-prime the surface.
When the walls are leveled, they begin to re-prime the surface. - At the end, a special waterproofing mixture is applied, which will help protect the seams and tiles from dampness and humidity, and therefore fungus.
At the end, a special waterproofing mixture is applied.
How to correctly calculate the number of tiles
First you need to choose a tile design. You need to write down its dimensions. After this, you can start calculating. Measurements are taken of each wall, and the location of the bathtub, toilet and sink is determined. A detailed plan of the room is made. Each wall is drawn on a separate sheet. In this case, you need to respect the scale. This will allow you to determine the number of elements needed to decorate each wall, taking into account the seams.
The plan will help you accurately determine the number of trimmed elements. They need to be positioned so that they are least visible. The detailed plan helps determine the exact number of tiles. You need to add 10% to the resulting number. A reserve is needed, because when cutting, the tiles may split incorrectly.
Stages of laying tiles on the walls in the bathroom
After completing all the preparatory work, you can begin the most important thing - laying the tiles. Before this, of course, according to all the rules, you need to lay the tiles on the floor, and only then start tiling the walls. Wall surface cladding consists of the following steps:
- First, you will need to prime the entire surface using a deep penetration primer with a roller.
- When the primer dries, you can apply moisture-proof mastic or any other waterproofing material to the walls. Particular attention should be paid to pipe outlets.
- For greater safety, you can stick a special moisture-repellent tape to the bottom edge of the walls. It will protect walls and floors from leaks and floods.
- Next, using a notched spatula, you need to apply tile adhesive or any other solution.
- You can start laying tiles from the floor itself, or you can start at a short distance. If you choose the second option, you first need to measure from the ceiling how many whole tiles will fit on the wall, and then mark the end of the last one with a pencil. From this mark you need to start laying tiles.
- Where the ceramics meet pipe outlets and sockets, you need to carefully cut out the holes to the desired shape. To do this you need to use a drill.
- Having laid out the first row, you need to check its accuracy using a level.
- At the end, you can finish the first row from the floor.
- Next, you need to rub the seams using a rubber spatula. Before doing this, it is advisable to moisten all holes with water.
- In places where the floor and walls meet, it is necessary to fill the space with sealant.
- If marks and stains remain on the surface of the ceramic, they are wiped with a sponge dipped in water. When water does not help, use a special liquid.
To avoid an uneven seam with a large difference, it is important to use crosses between them. Their optimal thickness is 4 mm.
Having laid out the first row, you need to check its accuracy using a level.
Step-by-step installation instructions
The instructions on how to lay tiles on the floor in the bathroom, as well as on the walls, have several sections:
- where to start laying ceramics;
- how to make markings;
- how to lay tiles on a wall in a bathroom;
- how to lay tiles on the floor;
- how to sand seams.
Where to start
For professional builders, the order of work is not fundamental. Some people first tile the floor, then the walls, and only then install the bathtub, others start with the walls, and others with the bathtub.
For those who carry out the entire cycle of work themselves, it is best to start with laying tiles on the walls - during the work, mortar, tools, and even tiles may fly down. If the glue can be rubbed off, then the tools and tiles leave chips, which the author has observed more than once, even among professionals. In addition, with this order of work, the bottom row of wall tiles rests on the floor tiles, solving another problem: a so-called “lock” is formed for water, which tends to seep through the joint.
In this regard, on the Internet you can find many recommendations in what sequence to tidy up the bathroom. Of these, in our opinion, only one deserves attention, where professional builders advise first tiling the walls, then installing a bathtub and completing the tiling by laying the floor.
Thus, beginners will avoid several problems at once:
- If you first install a bathtub, then the first row of tiles along the wall should go along the side of the sanitary ware, which, by the way, is good. But a huge problem for non-professionals is laying the two lower rows, namely, fixing the tiles in the penultimate row on the wall;
- Recently it has become fashionable to place the bathtub not on the tiles, but on the screed, which is easy to do with the above technology;
- there is no risk of installing a bathtub with a counter-slope (installed strictly horizontally), since you can always add mortar under the legs.
Another start when installing a shower cabin:
- all communications are installed;
- an inclined rough screed is poured;
- walls are lined;
- the floor in the booth is being finished - it should have a slope towards the drain hole;
- The tiles are laid on the rest of the floor in the room.
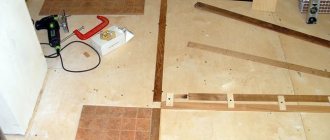
Marking
One of the conditions for correctly laid tiles with a pattern or pattern is to apply markings to the wall or floor. To avoid mistakes and apply the correct pattern to the wall, the tiles are laid out on the floor in another room. The tiles are numbered in pencil on the reverse side. The resulting diagram is transferred to the wall.
Marking is also required for the metal profile for the first row of cladding on the wall. The work is carried out using a pencil (marker), tape measure and level, preferably a laser one. First, the lowest corner in the room is located (how to do this correctly, you can see in the work “How to check the floor level in an apartment yourself”).
Then, starting from the floor, the location of the seam between the first and second rows is determined, after which a horizontal line is drawn along the wall along the entire perimeter of the room, which will allow the ceiling profile to be attached to the walls perfectly evenly.
Marking using a laser level.
Wall covering
The peculiarity of wall cladding is that with a slight curvature of the floor, the ceramics begin to move to the sides, forming so-called steps. To avoid problems with vertical seams, you need to either allow the first row to dry completely, which takes a long time, or artificially create a perfectly flat stand for the first row.
The second option has become very popular among professionals. To do this, they screw a ceiling profile to the wall using self-tapping dowels (used when covering gypsum board walls). The tiles are placed on it. After the lower rows have dried, the profile is removed, and the wall, after laying the tiles on the floor, is tiled.
Profile on the wall for the first row.
In practice, several methods of laying ceramics are used, in which glue is applied:
- only on the back side of the tile - this method is possible with smooth walls;
- on tiles and walls - used when there is significant curvature of the wall, since a thick layer of glue levels out differences in height of the wall surface;
- only on the wall - used by craftsmen with extensive experience.
Before starting work, the tiles and walls are sprayed with water so that they do not draw out the water necessary for the adhesive solution - due to a lack of moisture, the hydration process of the cement solution may be disrupted (wetting of the walls is not carried out under epoxy adhesive).
After gluing several tiles, they are brought into one plane using a level and a mallet. Innovative tile leveling systems (TIS) will help simplify the process. The principle of their operation is shown in the photo below.
Leveling the tile plane using SVP.
Leveling tiles with the Rubi Tile Level system.
The installation technique is simple:
- glue is applied to the wall or tile with the smooth side of the spatula;
- using the teeth of a spatula, ridges are created (without them it is impossible to adjust the plane of the tiles - the glue will constantly protrude between the seams);
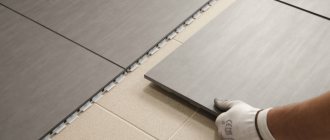
- apply the facing element to the wall and immediately place plastic crosses or SVP elements;
Laying the first row.
- using a mallet, level and devices (crosses or SVP) bring the tiles into the same plane with the already laid cladding;
- in the corners of adjacent walls, the tiles should overlap each other and not touch with their edges, which is clearly visible in the figure.
Options for tile joints in corners.
Holes are also drilled into the tiles using special crowns or drills for existing holes in the wall for various pipes and cables. These operations are carried out before laying the tiles.
Installation of ceramic floor
Floor covering work begins with applying silicone sealant to the joints of the floor and walls (an additional degree of protection against moisture penetration down to the neighbors). The first tile is laid in the far left corner, the last one is at the threshold. Otherwise, the installation technique is identical to working on the wall.
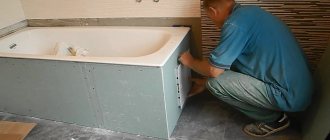
After the glue has dried, a sheathing of wooden slats or a metal profile for the screen is mounted on the floor, on the outside of the bathtub. Moisture-resistant drywall is attached to the sheathing with self-tapping screws. Along the edges, near the walls, hatches are installed to provide access to communications. They are attached to the sheathing using magnets (removable with suction cups). The tiles are glued to the gypsum board.
Hatch for servicing communications.
You can watch a video on how to lay tiles in a bathroom.
Final work
Among the final works are two operations:
- sealing the joint between the bathtub and the wall;
- grouting joints.
The joints between the tiles and the side of the bathtub are sealed with silicone sealant. But the tiles cut in narrow strips, laid along the entire perimeter at an angle of 45°, look more beautiful. It effectively hides the seam while preventing water from seeping down the wall under the bathtub.
Grouting of joints with a fugue is started after the glue has completely dried - at least after two days. The consistency of the grout should resemble rich sour cream with a spoon in it. If the solution is thin, it will float off the seams. Thick materials cannot be rubbed evenly into the seams.
Grouting joints.
Rubbing the fugue between the tiles is done with a rubber spatula. After filling the seam with the solution, the surface is grouted at an angle of 25-30°. In one pass, about 3 m2 of area is processed - it depends on the skill of the finisher and the size of the tiles.
Traces of paste on the tiles are immediately removed with a dry cloth (a wet cloth will leave stains that will take a long time to wash away). After 3-4 hours, the seams can be corrected with your fingers - rub the solution in places where there were gaps or the fugue failed. After this, the seams are sanded with a foam sponge.
Stages of laying tiles on the floor in a bathroom
Traditionally, the floor in the bathroom is also tiled. This work is carried out before you start laying tiles on the walls. Therefore, the stages that make up the process are:
- First you need to do all the preparatory work that was described above.
- Then you can begin the work itself - applying glue. This is done with a notched trowel. Use the flat edge of a spatula to spread the glue over the floor surface, and use the teeth to level the layer and remove excess glue. It is important to know that the glue is applied not only to the floor, but also to the tile itself. In this case, the layers of glue on the floor and on the tiles should be perpendicular to each other.
- Having laid out the first row of tiles, you need to check them for evenness. To do this, use a water level.
- Once you are sure that the grout and tiles are level, you can continue laying the rest.
- After finishing the work, the first row of walls from the floor is laid out with tiles (if it has not already been laid out).
If it is discovered that the tile has not laid correctly or some part of it has fallen out of the row, you need to immediately correct the situation before the glue has completely dried. This usually happens when the angle of the walls is calculated incorrectly and has a curved surface.
If it is discovered that the tile has not laid correctly or some part of it has fallen out of the row, you need to immediately correct the situation before the glue has completely dried.
How to choose bathroom tiles
Before starting work, a tile layout plan is drawn up. The choice of design is important. Medium-sized tiles with a square shape are easy to install. It is more difficult to correctly lay a mosaic that includes many small elements of two or more colors and shapes.
Size and type
Tiles are now available in different sizes. There are mosaics on sale, the individual elements of which reach 3x3 and 5x5 cm. There are also larger versions of mosaic tiles. Such small tiles require careful preparation of the walls and floor. Its installation is complicated and takes more time.
Mosaic tiles are quite complex and require more time to install.
Large-sized tiles are also made, but not every beginner can cope with laying them. Large elements are more easily damaged. They are also more difficult to cut. It is best to use such tiles in large bathrooms, so that as many intact elements as possible fit on the walls and floor.
It is convenient to lay rectangular tiles measuring 40x60 cm on the walls. Such tiles are laid vertically. It can be combined with thin elements that are used to form dividing lines. It is easier to place elements measuring 60x60 cm on the bathroom floor.
Shiny or rough
Rough porcelain tiles can go well with a glossy finish.
There are both glossy and rough options on sale. Smooth, shiny tiles are easier to clean, but even small deposits of water stone and other contaminants are visible on them, so this coating requires careful care. When wet it becomes slippery. In addition, this coating reflects light, which is not always appropriate.
It is better to put rough tiles in the bathroom. Thanks to the features of its top layer, it gets dirty less and does not become slippery. Rough porcelain tiles are recommended to be laid on the floor. It is possible to combine glossy and rough coatings.
Texture, color and pattern
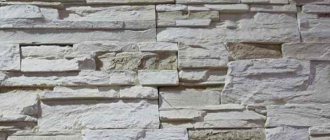
Nowadays tiles are produced in different shades and textures. There are many types of tiles that have both a textured and smooth surface. There are models with patterns in the form of floral patterns or abstractions. Decor imitating natural materials is also on sale, including:
- skin;
- concrete;
- slate;
- granite.
In the bathroom, the tiles can be embossed.
Often, tiles of several colors are installed in the bathroom, separated by a line of tiles of other sizes and styles. Dark brown elements are laid up to the middle of the wall. For the dividing line, you can use elongated beige elements with brown ornaments. The wall is covered with beige material from the middle to the ceiling. A combination of samples of other colors is possible. Both in the photo and in life, this design looks neat.
Grout
The decorative coating in the bathroom is exposed to moisture. Water getting under the tiles will lead to the formation of fungus and elements coming off. To prevent this, it is important to seal the seams correctly. It is not recommended to use cheap cement-based grout in the bathroom. It quickly cracks with frequent contact with water.
To prevent water from getting under the tiles, it is necessary to seal the seams correctly.
The best are two-component compositions based on epoxy resin, which repel water and do not change color. They are not affected by chemicals and fungus. The color of the composition is selected according to the darkest shade. You need to immediately purchase the required amount of grout for the joints (the calculator will help you calculate how much material will be needed in your work).
Grouting joints after laying tiles in the bathroom
After the joints have completely dried, you can begin grouting. It is important to ensure that there are no holes in the seams when grouting or that the seam is too thin or thick. An hour after grouting, you can correct your work with your hands.
When the grout is completely dry, wipe the ceramics with a sponge and then with a dry cloth.
The lightest shade of the tile is chosen as the grout shade. For the grout itself, a medium-soft rubber spatula is suitable so that it does not bend when pressed and can push the grout into the seam.
The lightest shade of the tile is chosen as the grout shade.
Expert advice on laying tiles in the bathroom
Below are tips from real professionals on laying tiles. They will help you avoid mistakes and do the job perfectly the first time:
- Just starting work, a beginner should not take on a large volume at once. You must first try your hand at a small surface;
- It is important to remember to protect the seams from moisture and be sure to use water-repellent and sealed materials;
- When buying glue, be sure to look at its release date. After all, during long-term storage it loses its strength;
- Before buying tiles, be sure to buy more than the required amount in reserve;
- It is always necessary to check the rows for correct placement vertically and horizontally, so as not to end up crookedly laid;
- It is also necessary to prepare for finishing work in the bathroom in advance - purchase the missing tools and consumables.
It is always necessary to check the rows for correct placement vertically and horizontally, so as not to end up crookedly laid in the future.
As you can see from this article, laying tiles is not exactly an easy job. It requires perseverance and accuracy from the master. However, if you follow the step-by-step instructions and try to avoid mistakes, even a beginner can do the styling with their own hands no worse than a professional.
How do we choose the right tile?
Assortment of ceramic tiles
Nowadays there is a very large selection of ceramic tiles in stores, and often, when entering such supermarkets, your eyes, as they say, run wide. A huge variety of tiles of various designs and colors, thousands of patterns and different sizes of tiles.
After such an abundance of flowers, you can’t immediately concentrate and choose exactly what you need, and you also need to remember to calculate the size of the bathroom and toilet. Because choosing a shade if we buy little, or returning the rest, will be problematic.
To do this, we will proceed as follows: first, go to the store’s website and select an approximate pattern and color of the tile in the catalog, then select the dimensions of the tile; We need them so that we can then calculate the exact number of tiles needed.
After this, you need to determine the area of the bathroom and toilet, it is best to do this as follows: draw each wall separately on a sheet of paper in a box, indicating the radiators, bathtub and washbasin, then, observing the scale, draw the tiles on the sheet the way we want them see on the wall.
And finally, we count the number of tiles that we have drawn, this will be the number of required tiles. It doesn’t matter that the result is in pieces, the store managers will help you count them like that. Next, we go to the store and once again choose the color, design and pattern. It is important to choose tiles of the same sizes that you chose at home, so that there is no confusion with the quantity.
Now you can buy the material you like.
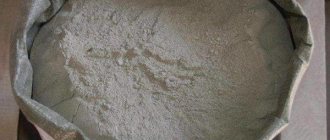
Let's not forget about tile adhesive, there is a large quantity, I advise you to purchase CM11.
The glue is quite suitable for the bathroom, especially since it has been used for many years, which confirms its reliability, and the price of such glue is quite affordable for everyone.
Since moisture is a good environment for microorganisms, I advise you to purchase an antiseptic for walls, it will help get rid of unnecessary microflora on the walls.